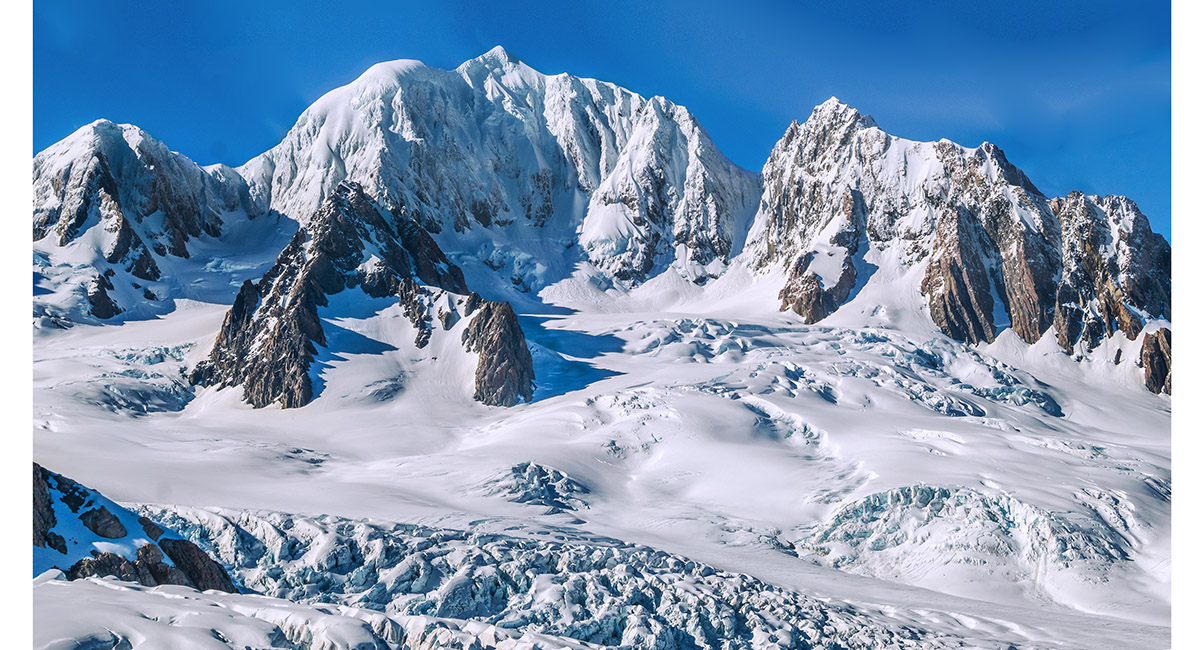
The Minarets, December 2024
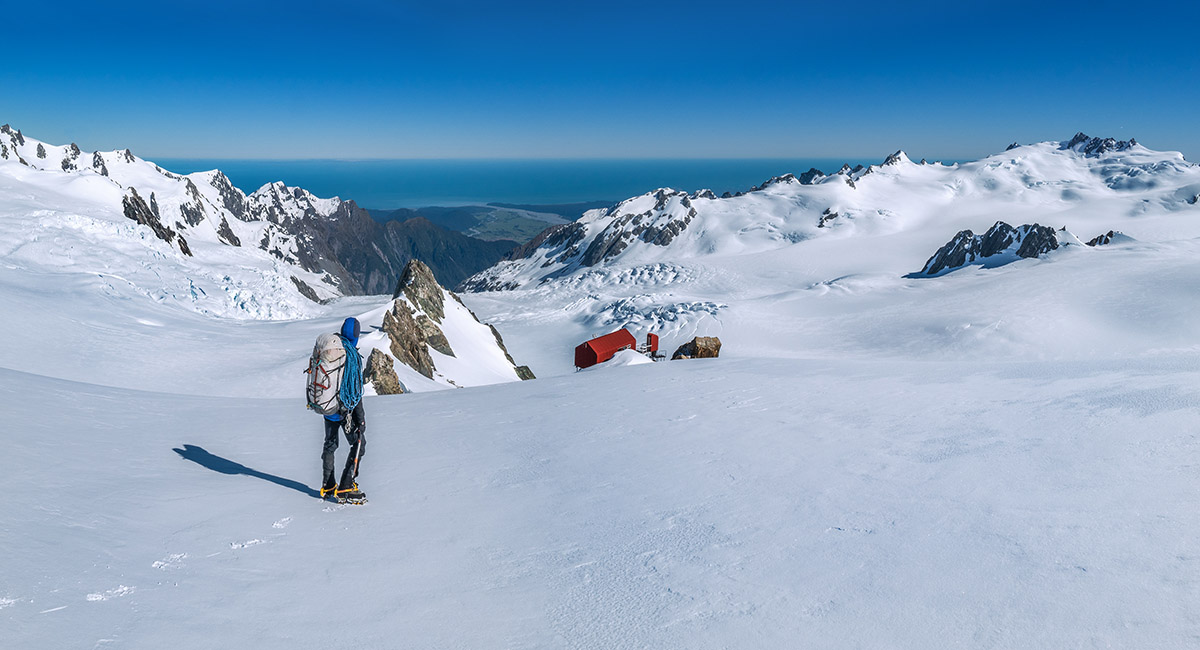
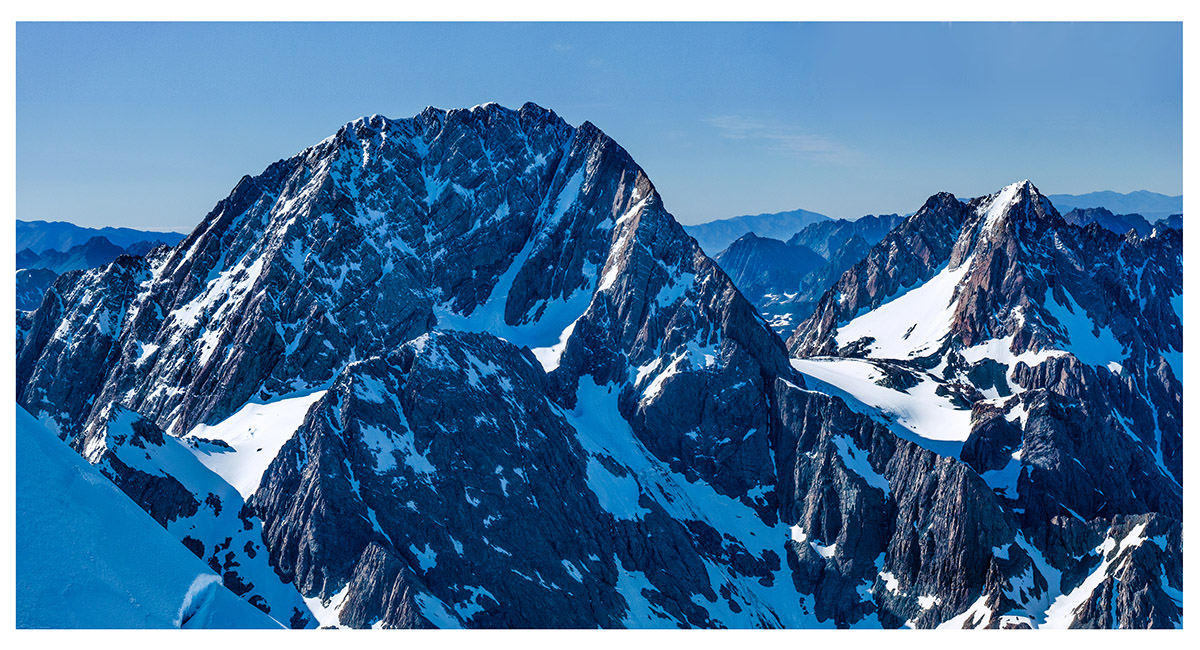
A view of Lendenfeld Peak (left), Mt Tasman (centre) and Torres Peak (right) on the flight in to Centennial Hut

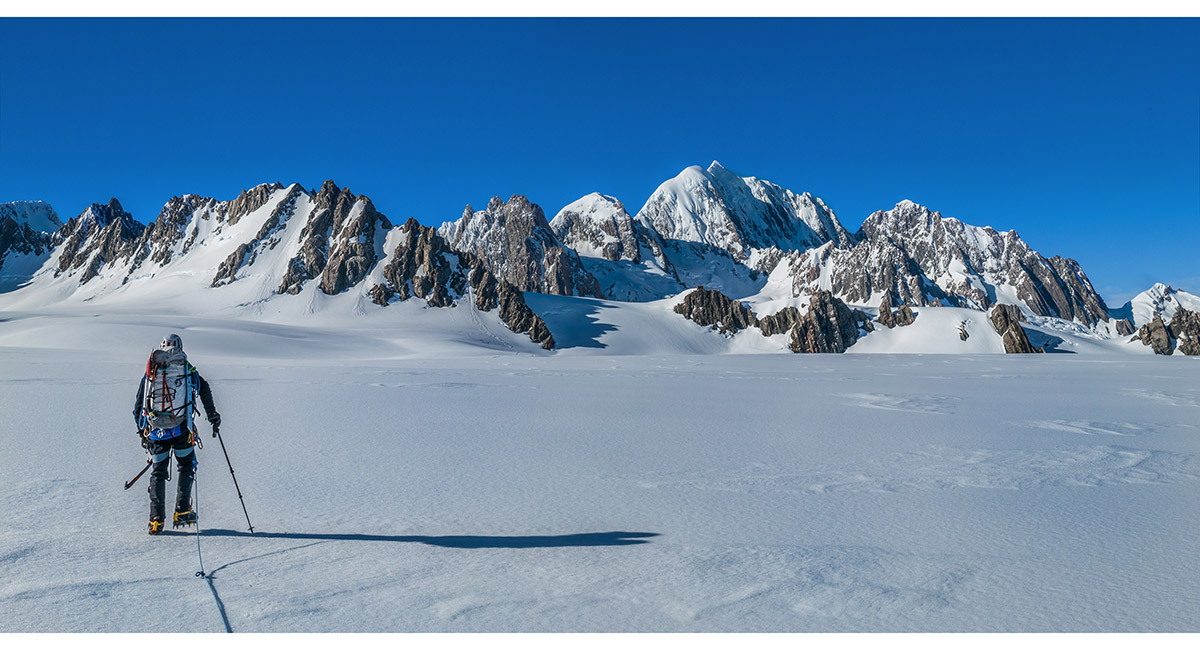
On the approach to Centennial Hut - a nice view of our objective, the Minarets

Heading down to the hut from the drop-off point. Crampons required from the get go in very firm frozen snow conditions

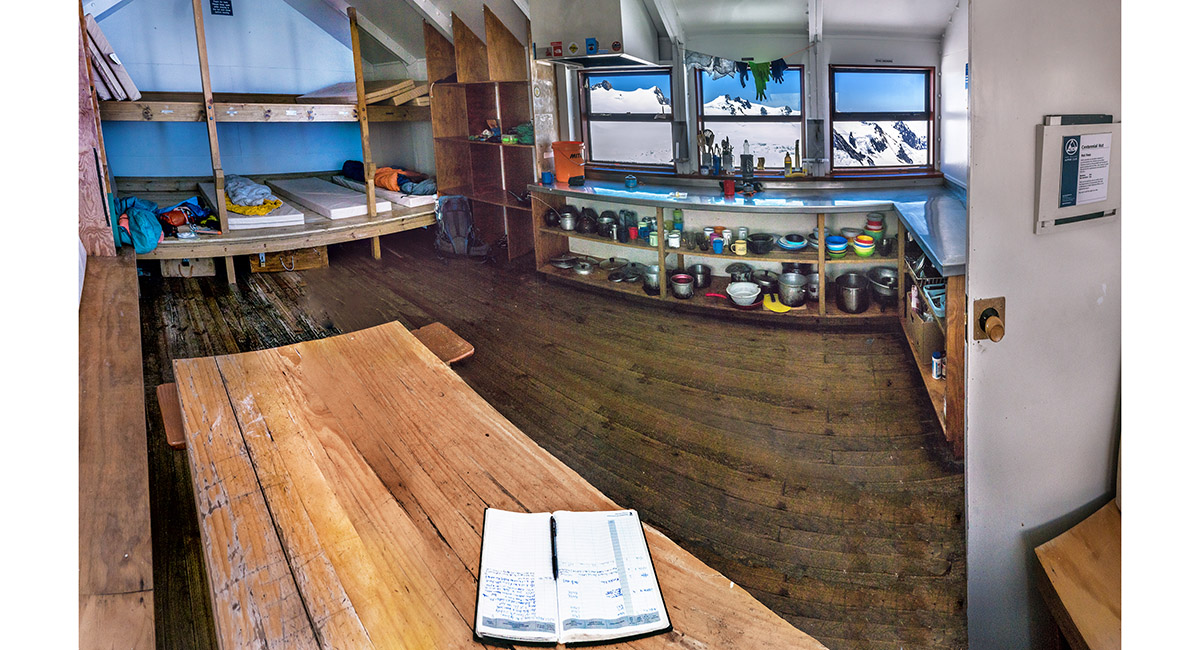
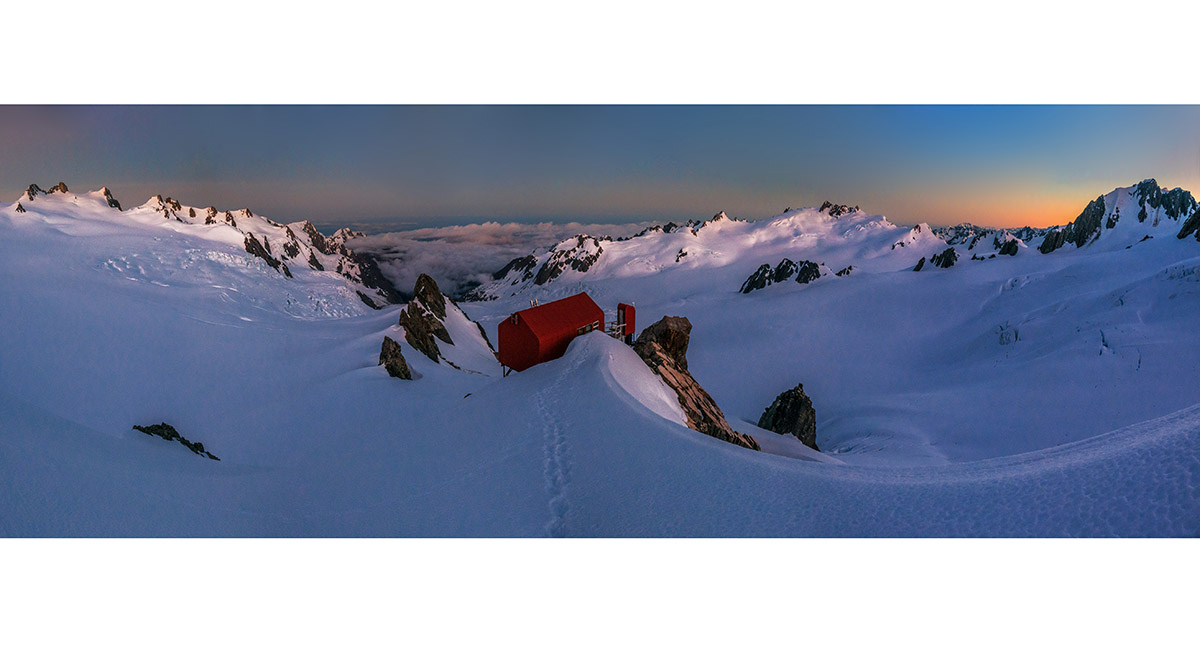
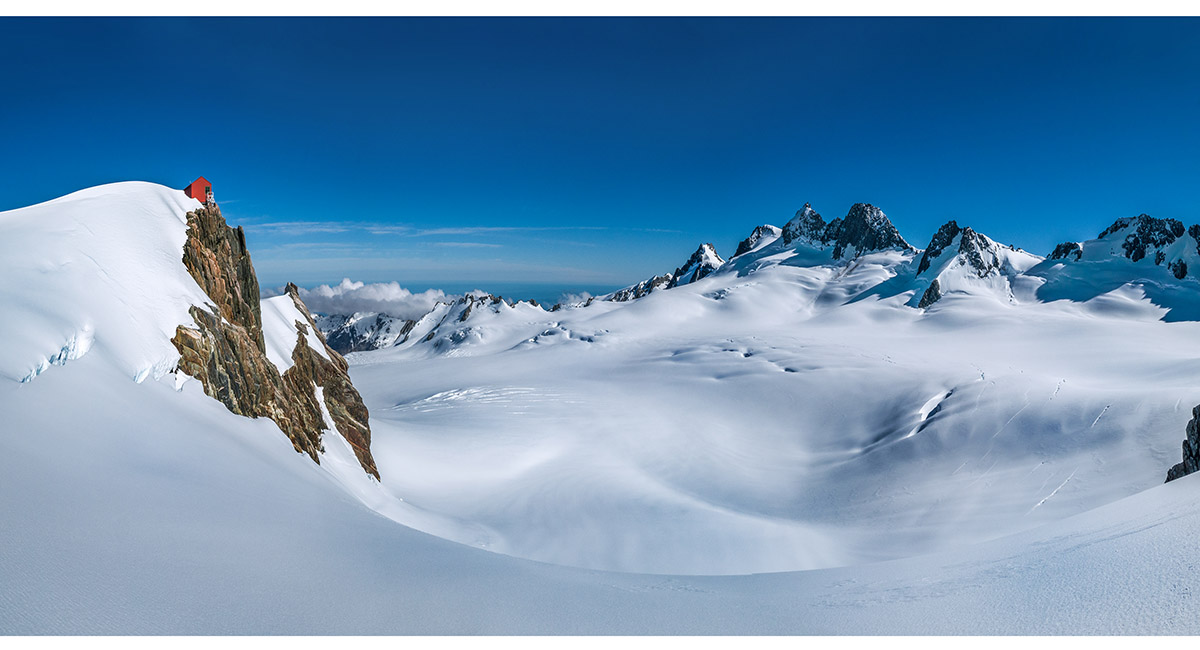
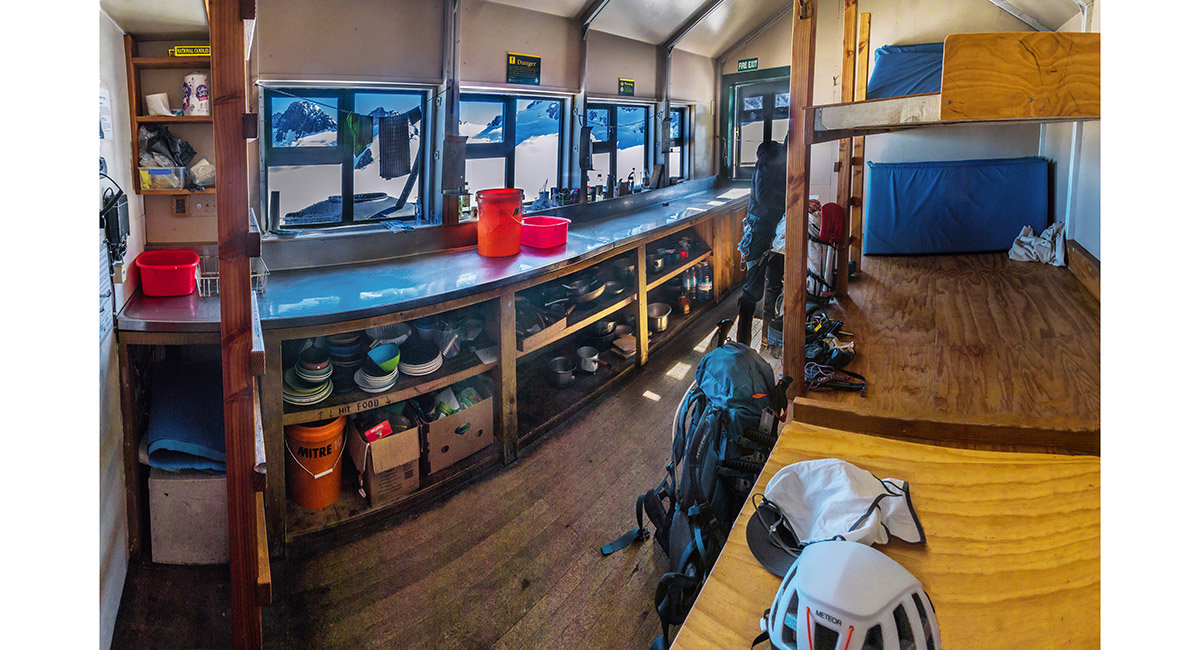
Inside 2,400m Centennial Hut - a superb location, with a view past the Tusk down Franz Joseph Glacier


A view from the end of the rock buttress, back to Centennial Hut

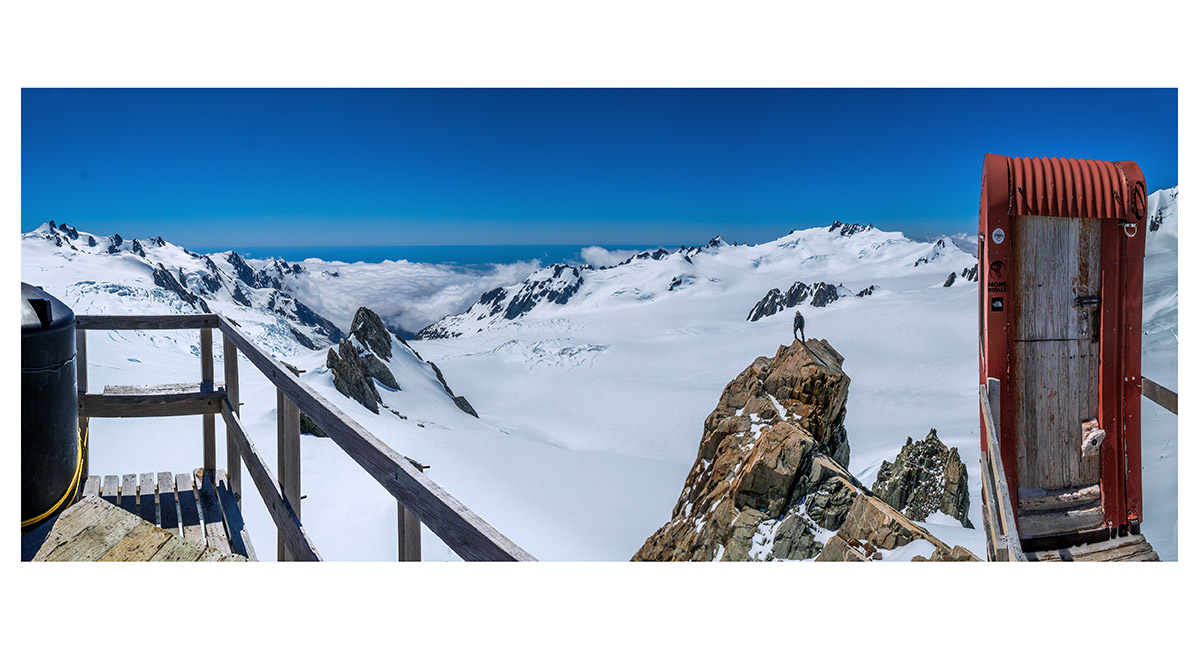
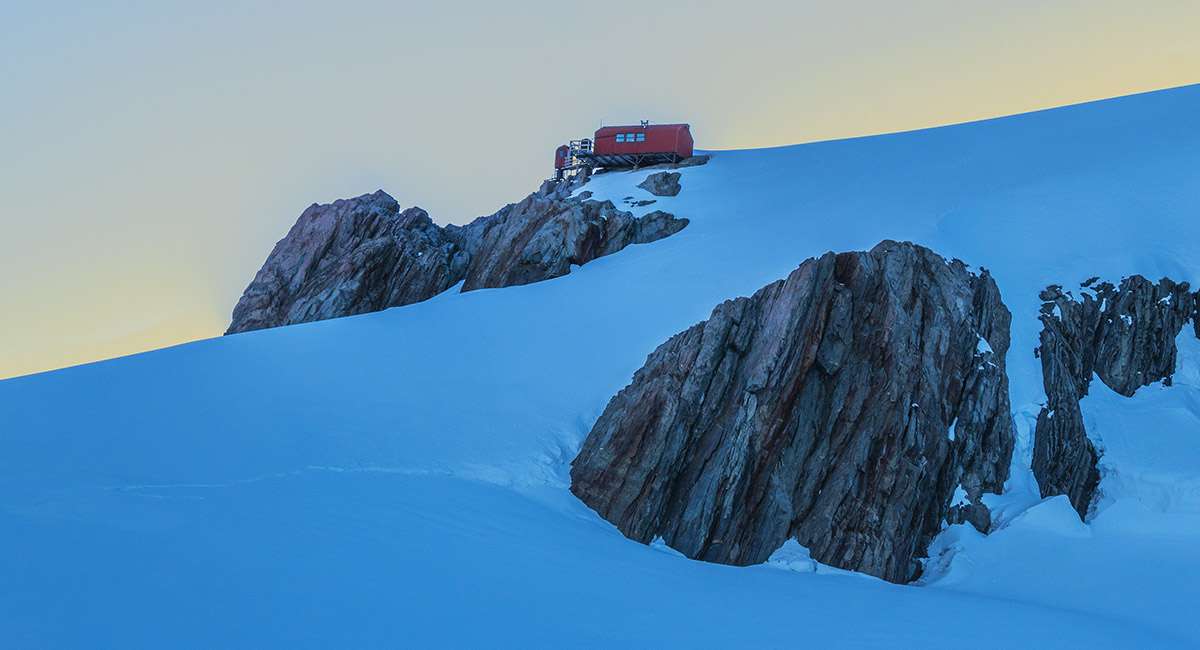
Looking north from the hut's small deck. Jim is perched on the end of the buttress


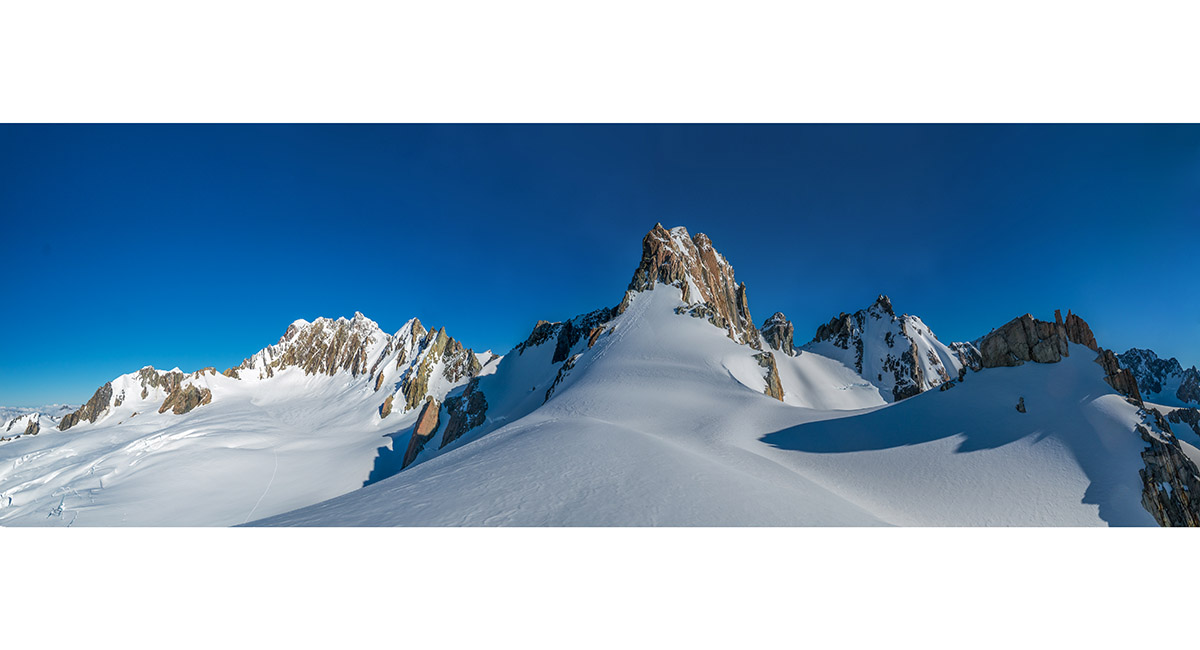
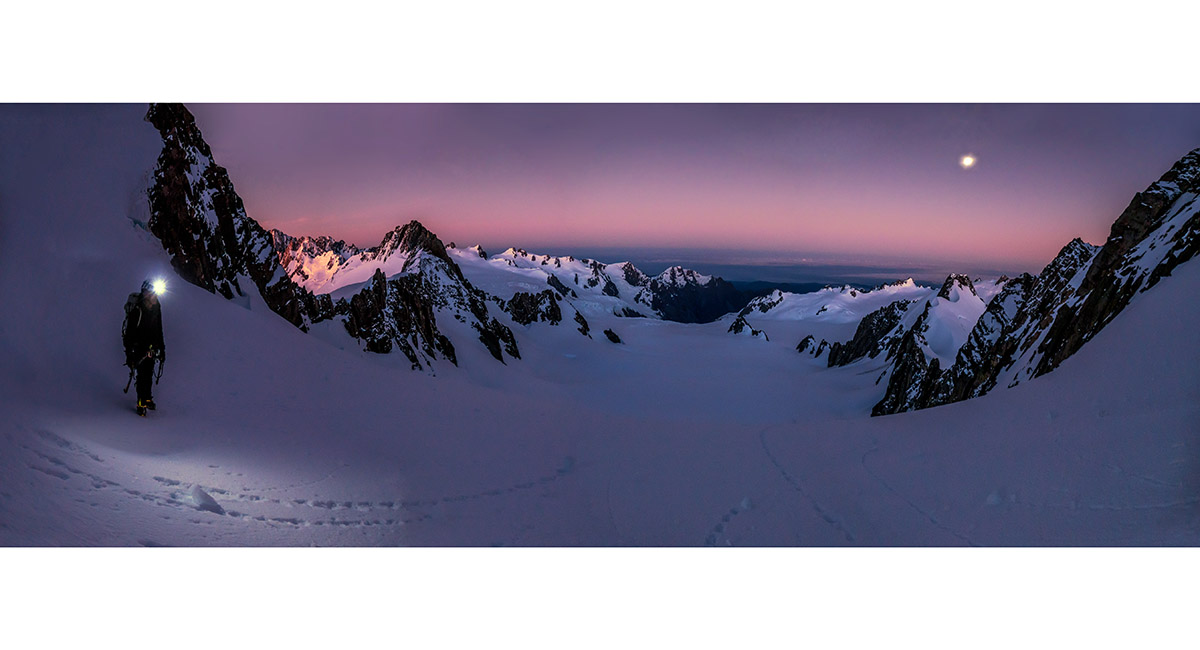
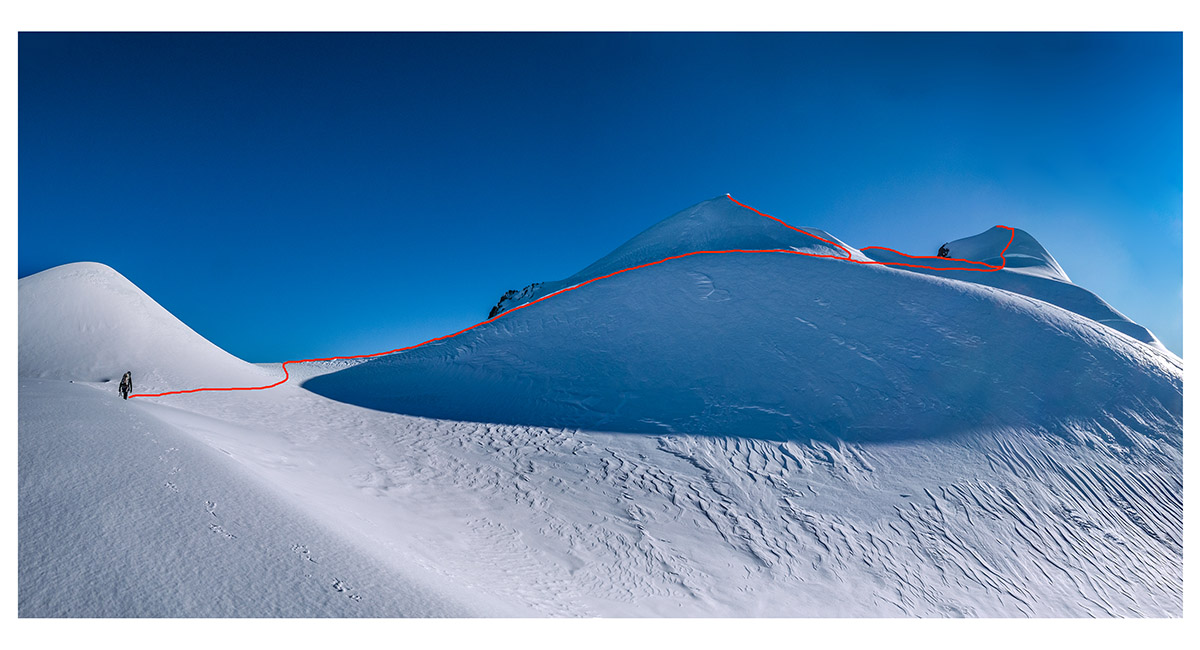
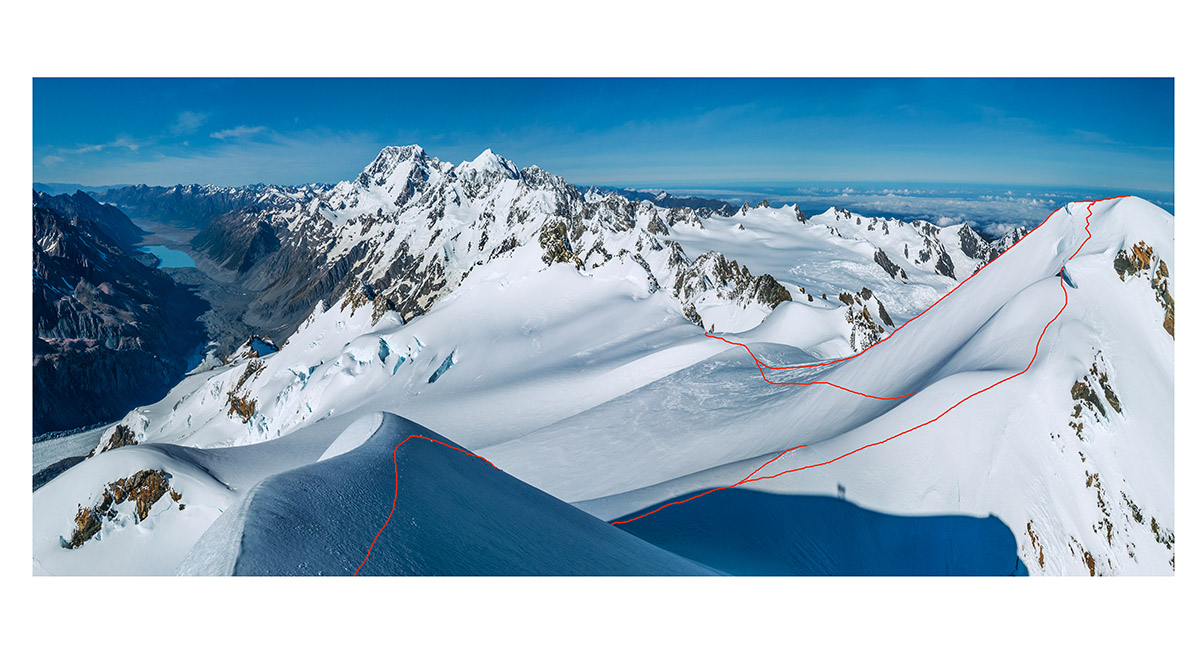
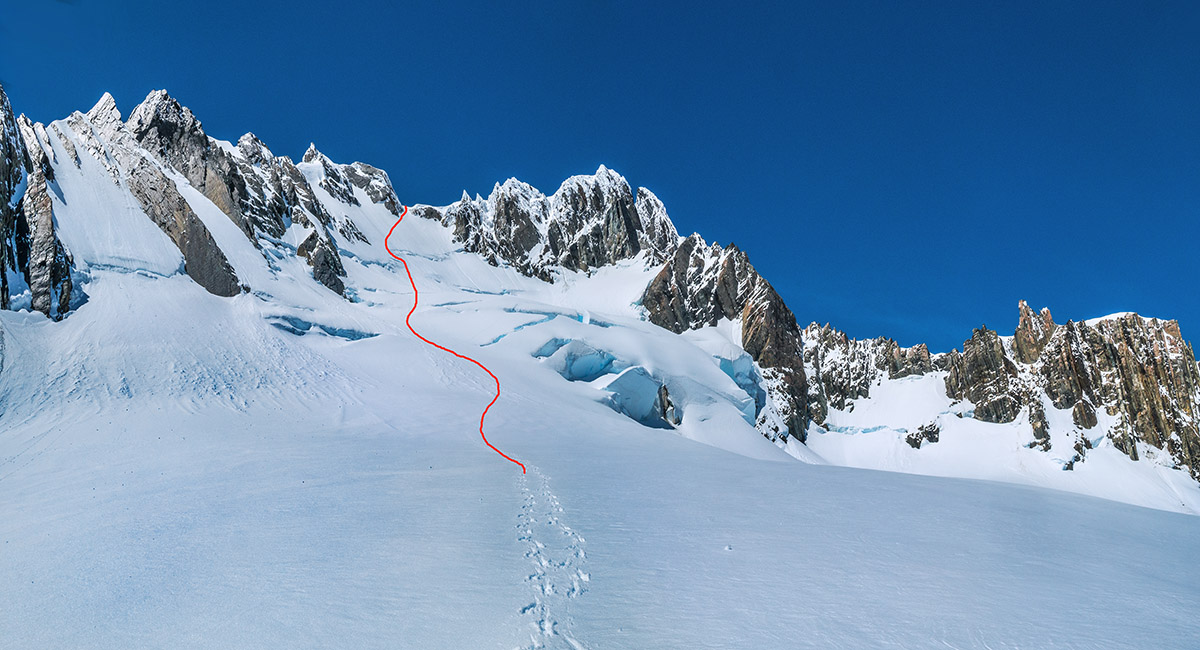
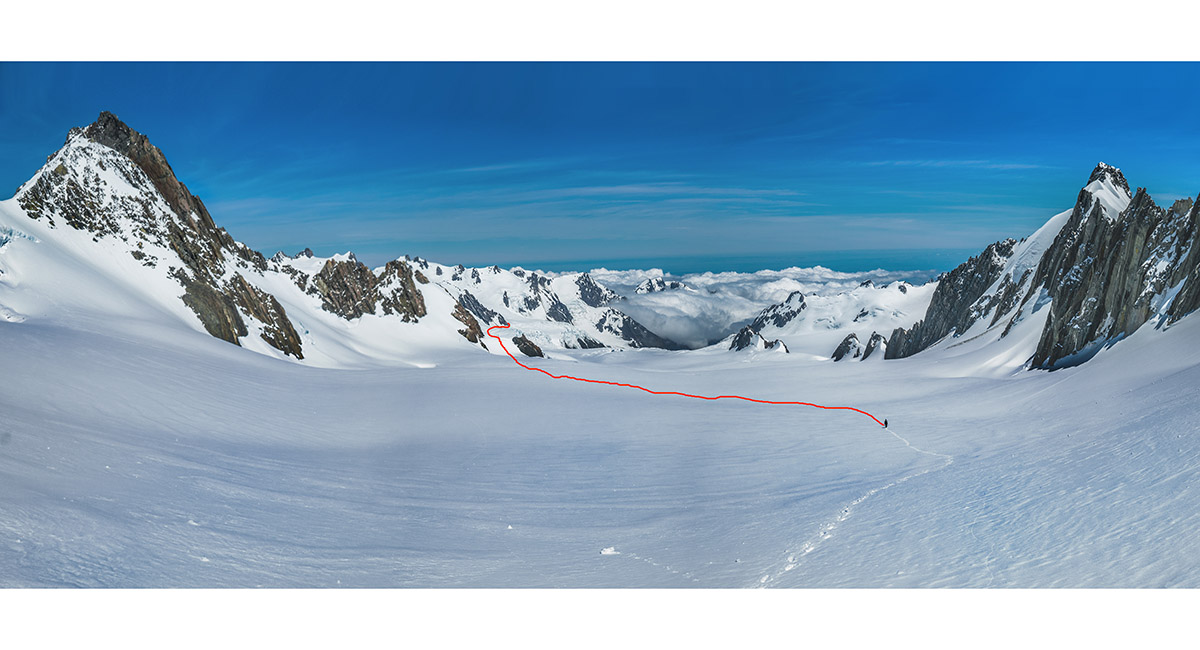
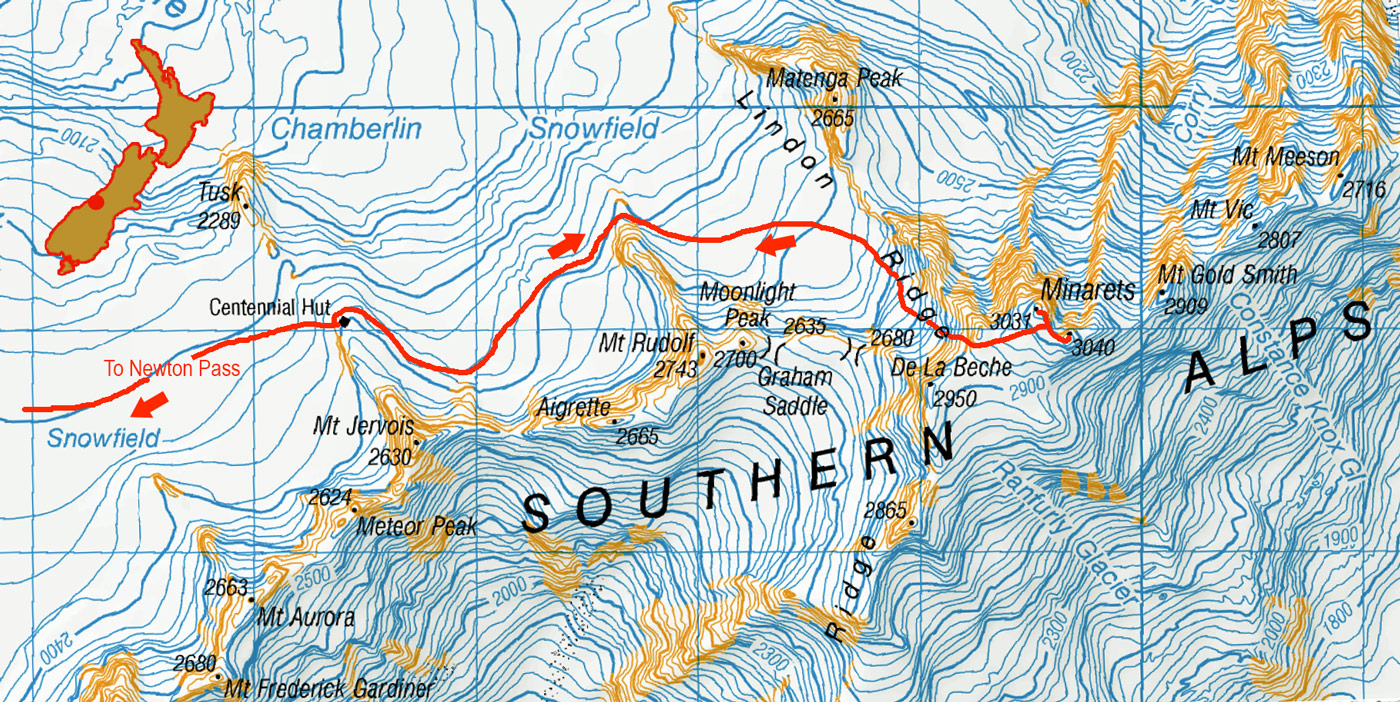
On our first day we did a recce east, skirting Chamberlin Snowfield, to the base (2,500m) of the buttress extending north from Mt Rudolf, so we could eye-ball the snow face giving access to the Minarets. Our route of the following morning is marked

The view south, from above the hut, to Mt Jervois (2,630m). The Minarets are mid left

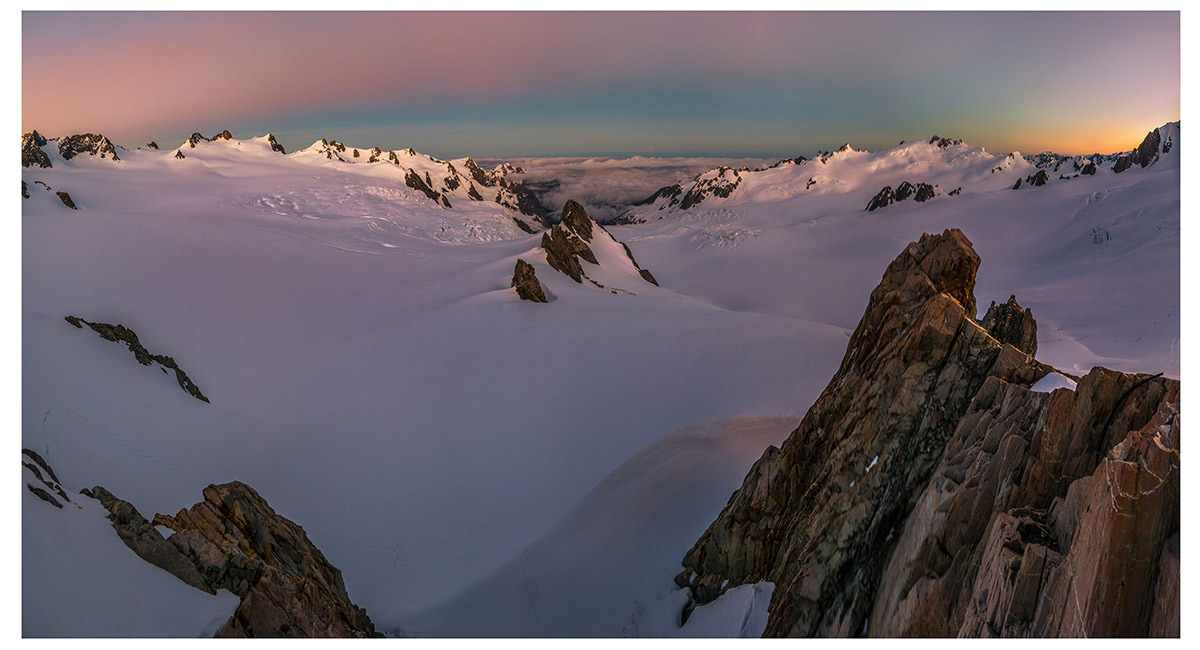
Sunset view north and west from above the hut


Sunset view northwest from the hut, past Tusk to the Franz Joseph nevé

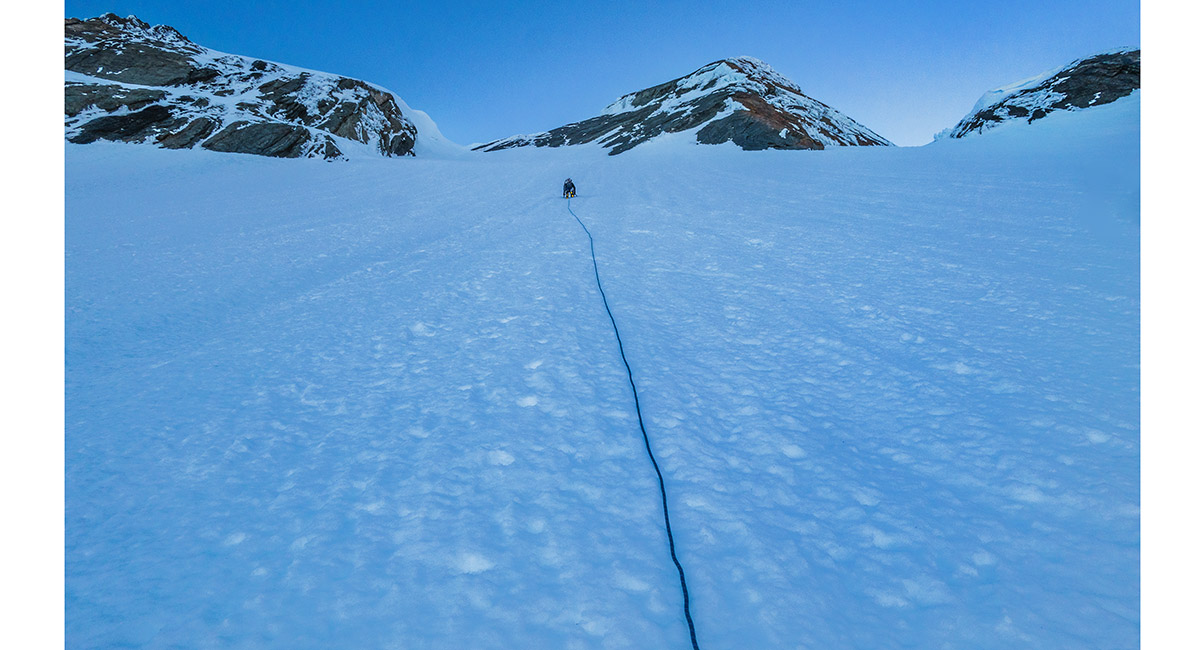
Jim on the initial less steep section of the snow face extending south and up from Chamberlin Snowfield, at about 2,550m at dawn

The view north, from about 2,550m on the snow face extending south and up from Chamberlin Snowfield

Jim leading the first of three pitches from 2,700m to 2,900m. The snow was frozen so that just front points penetrated. Whacking a snow stake in required concentrated effort, but resulted in bullet-proof anchors


Jim leading off on the final and steepest pitch - perhaps 50 degrees and frozen solid - not a place to slip

At 2,900m at the top of the frozen snow face, with the West Coast in the distance

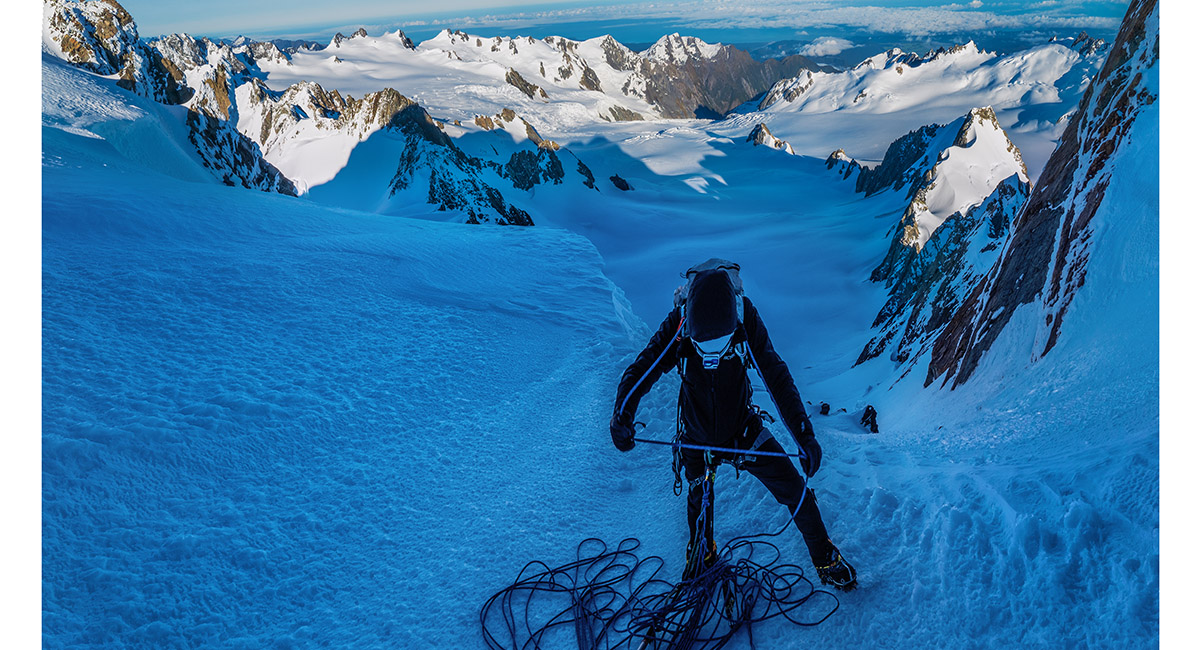
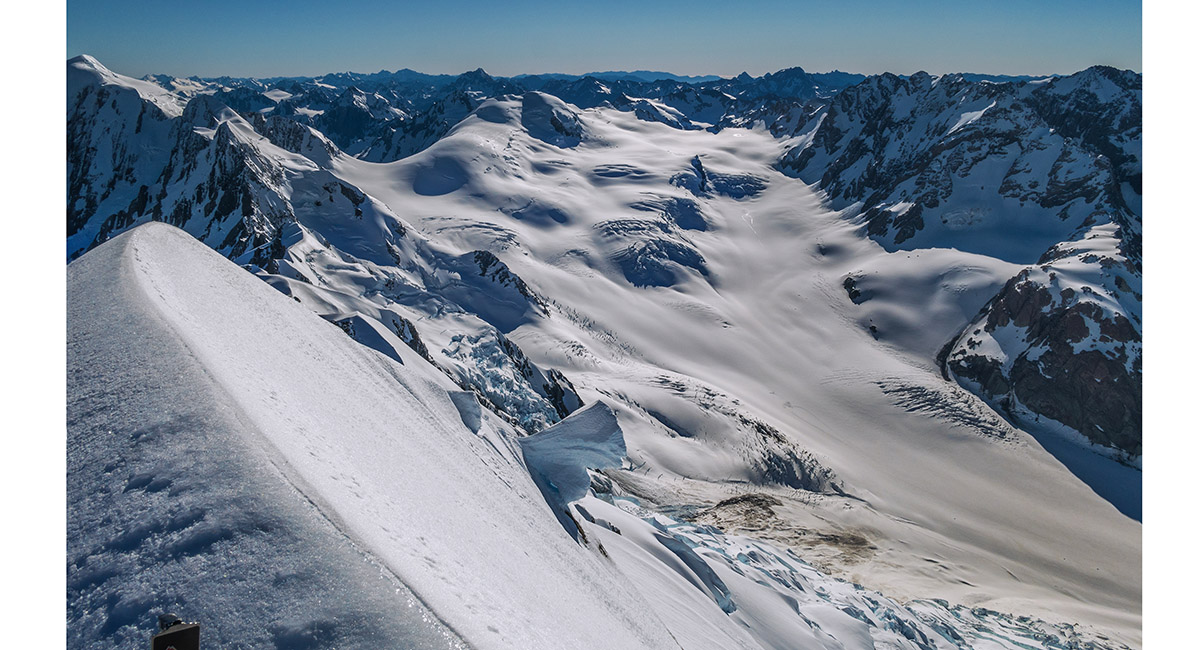
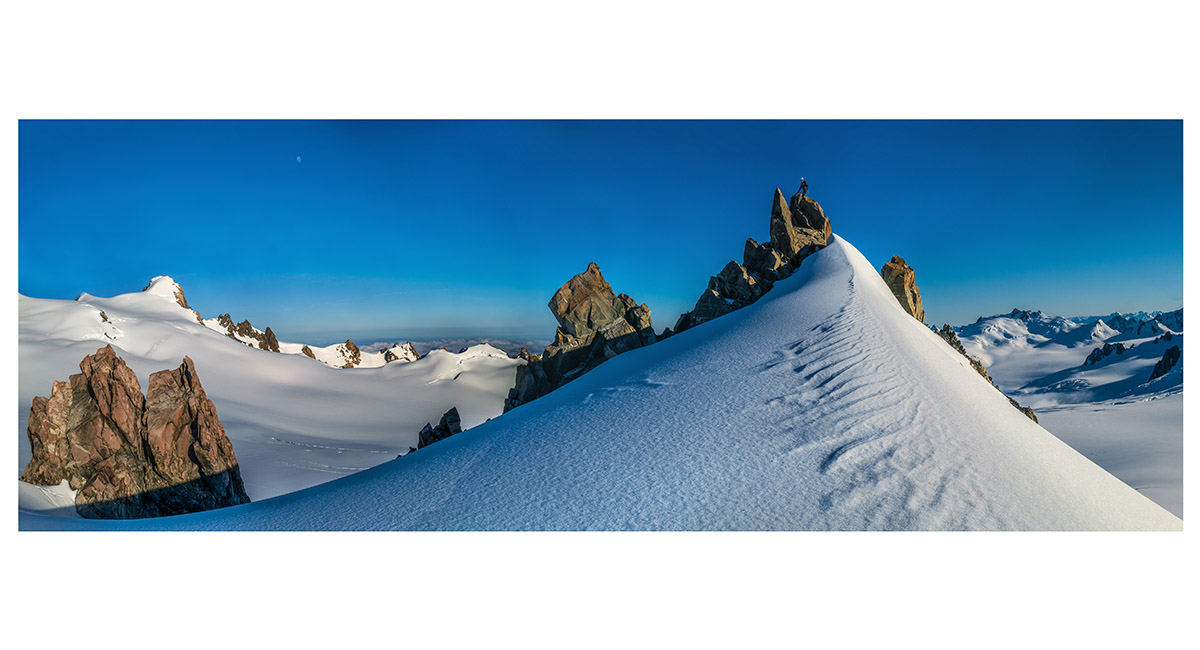
Beyond the snow face is a wide flat expanse giving access to De La Beche to the west (left) and the Minarets to the east (out of picture). I was glad to be on safe ground again for a bit, before we resumed front pointing on frozen snow to reach the two Minaret summits

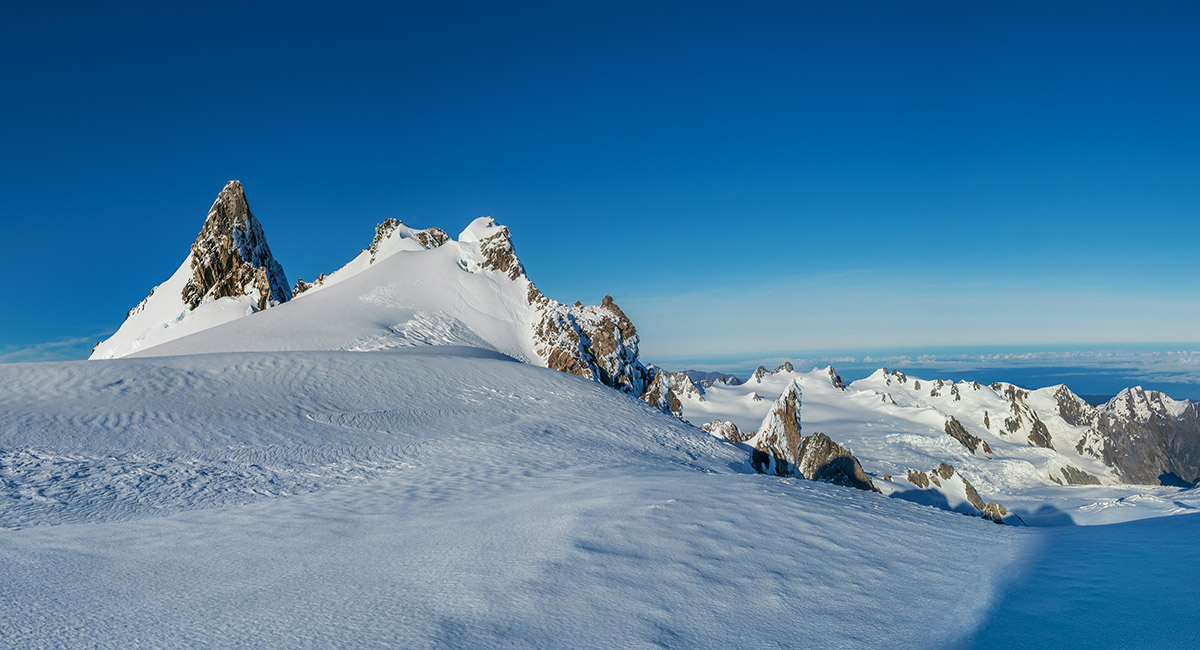
Here is the route east we took, first climbing the higher east Minaret (3,040m - right), then dropping back into the saddle between them to climb the 3,031m west Minaret

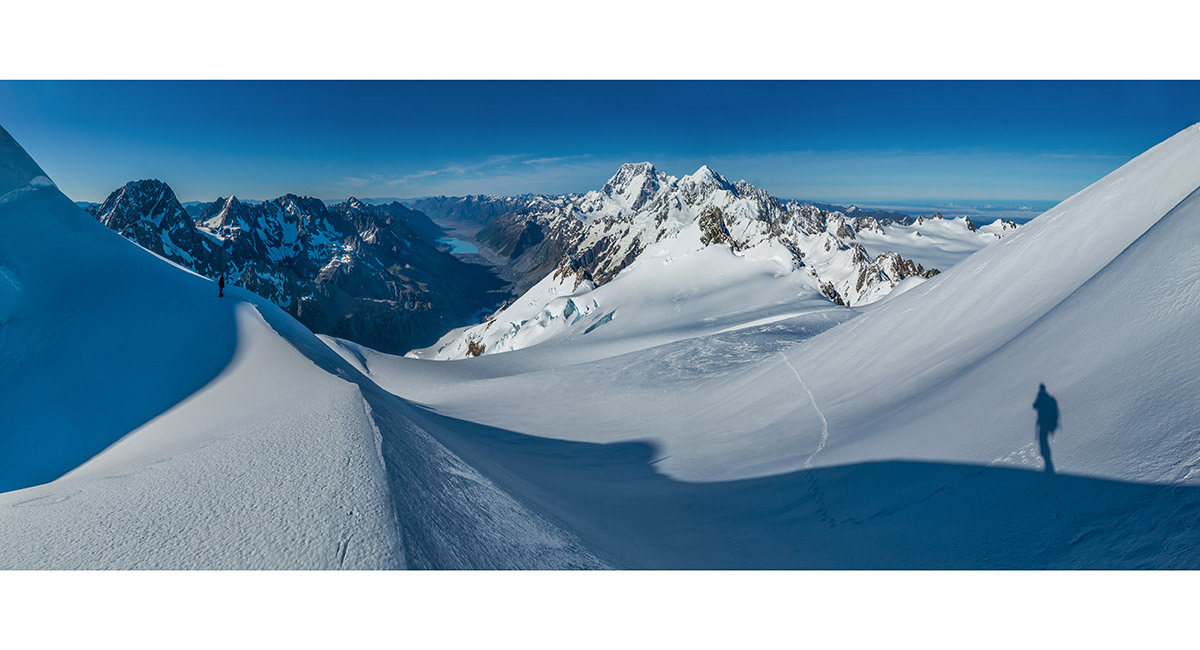
In the saddle between the Minarets, looking south down Tasman Glacier. Malte-Brun is left and Aoraki Mt Cook and Mt Tasman right of centre. De La Beche is directly in front of and below Mt Tasman

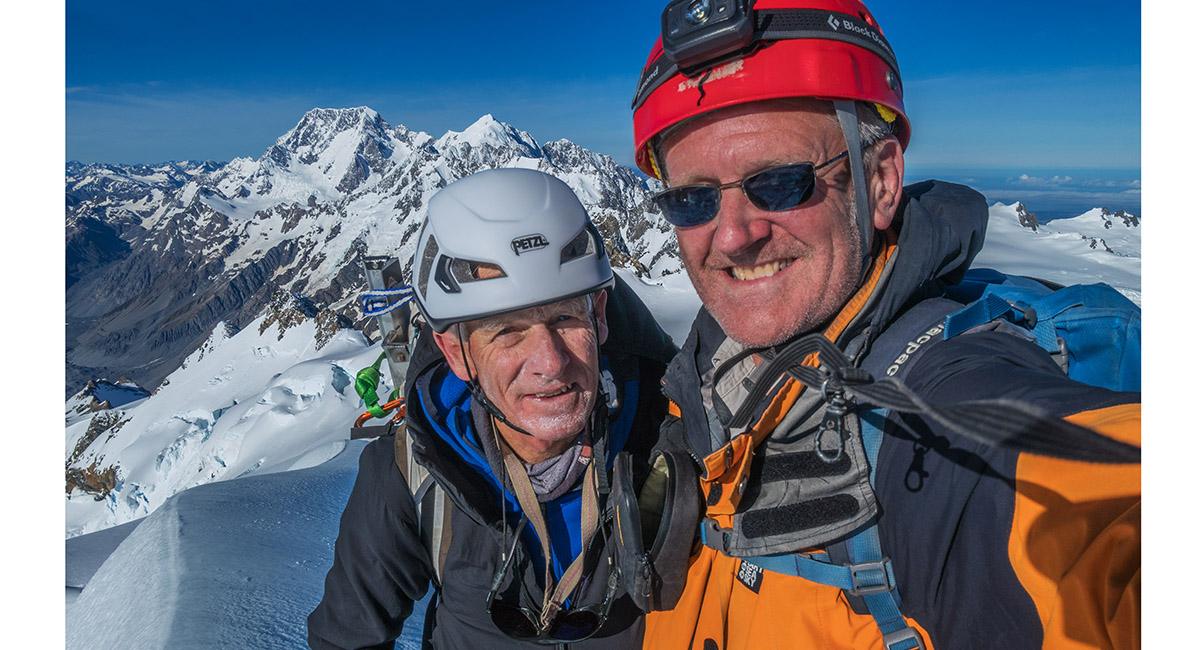
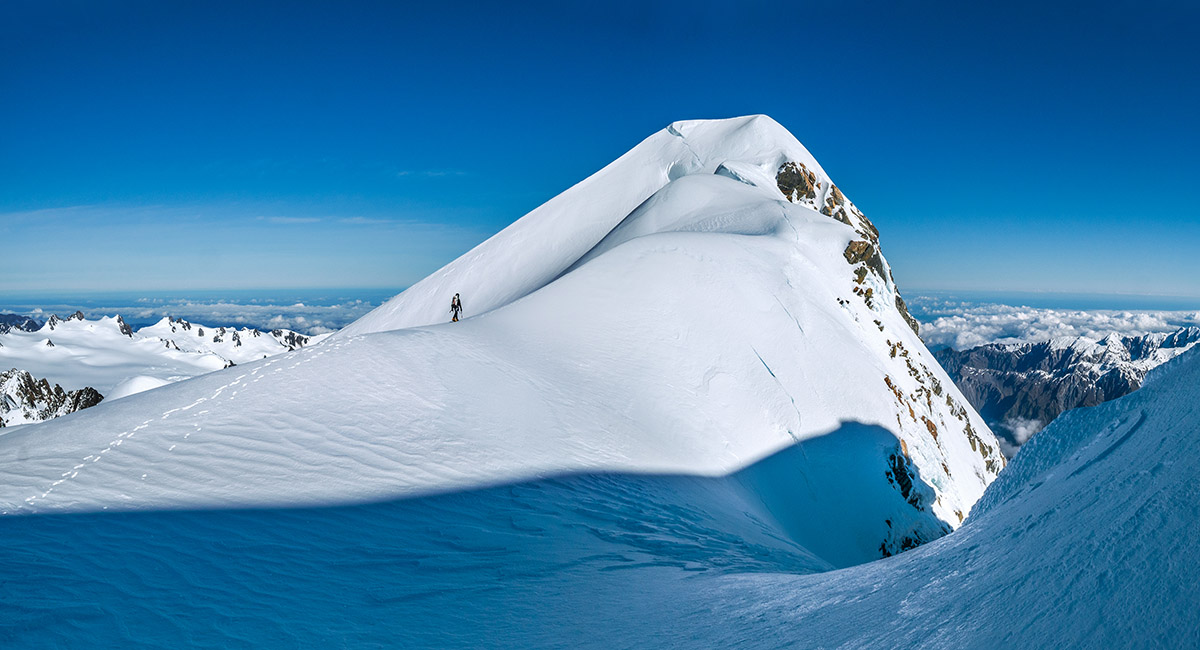
On top of East Minaret (3,040m). My third 3000er. Second time up for Jim, who has climbed all of Aotearoa's 3000ers, many of them more than once

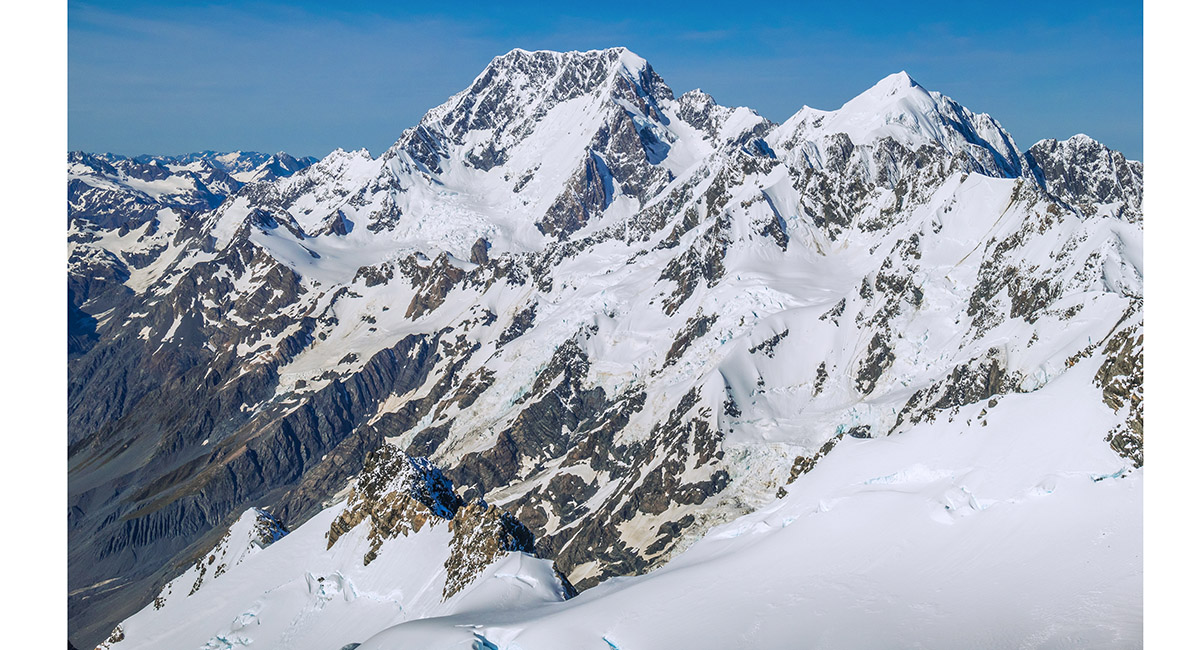
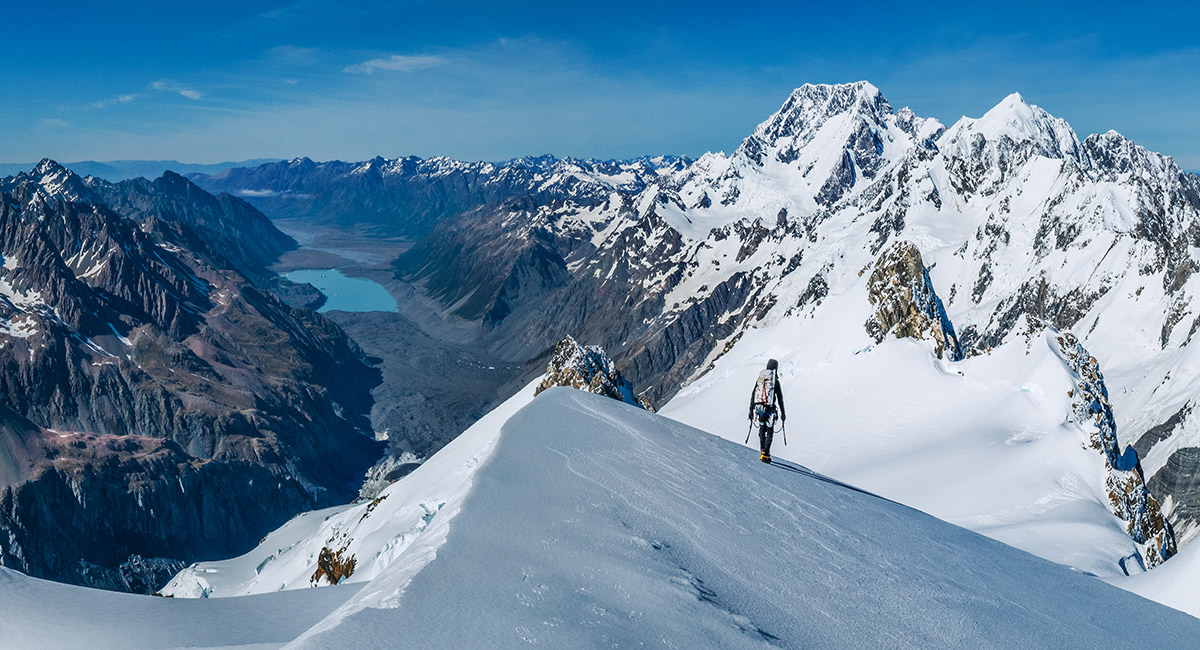
Summit view south to Aoraki Mt Cook

Summit view south to Aoraki Mt Cook, showing the route up and down West Minaret we would shortly take. East Minaret's summit offered no place to relax - frozen hard and dropping off steeply on both sides

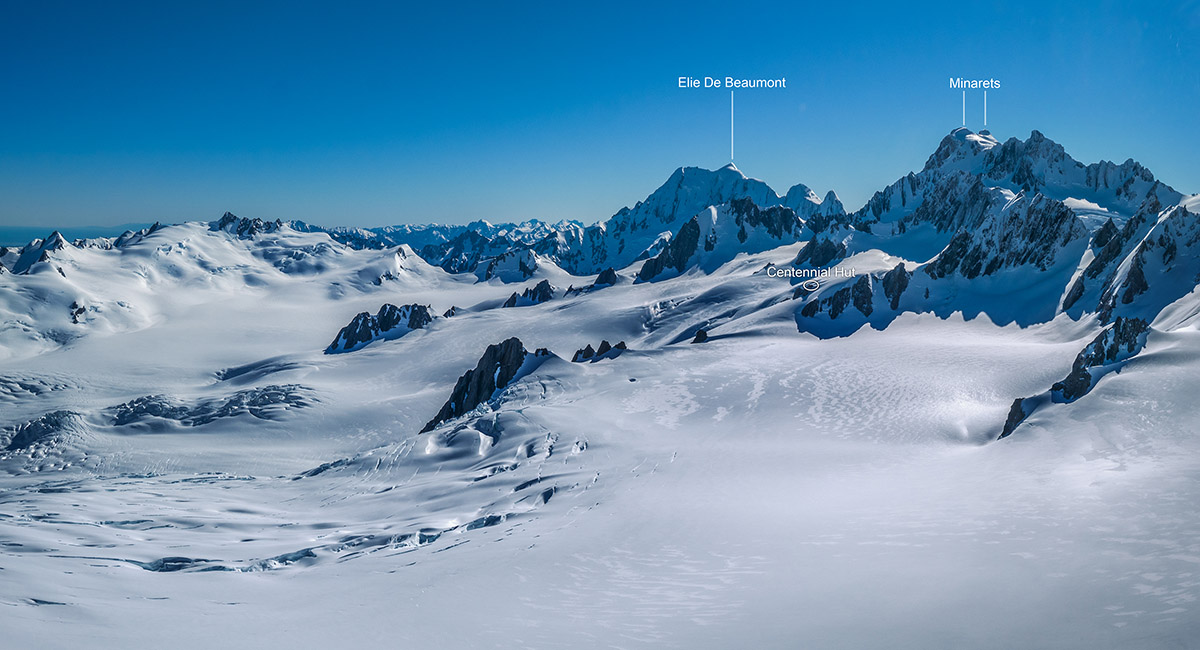
Summit view east to the head of Tasman Glacier. Elie De Beaumont is far left, with Mt Walter and Mt Green in front. Hochstetter Dome is left of centre

Jim heading up the flanks of West Minaret

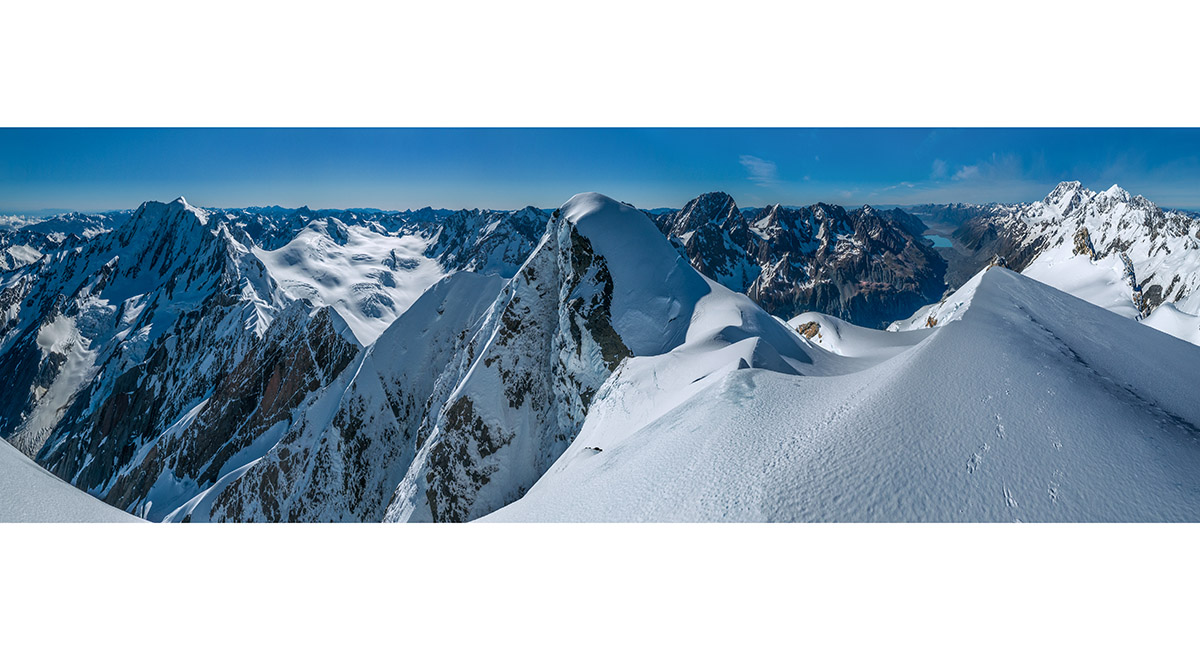
West Minaret (3,031m) summit view east to Elie De Beaumont (left), East Minaret and Malte-Brun (centre) and south to Aoraki Mt Cook and Mt Tasman - quite a view!

West Minaret summit view south to Malte-Brun and Aiguilles Rouges

Jim commencing the descent of West Minaret down easier terrain. De La Beche to his right

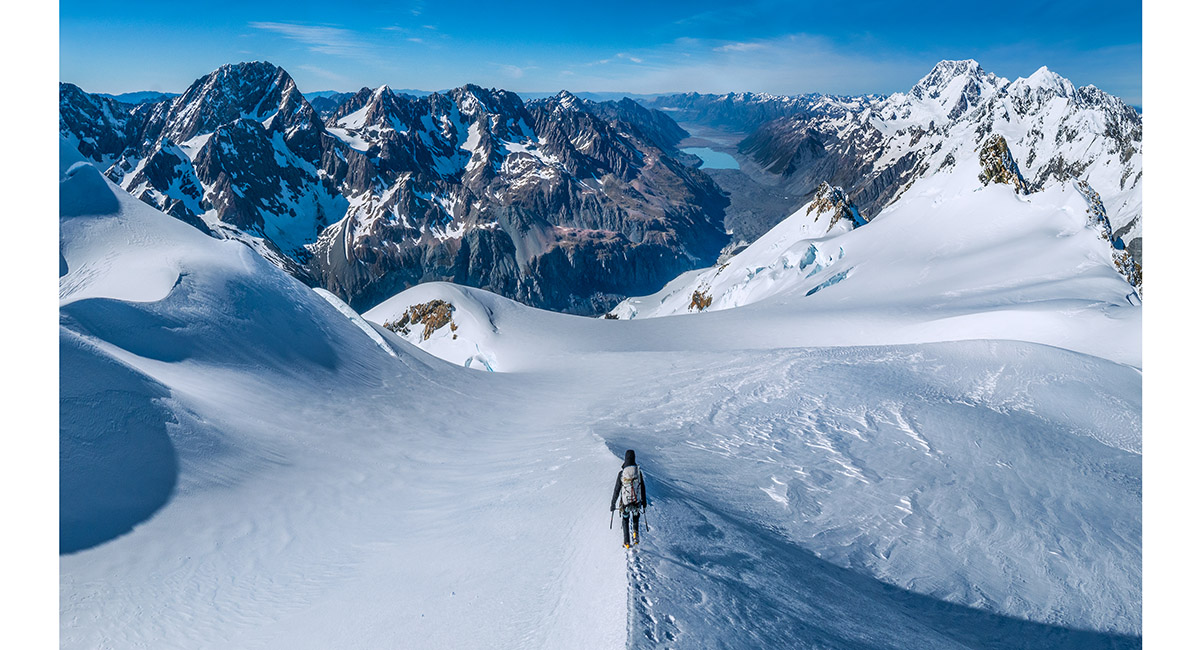
Nearing the flat expanse at 2,900m again, looking south

A view at the base of the snow face above Chamberlin Snowfield, showing our route of ascent/descent. In those frozen hard conditions Type II fun for me, and only doable with the help of Jim's impressive mountaineering skills and strength

A view at the base of the snow face above Chamberlin Snowfield, showing our route across it to the buttress extending north from Mt Rudolf

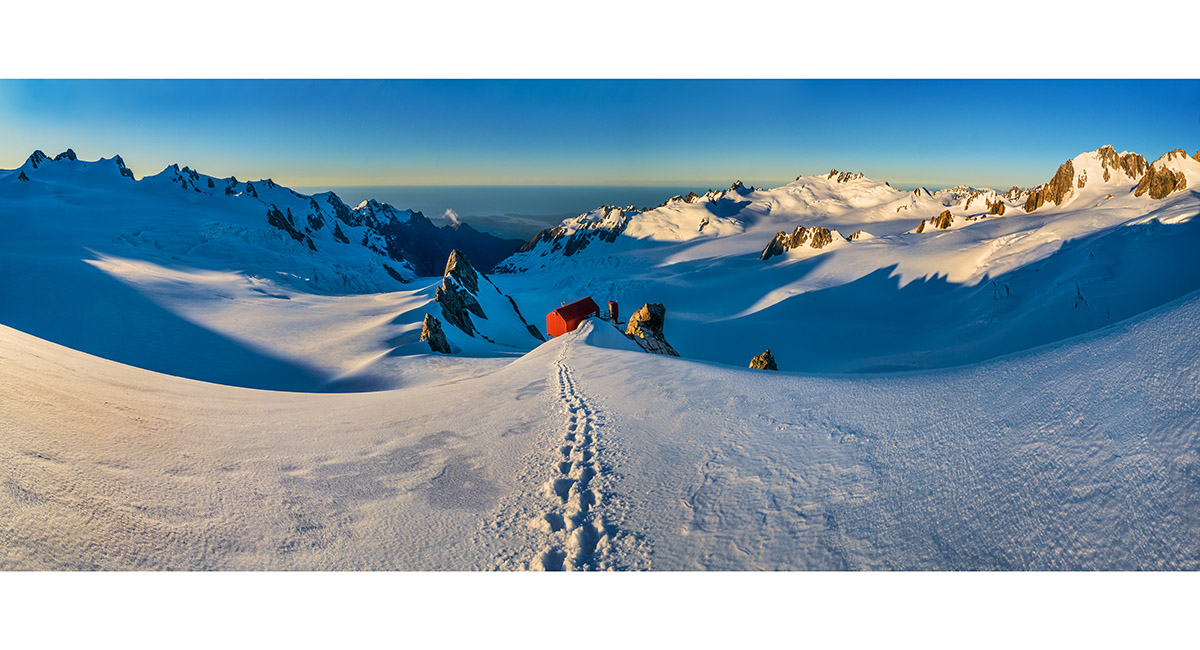
Centennial Hut at dawn on Day 3

Dawn view to Tusk from Centennial Hut

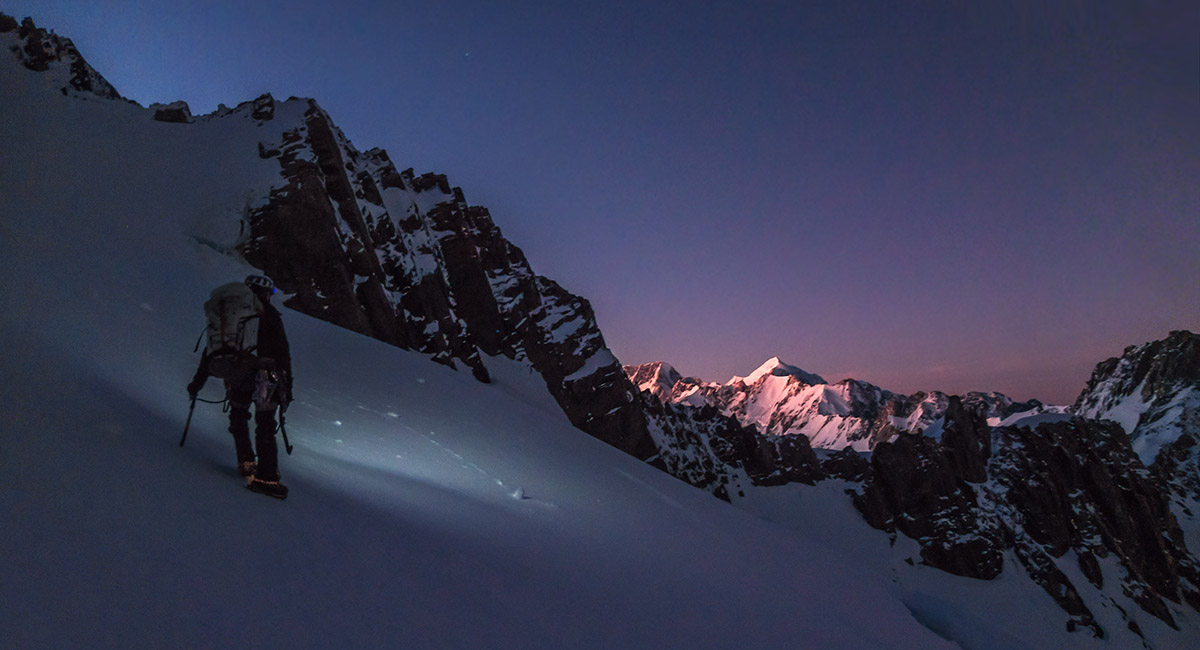
We got away at day-break to take advantage of the frozen conditions. While challenging on steep terrain, on flatter surfaces it permitted quick progress. This is a view of Centennial Hut from Davis Snowfield


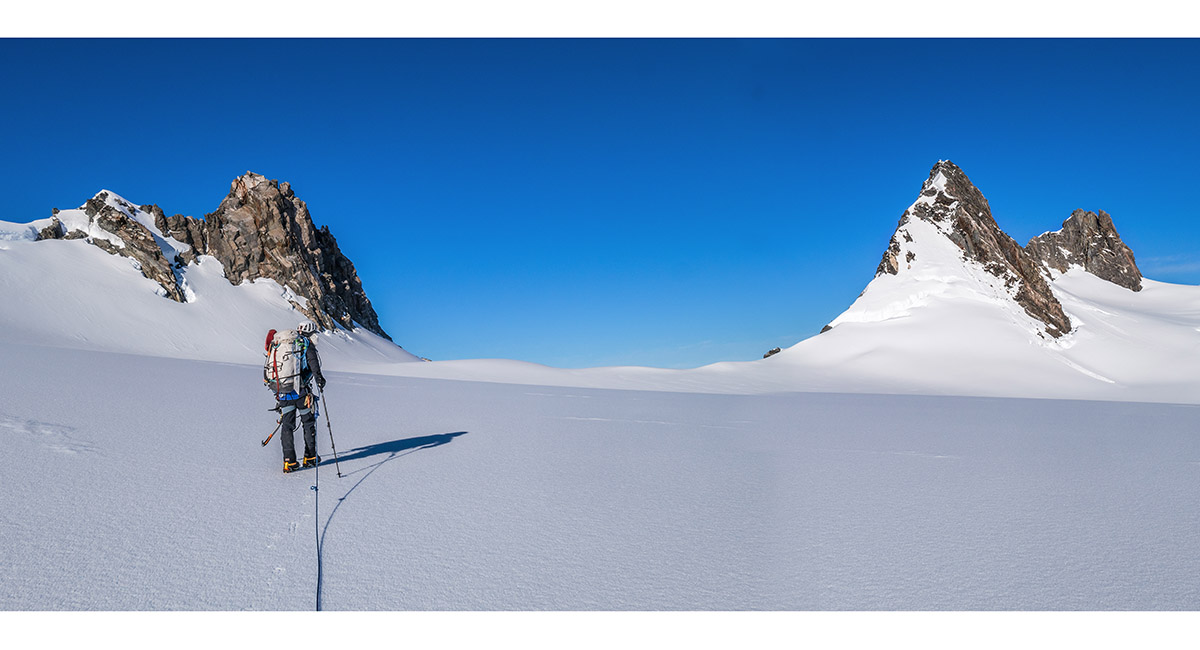
On the gradual ascent from Davis Snowfield to Newton Pass

Jim knocks off another high point, this one an un-named 2,470m prominence east of Newton Pass

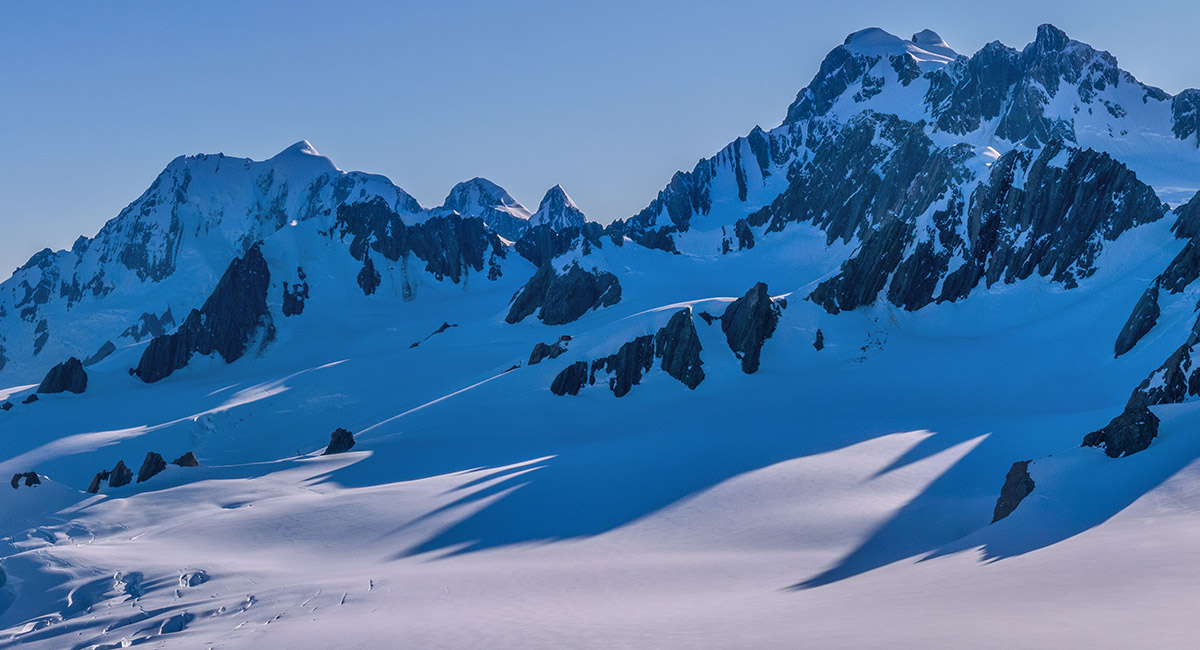
A view east from the prominence to the Minarets and De La Beche (far right), Mts Green and Walter (left of centre) and Elie De Beaumont (left). Centennial Hut is directly below the sharp fang of Mt Green

At about 2,460m, approaching 2,492m Newton Pass. West Hoe (2,574m) at left and Mt Christie (2,636m) and Mt Halcombe (2,659m) at right


The view east from Newton Pass. The Minarets and De La Beche (far right), then Mts Green, Walter and Elie De Beaumont


The view west and south from Newton Pass. Mt Tasman and Torres Peak top left and Fox Glacier nevé below

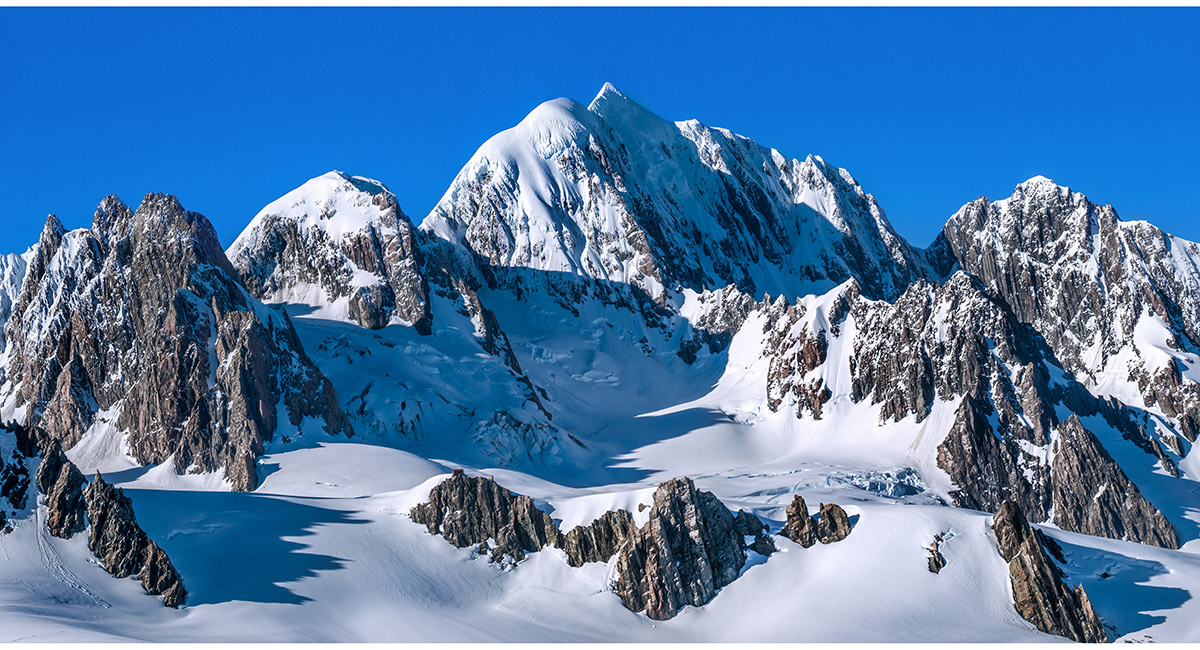
From Left, Mt Haast (3,114m), Lendenfeld Peak (3,194m), Mt Tasman (3,497m) and Torres Peak (3,160m). Pioneer Hut (2,480m) sits beneath Lendenfeld

Crossing Explorer Glacier at about 2,400m, towards Pioneer Hut


Our descent route from Newton Pass, across Explorer Glacier. West Hoe Pass is at right

On the final climb to Pioneer Hut


The rather exposed Pioneer Hut throne - best not to leave your journey to this loo to the last minute, otherwise you maybe in the shit in more ways than one

Inside Pioneer Hut (2,480m)

To order a print or web resolution file of any image you see in this slide show, just right click the image, click “Copy Image URL” and paste in to the “Your message” box of our Contact Us form. Please also note, for each image, if you want a print or web resolution file. We will get back to you as soon as possible to confirm price and payment details.
Open Contact Us in a new window to paste Image URL(s) easily