Tasman Glacier, November 2021
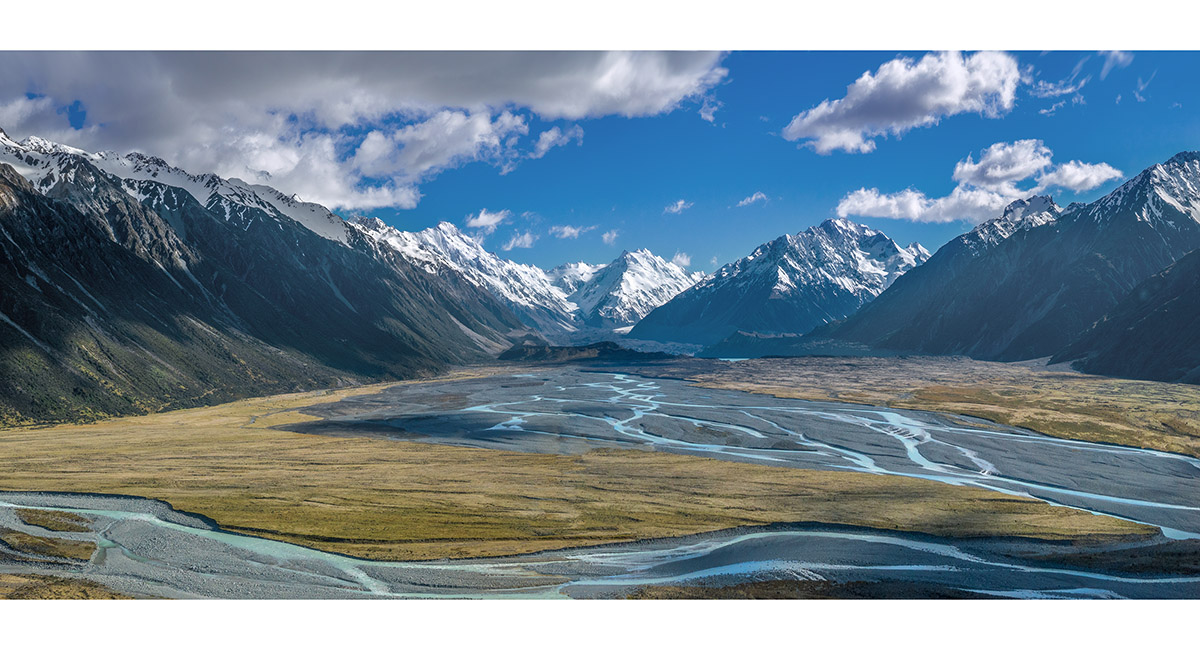
A helicopter view north up Tasman Glacier, soon after leaving Aoraki Mt Cook airport

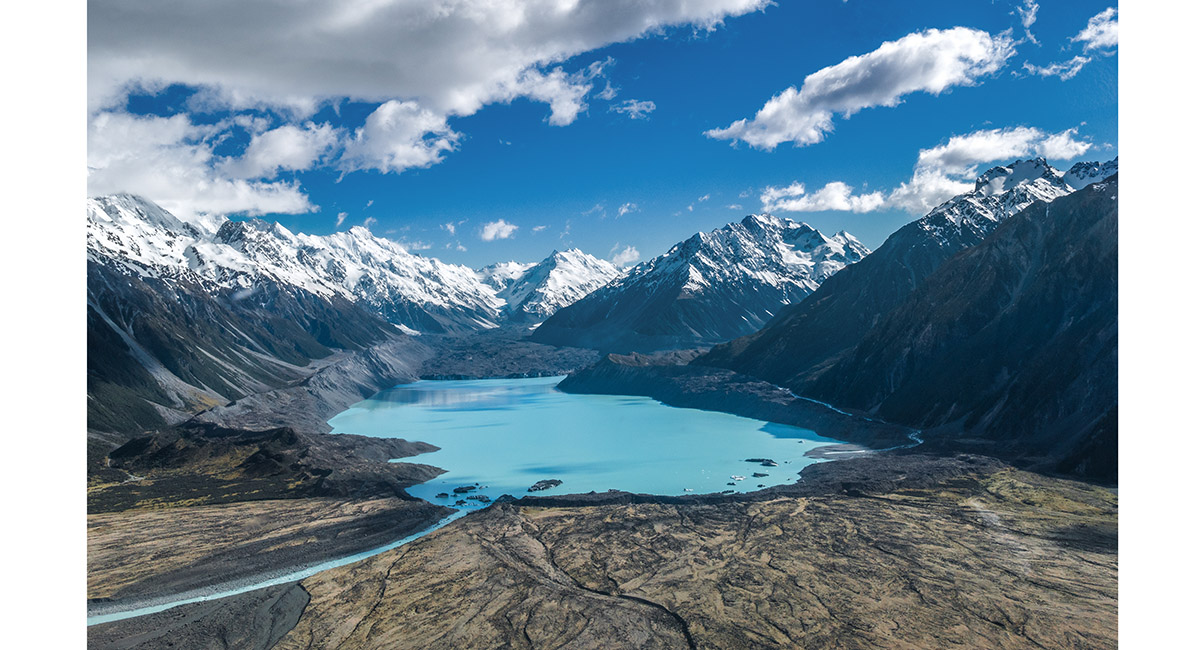
Tasman Glacier terminal lake

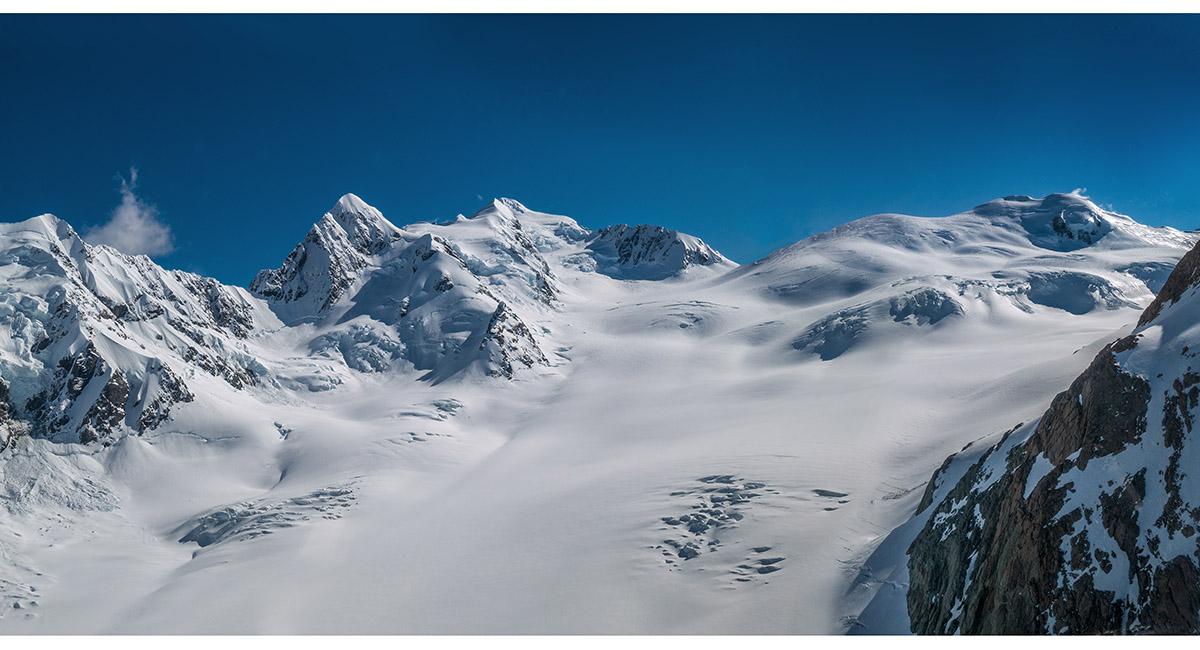
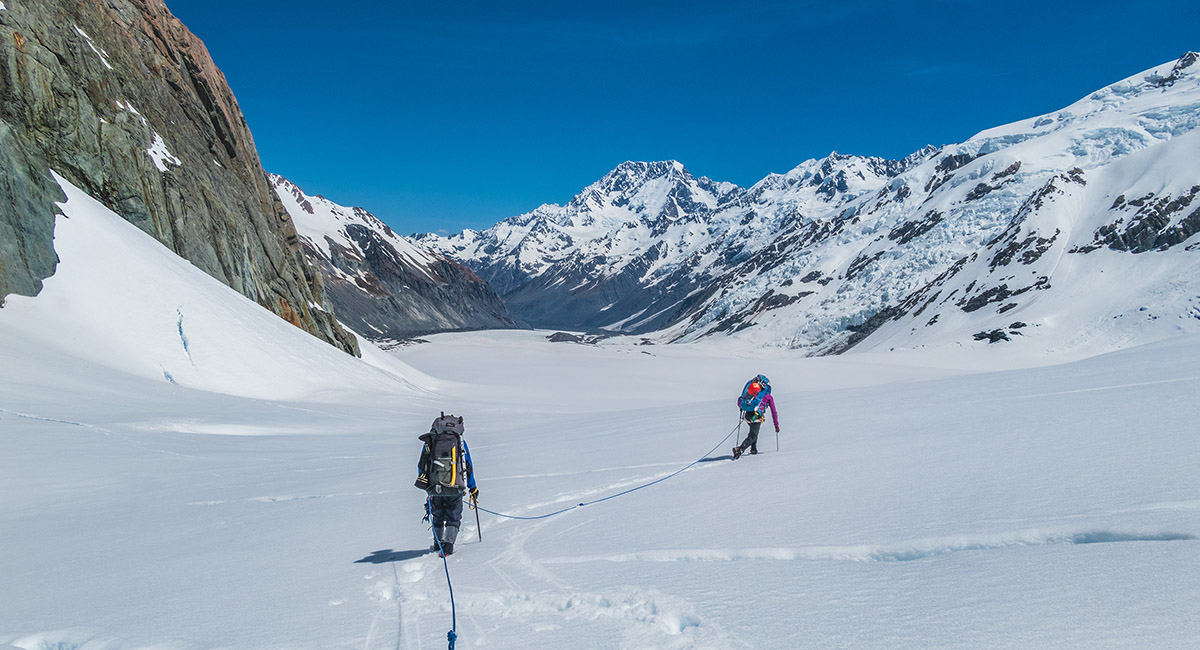
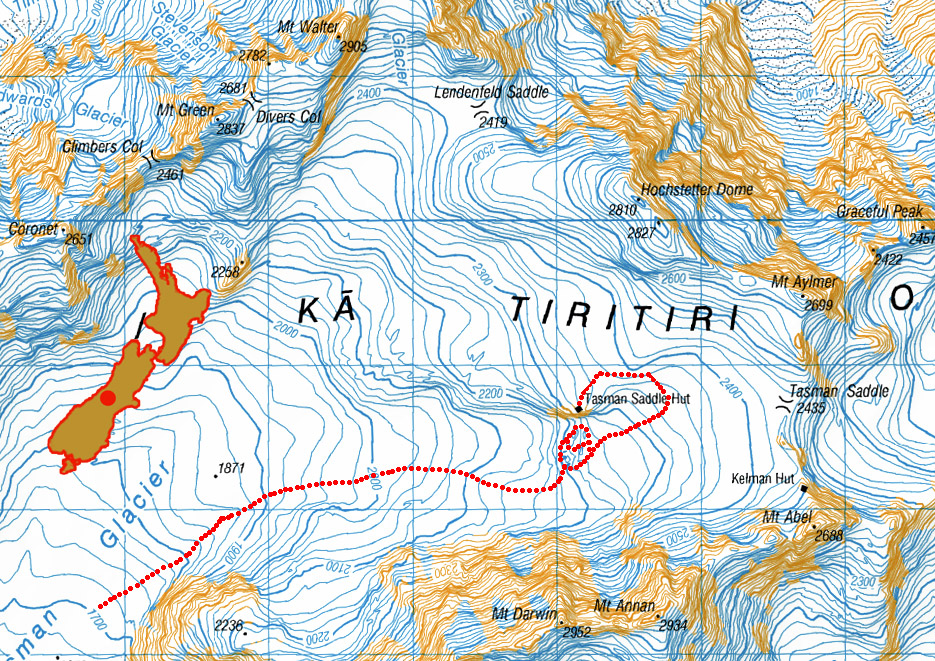
Approaching the head of Tasman Glacier. Mt Green (left), Mt Walter and Elie De Beaumont (left of centre) and Hochstetter Dome (right)

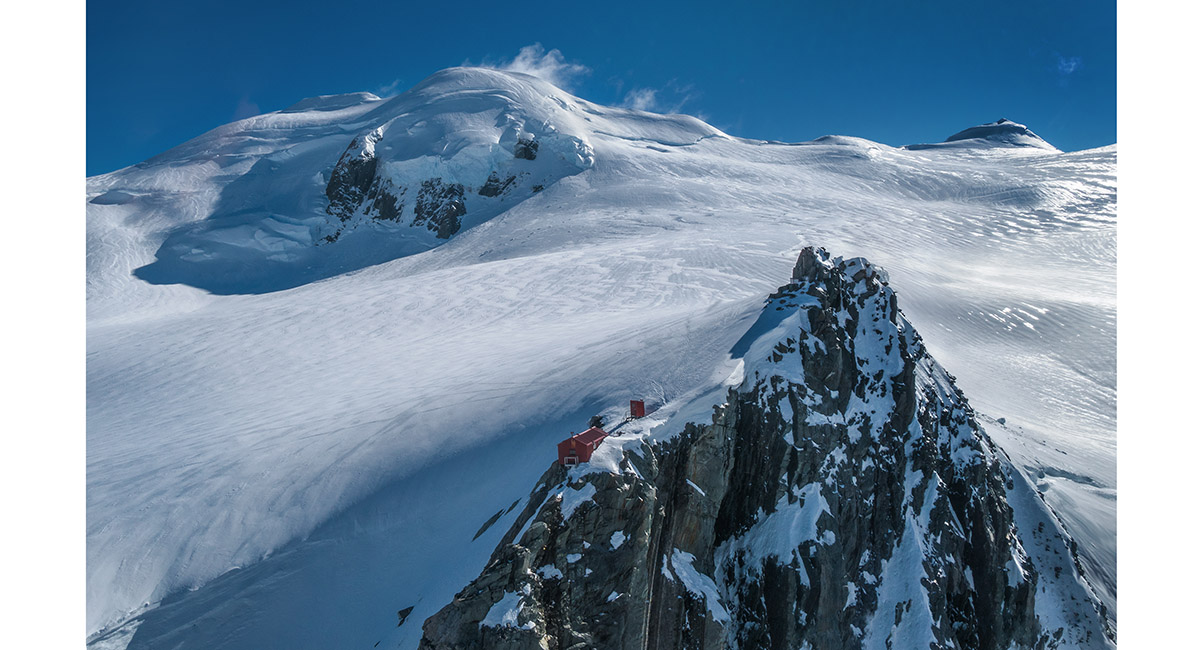
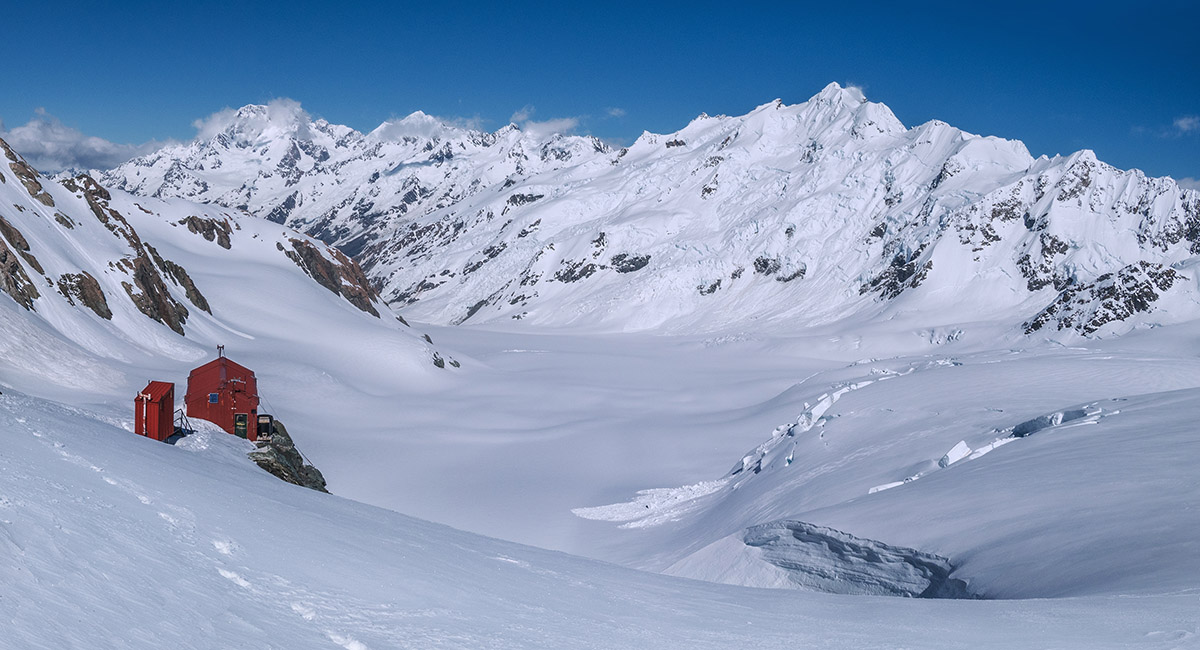
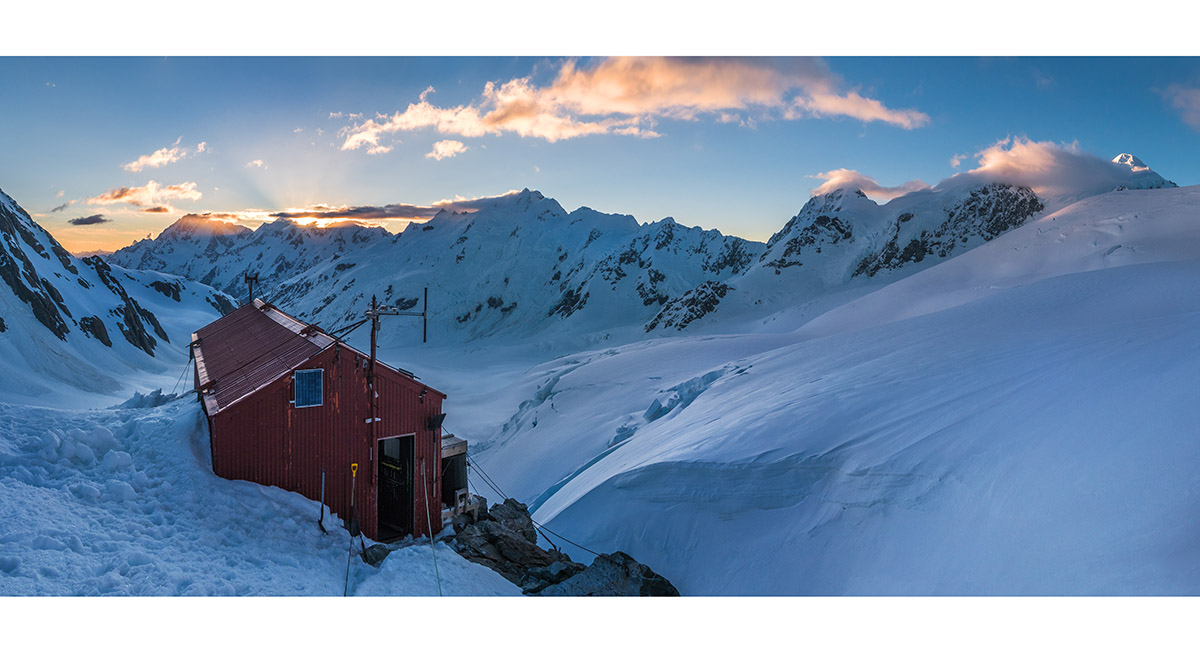
Tasman Saddle Hut (2,320m) with Hochstetter Dome (2,827m, left of centre) and Mt Aylmer (2,699m, right) behind

A view down Tasman Glacier to the main divide, with Tasman Saddle Hut left


Inside Tasman Saddle Hut

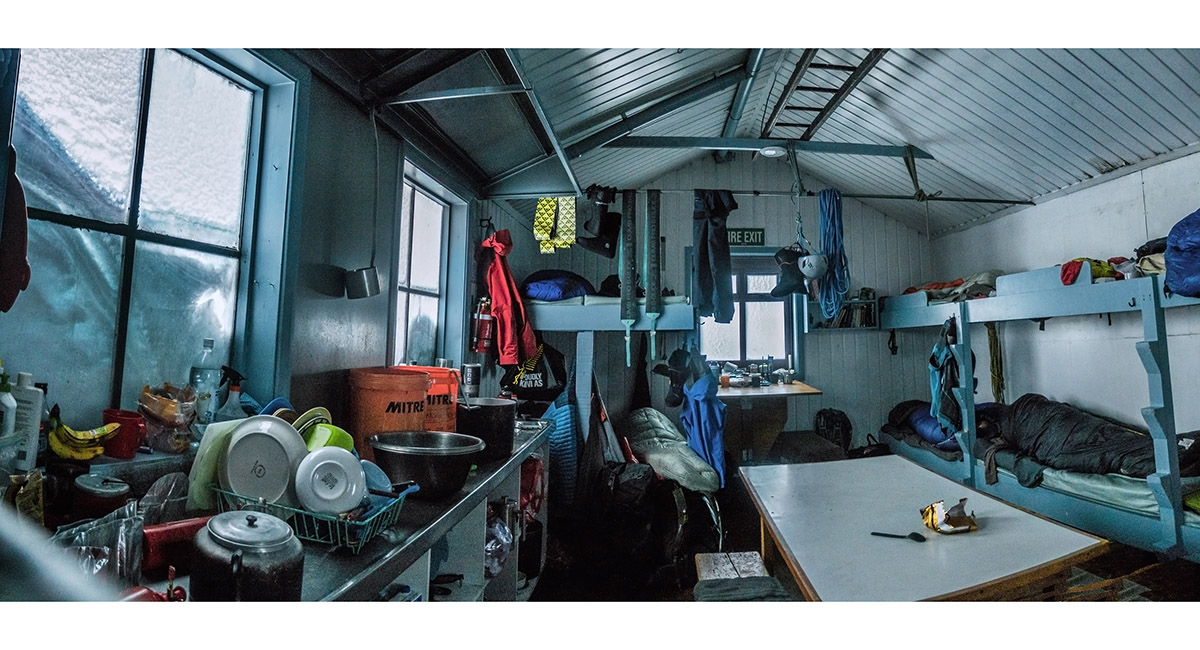
Inside Tasman Saddle Hut

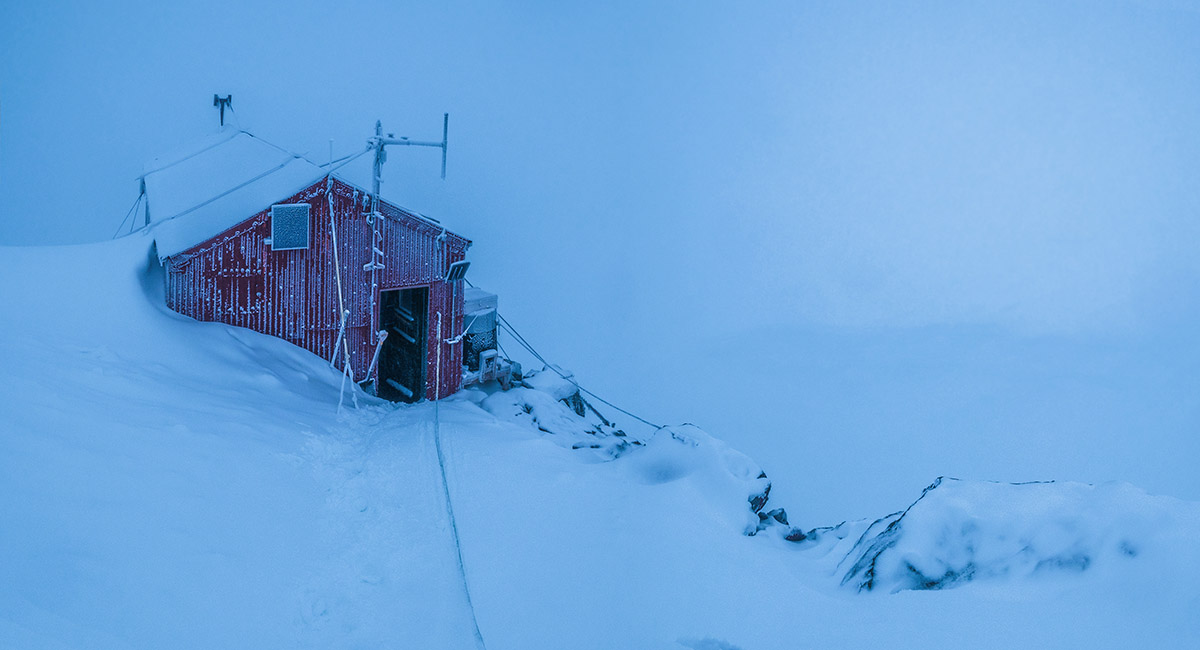
Tasman Saddle Hut after snowfall

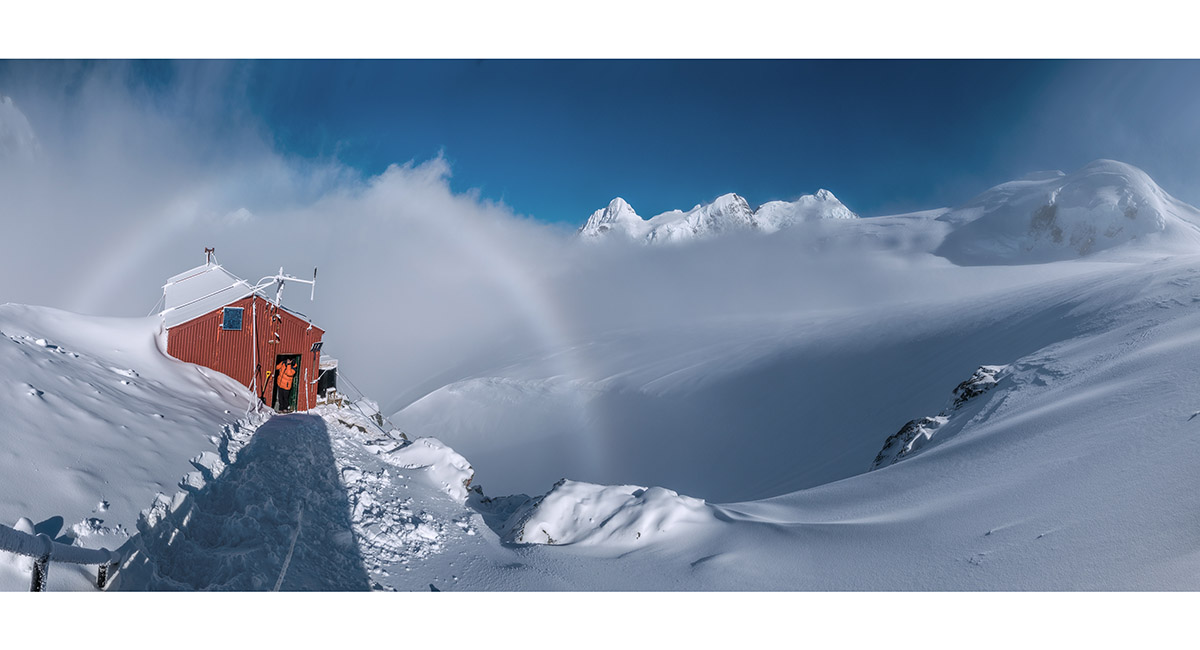
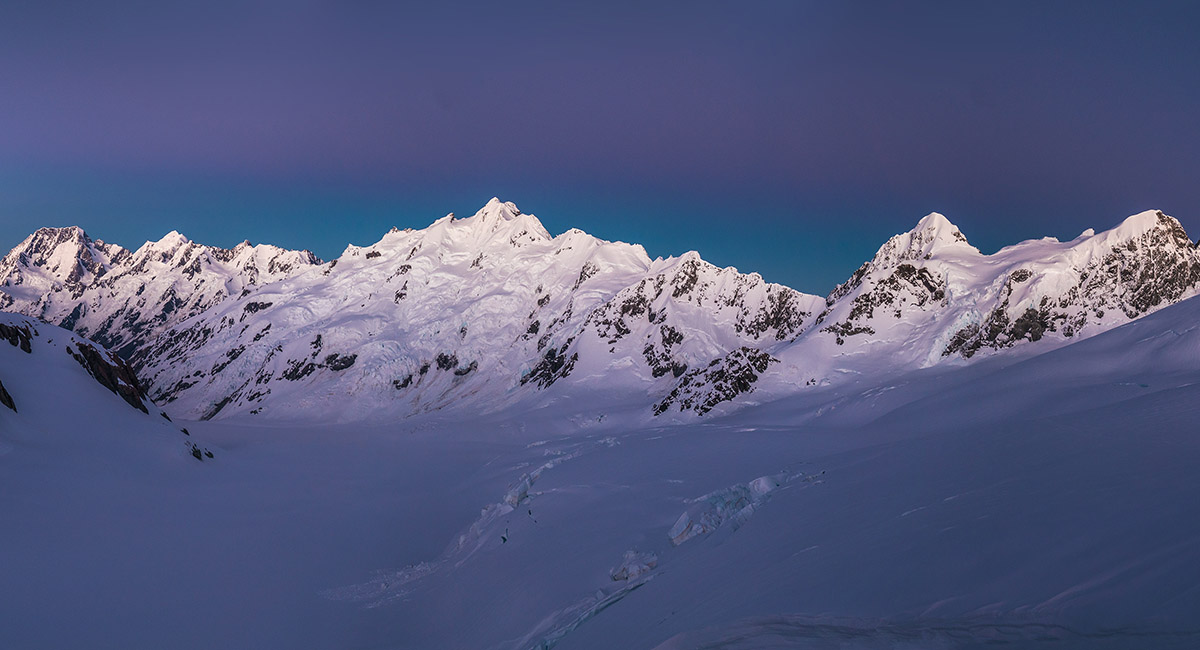
Tasman Saddle Hut and the main divide as the weather clears

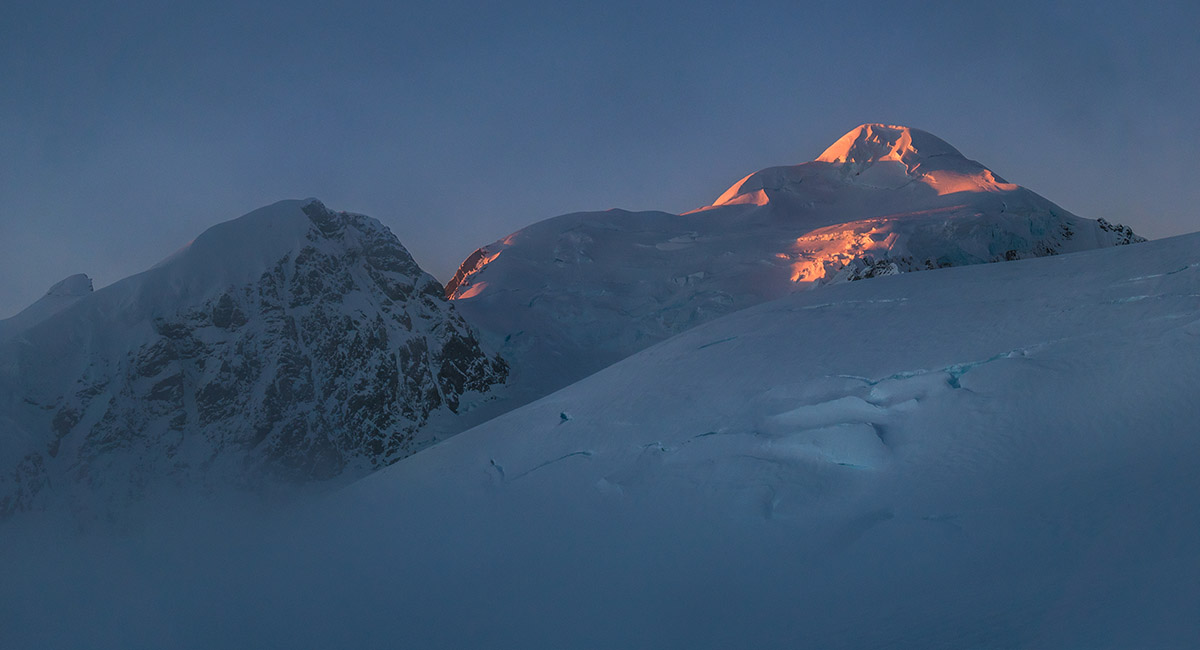
Elie De Beaumont at sunset

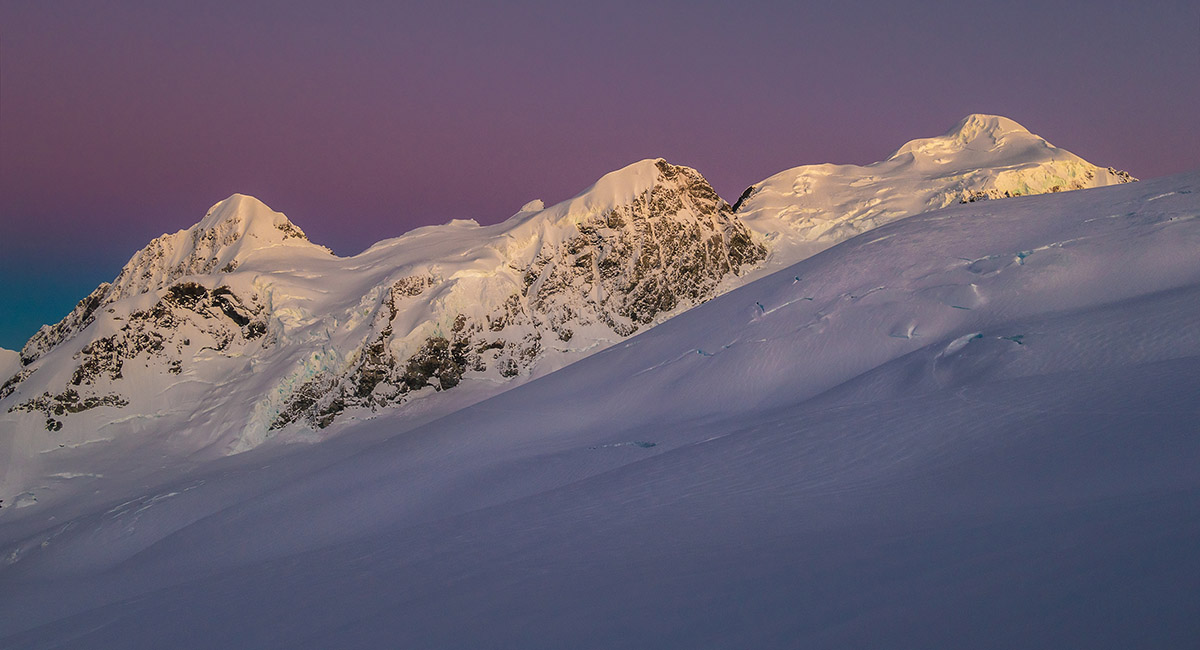
A dawn view of, from left, Mt Green, Walter and Elie De Beaumont

A dawn view over Tasman Saddle Hut to the main divide

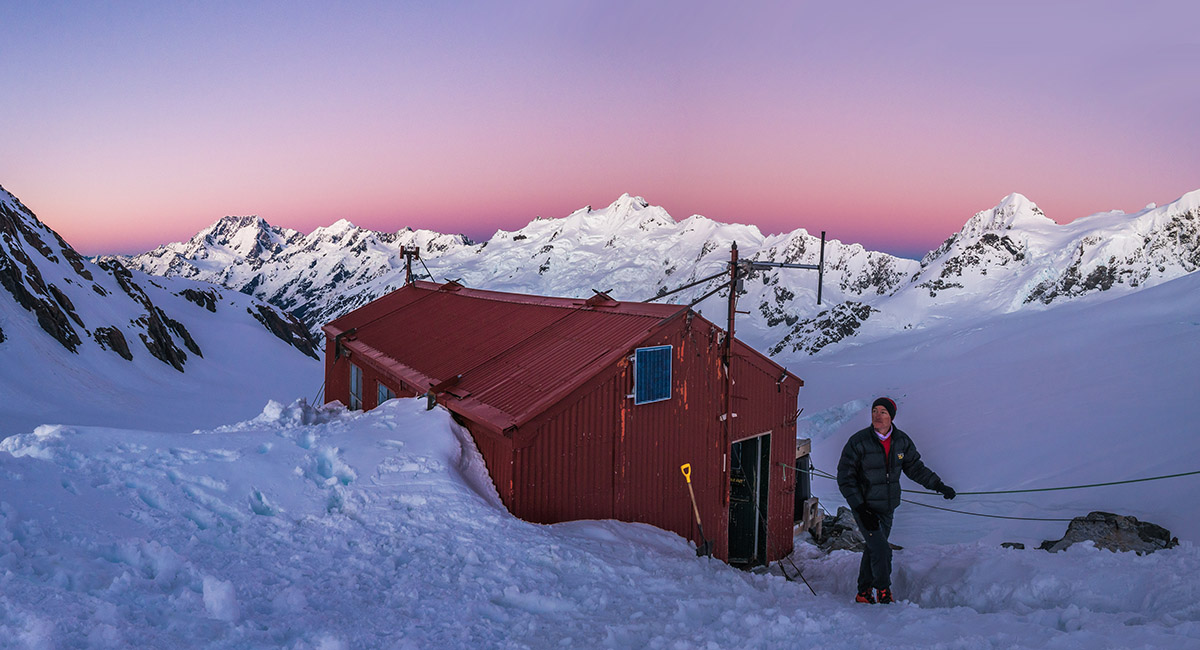
A sunrise view over Tasman Saddle Hut to the main divide

Aoraki Mt Cook and Tasman at sunrise


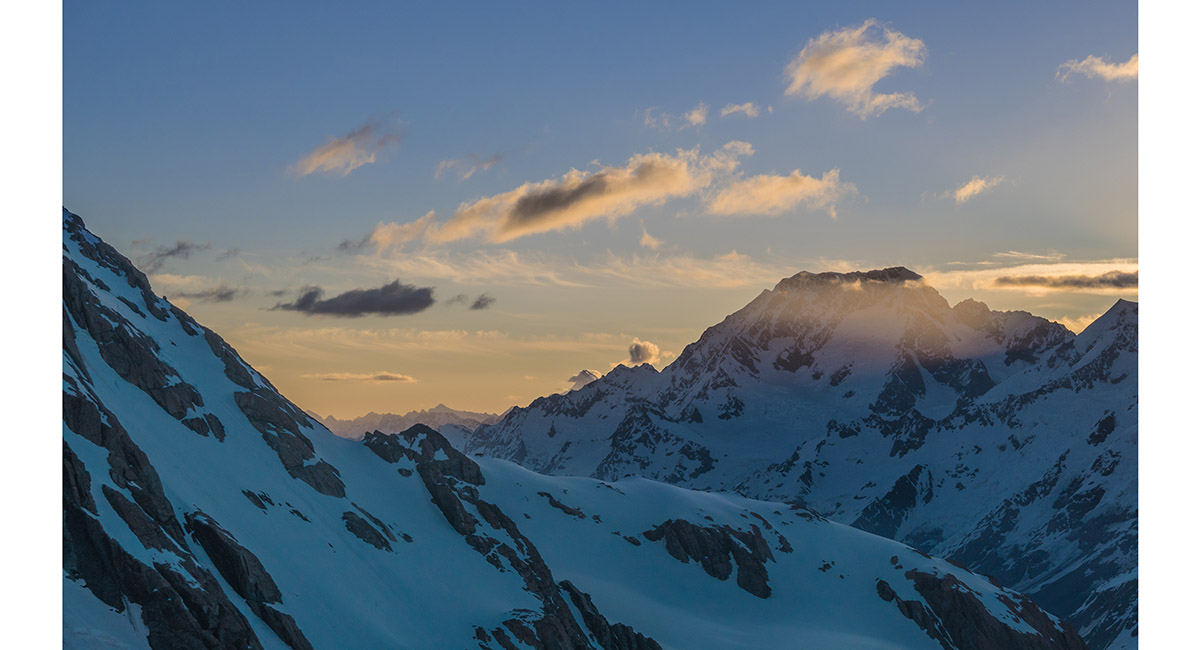
A sunset view from the south facing balcony of Tasman Saddle Hut

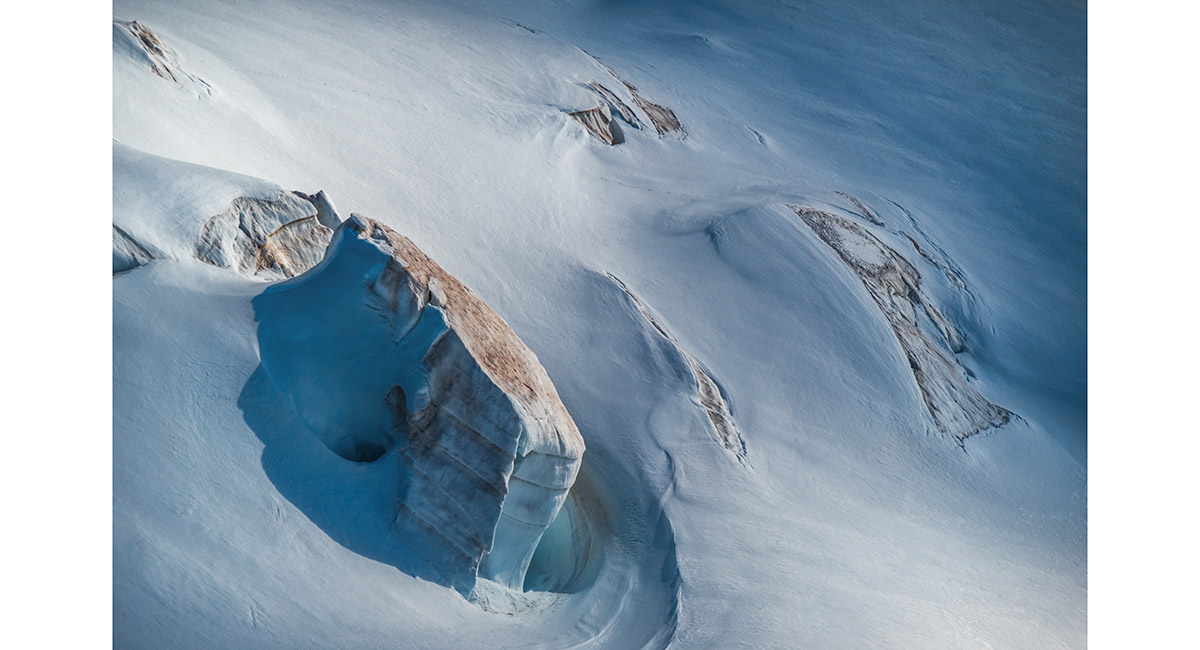
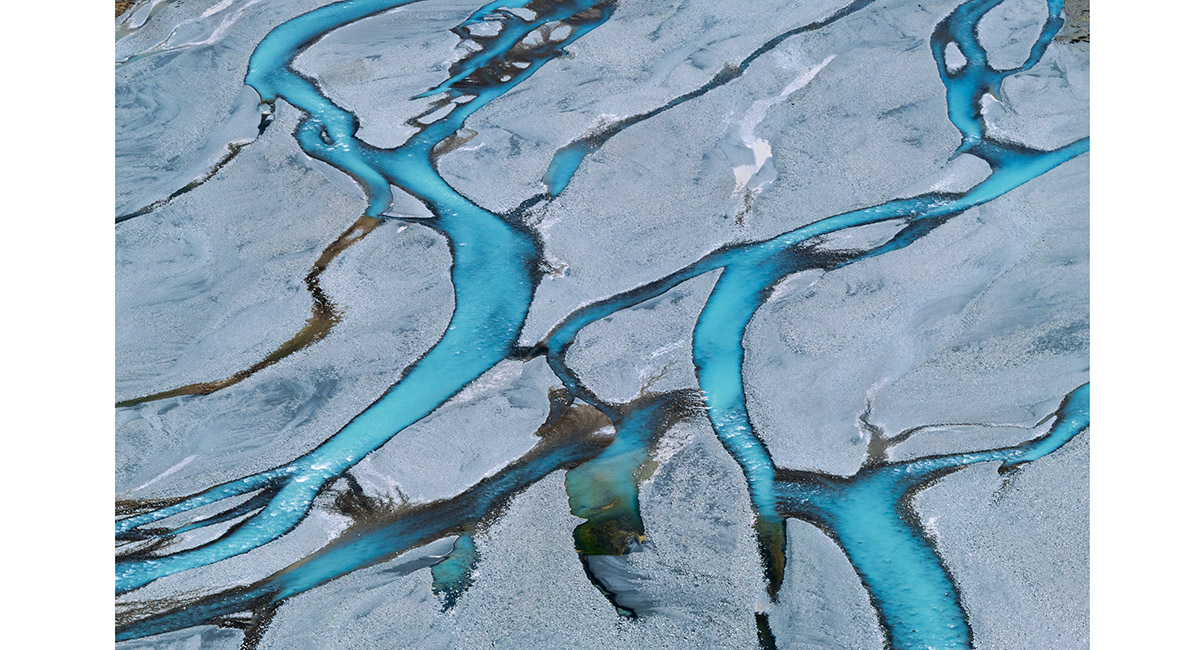
Dusk light on glacier formations

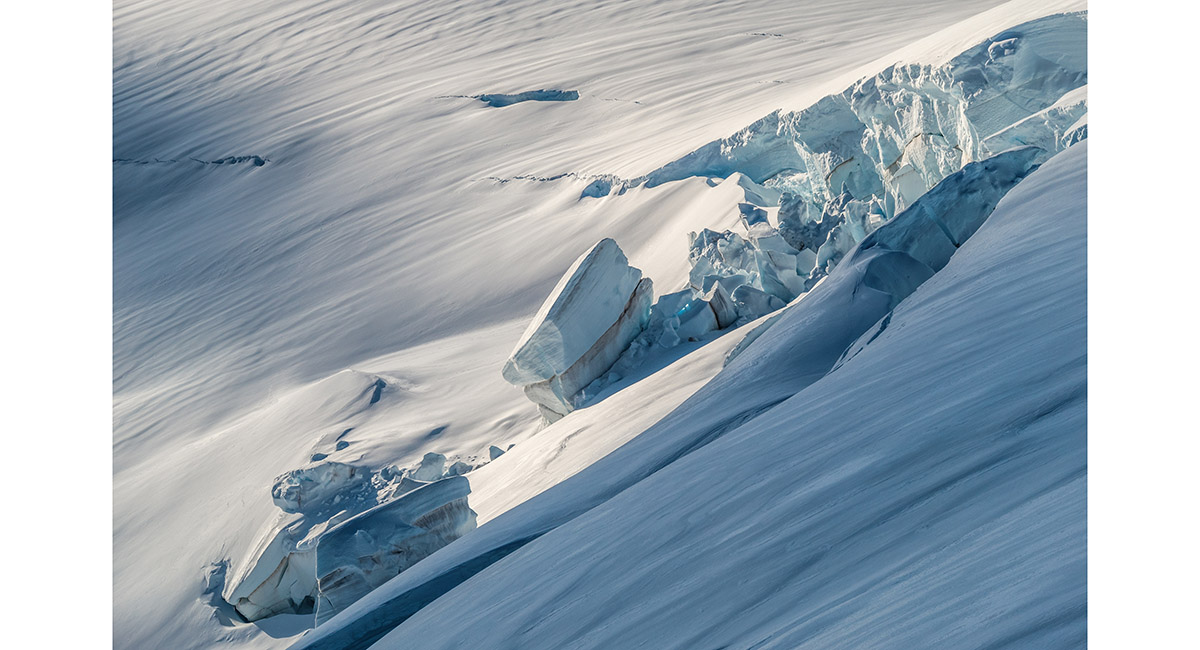
Dusk light on glacier formations

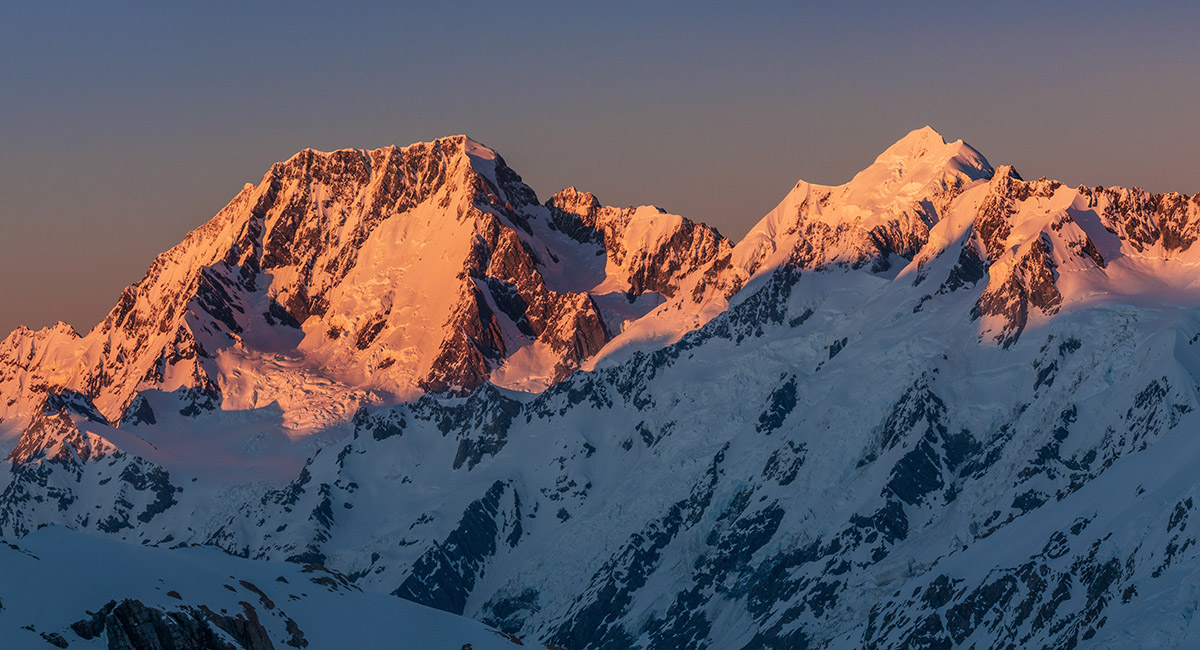
Aoraki Mt Cook at sunset


A sunset view to the Aroarokaehe Range

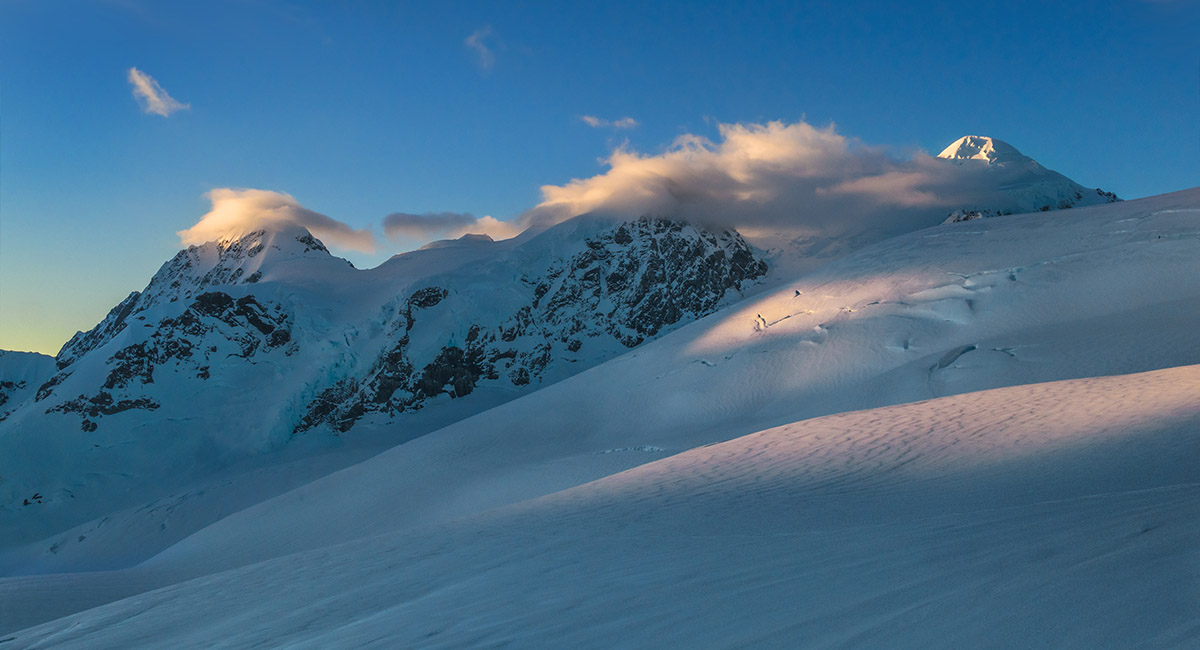
Mts Green and Walter cloaked in cloud, with Elie De Beamont (right) at sunset

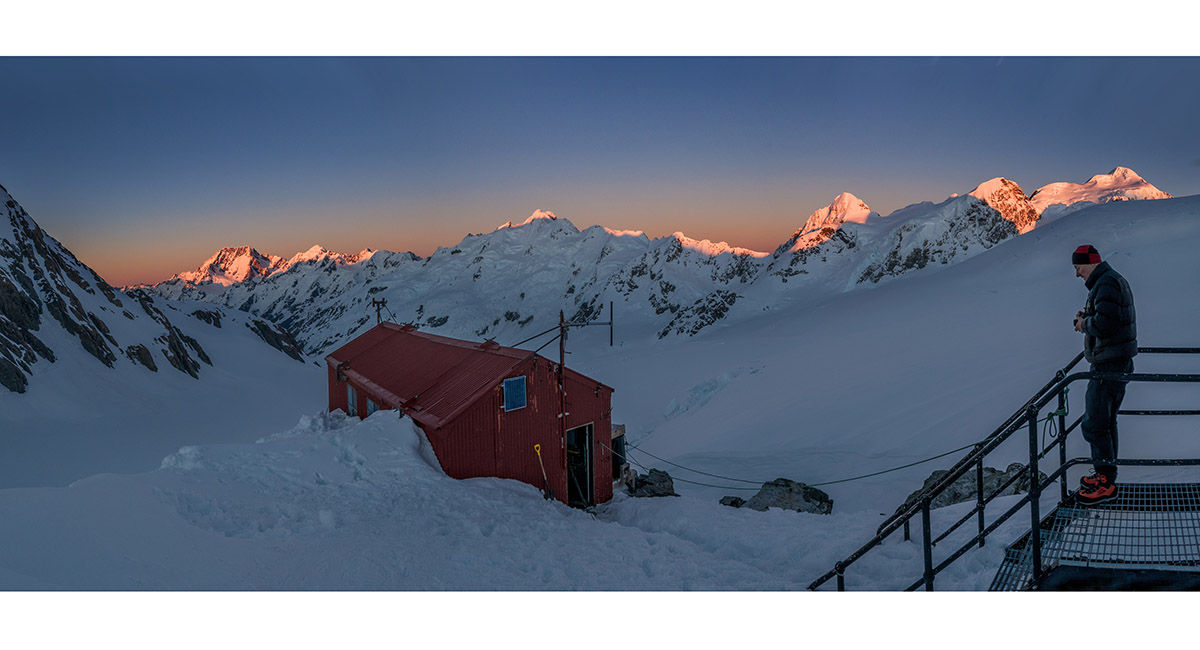
A sunset view over Tasman Saddle Hut to the main divide

A dawn view of the main divide - Aoraki Mt Cook far left, Minarets left of centre, Mounts Green and Walter right

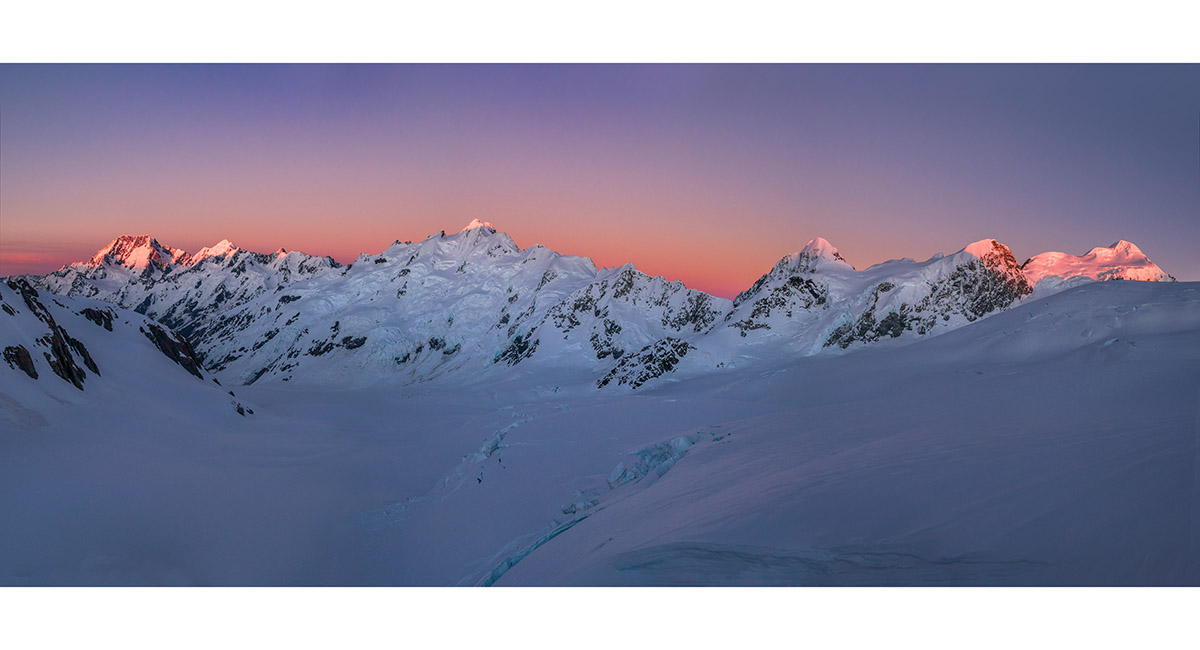
A sunrise view of the main divide - Aoraki Mt Cook far left, Minarets left of centre, Mounts Green, Walter and Elie De Beaumont right

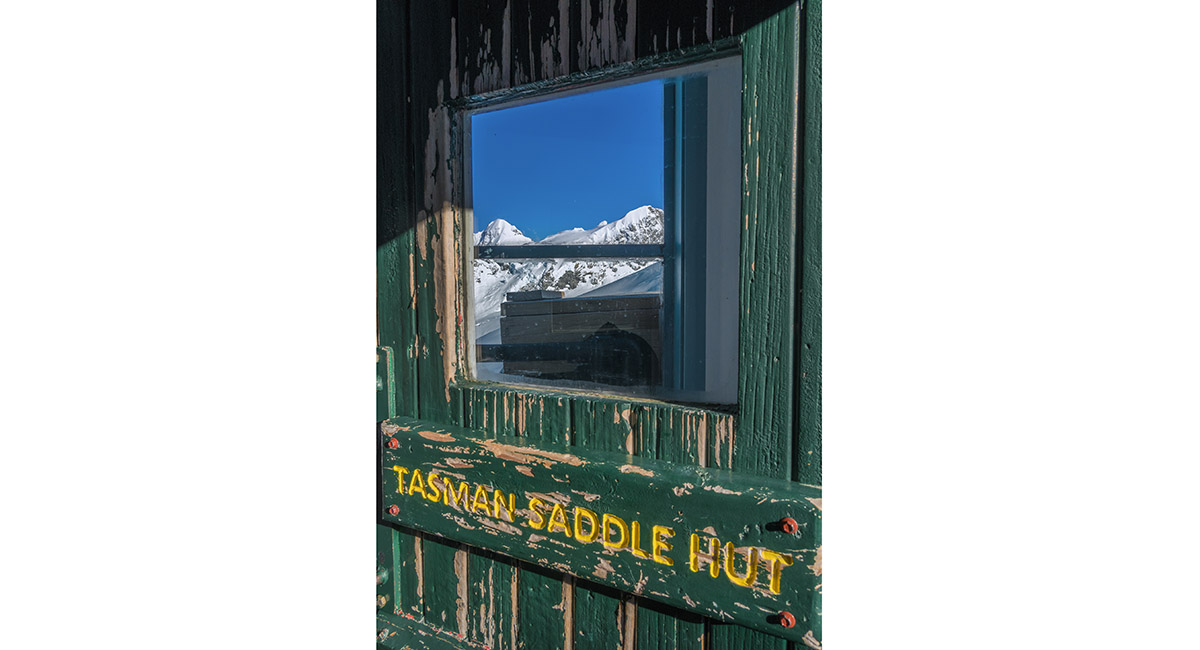
The front door of Tasman Saddle Hut

Descending on the eastern side of Tasman Saddle Hut (beyond the skyline top right)


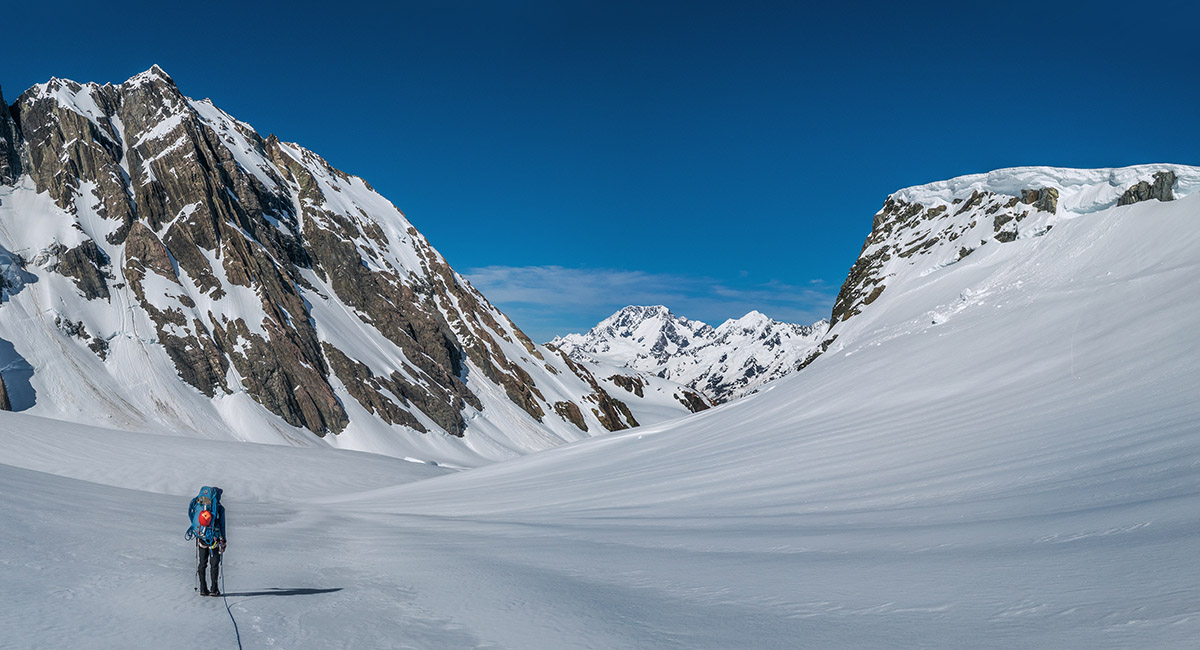
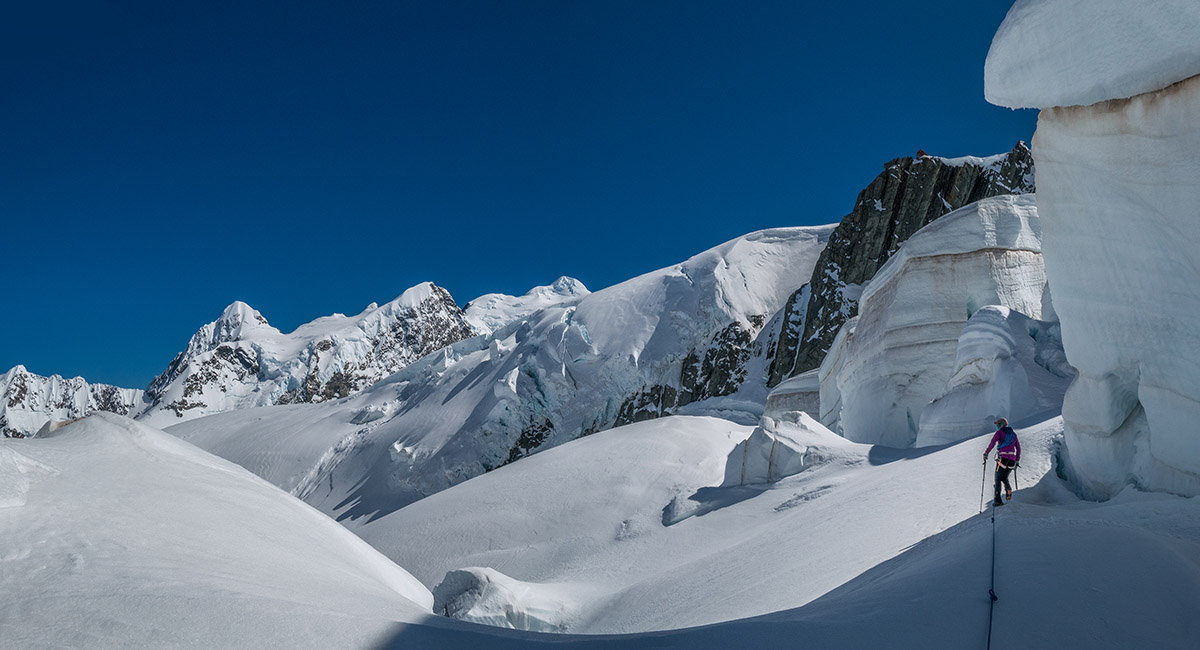
Approaching the base of the crevasse field (2,200m) directly below Tasman Saddle Hut

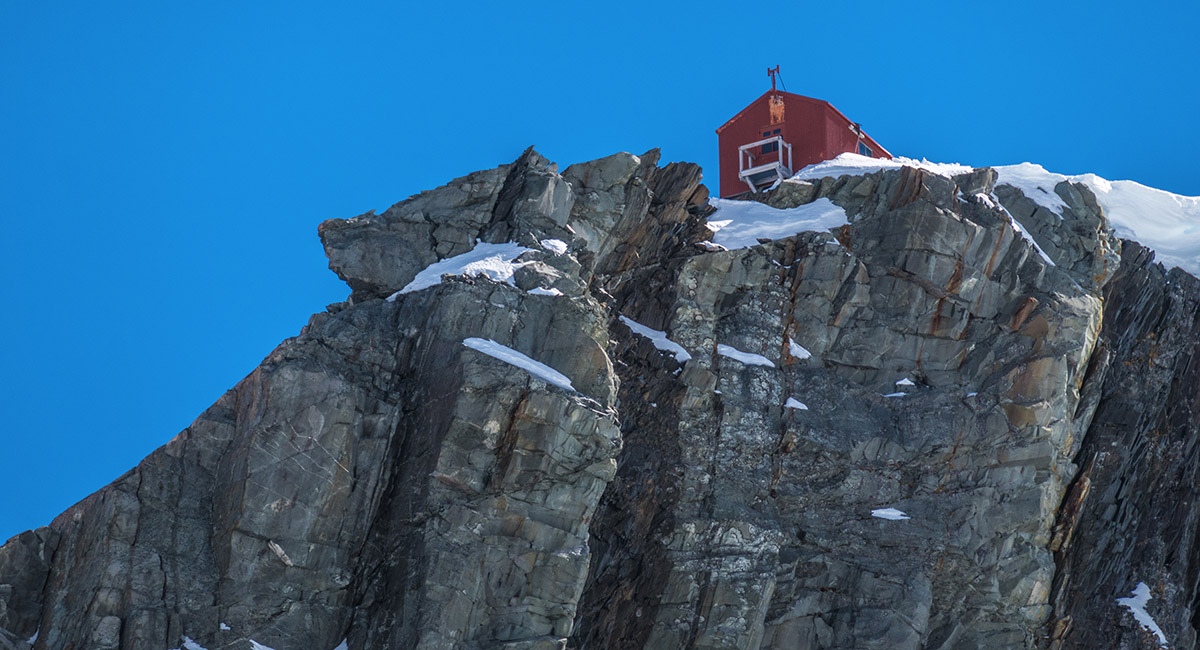
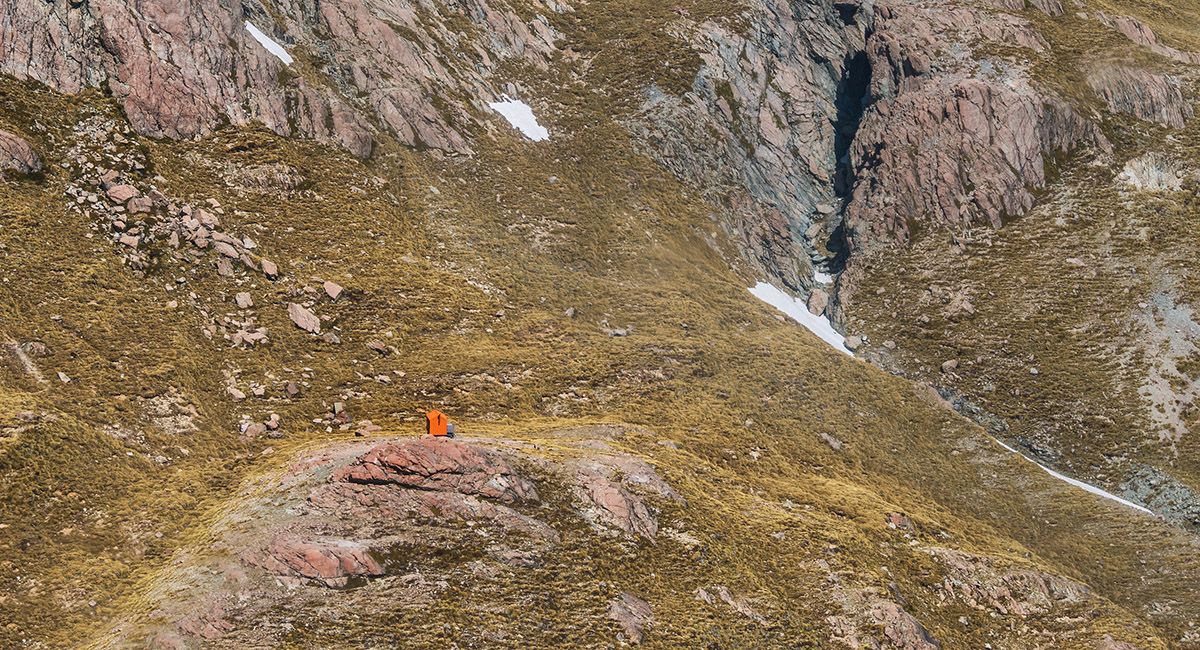
The precarious clifftop perch of Tasman Saddle Hut

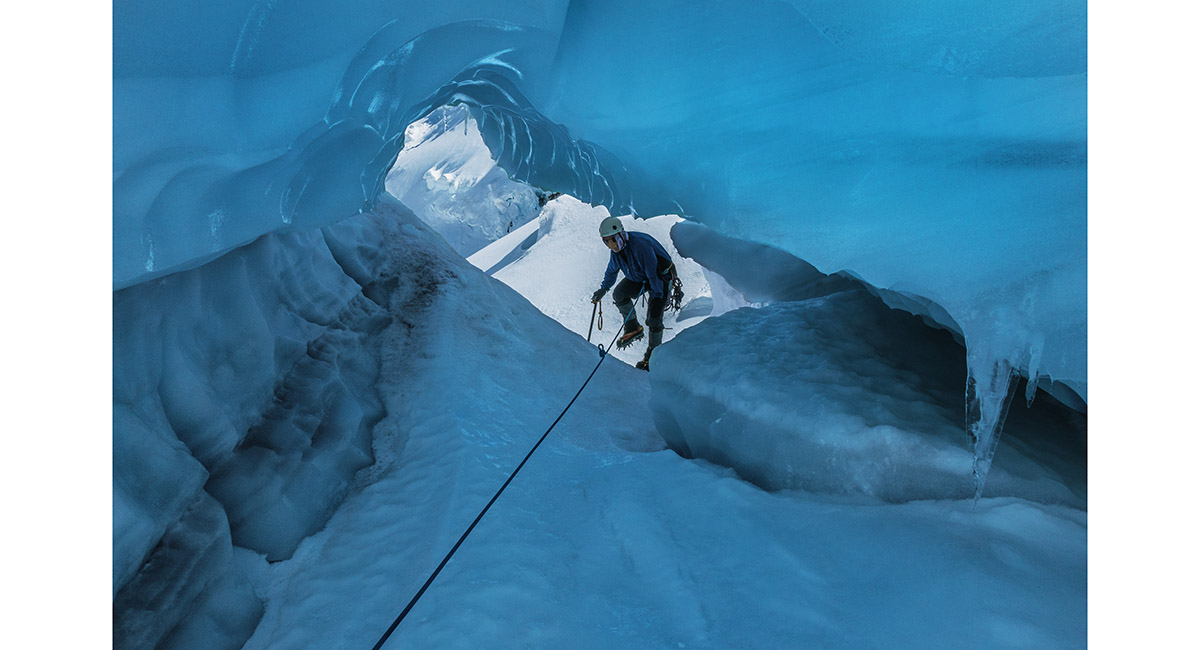
Exploring the crevasse field beneath Tasman saddle Hut

Exploring the crevasse field beneath Tasman saddle Hut

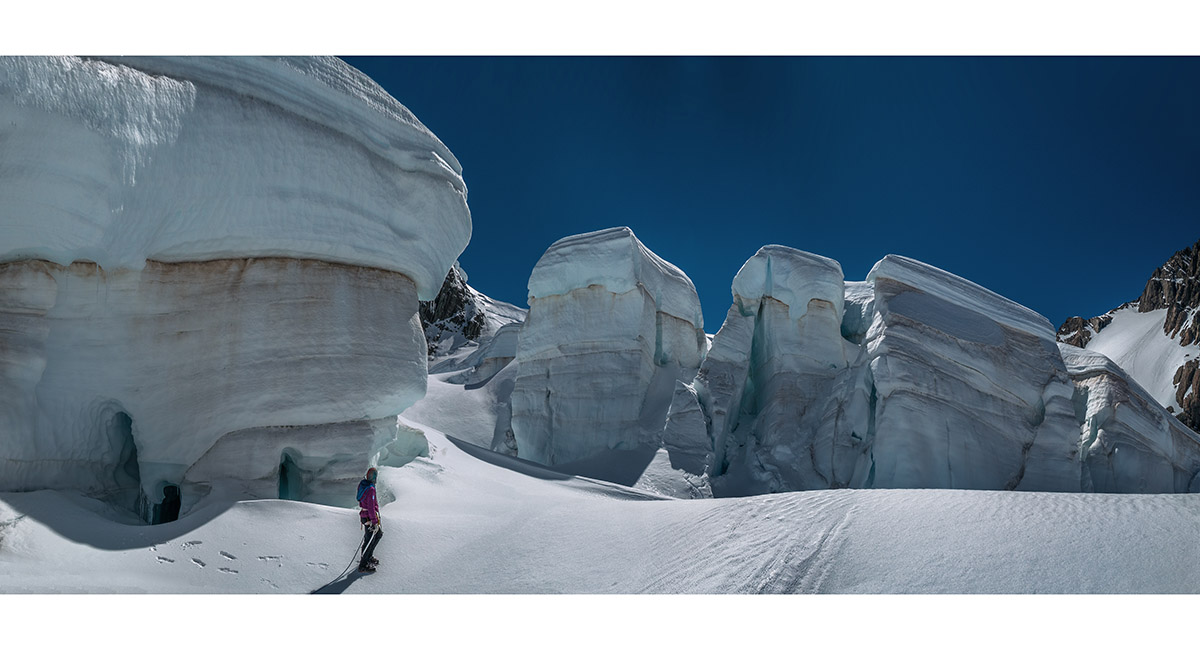
Exploring the crevasse field beneath Tasman saddle Hut

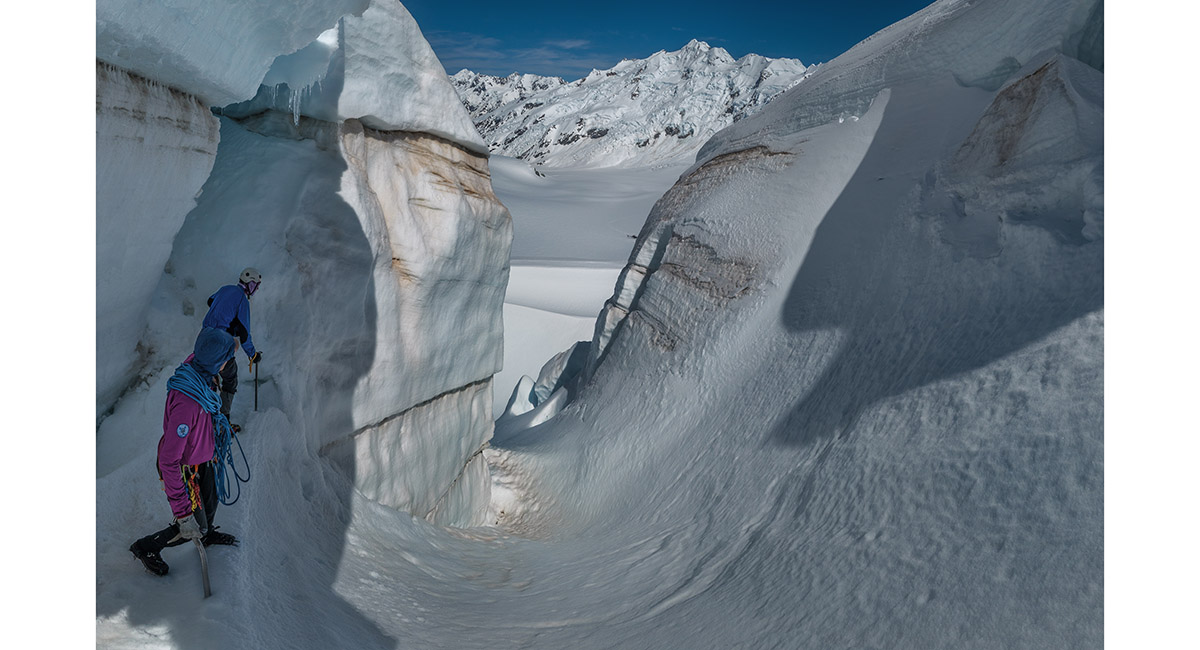
Exploring the crevasse field beneath Tasman saddle Hut

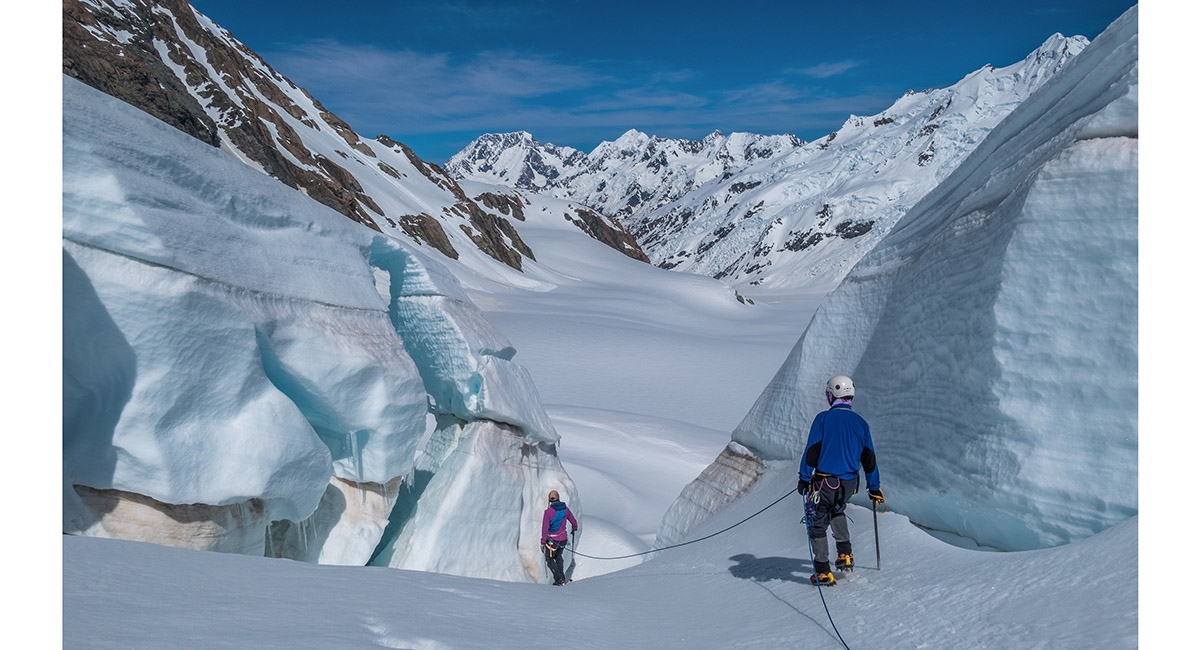
Exploring the crevasse field beneath Tasman saddle Hut

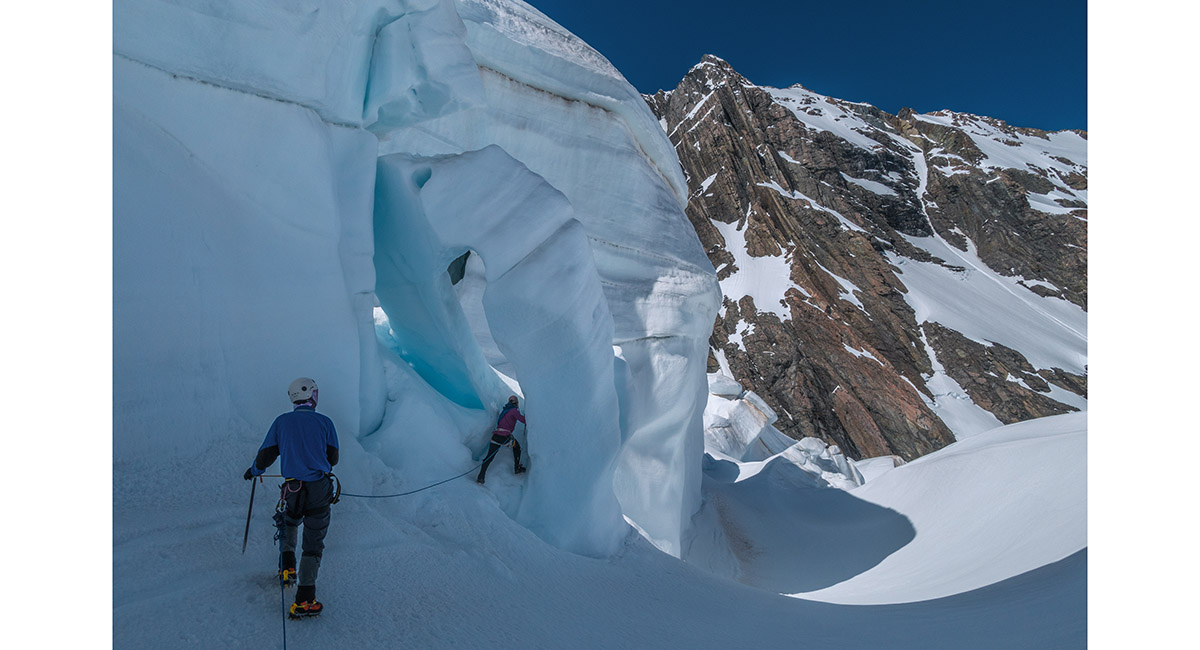
Exploring the crevasse field beneath Tasman saddle Hut

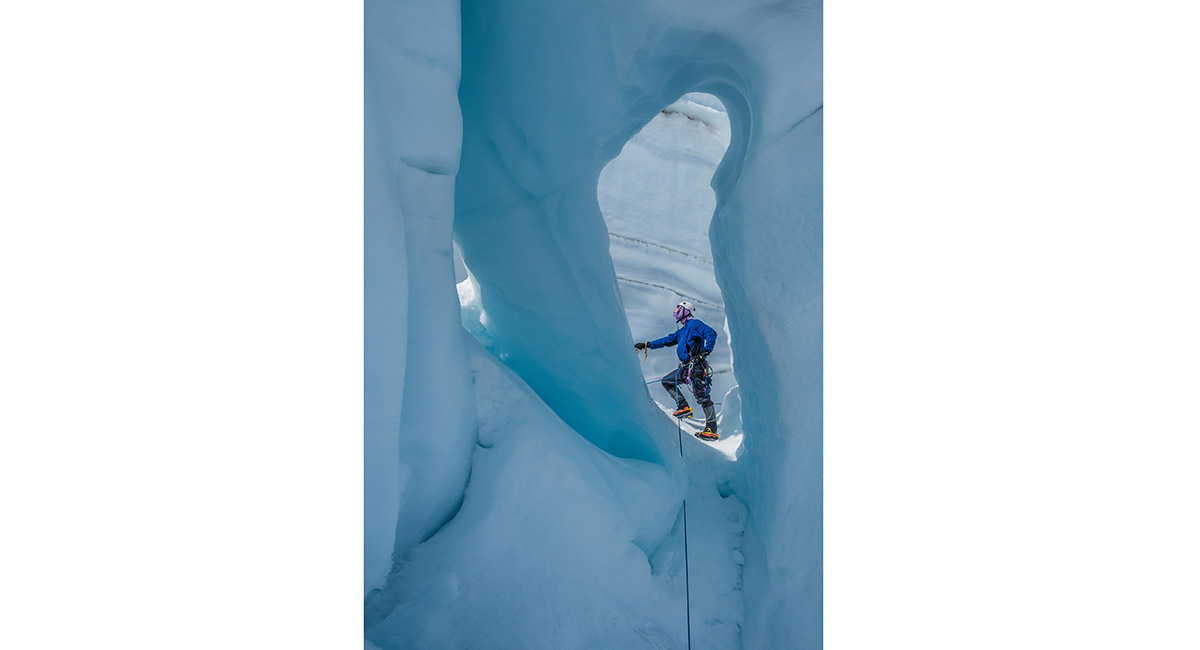
Exploring the crevasse field beneath Tasman saddle Hut

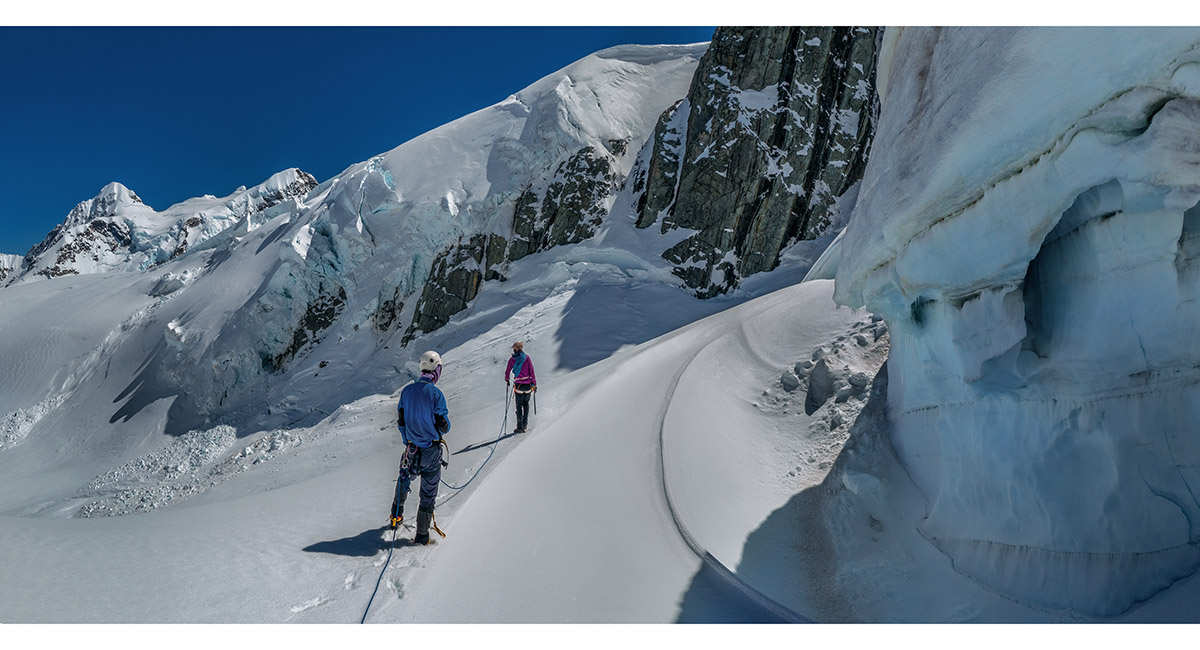
Exploring the crevasse field beneath Tasman saddle Hut

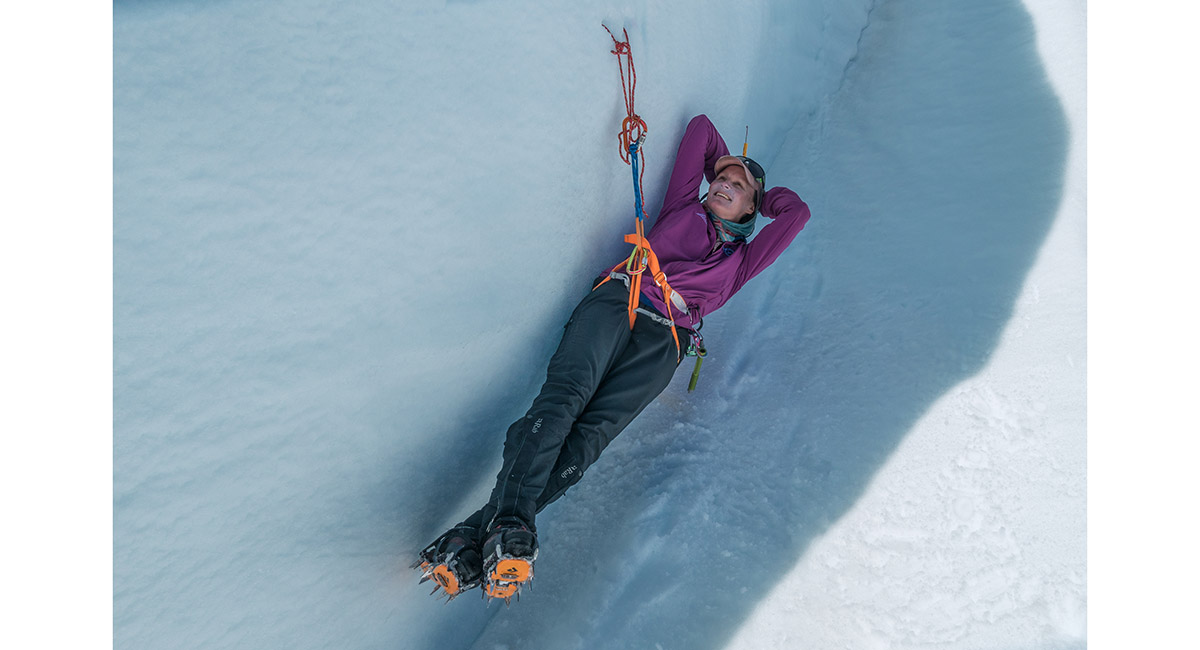
Jane Morris demonstrates that her V thread anchor is up to it

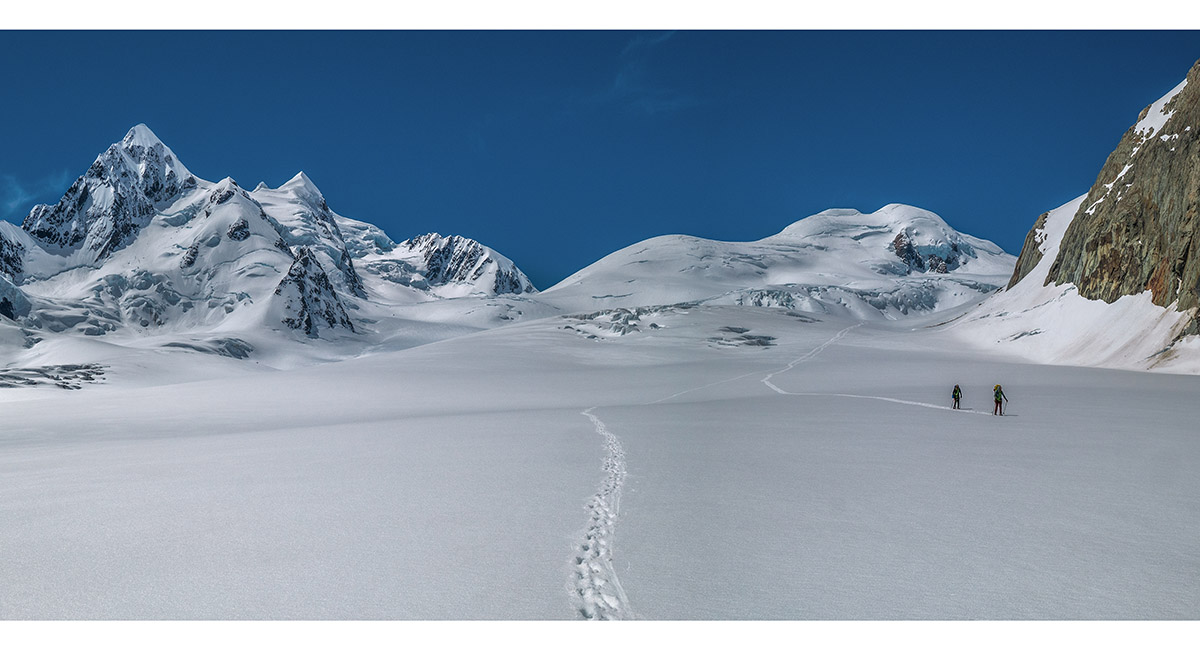
Descending south towards Darwin Corner

A view north up Tasman Glacier from Darwin Corner (1,600m)

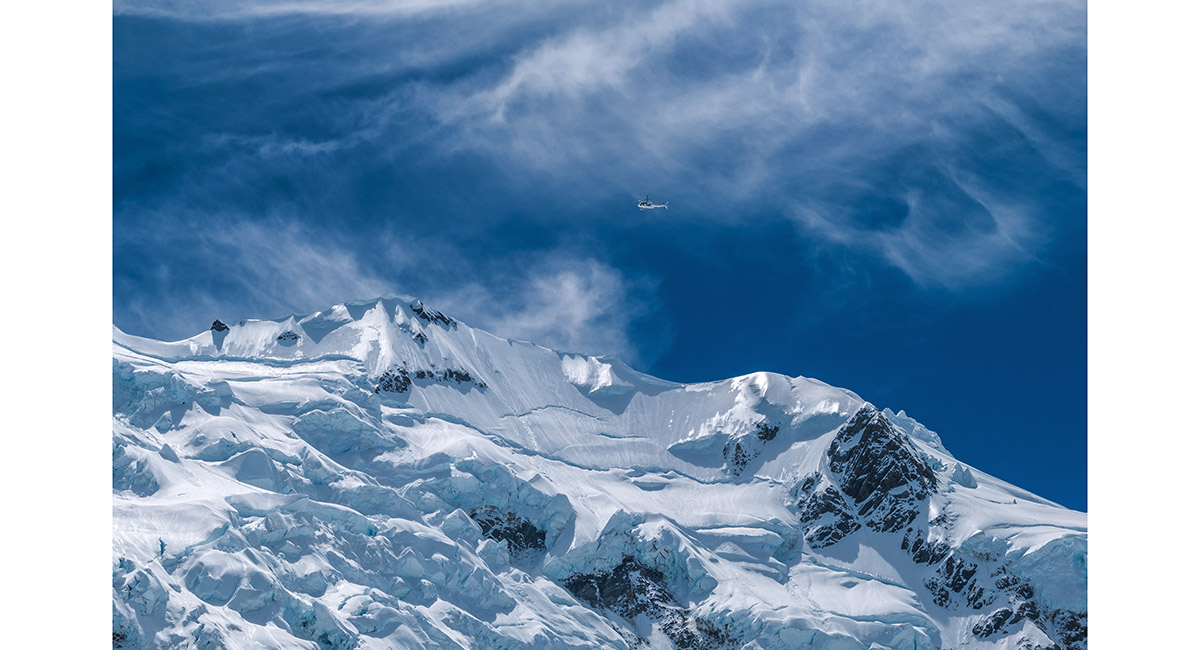
Our approaching helicopter, Darwin Corner

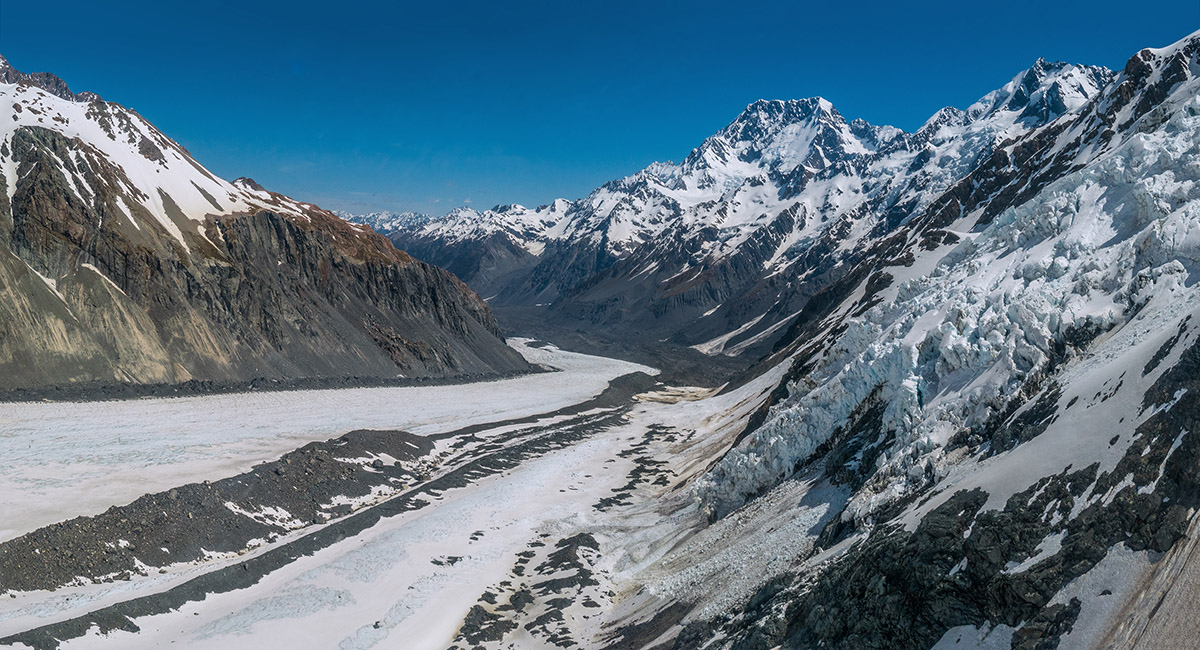
A view down Tasman Glacier from above Darwin Corner

The new Beetham Hut


A view south to the terminal lake of Tasman Glacier

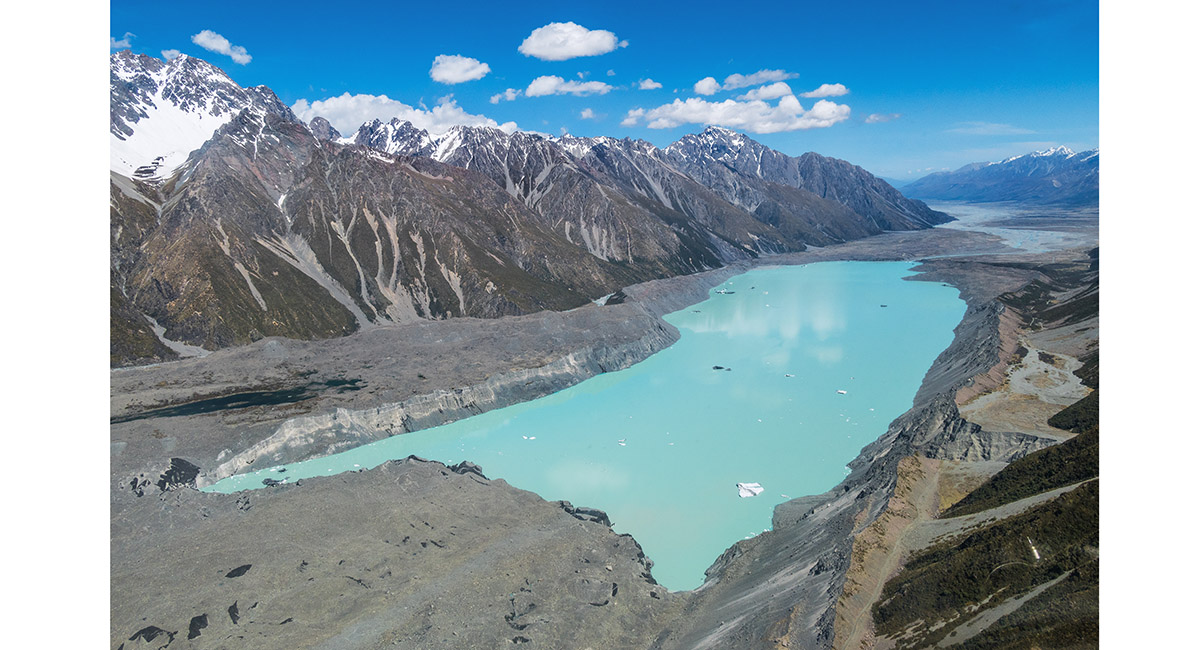
The terminal lake of Tasman Glacier

Braided river south of the terminal lake

To order a print or web resolution file of any image you see in this slide show, just right click the image, click “Copy Image URL” and paste in to the “Your message” box of our Contact Us form. Please also note, for each image, if you want a print or web resolution file. We will get back to you as soon as possible to confirm price and payment details.
Open Contact Us in a new window to paste Image URL(s) easily