Cinerama Col, June 2019

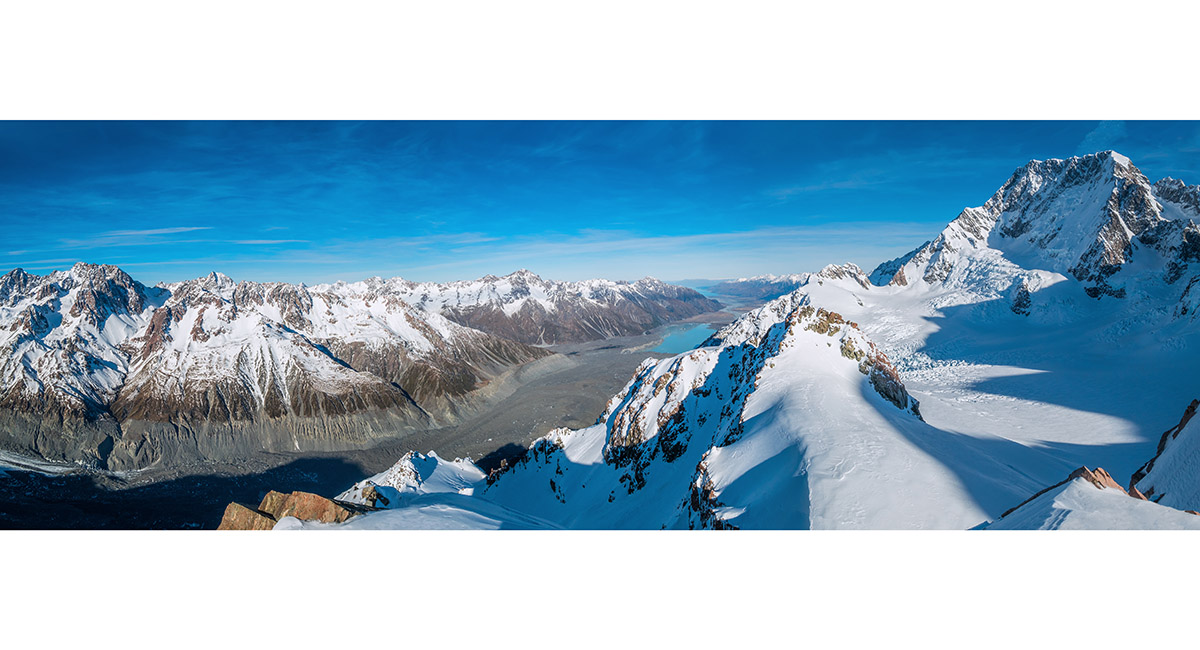
A view from the helicopter to Mt Cook (left) and the Tasman Valley

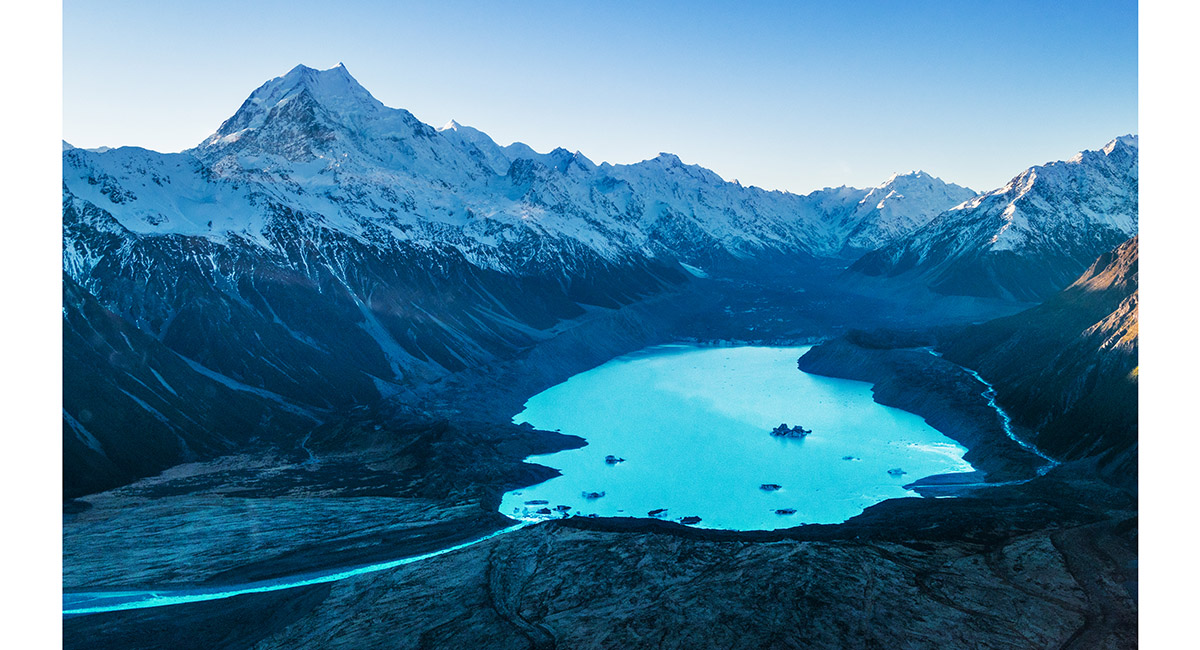
A view from the helicopter to Mt Cook (left) and the Tasman terminal lake

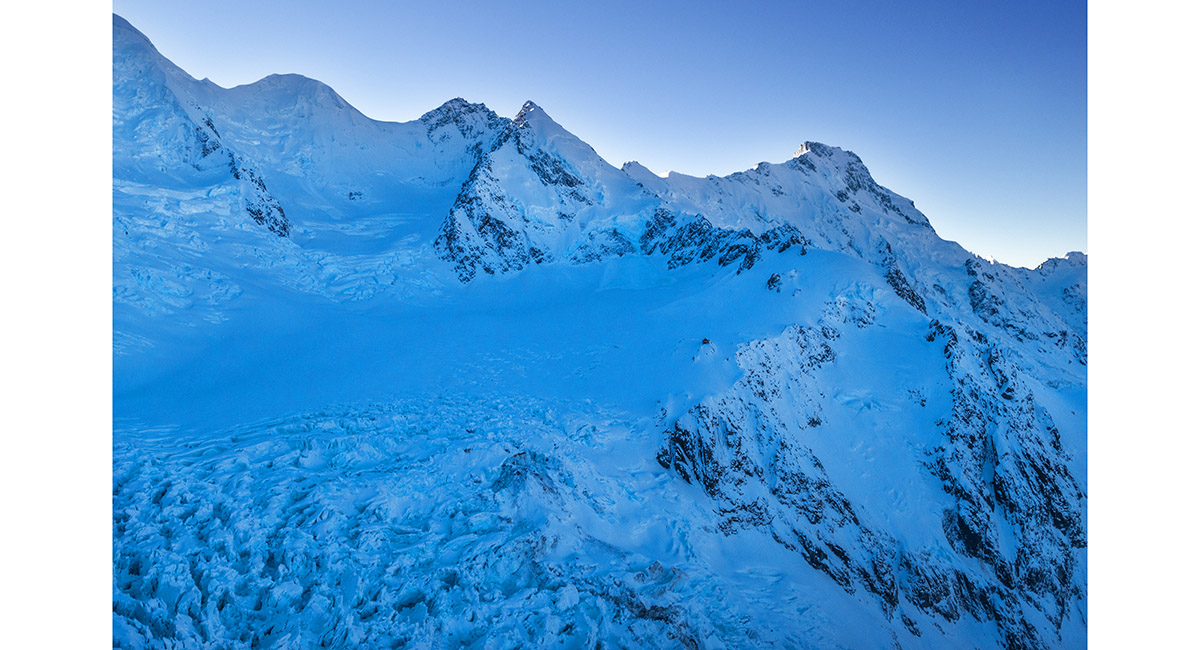
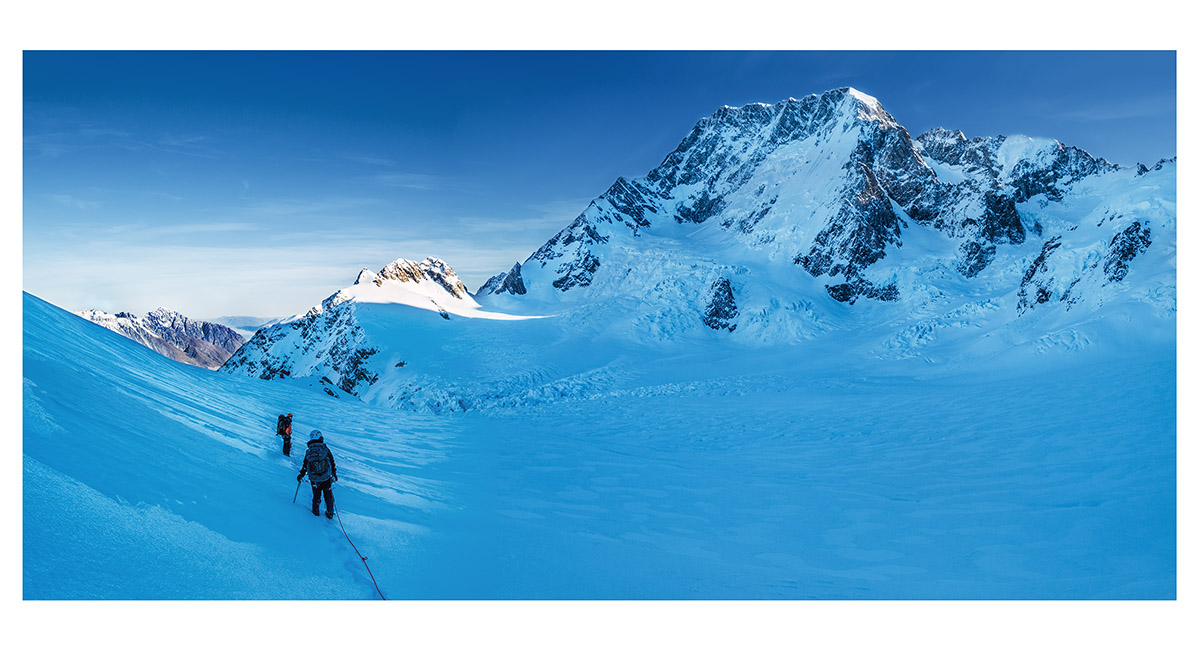
Approaching the Grand Plateau. Hochstetter icefall is bottom left, Mt Dixon centre skyline and Plateau Hut the dot at centre right


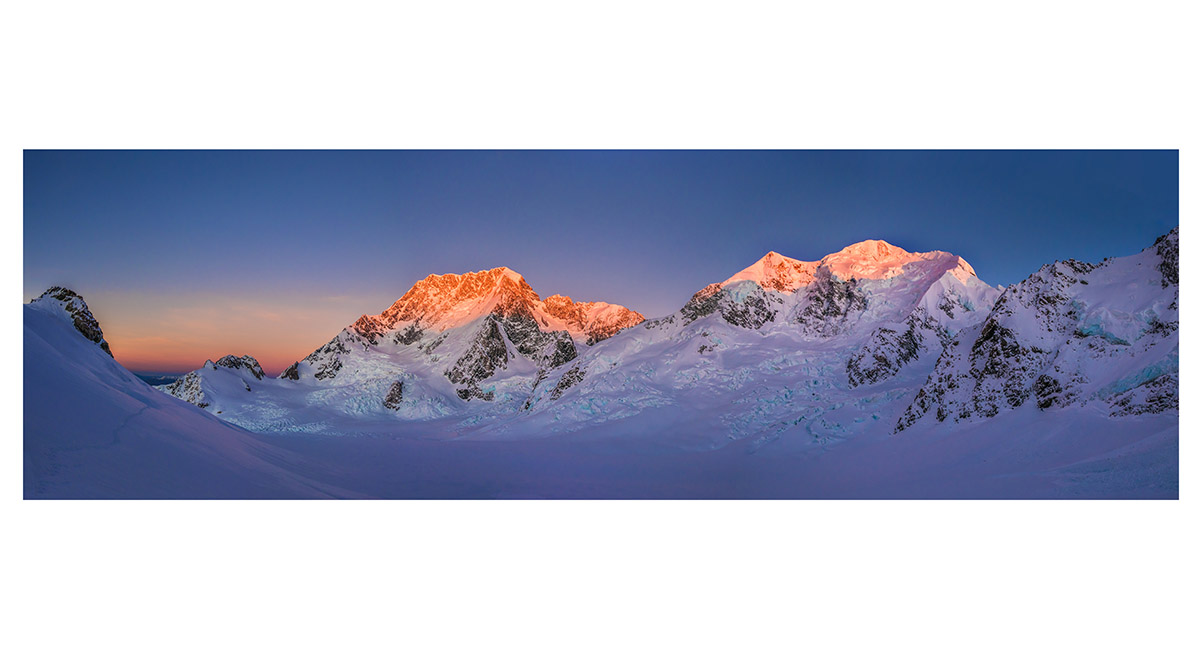
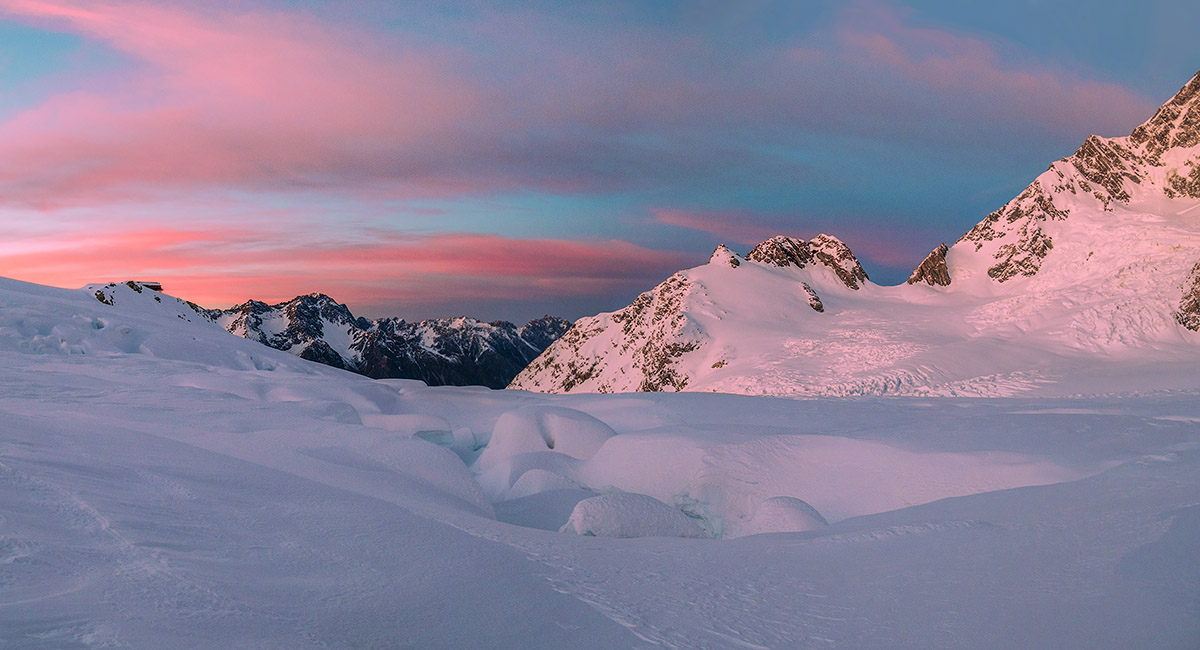
A dusk view south of Plateau Hut, with the ANZAC Peaks and Cinerama Col behind

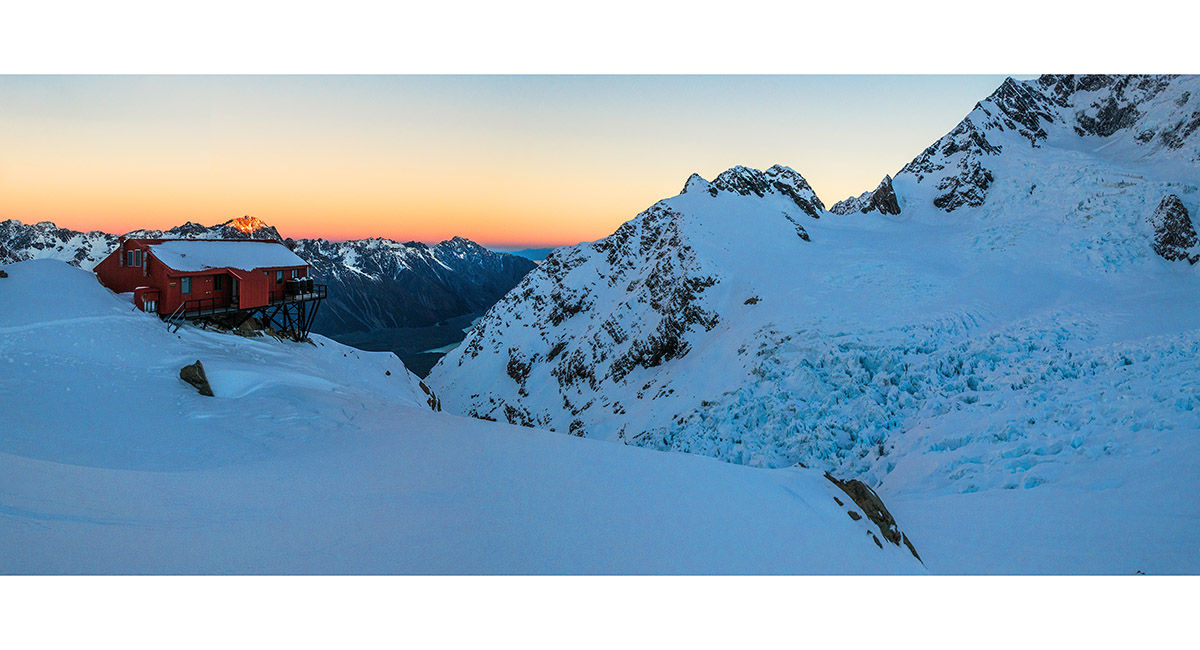
A dusk view south of Plateau Hut, with the top of the Hochstetter icefall and ANZAC Peaks behind


Dusk view from Plateau Hut to, from left, Malte Brun, Arguilles Rouges, Mt Nathan, Mt Chudleigh and Mt Johnson

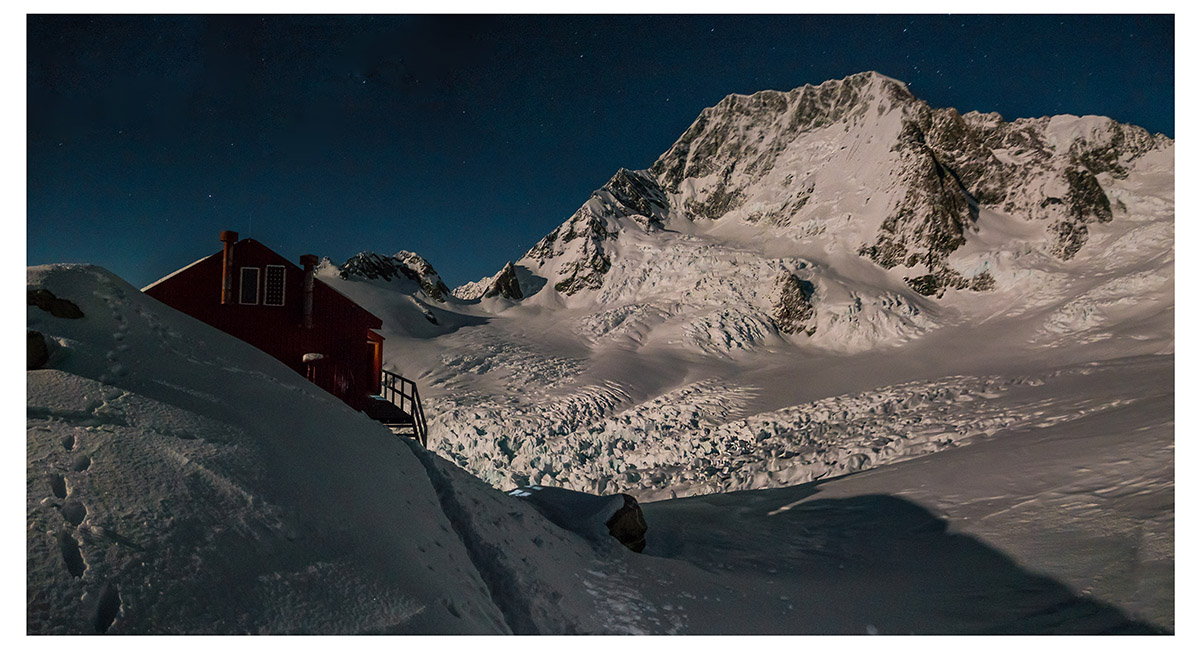
Plateau Hut and Mt Cook under full moon light, viewed from the loo


At dawn on our approach to Mt Dixon, looking south to the ANZACs, Mounts Cook, Dampier, Vancouver, Silberhorn and Tasman

At dawn on our approach to Mt Dixon, looking south to the ANZACs, Mounts Cook, Dampier, Vancouver, Silberhorn and Tasman


Approaching Mt Dixon (3,004m, left of centre)


Approaching Mt Dixon (3,004m, right of centre), Tasman (3,497m) and Silberhorn (3,300m)

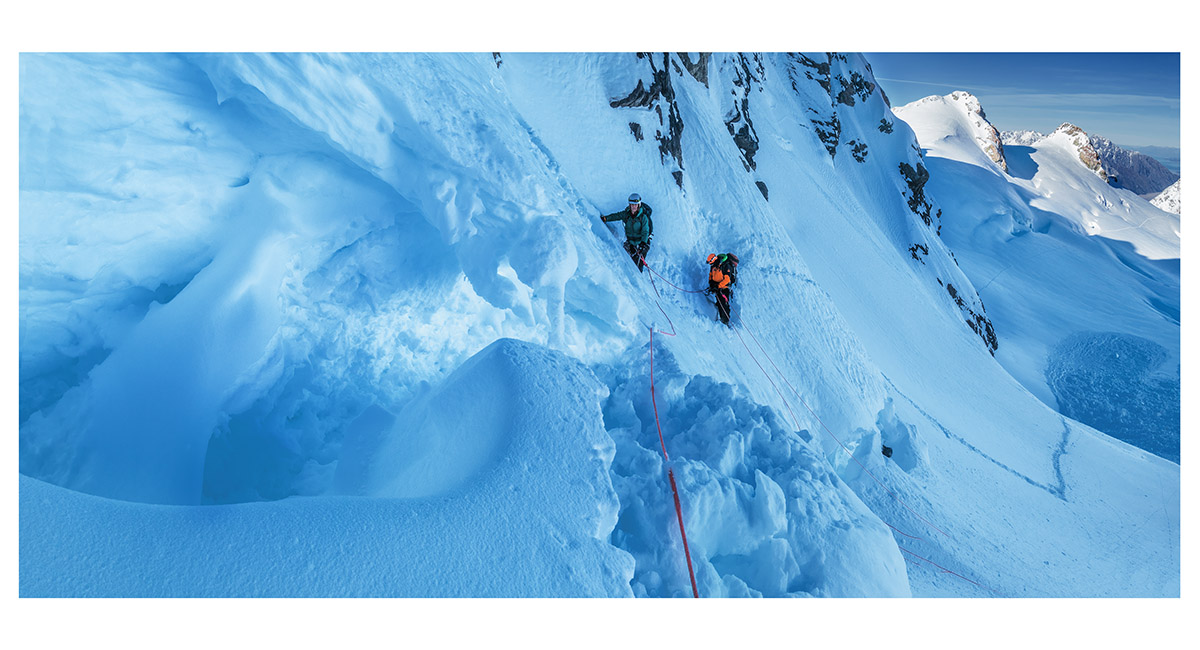
A view from my stance having just recrossed the bergshrund at the base of Mt Dixon. Powder dry snow afforded no protection on the steep chute above the schrund


Simon about to recross the schrund


On our approach to Point 2,452m - the small peak north of Glacier Dome

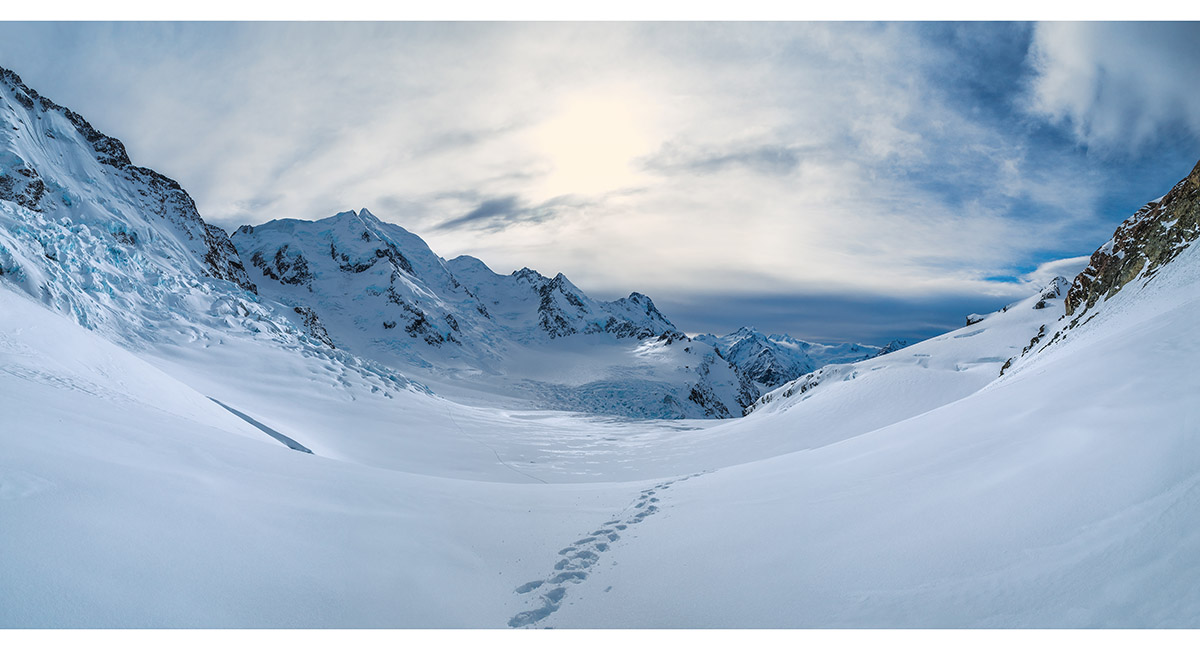
A view to the head of the Tasman Glacier, from Point 2,452m

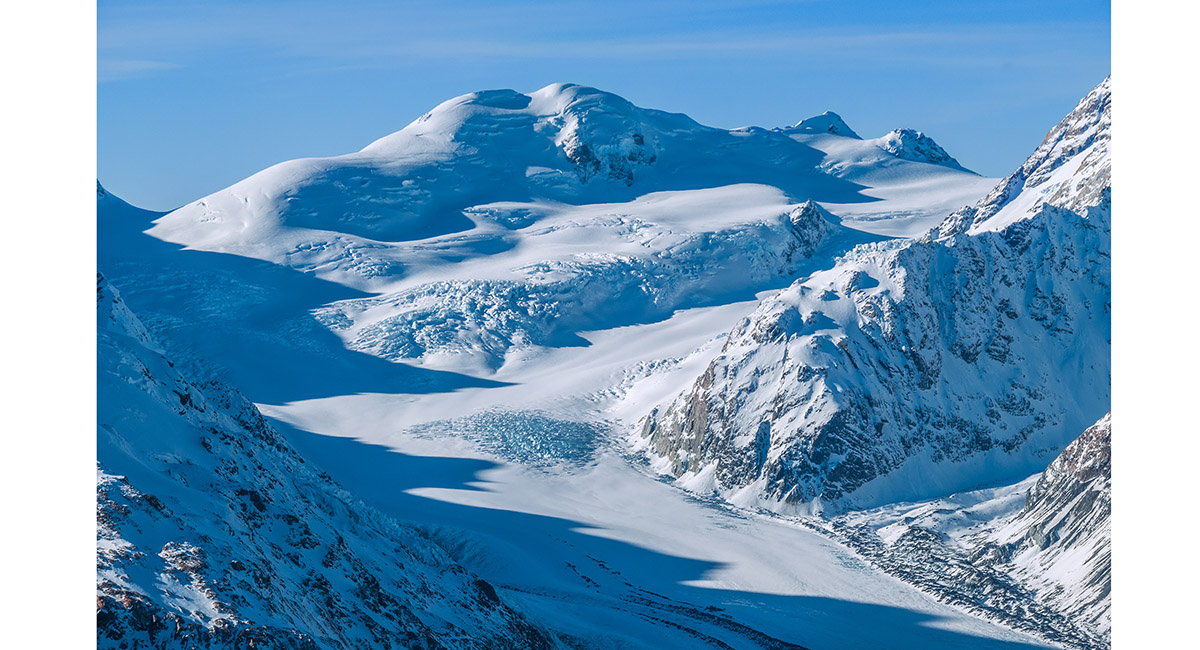
A view of Hochstetter Dome (2,827m) from Point 2,452m

Looking south to Mt Cook (far right), the Tasman Glacier lake, Nuns Veil and Liebig Ranges, from Point 2,452m


Returning to Plateau Hut. Glacier Dome (2,424m) is left, the ANZACs (2,528m) dead ahead and, beyond Cinerama Col (2,333m), the East Ridge of Mt Cook stretching up right

Plateau Hut (2,200m) in sight again, dwarfed by Mt Cook (3,724m)


Getting ready for a dawn start on our descent over Cinerama Col

We headed west across the Plateau to begin with in order to avoid the most heavily crevassed terrain. Here Plateau Hut and the ANZACs are bathed in alpenglow


As the sun rose the moon set behind Dampier


A classic sunrise glow on Mt Cook

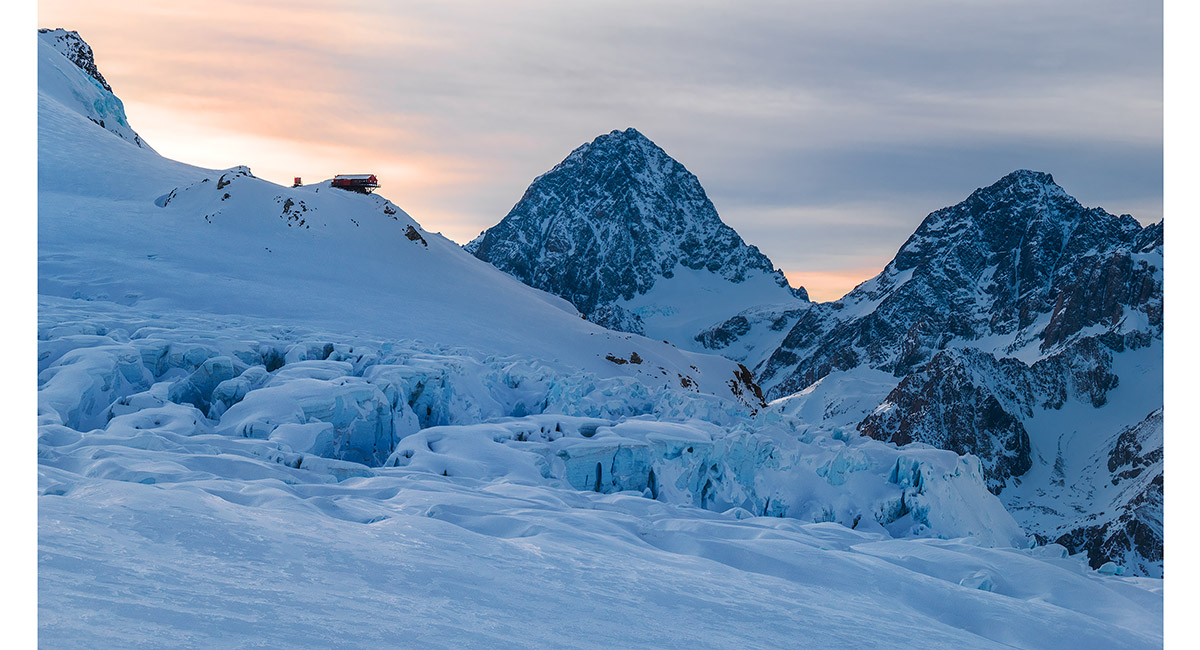
Plateau Hut is perched spectacularly above the Hochstetter icefall, with Malte Brun behind


At about the halfway point on the route to Cinerama Col

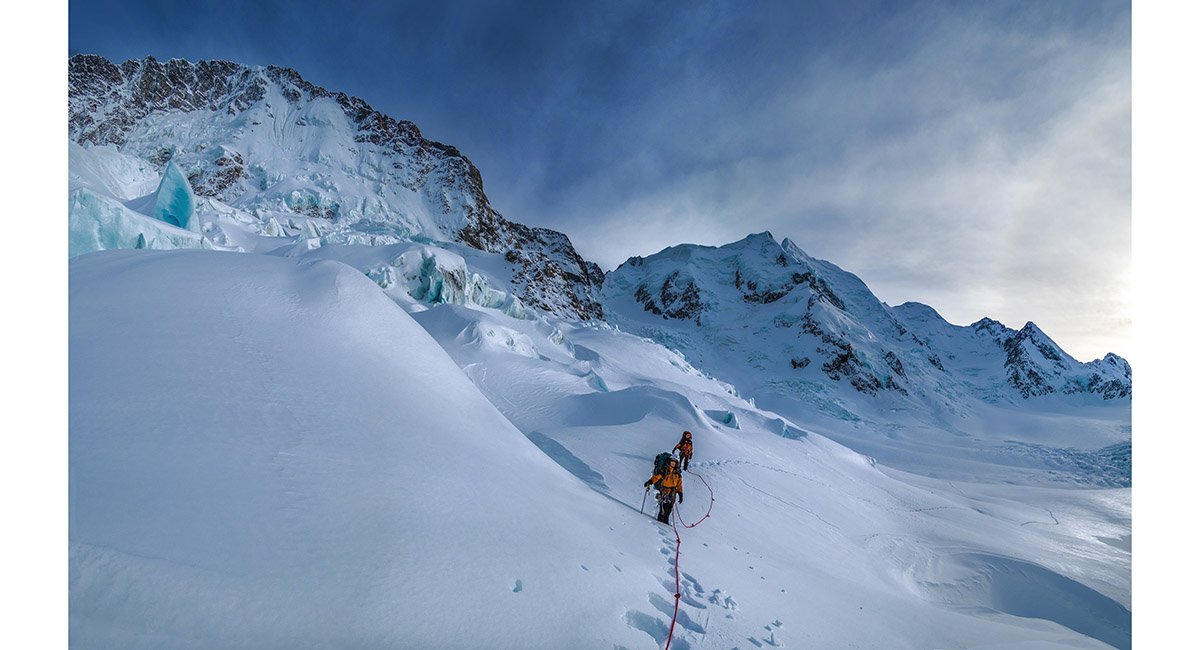
Picking a route through crevassed terrain, with the ice of Mt Cook's east face above

Approaching Cinerama Col, with the East Ridge of Mt Cook reaching skyward

A view north after about 3 hours of walking from Plateau Hut

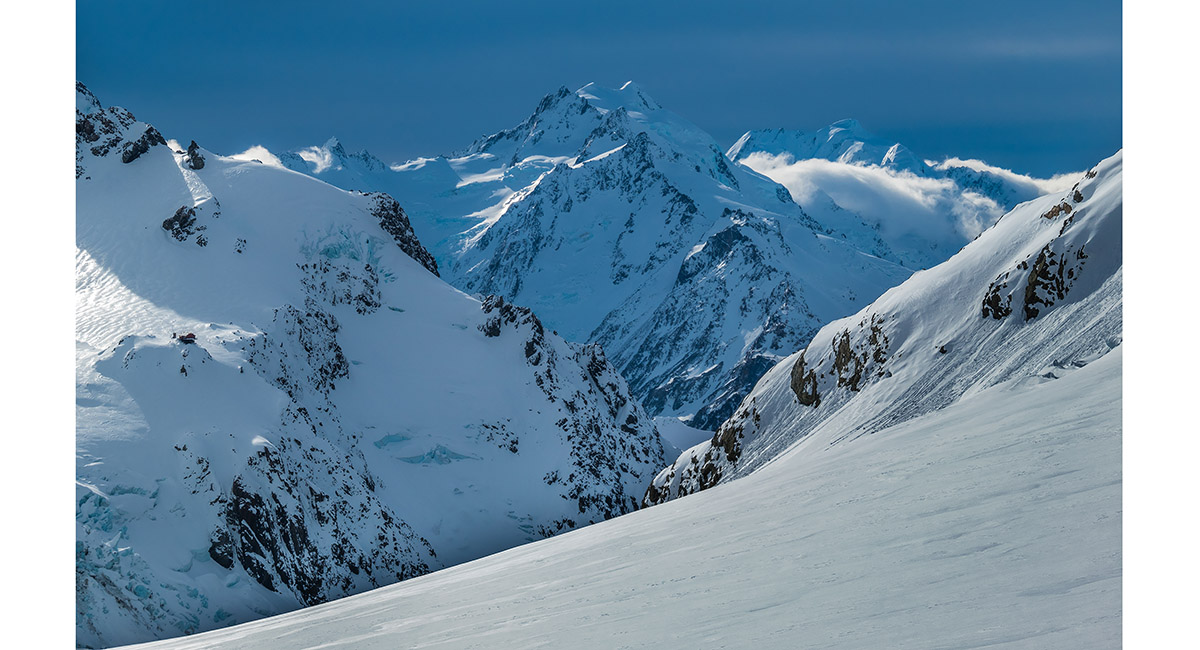
Plateau Hut (2,200m) is in the left foreground here, with the Minarets (3,031 and 3,040m) behind


Nearly on Cinerama Col - the gradient was steeper than it appears from Plateau Hut

It took us about 4 hours to cover the distance between Plateau Hut and Cinerama Col. Here the Plateau stretches out to Mt Dixon - about 6.5 hours walk away

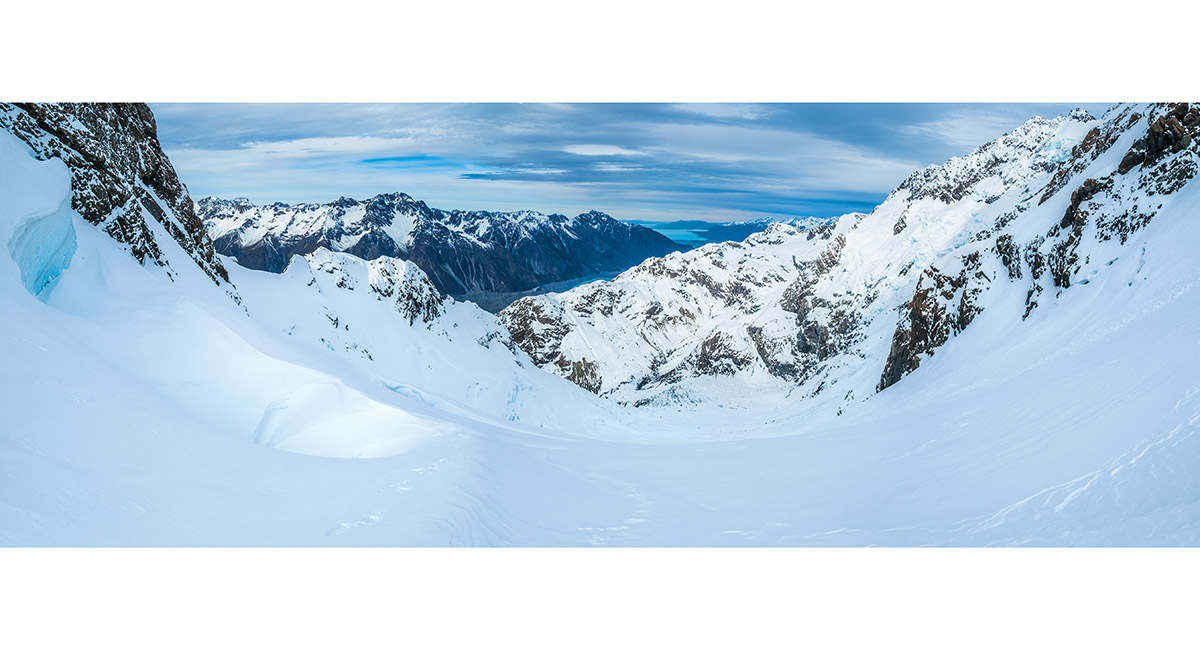
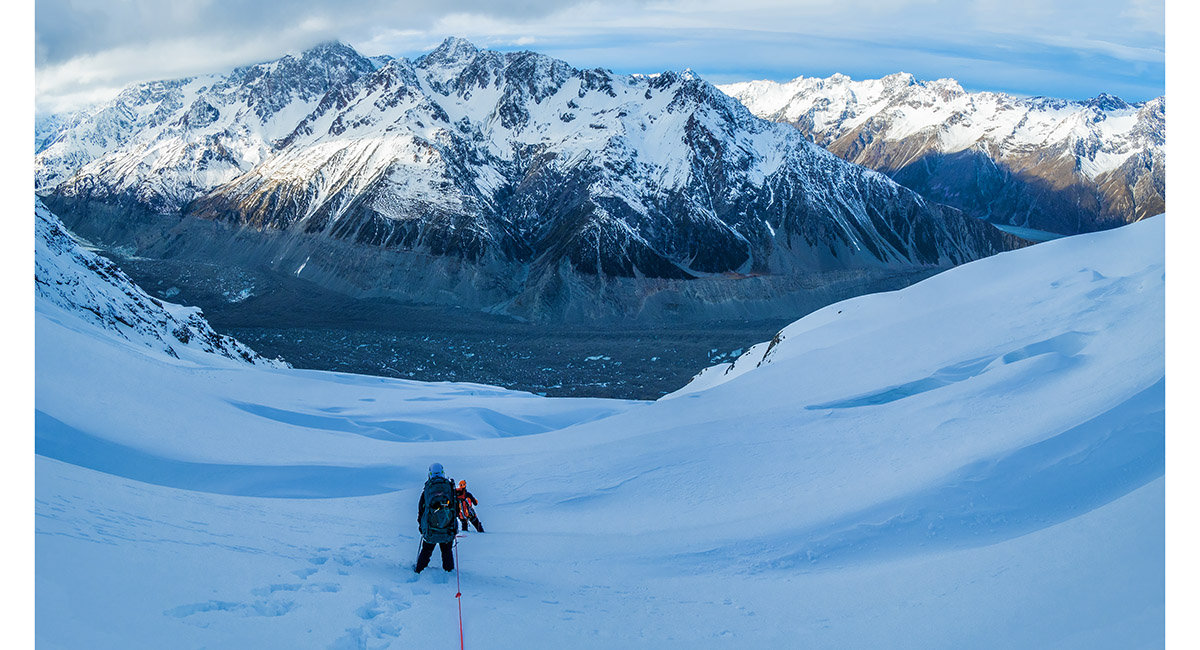
The view south over Cinerama Col (2,333m) to the Caroline Glacier

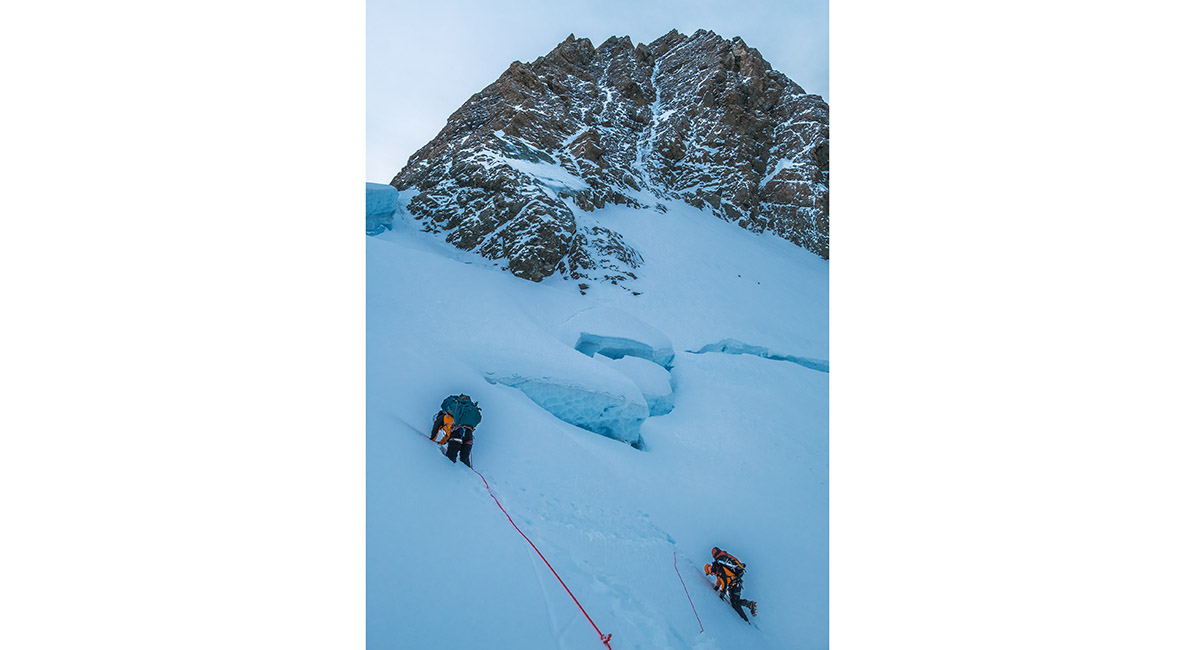
Our route picked a way down through a steep crevassed section as we worked our way around to the left below the ANZAC Peaks


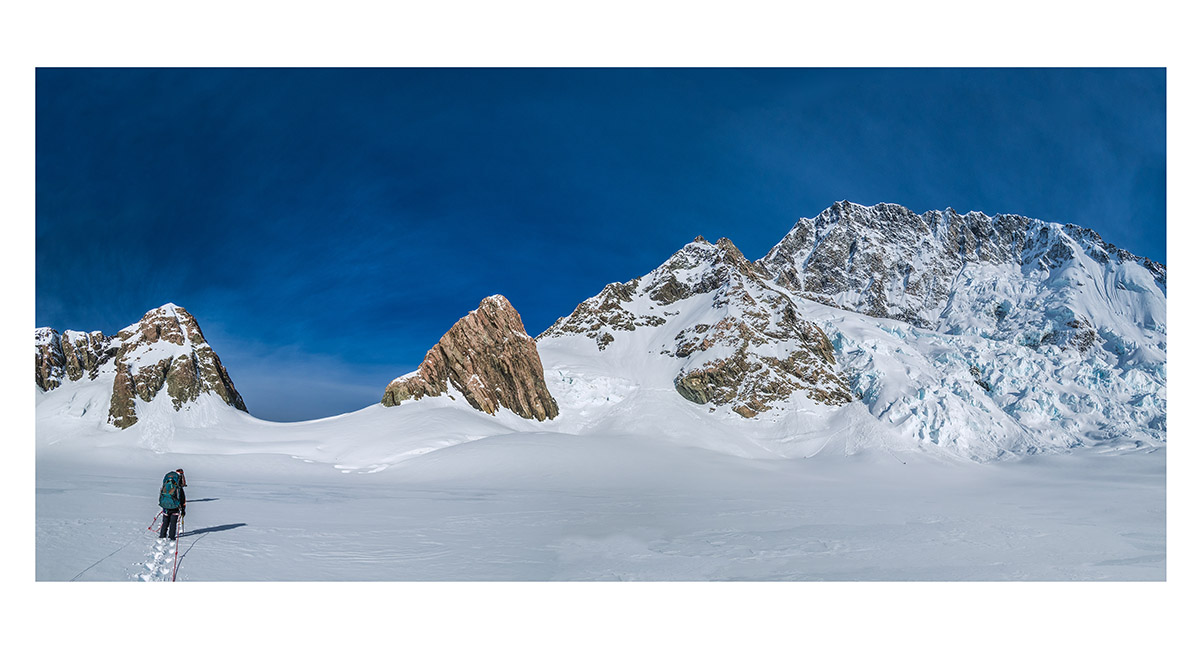
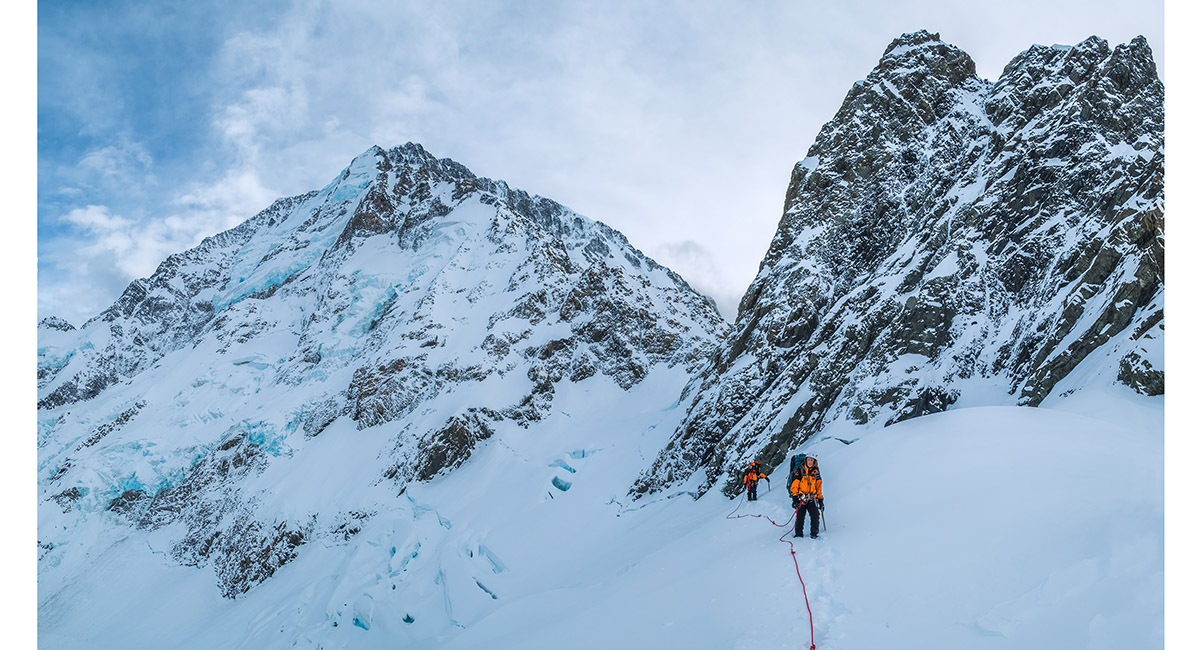
Here the ANZACs are high above to the left. We are heading towards the dip (2,180m) to the left of the snow fang

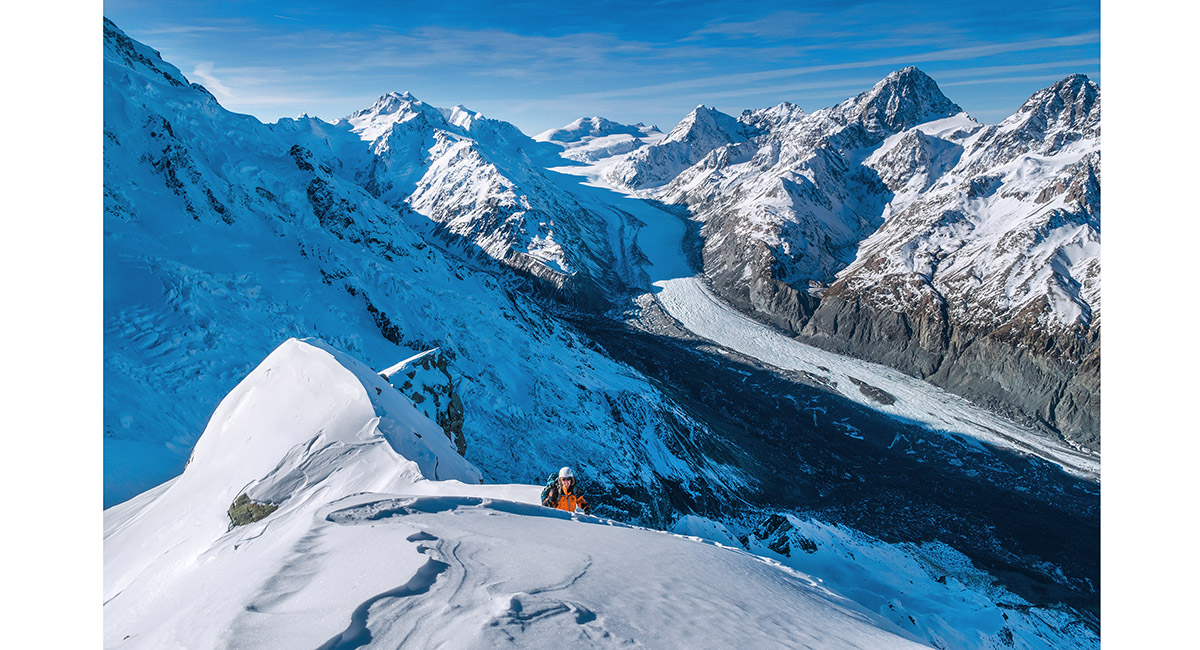
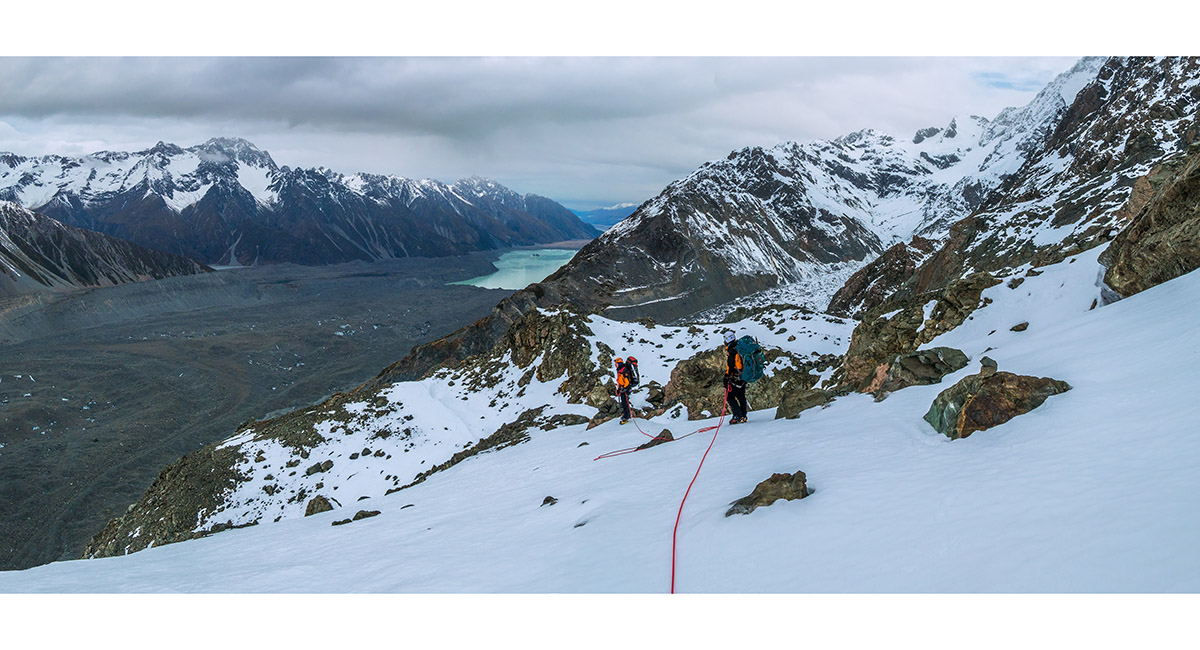
A view back from the small saddle between the Caroline Glacier and Boys Glacier - our route down from Cinerama Col is all visible apart from the Col itself, which is hidden by the south western end of the ANZACs. The east ridge and Caroline Face of Mt Cook are left


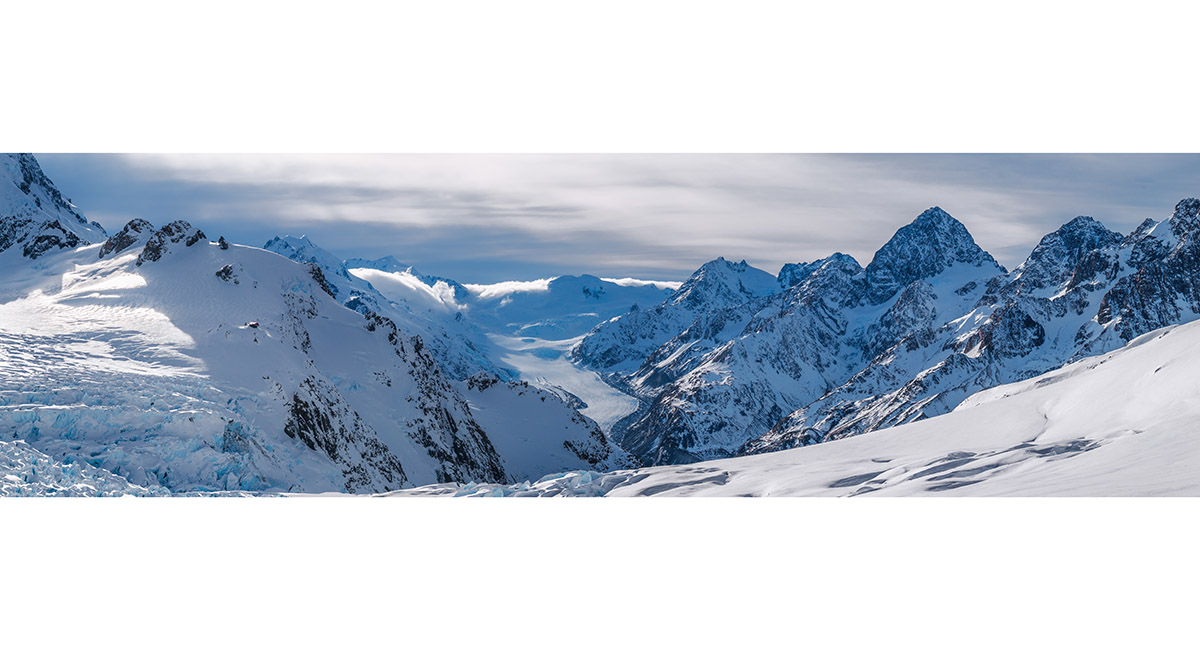
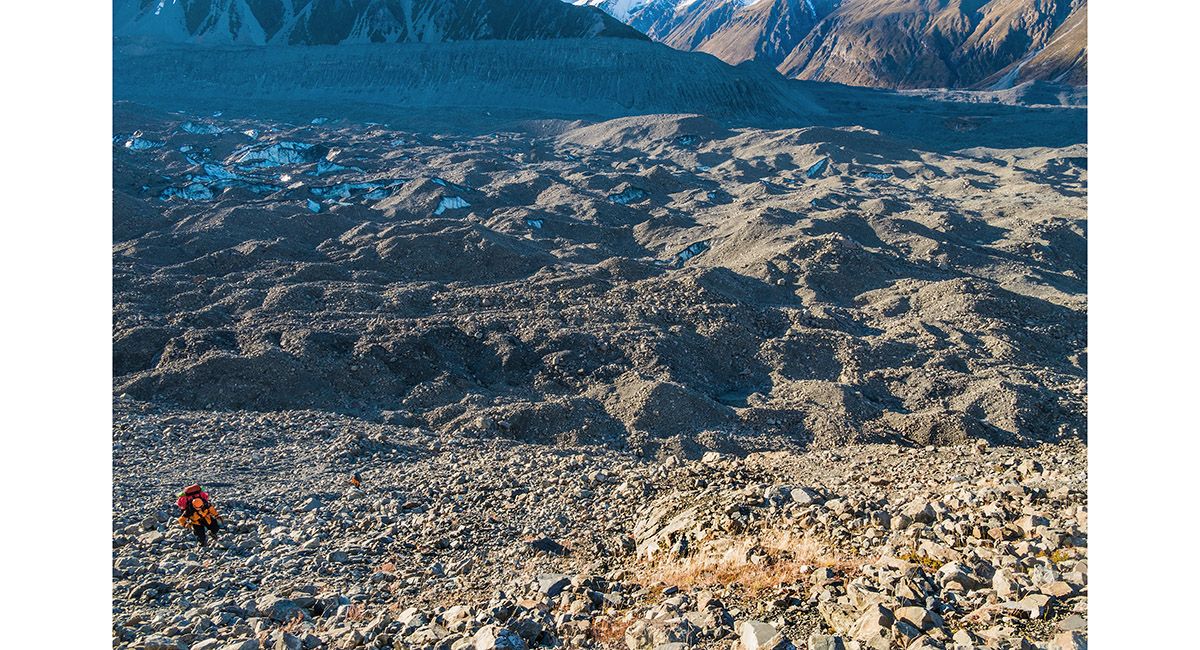
Looking northeast, from about 2,150m, down Boys Glacier to the Tasman Glacier another 1,000m below

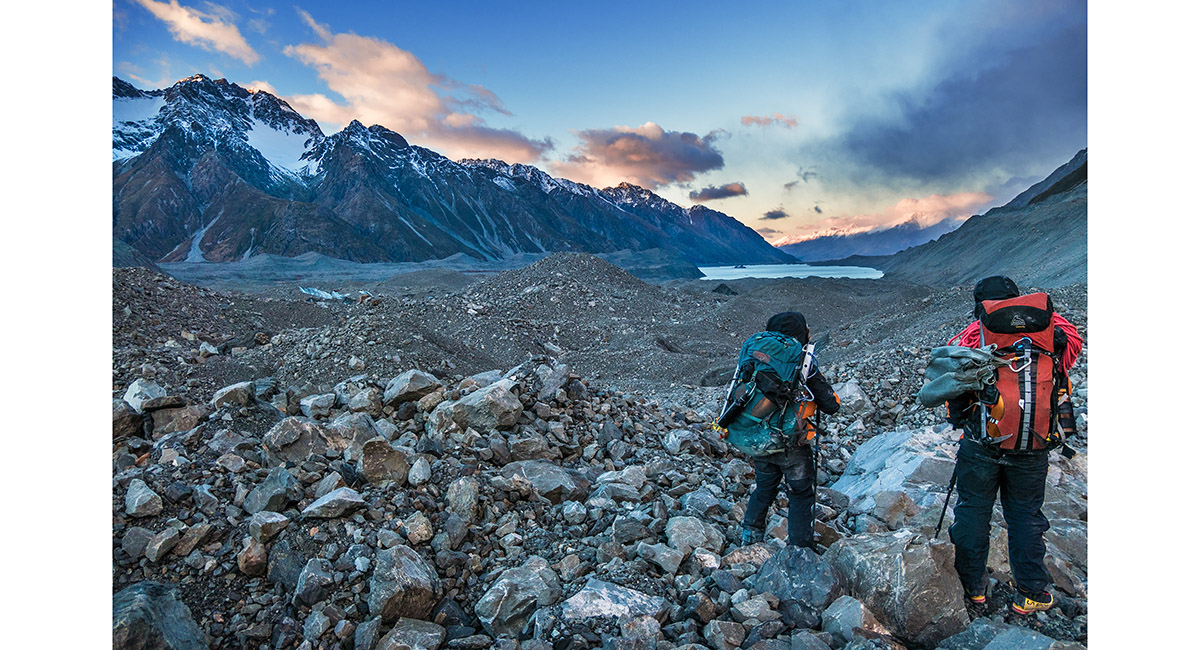
Descending Boys Glacier towards the Tasman Glacier

At about 1,700m on Boys Glacier, with Tasman Lake in the distance

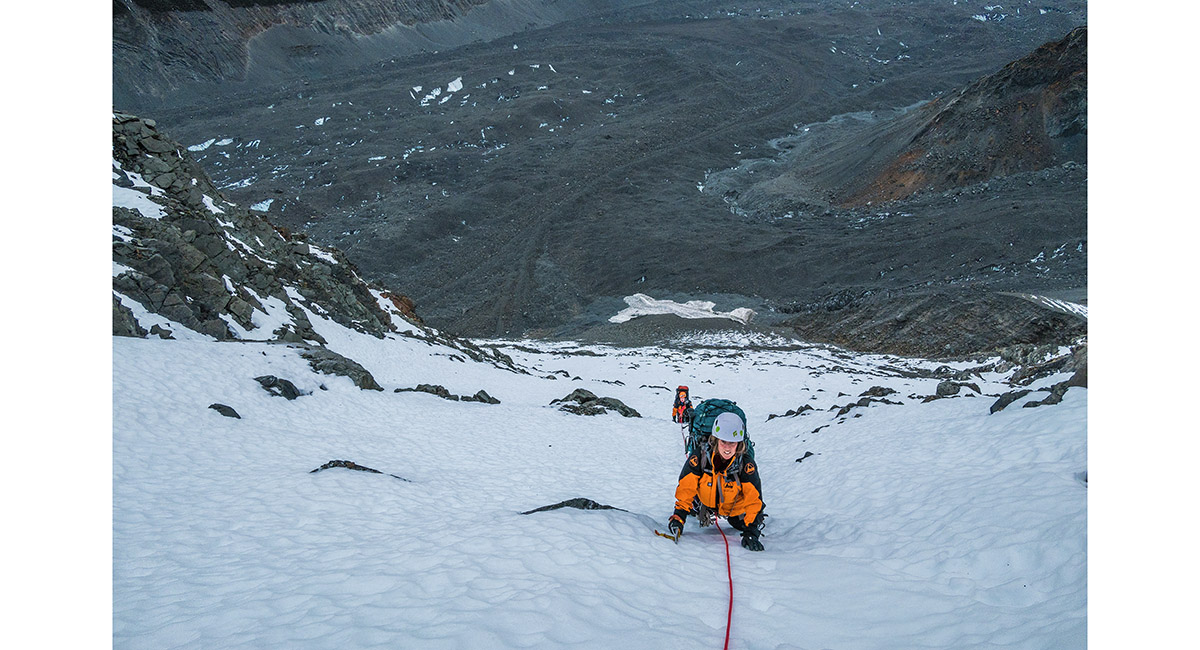
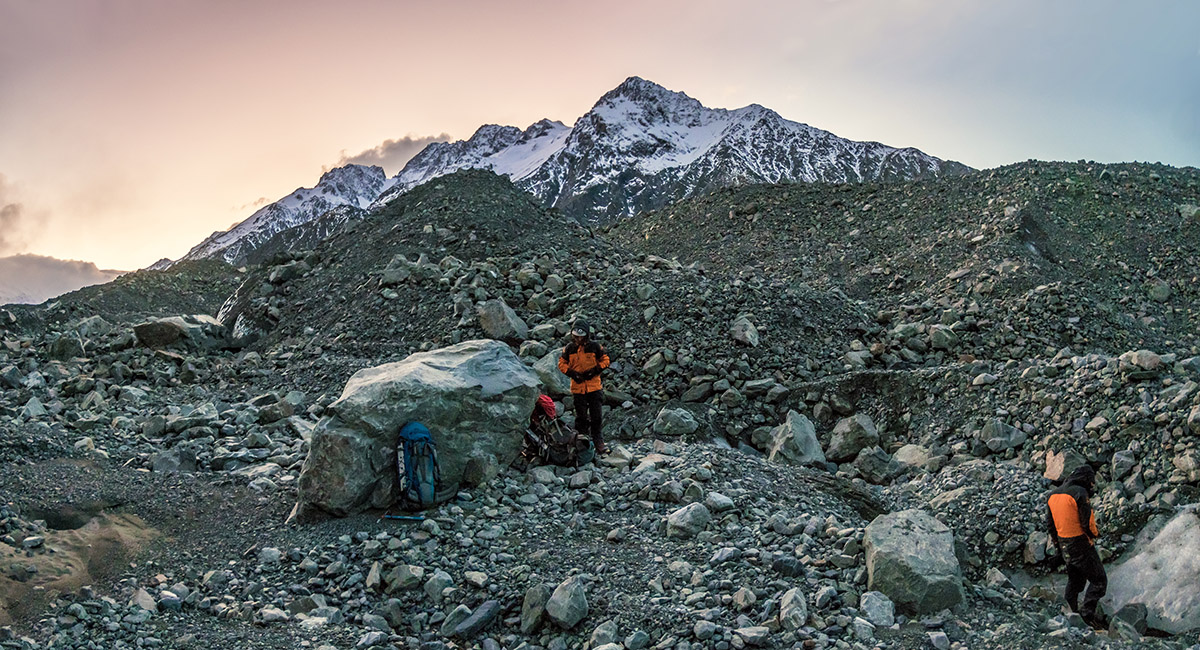
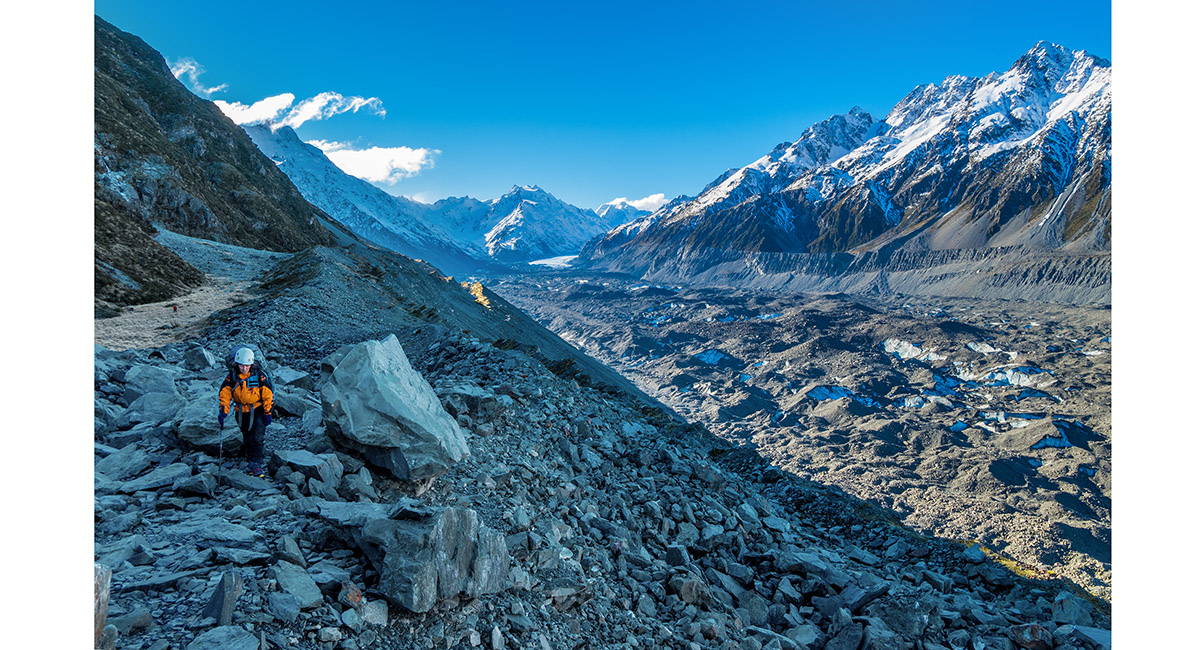
At about 1,600m the Boys Glacier gives way to steep scree. Snow covered it making the descent easier to begin with, but as the snow thinned the loose rubble became treacherous


As the Tasman Glacier slowly drew closer, so did night fall. Then it began snowing


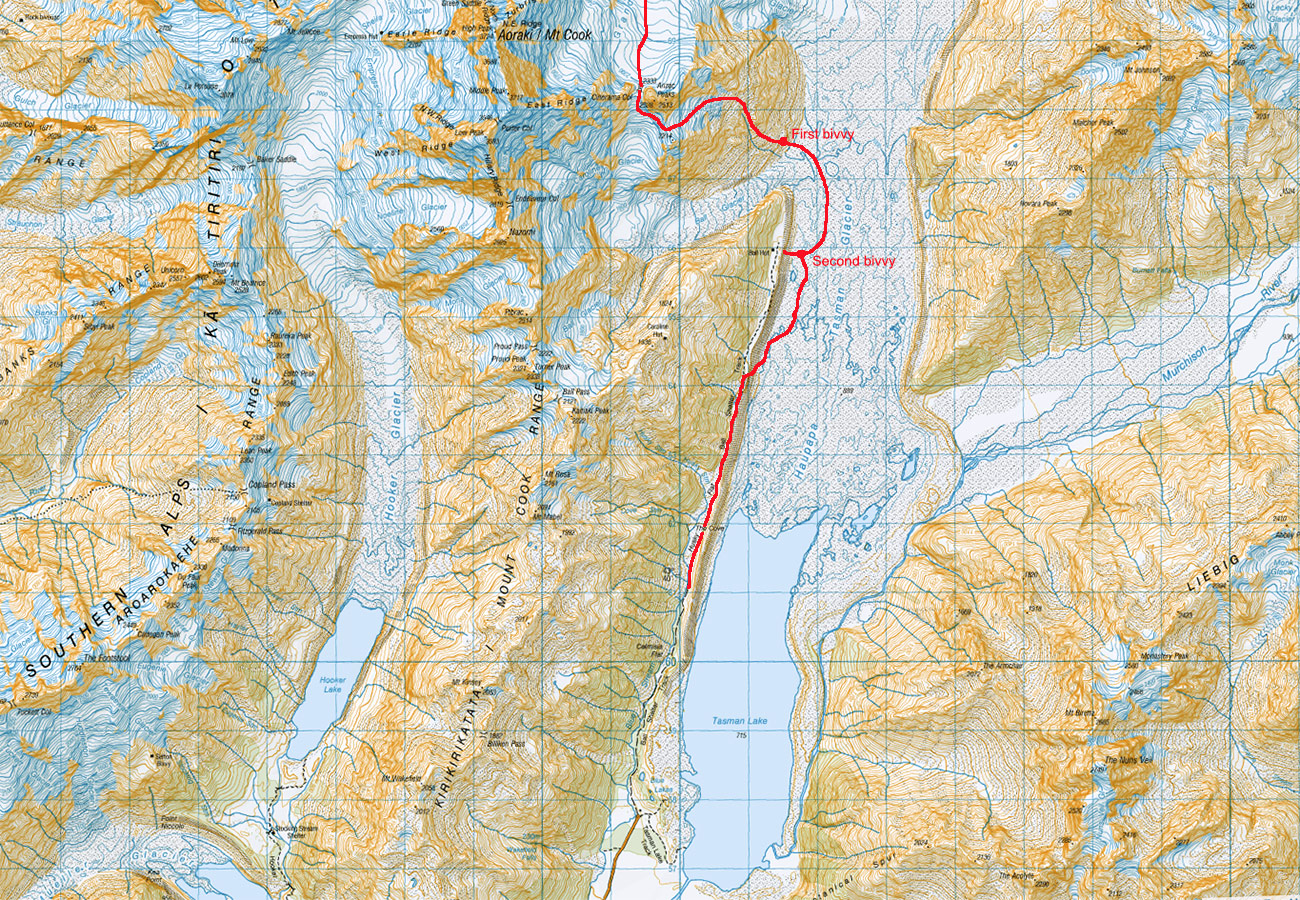
We were benighted at about 1,050m. Visibility was very bad and rock fall quickly increased in frequency. We took refuge right on the southern edge of the scree slope at 6.30pm, resigned to a freezing bivvy. Luckily the snowing eased about 11.30pm and a full moon gave us a chance to escape the unstable scree

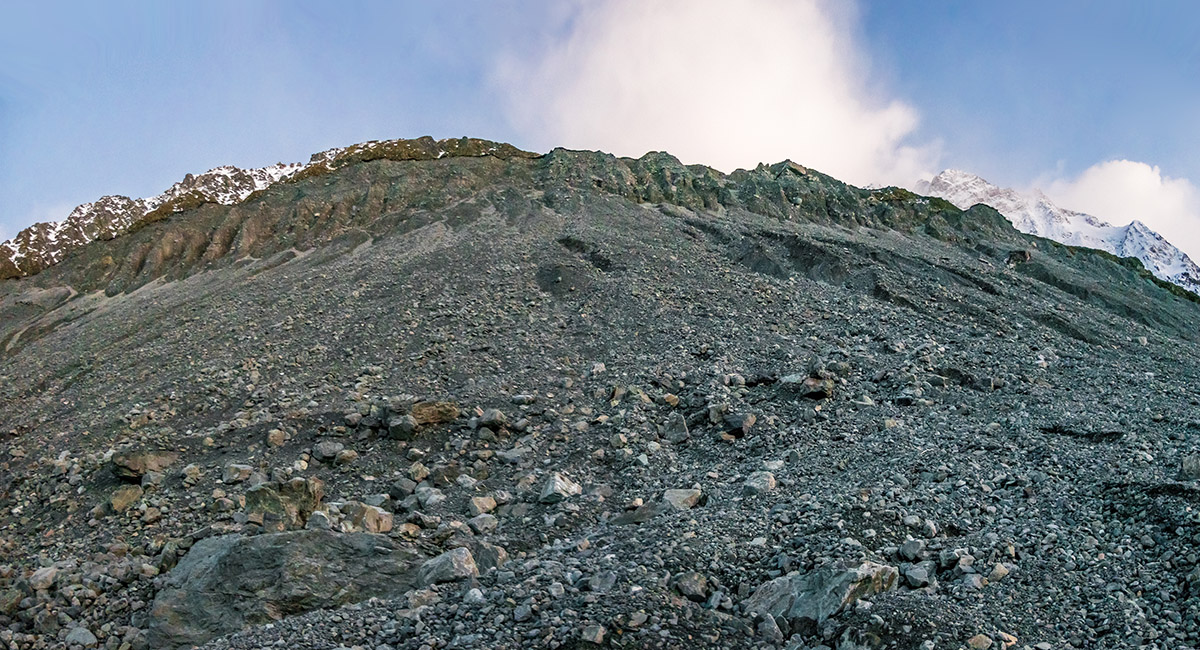
During the freezing night we tried to climb the western moraine of Tasman Glacier to reach Ball Shelter, but rockfall was horrendous and the lip of the moraine very steep and slippery. We were driven back to the Tasman Glacier for another 4 or so hours of shivering until daybreak. This view is up the moraine we all but climbed in the dark

And here, at dawn, is our second bivvy spot on the western side of Tasman Glacier

An early morning view down Tasman Glacier before we reached our moraine exit point before the terminal lake


A view across Tasman Glacier to the Liebig Range

About 80m above Tasman Glacier on the western moraine

Finally, safe up on the moraine lip about 130m above Tasman Glacier. Just on the far side of the lip required a 25m pitch using crampons - no photos due to the focusing nature of the terrain


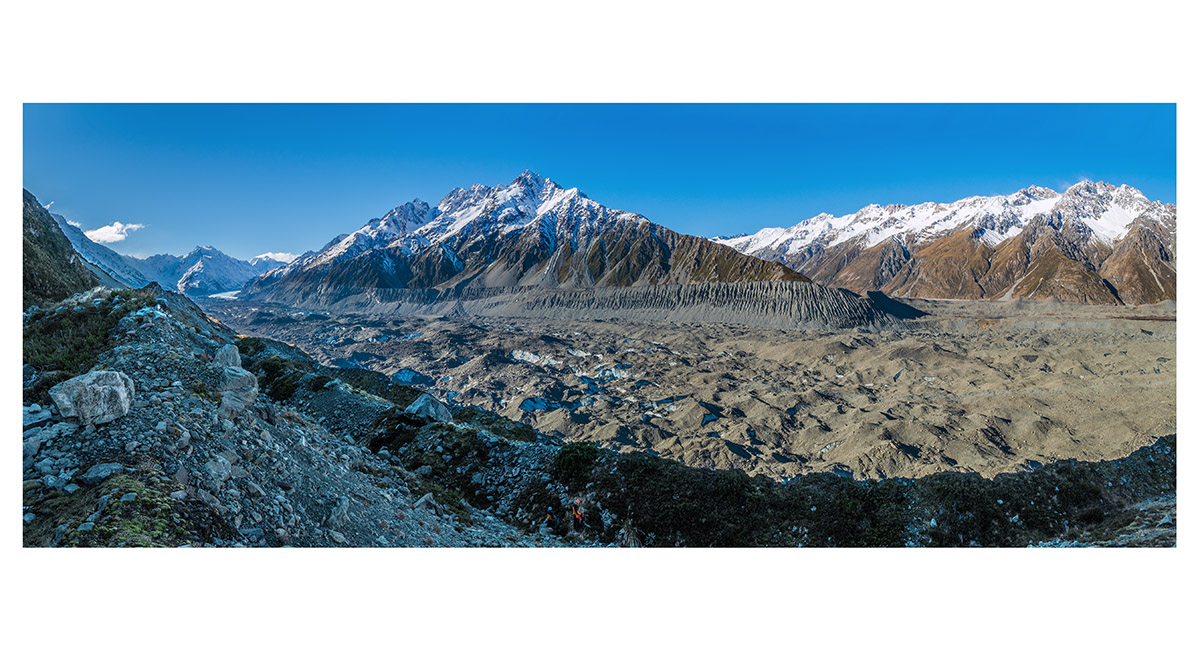
A view from the Ball Shelter trail on the lip of the moraine, looking south to the terminal lake

A view from the Ball Shelter trail on the lip of the moraine, looking back north up Tasman Glacier


At 3pm, just as we reached our parked vehicle about 3kms north of Blue Lakes carpark, a helicopter appeared. A SAR team had been searching for us all day


So our next stop was the SAR office for a debrief - a fascinating process. While we hadn't needed rescuing, given the weather and terrain, we could have. We greatly appreciated the efforts that the SAR team made on our behalf

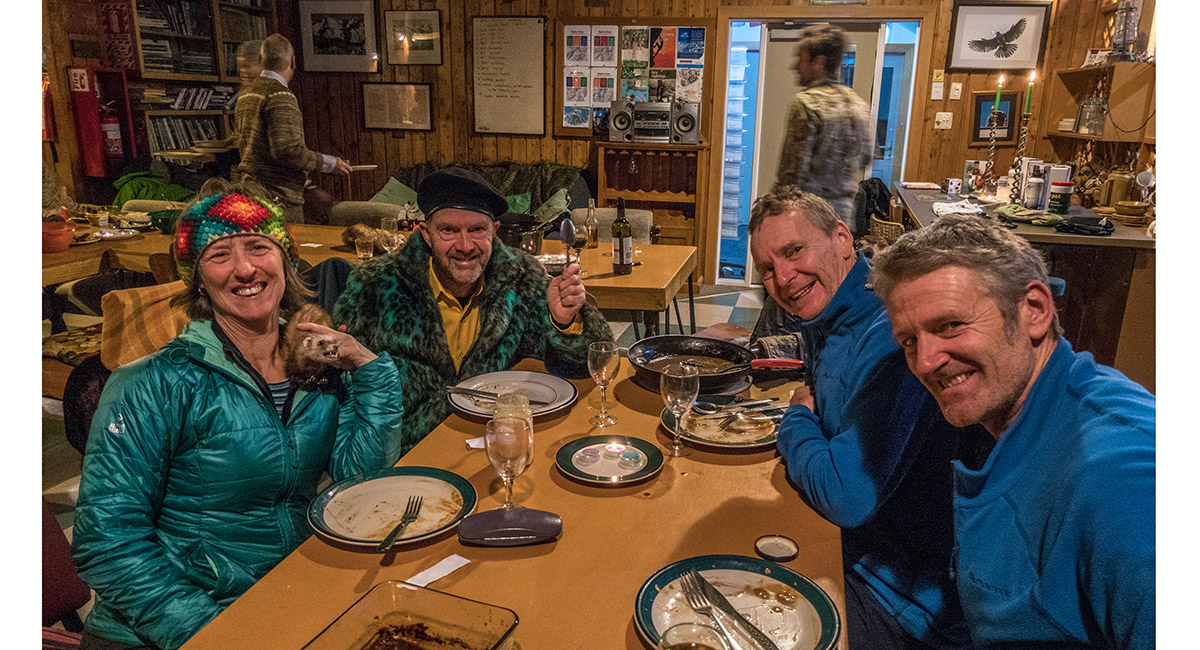
Next evening it was a happy coincidence that the local Mount Cook Village community held their annual Wild Food evening at Unwin Lodge. Warm, dry, well fed and safe - a world apart form our bivvy on the steep scree below Boys Glacier

Read about it The longest night NZAC Journal 2019

To order a print or web resolution file of any image you see in this slide show, just right click the image, click “Copy Image URL” and paste in to the “Your message” box of our Contact Us form. Please also note, for each image, if you want a print or web resolution file. We will get back to you as soon as possible to confirm price and payment details.
Open Contact Us in a new window to paste Image URL(s) easily