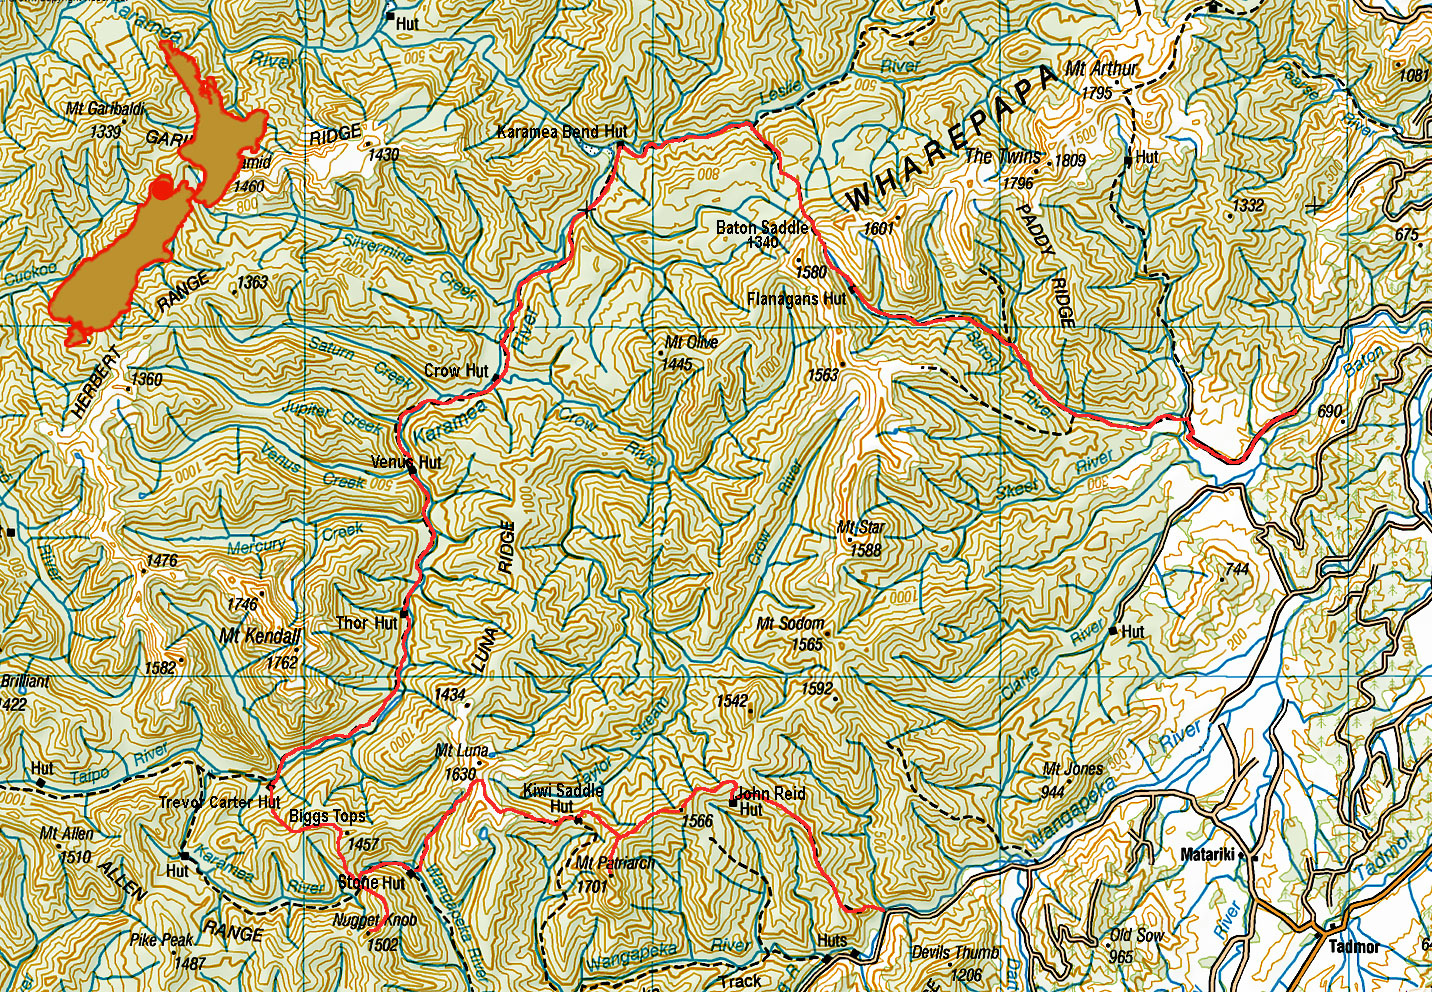
Mt Patriarch, Nugget Knob, Biggs Tops, Baton Saddle, March 2018

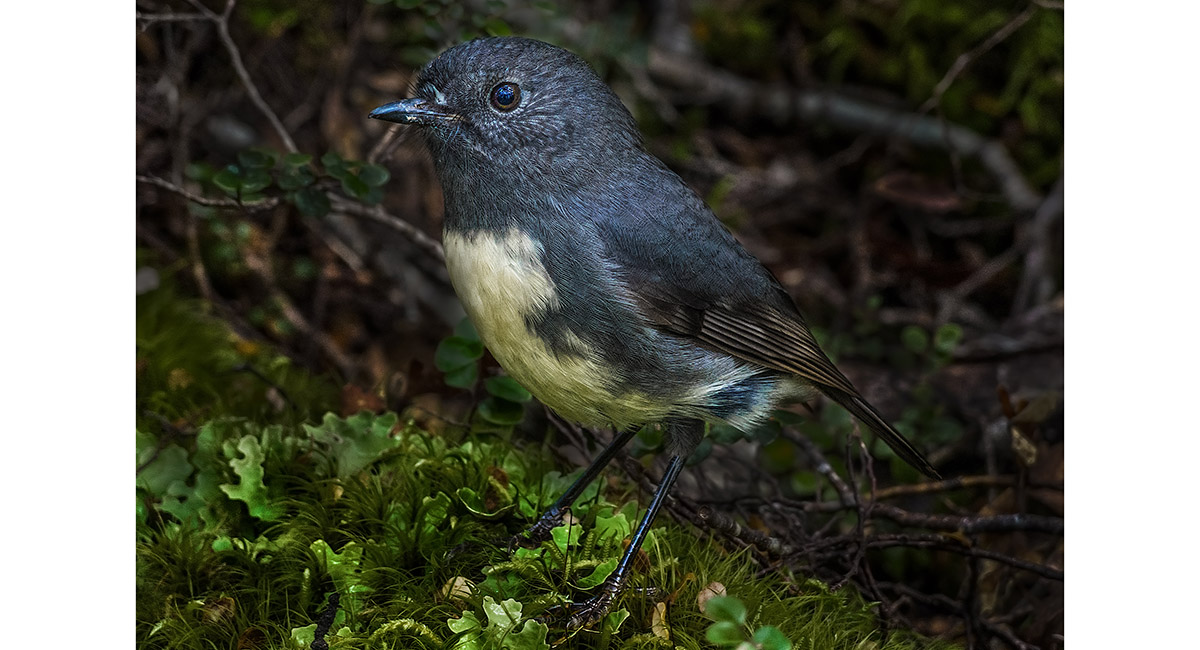
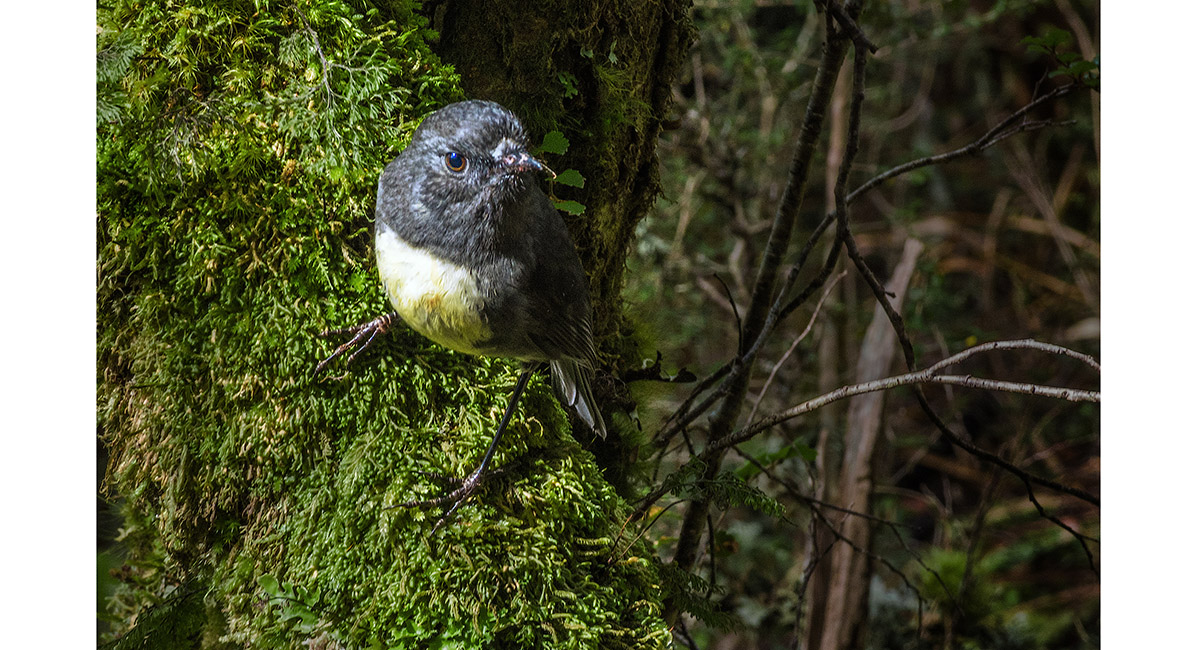
The first of numerous forest floor close encounters with inquisitive Robins, near the trail entry at about 300m on the true left of Wangapeka River


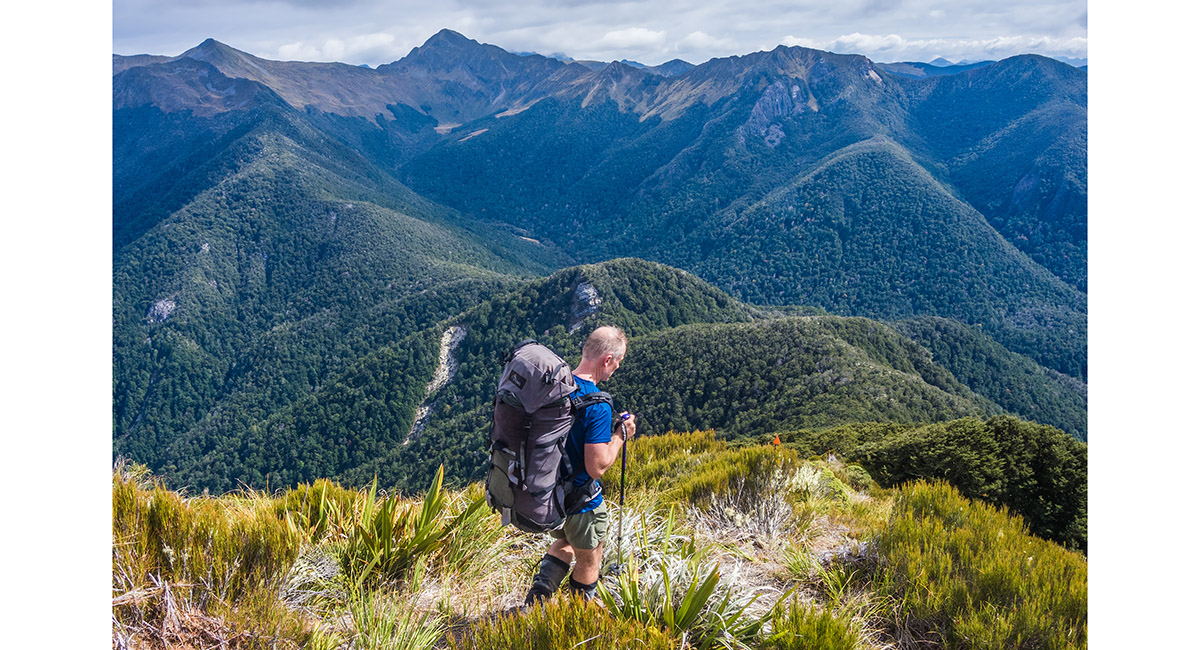
On the way to John Reid Hut, here at about 700m

Another Robin encounter

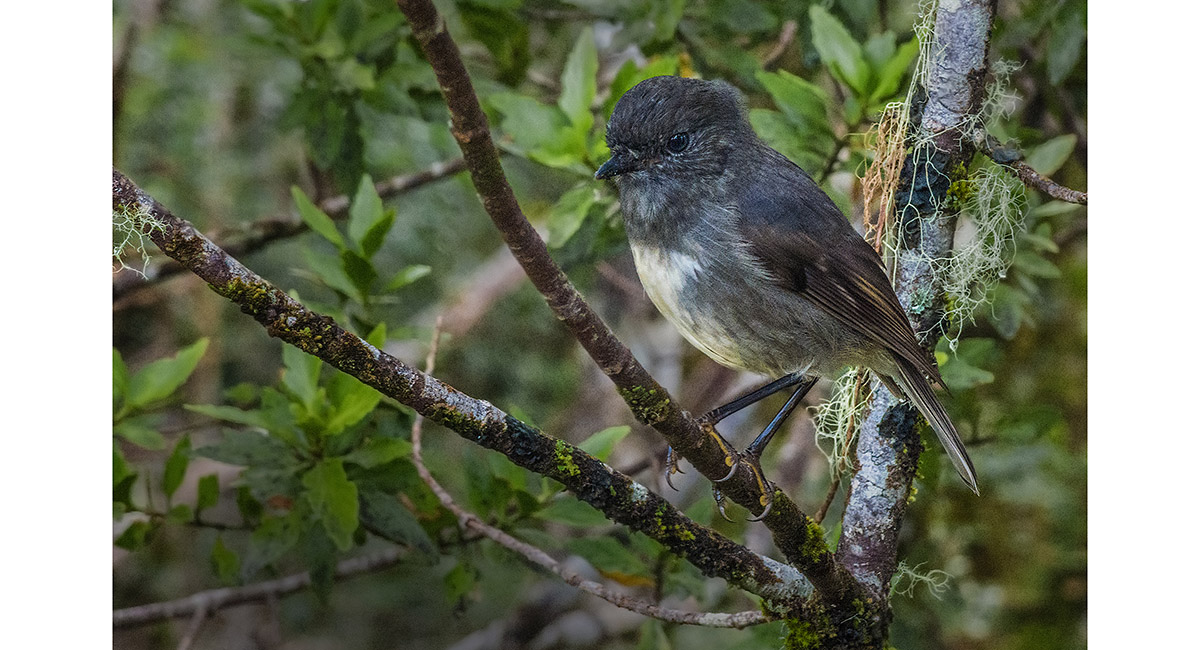
Another Robin encounter


On the way to John Reid Hut, here at about 900m

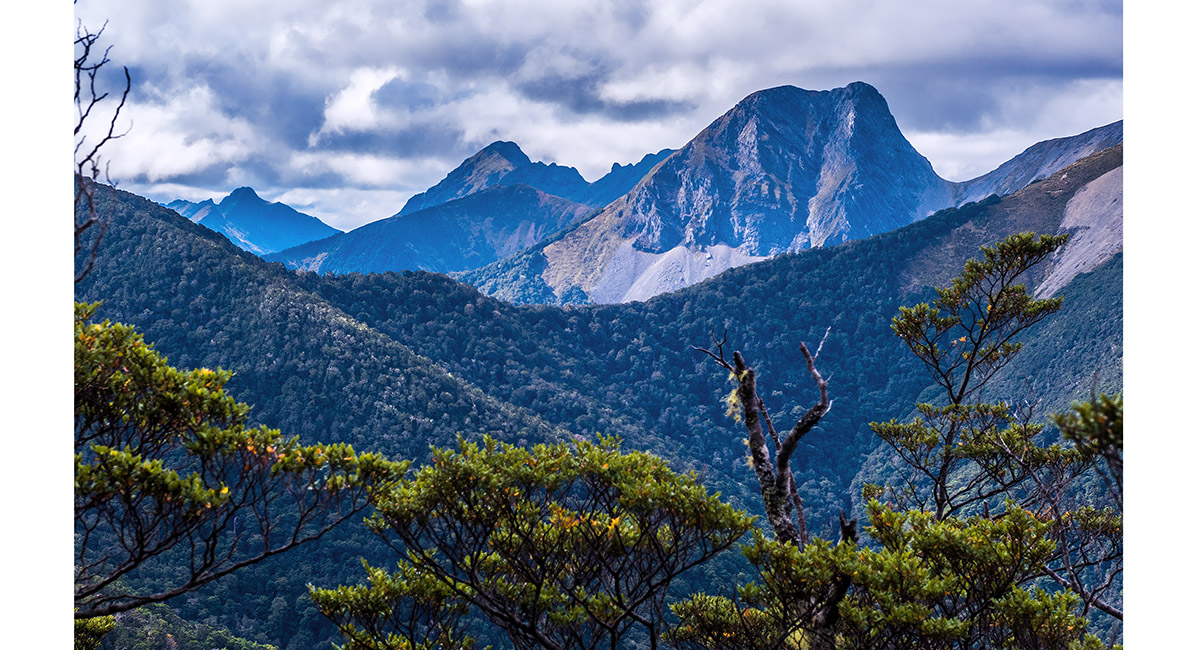
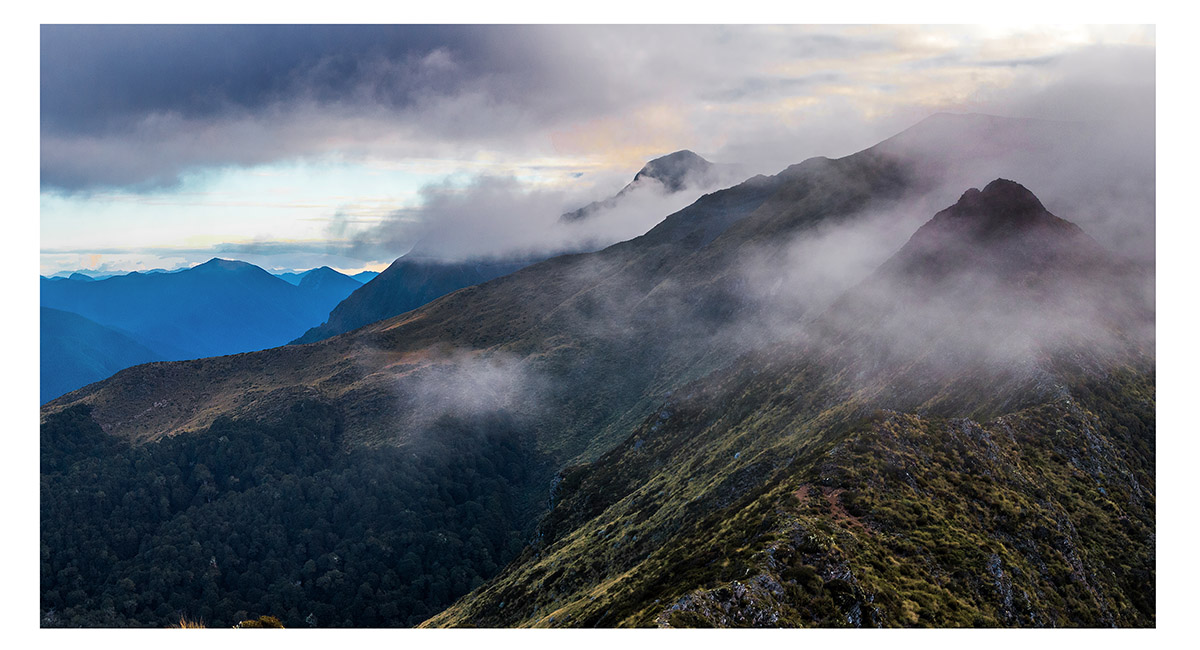
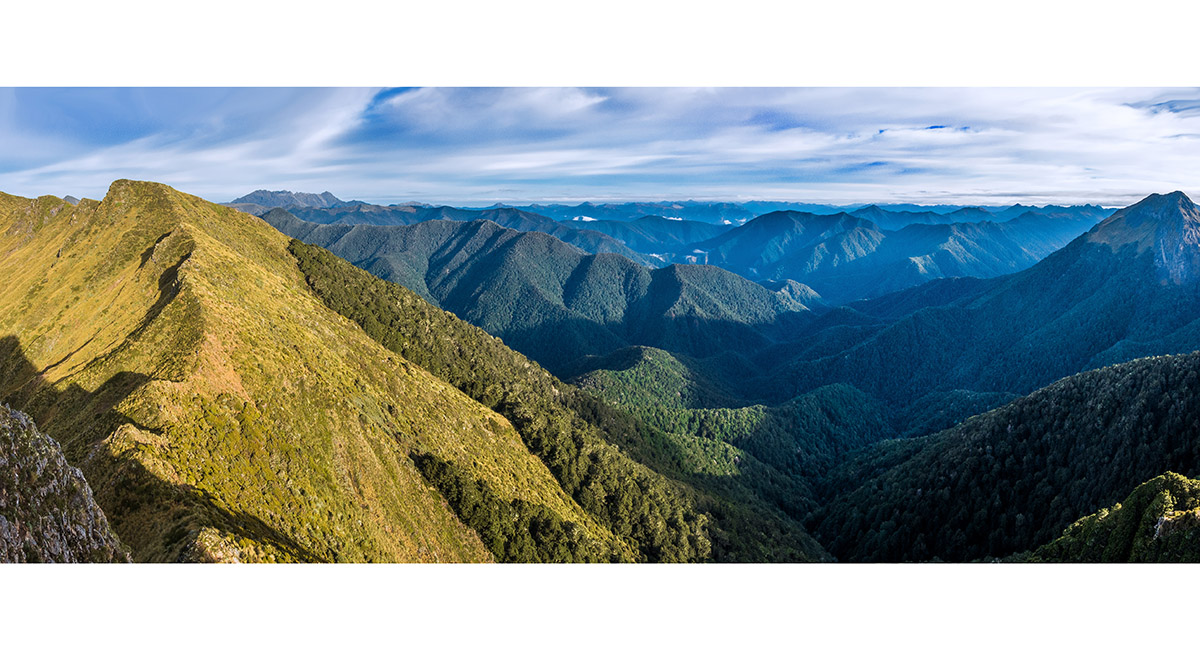
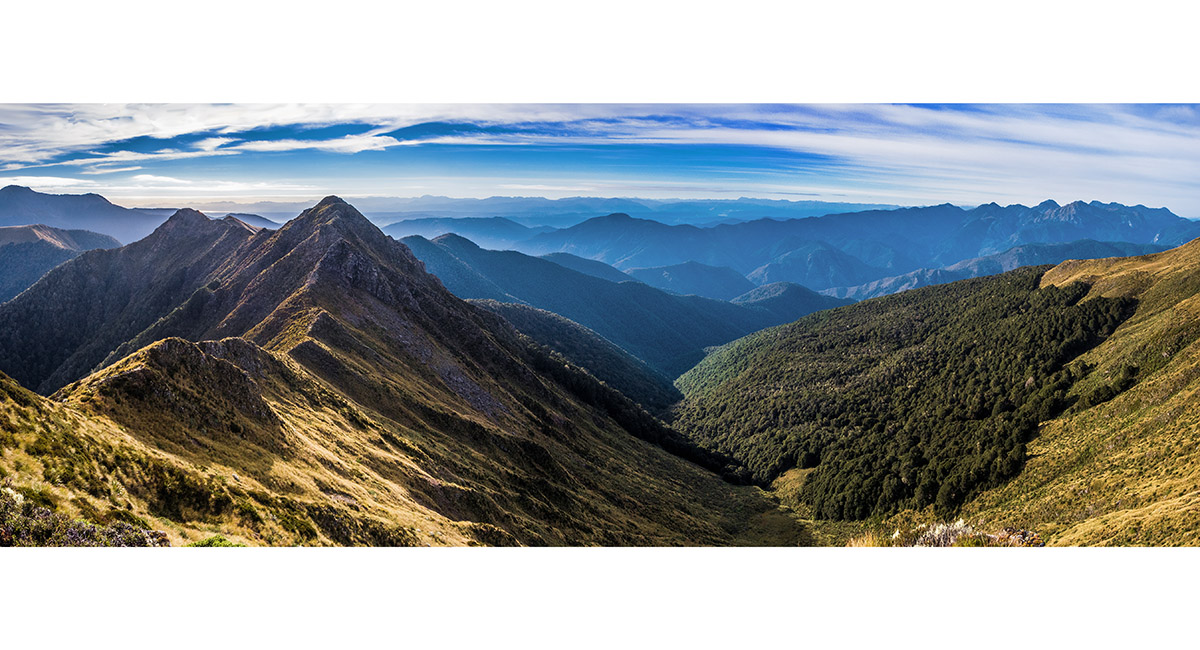
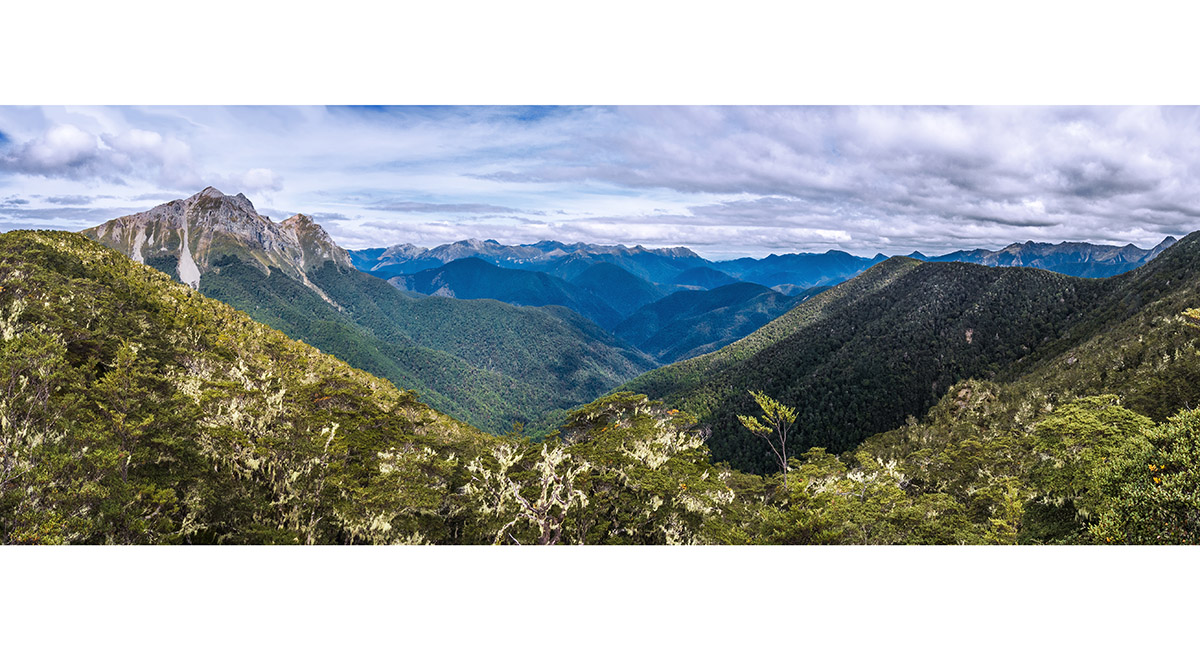
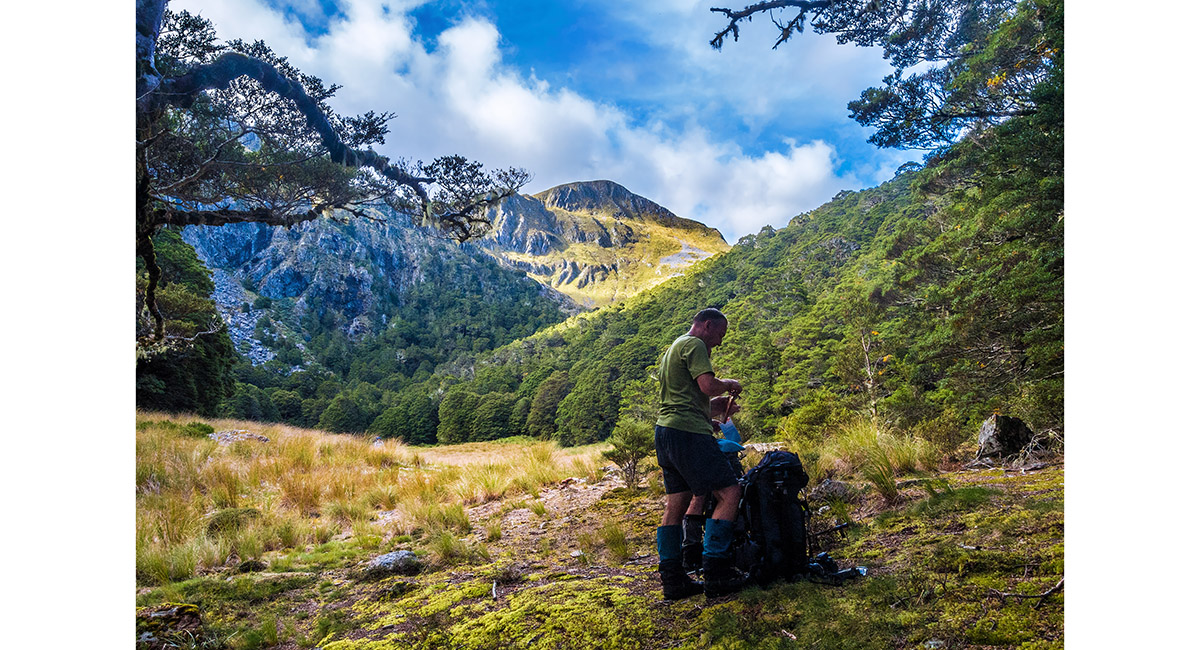
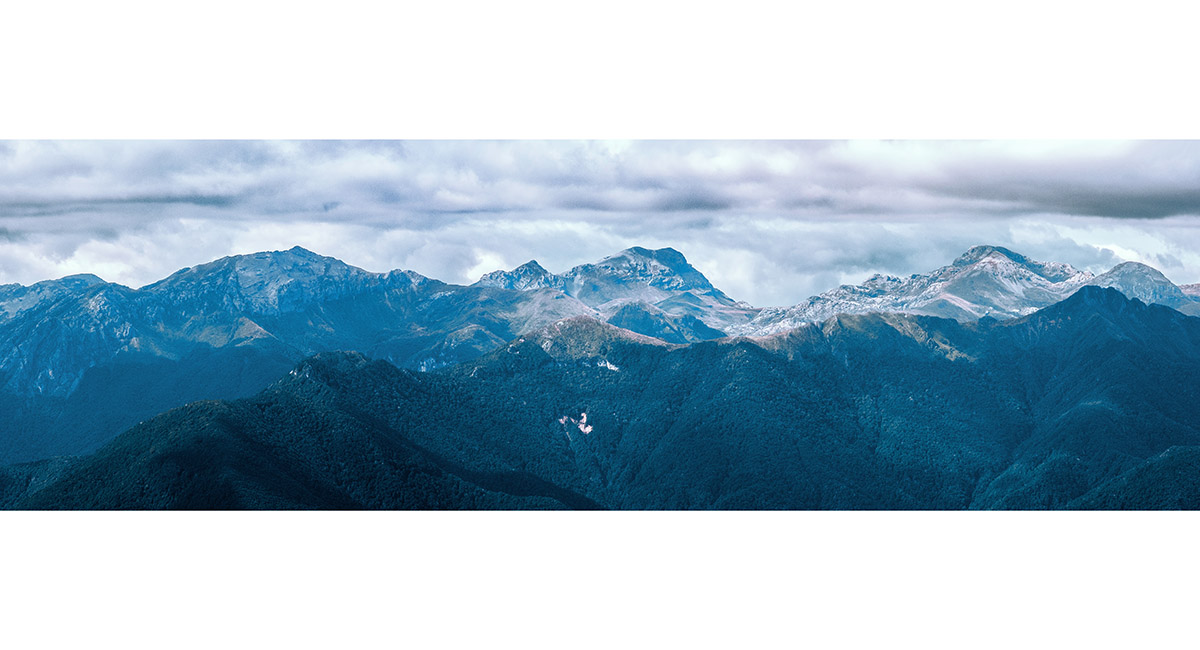
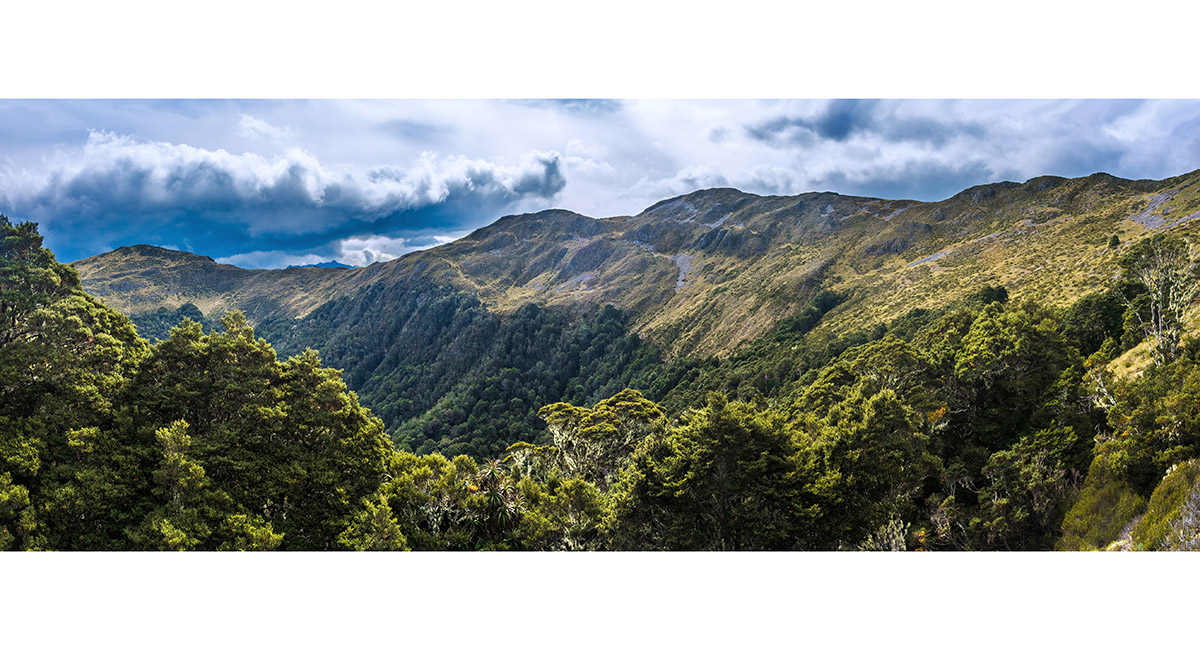
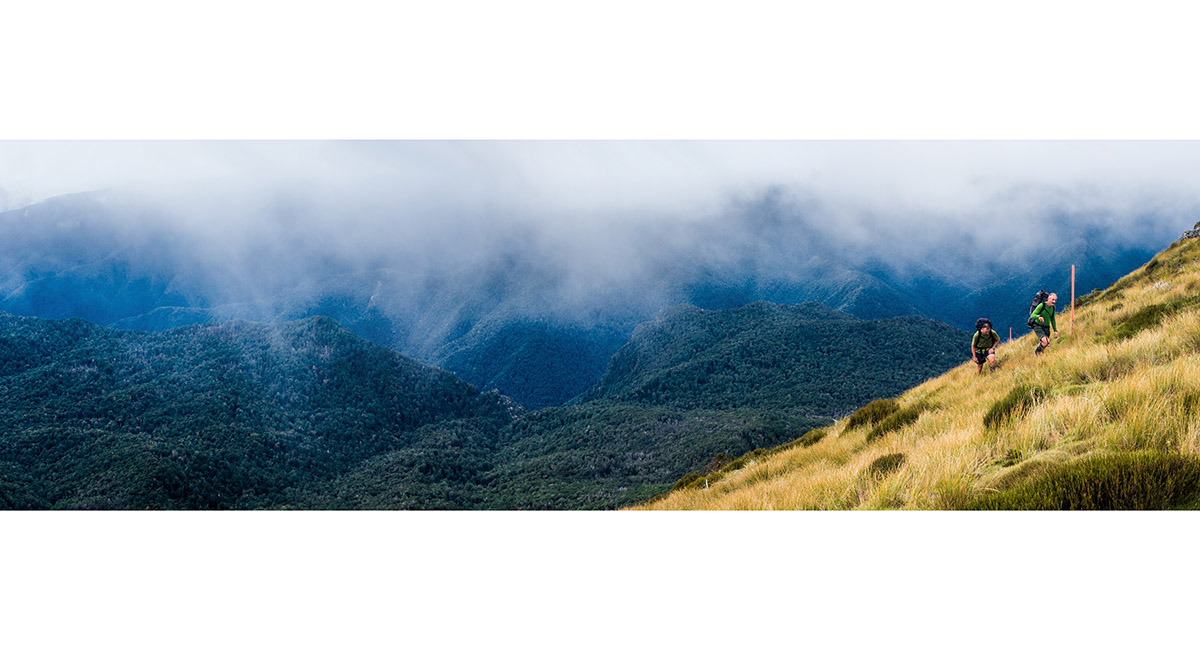
Looking southwest from the trail below John Reid Hut, at about 1,100m

Looking southwest from the trail below John Reid Hut, at about 1,100m. The twin summits of Mt Patriarch are furthest right

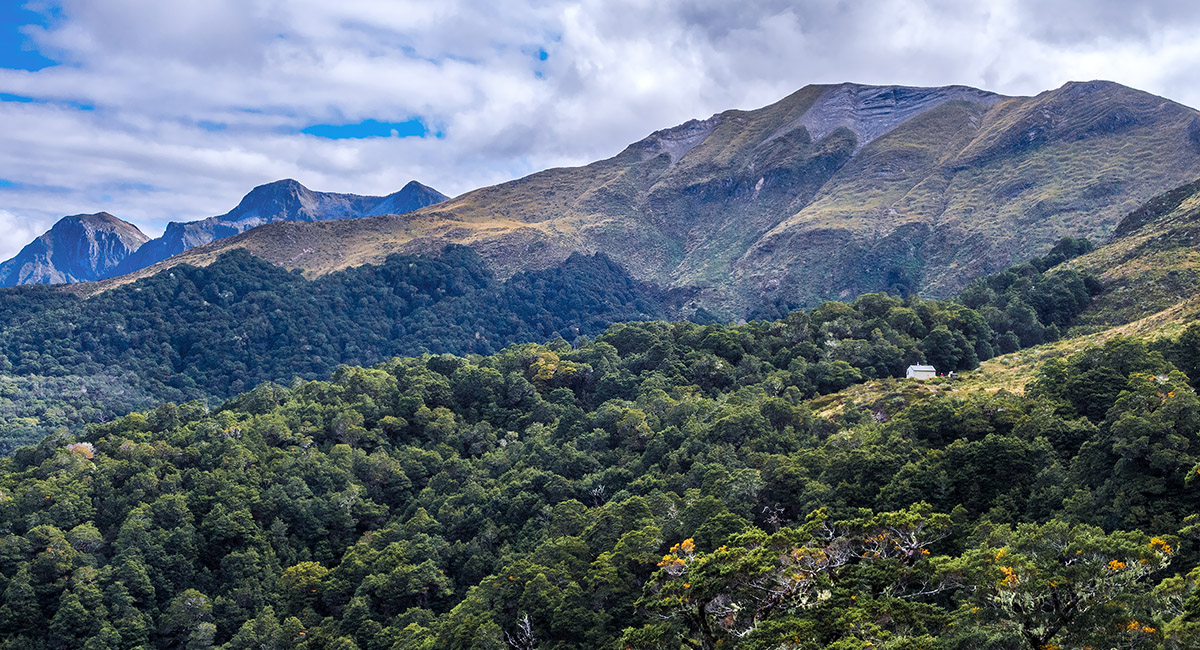
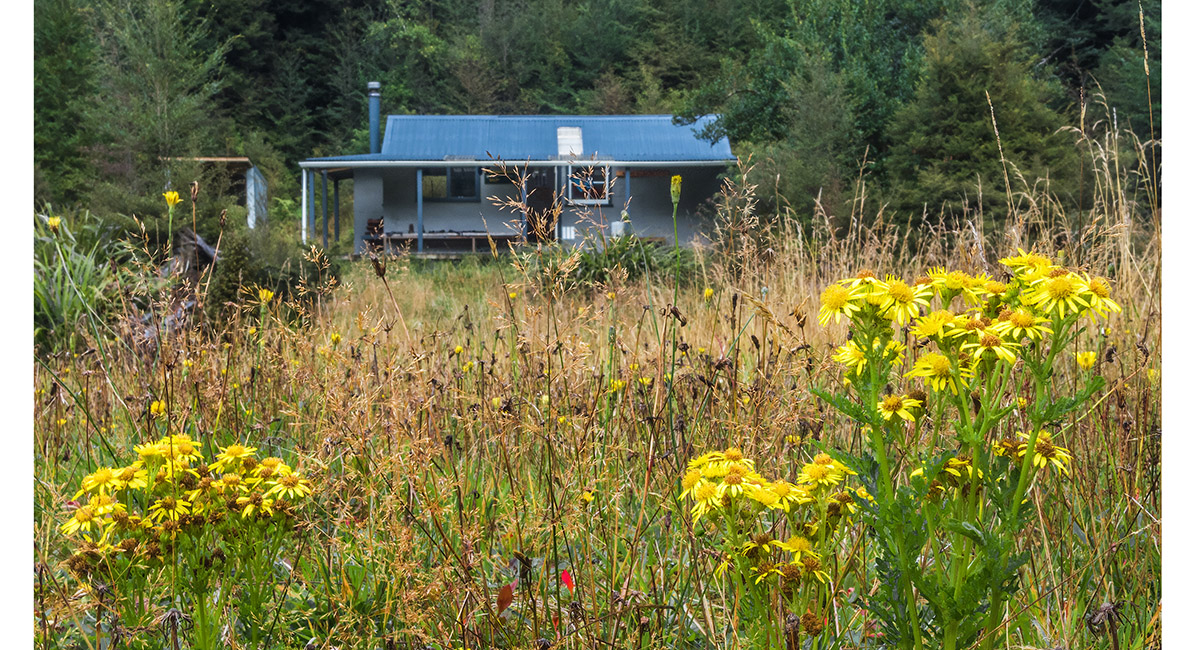
John Reid Hut (1,240m), with Mt Patriarch (1,701m and 1,692m) and Nugget Knob (1,502m) on the skyline

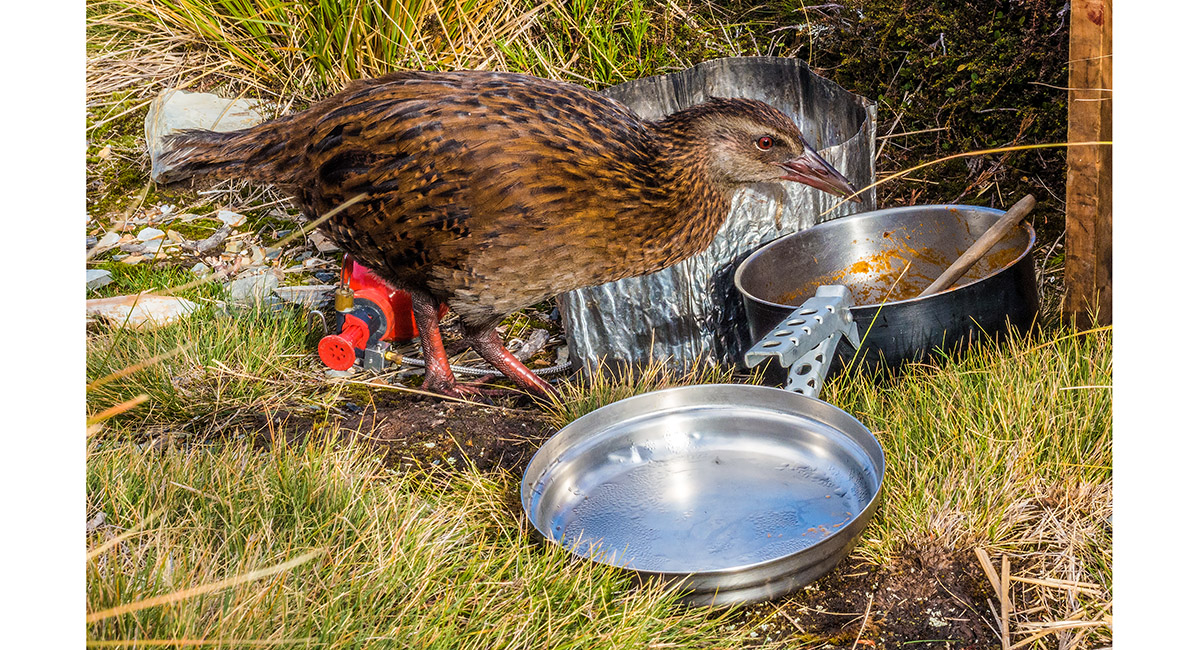
An opportunistic Weka outside John Reid Hut. These birds were at all our camp and hut stops, as well as fossicking in the forest

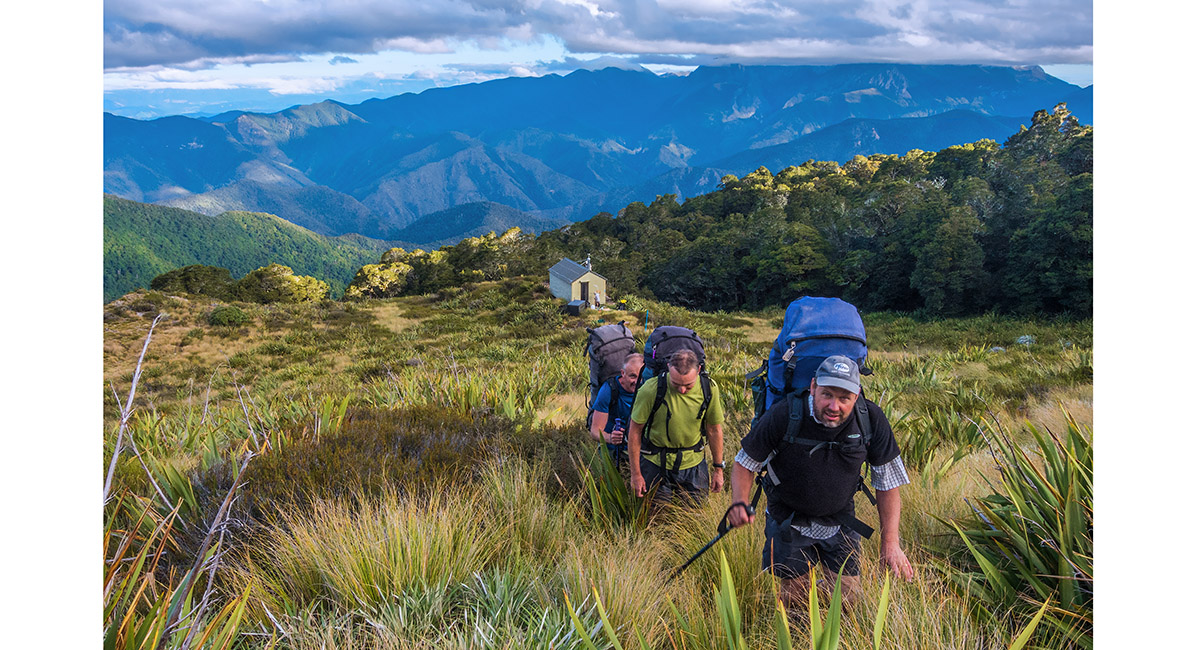
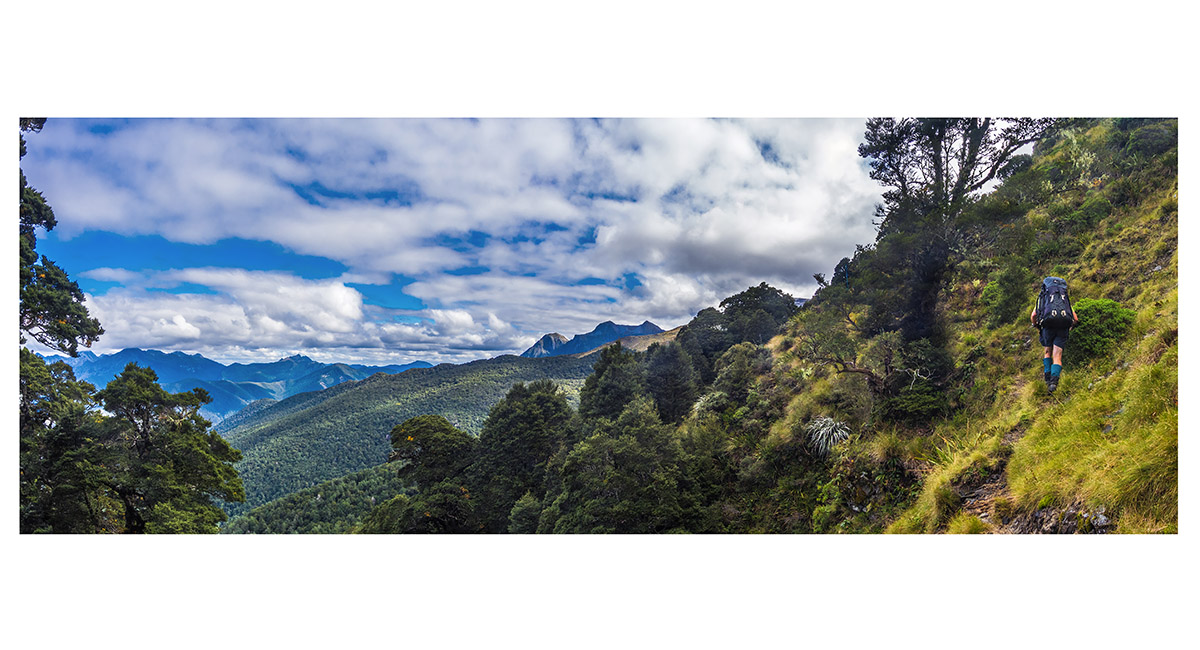
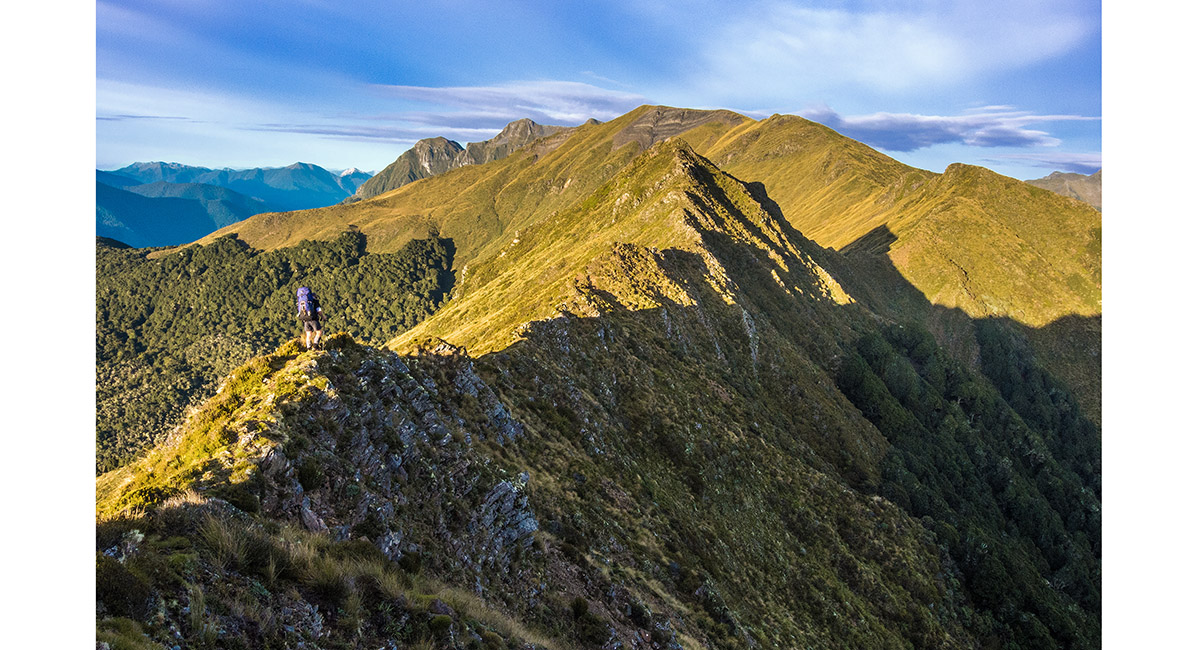
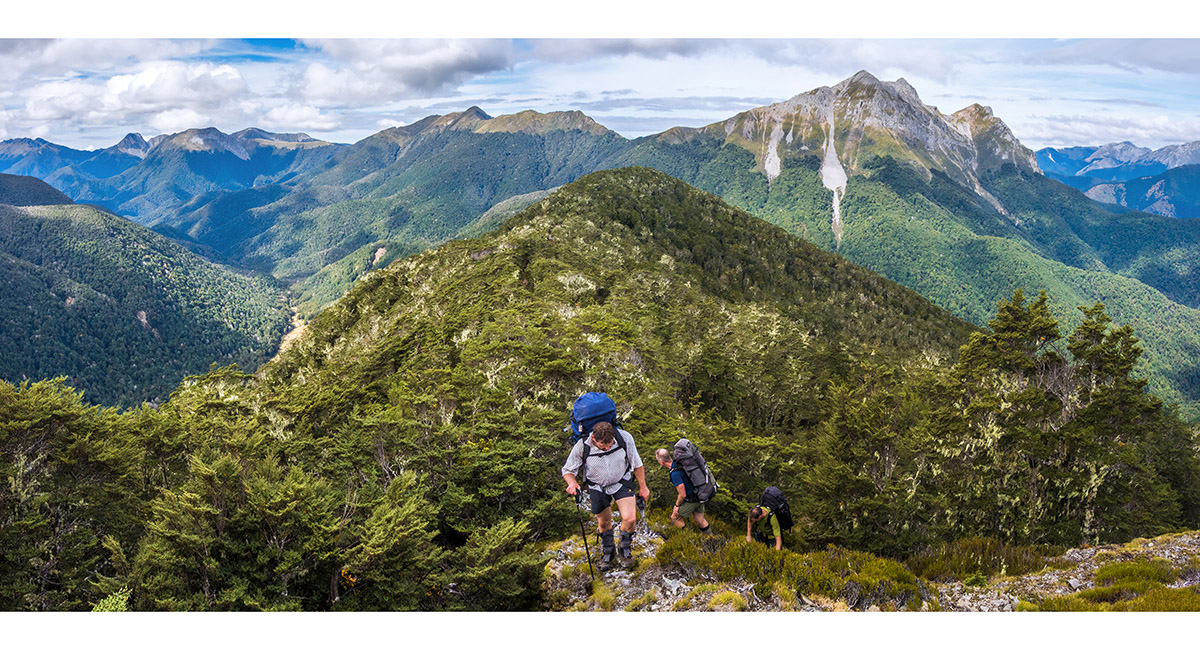
Departing John Reid Hut after dinner, in the direction of the Arthur Range


Departing John Reid Hut after dinner, in the direction of the Arthur Range

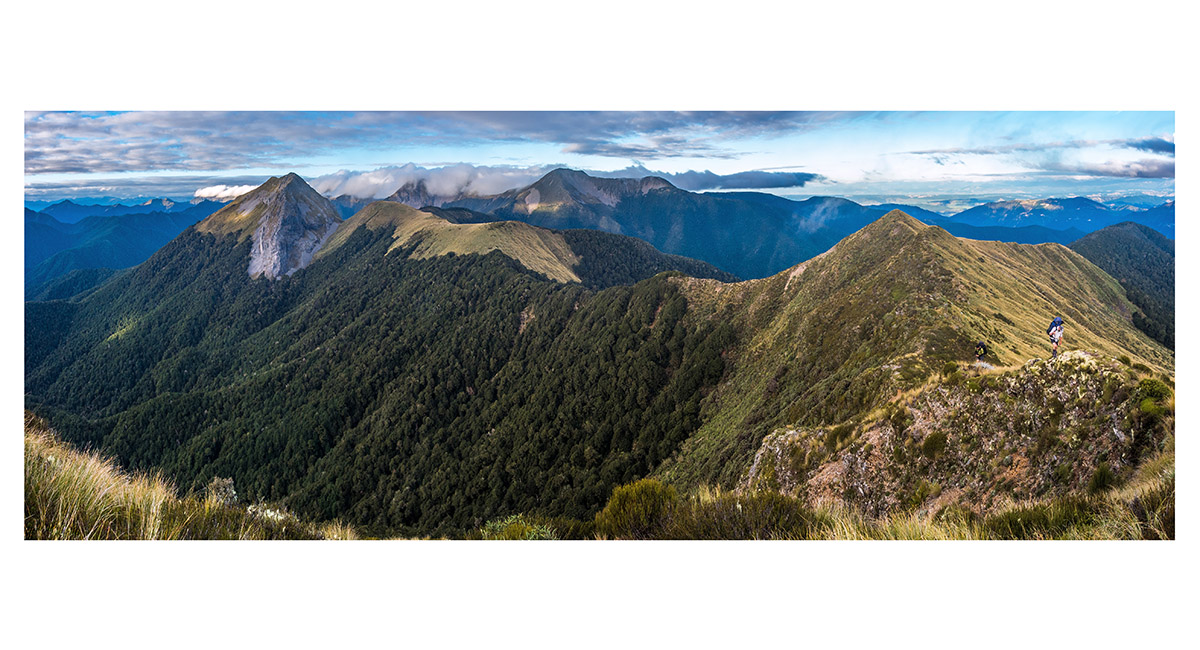
A view north from about 1,400m on the Arthur Range, towards Mt Baldy (1,542m - left)

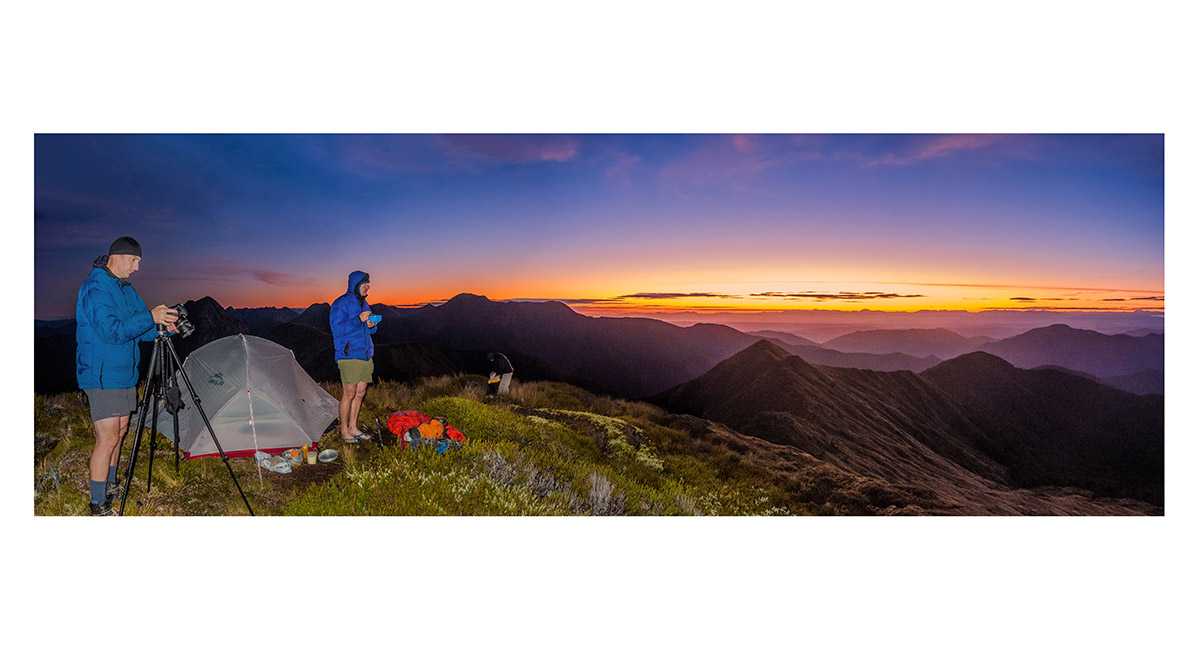
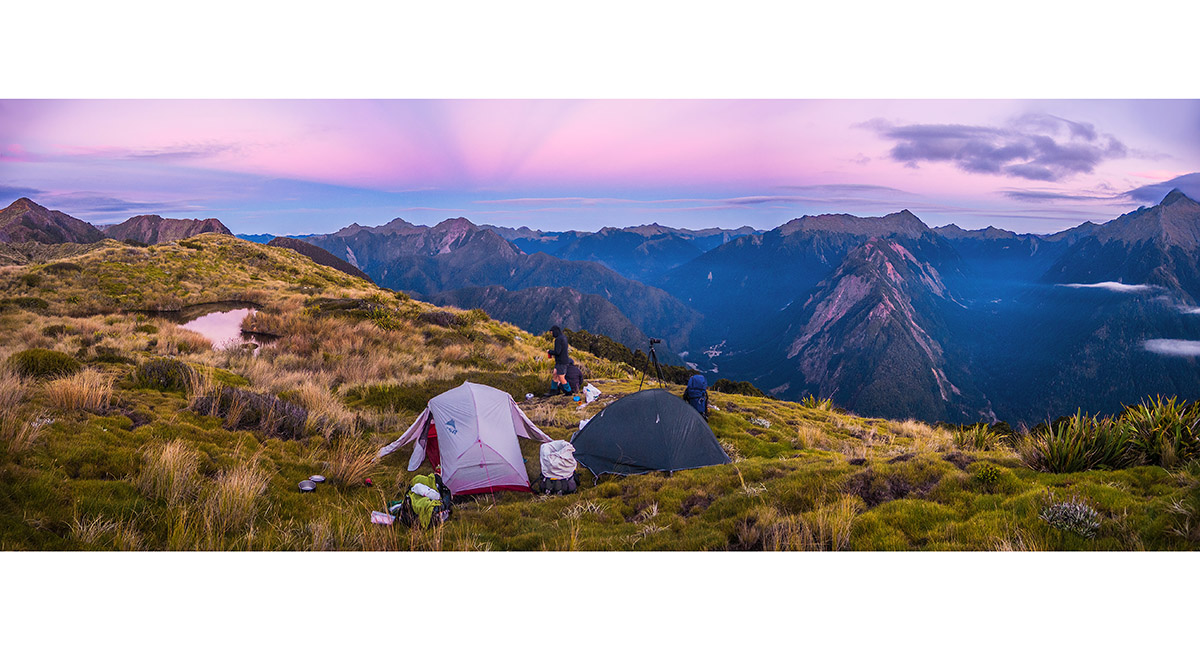
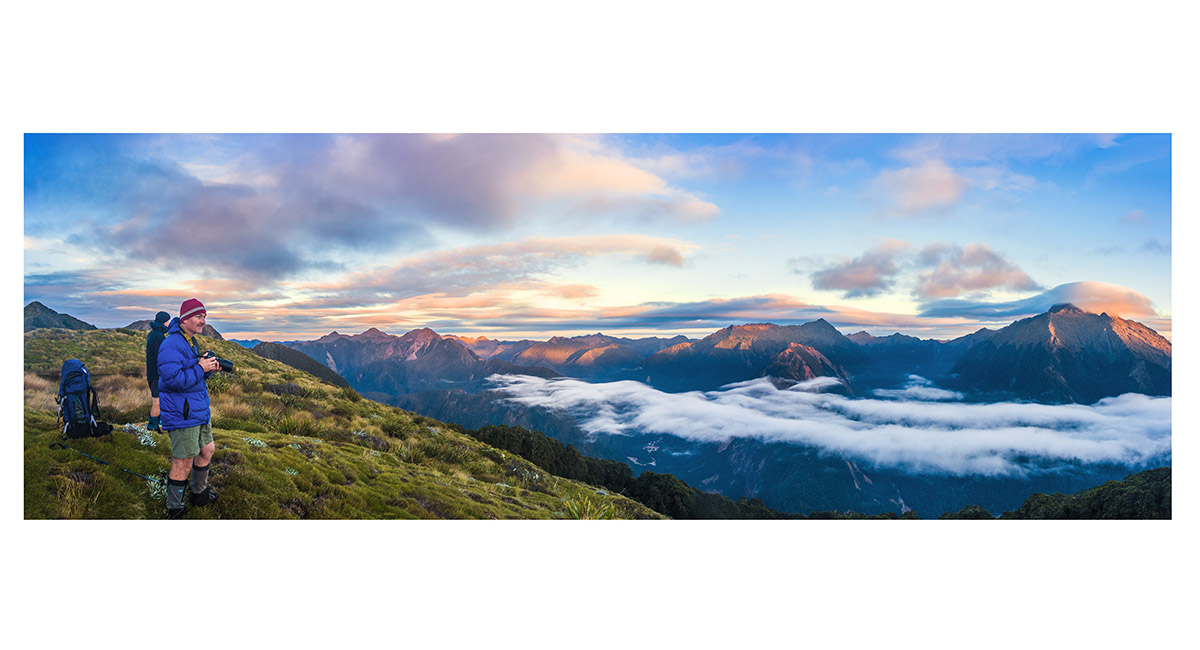
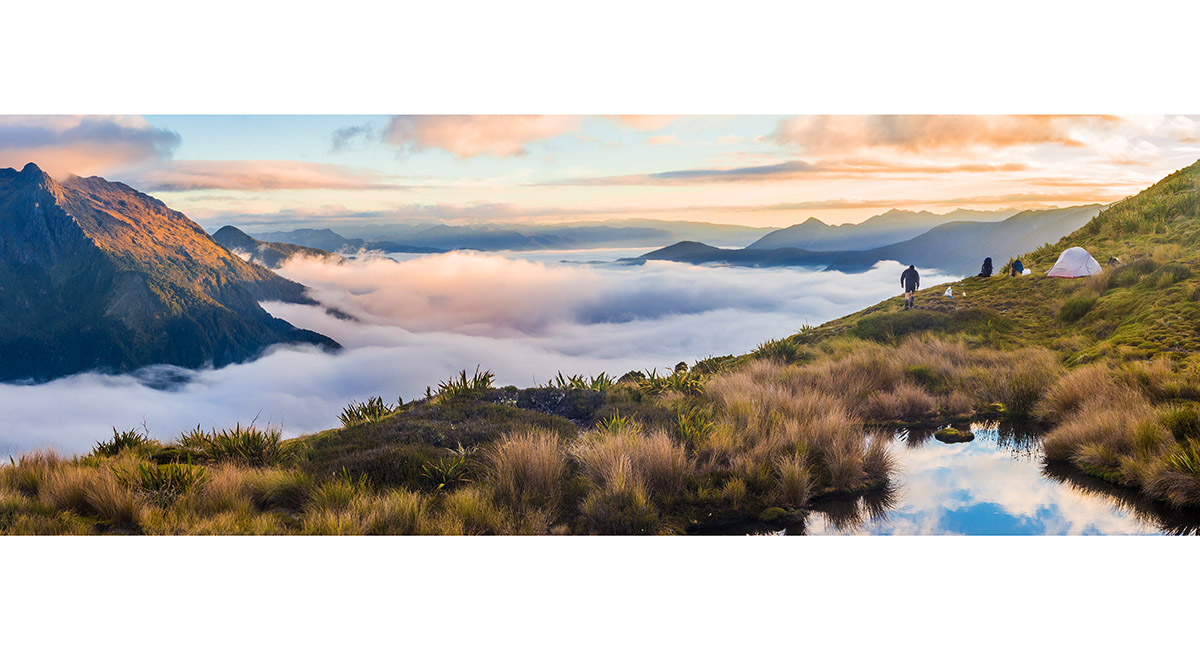
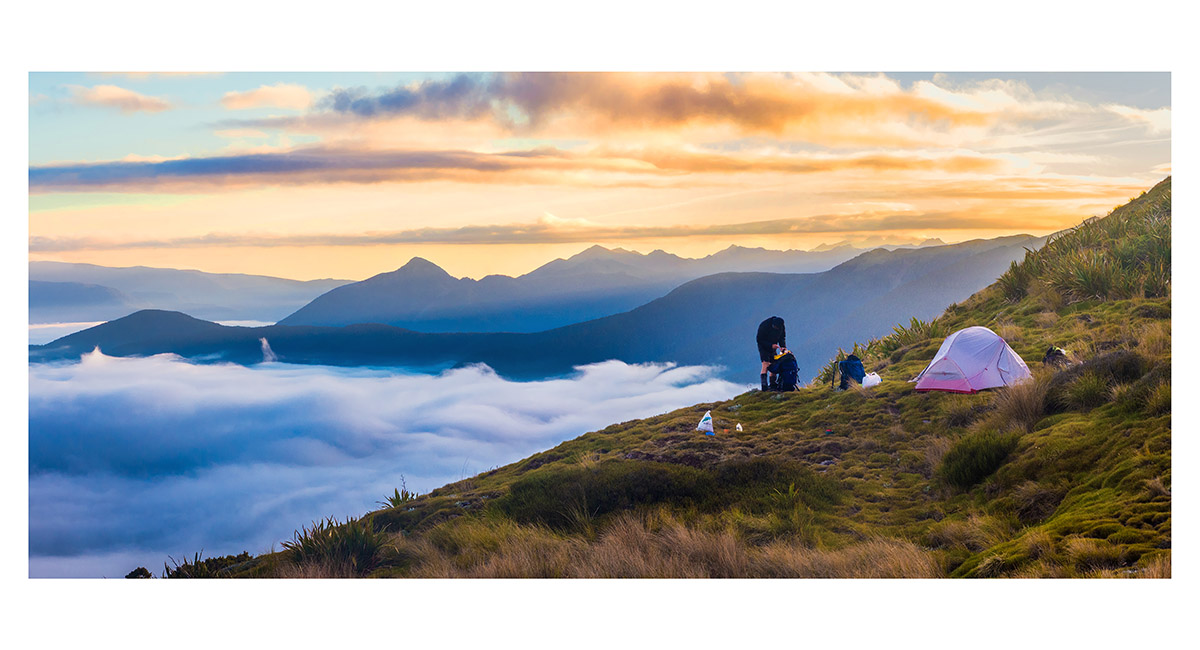
A dusk view west, along the Arthur Range, from our campsite at 1,463m

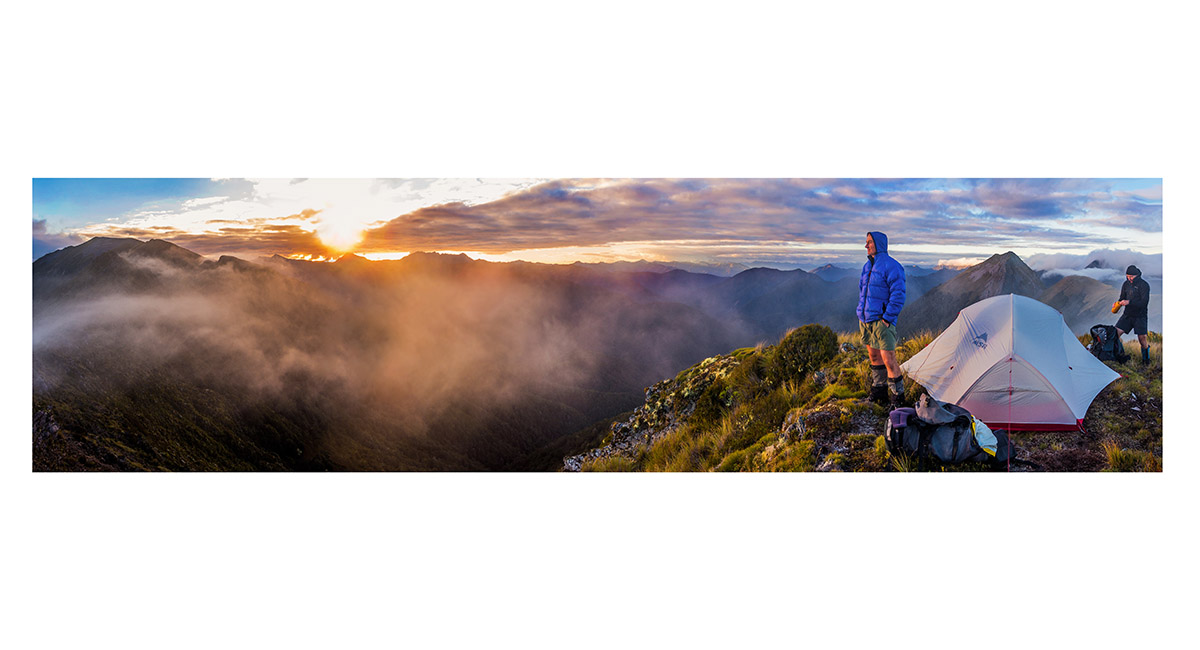
A dusk view from our 1,463m campsite on the Arthur Range, spanning the Luna Ridge and Mt Baldy (far right)

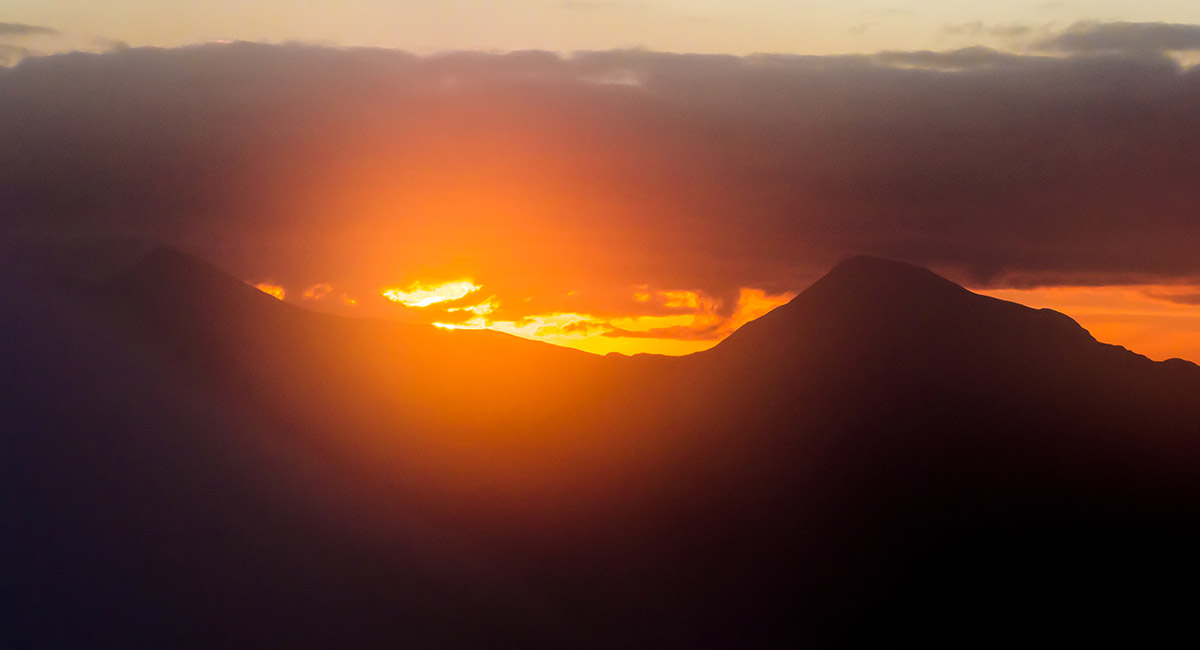
The sun dropping below the Luna Ridge

Dawn view north to Mt Baldy

A dawn view from our 1,463m campsite on the Arthur Range, spanning Mt Baldy (far left) and the Lookout Range to the east

A dawn view east from our 1,463m campsite on the Arthur Range

A dawn view east from our 1,463m campsite on the Arthur Range

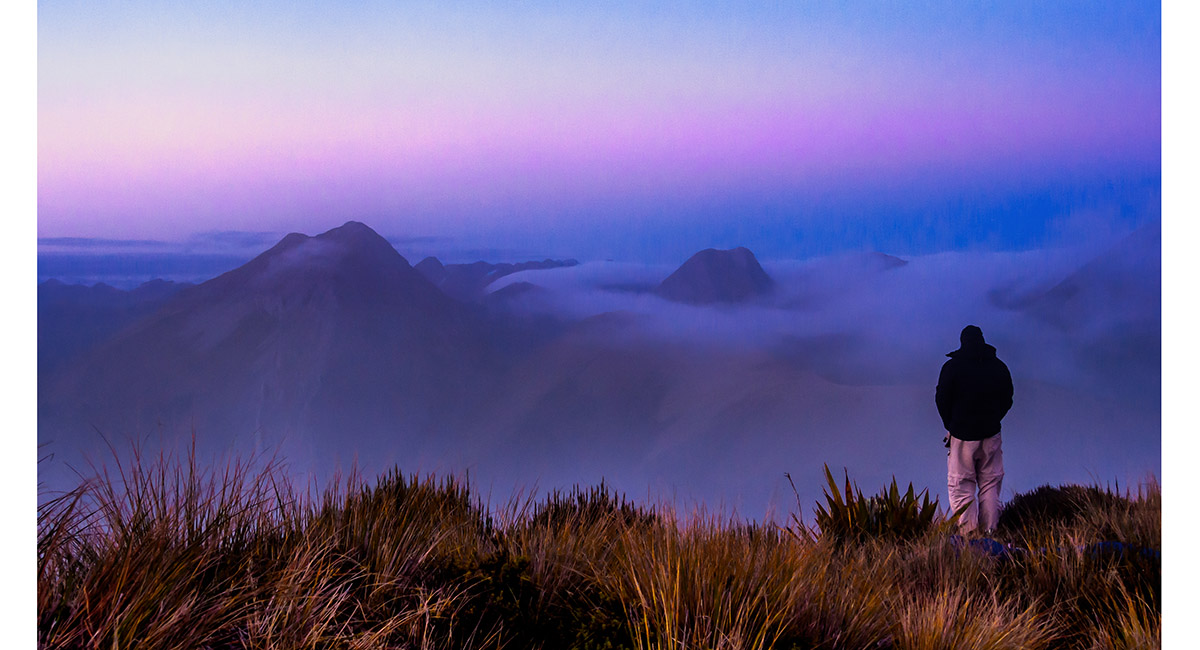
A dawn view from our 1,463m campsite on the Arthur Range, looking west and north to the Luna Ridge


A dawn view east from our 1,463m campsite on the Arthur Range, looking north to the Luna Ridge and Mt Baldy ( right of centre)


A dawn view from our 1,463m campsite on the Arthur Range, looking west and north to the Luna Ridge. The saw teeth of Mt Kendall (1,771m) are right of centre on the skyline


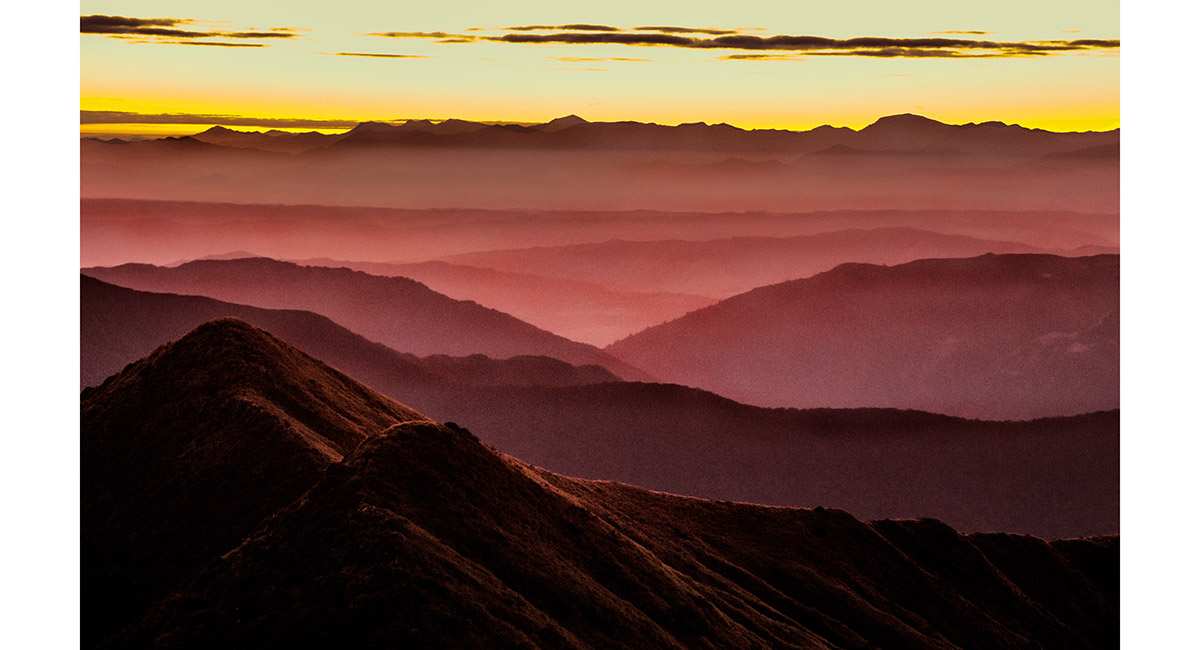
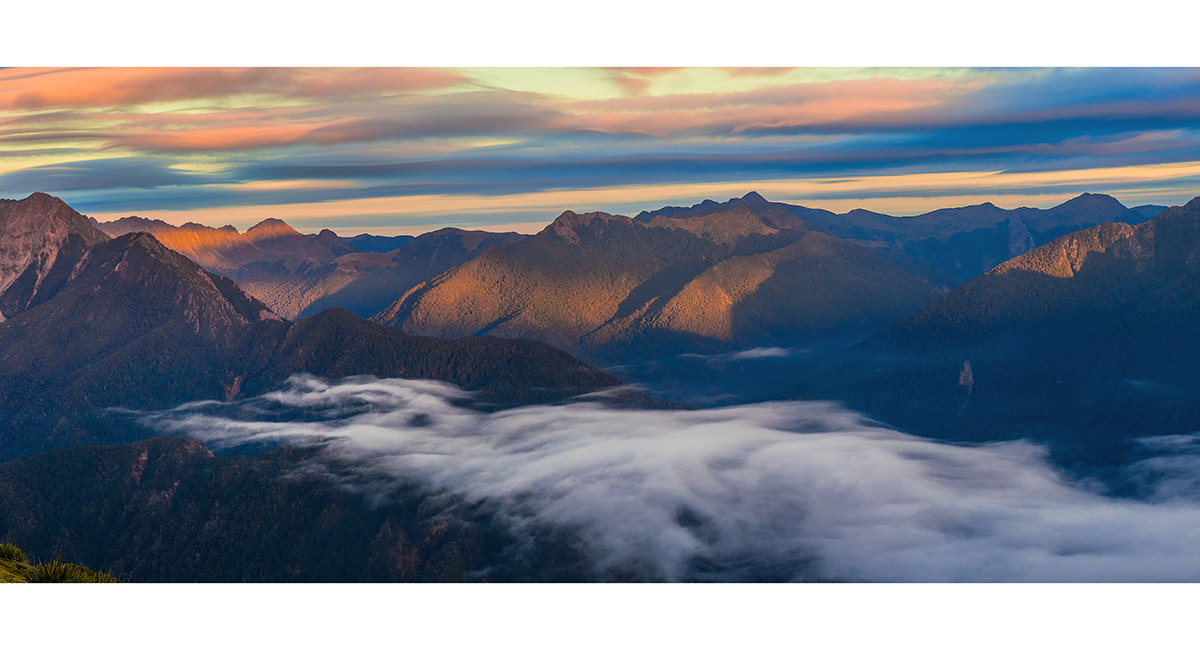
Sunrise from our 1,463m campsite on the Arthur Range, looking southeast to the Lookout Range


Sunrise from our 1,463m campsite on the Arthur Range, spanning Mt Baldy (far left) and the Lookout Range to the east

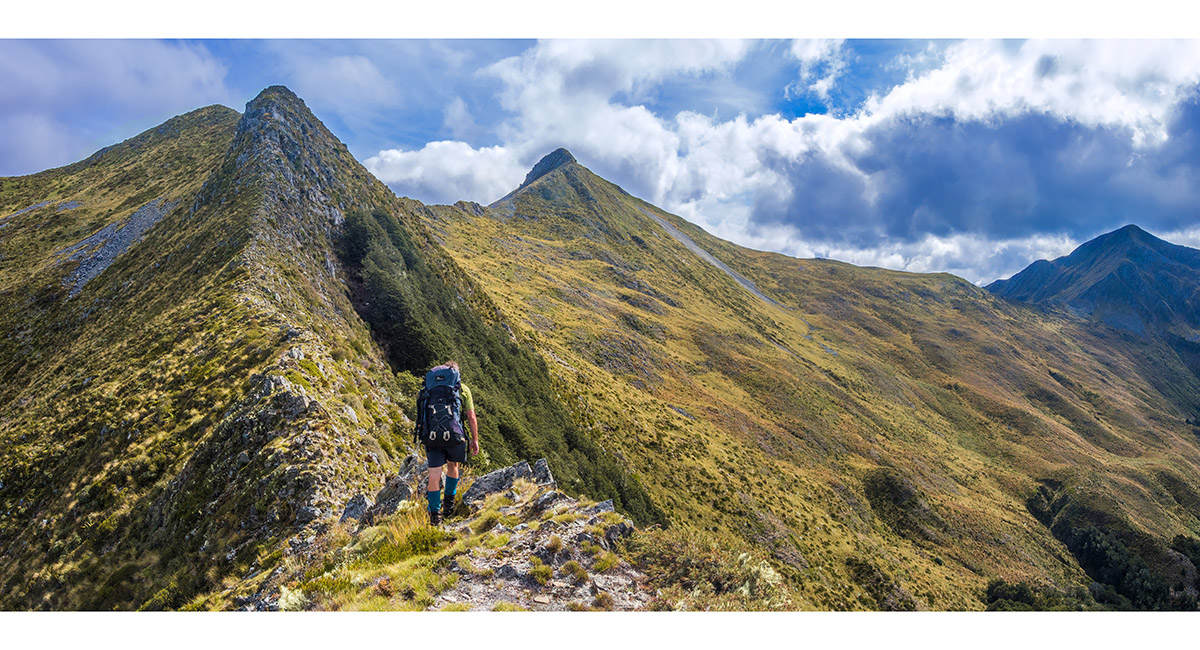
Departing our campsite, heading west along the Arthur Range towards Mt Patriarch. Its twin summits are left of centre, with Nugget Knob further left

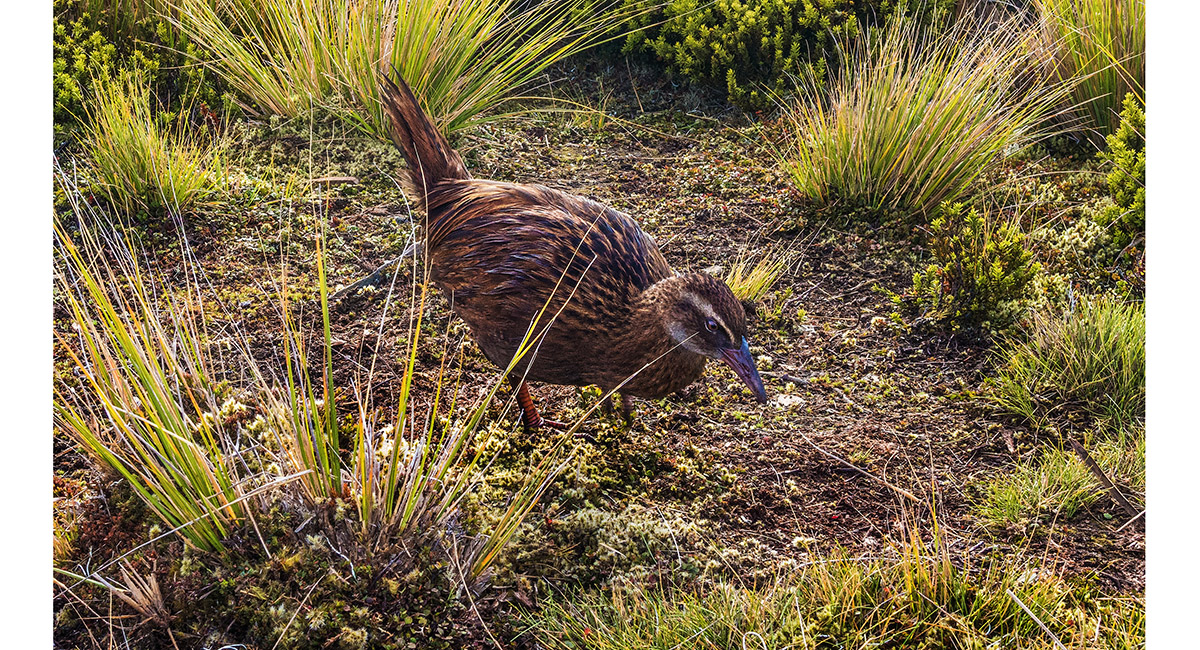
Our campsite Weka searching for abandoned titbits as I depart

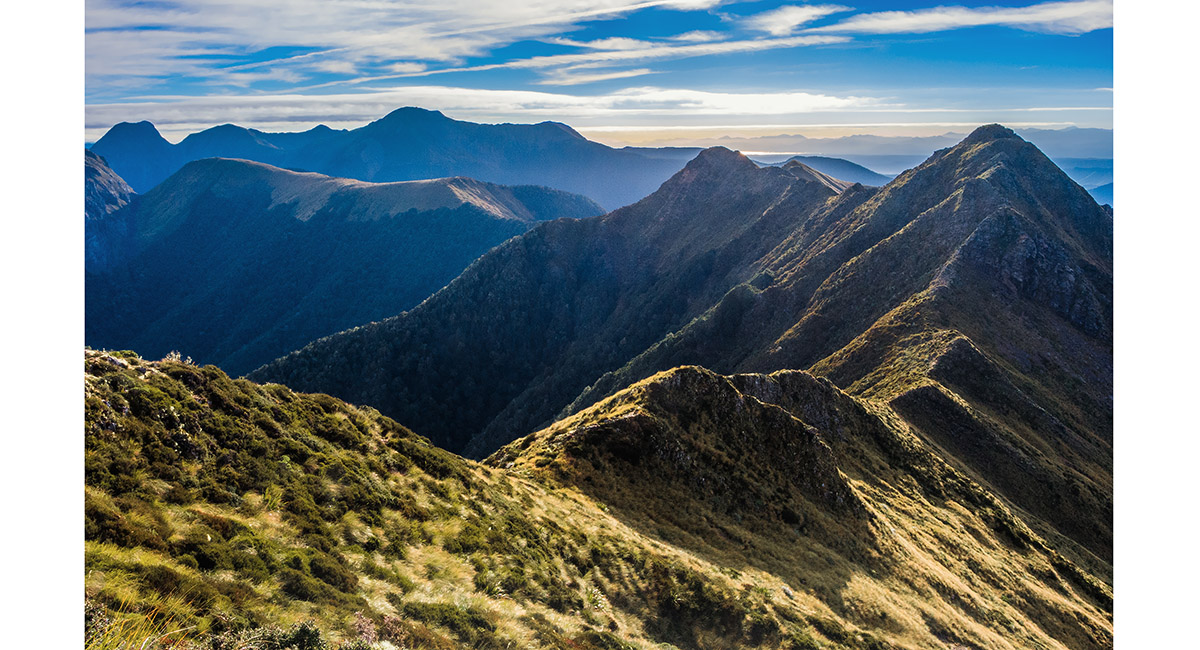
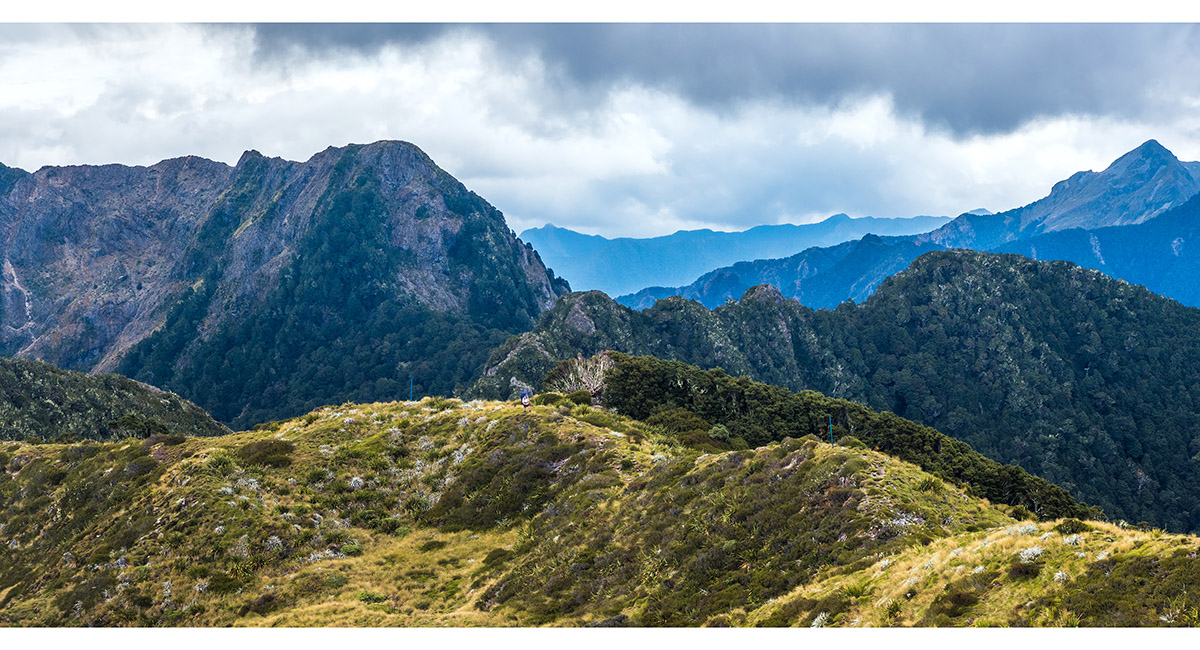
A view from about 1,500m on the Arthur Range, taking in Mt Luna (1,630m) and Kendall (1,771m) left, the Luna Ridge and Mt Baldy (1,542m) far right

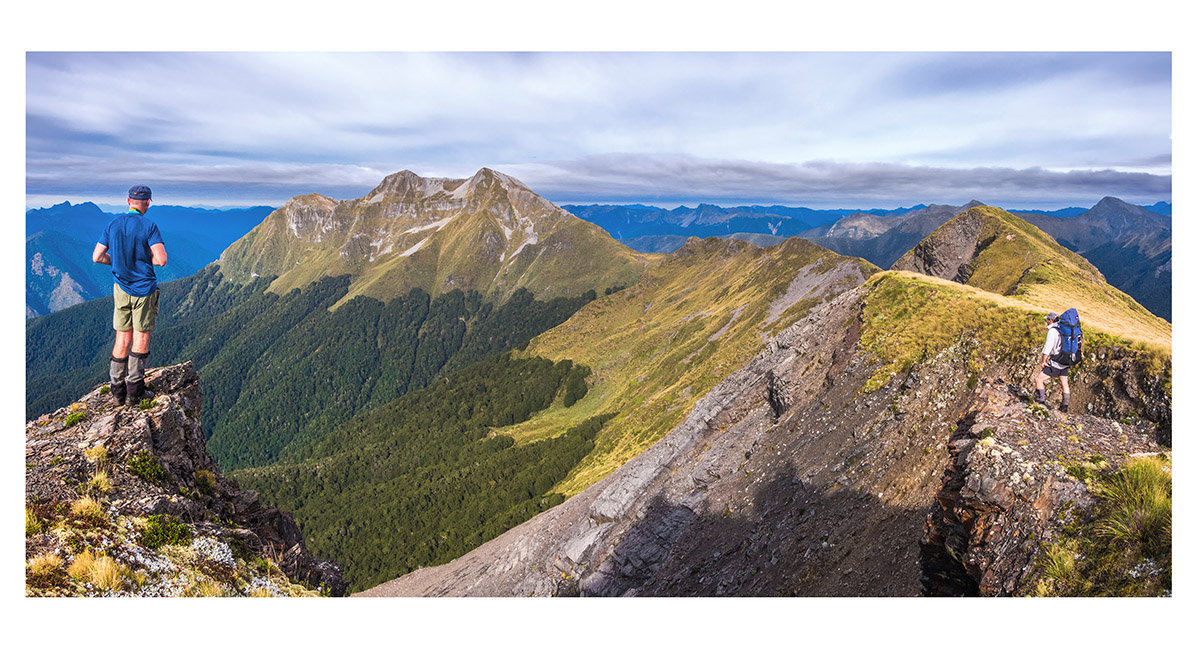
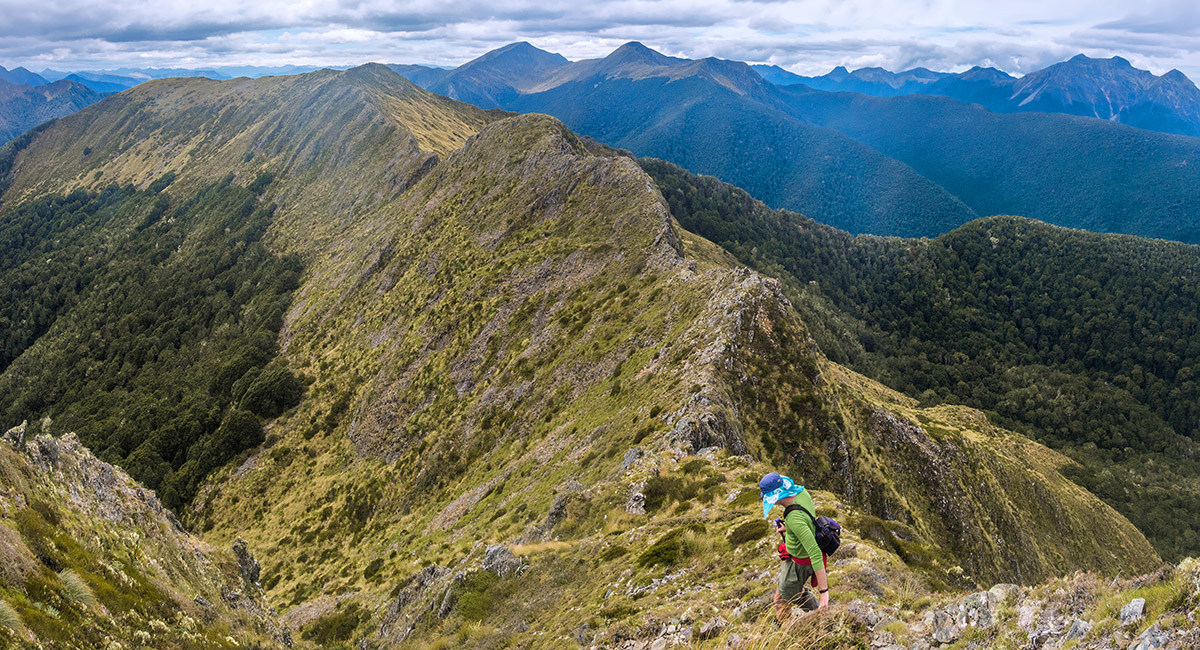
Looking northeast along the Arthur Range, towards our campsite and route that morning

Looking northeast along the Arthur Range, towards our campsite and route that morning (left) and then around to Mount Owen in the south (far right)

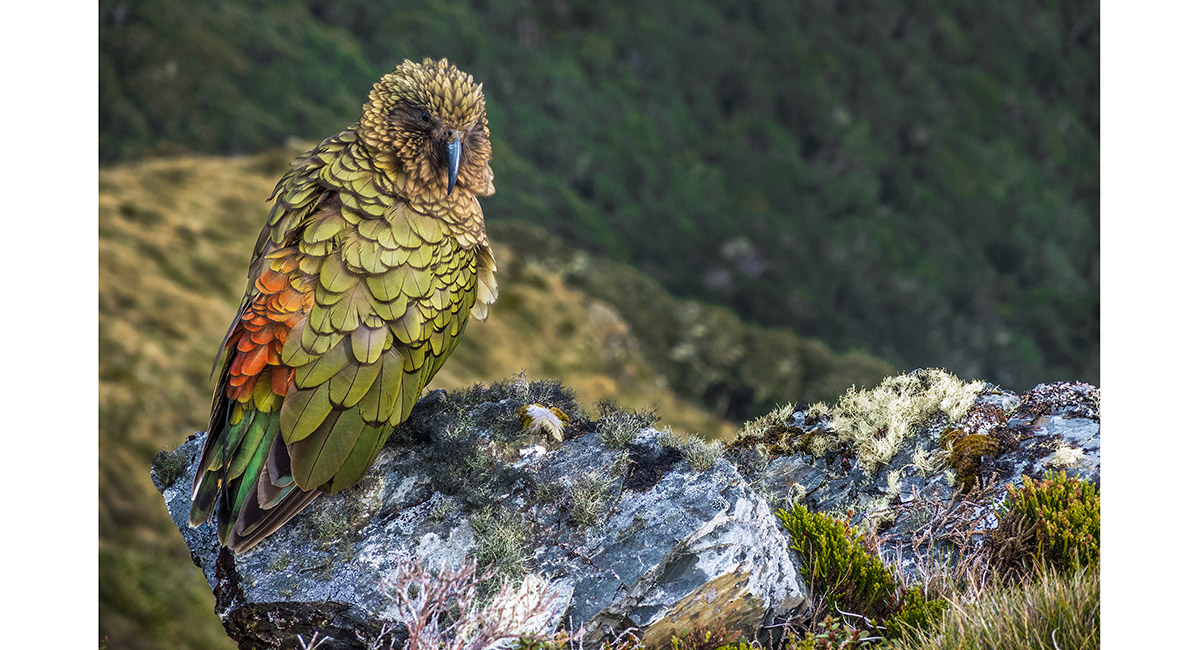
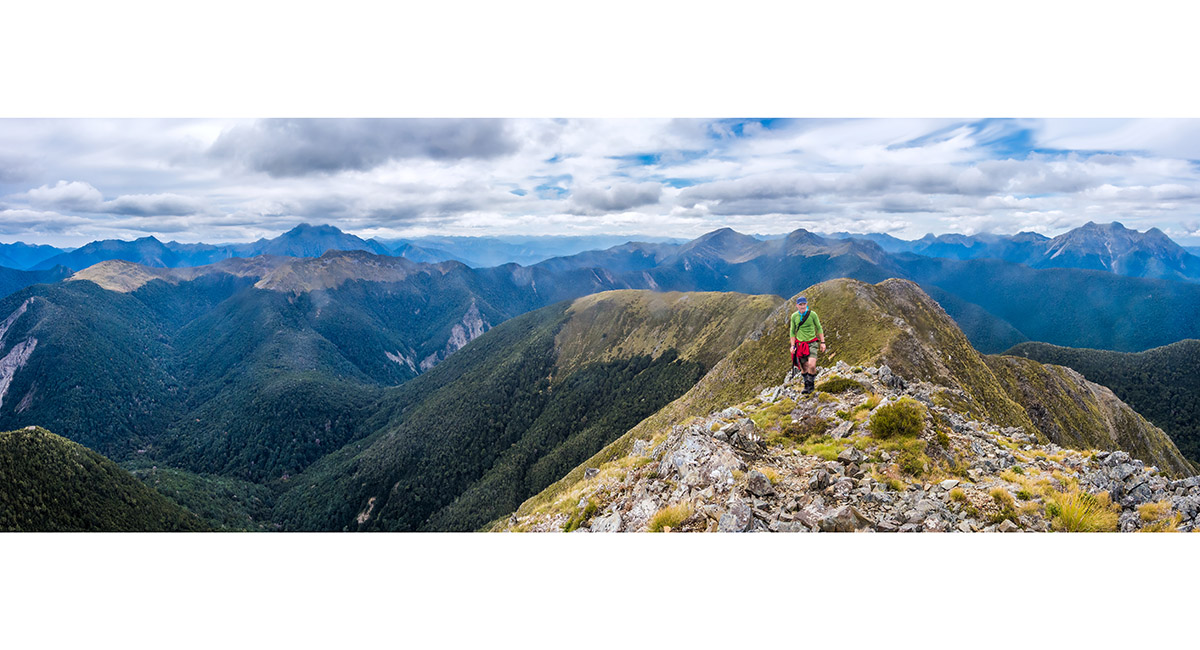
A local enjoys the morning sun at about 1,500m on the Arthur Range, north of Mt Patriarch

I got a bit too close for his comfort

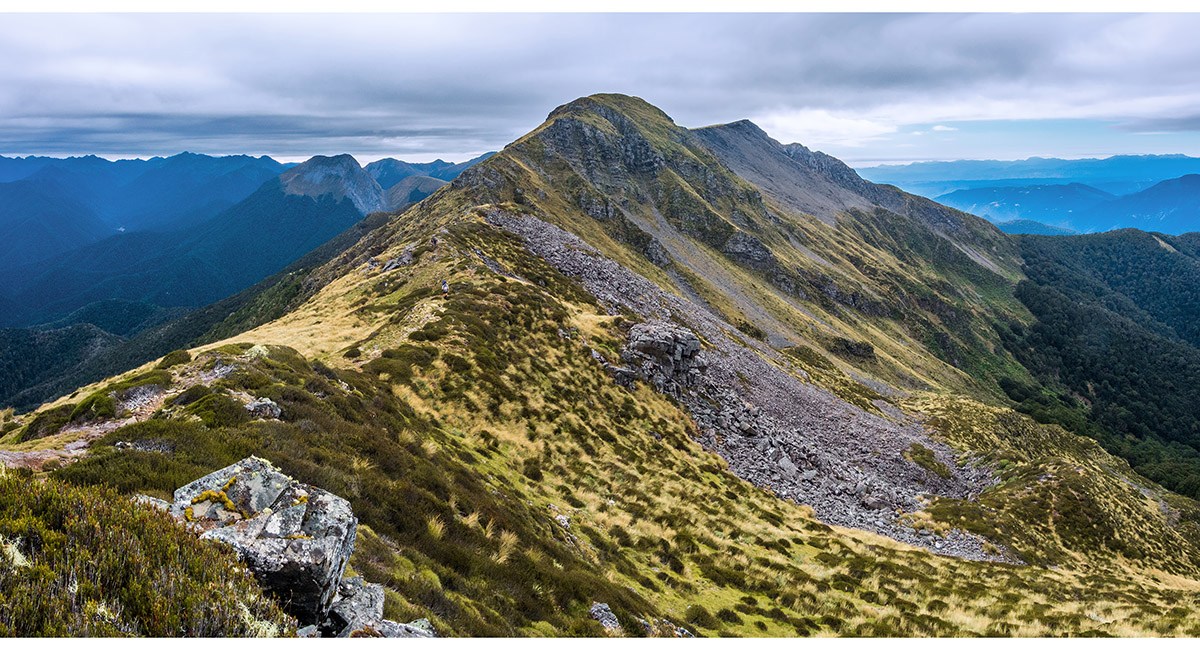
On the Arthur Range, looking to Mt Patriarch (1,701m right and 1,692m left). The third lower peak is the site of a trig at 1,600m

Looking back along the Arthur range to the northeast. Mt Baldy is left of centre

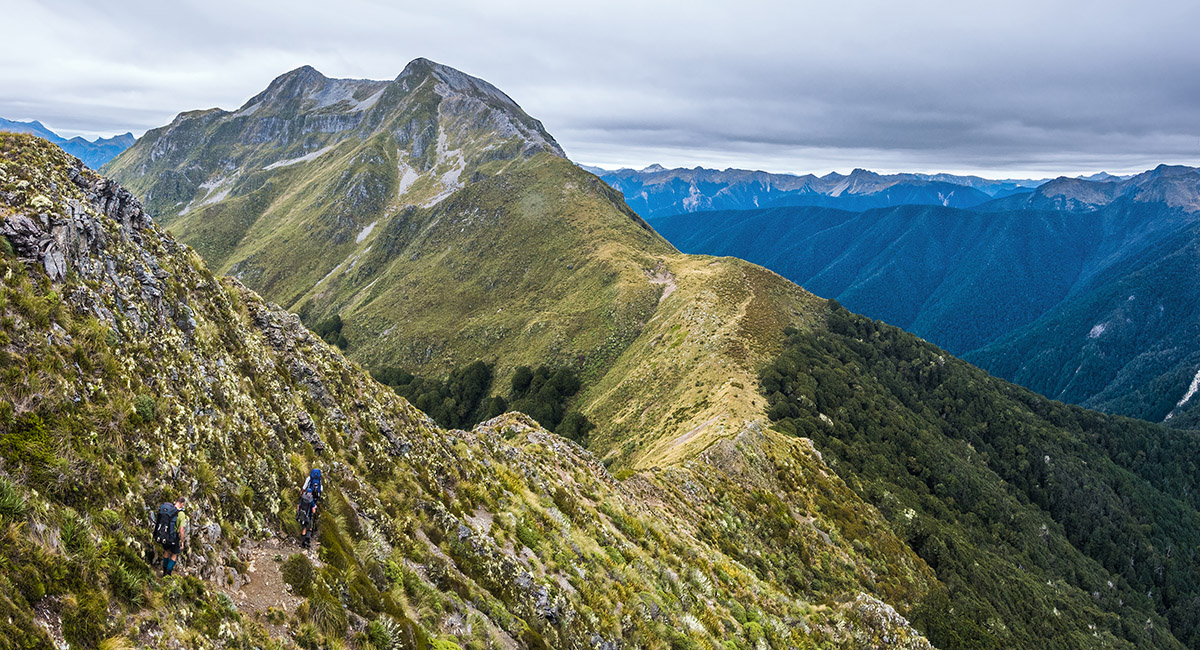
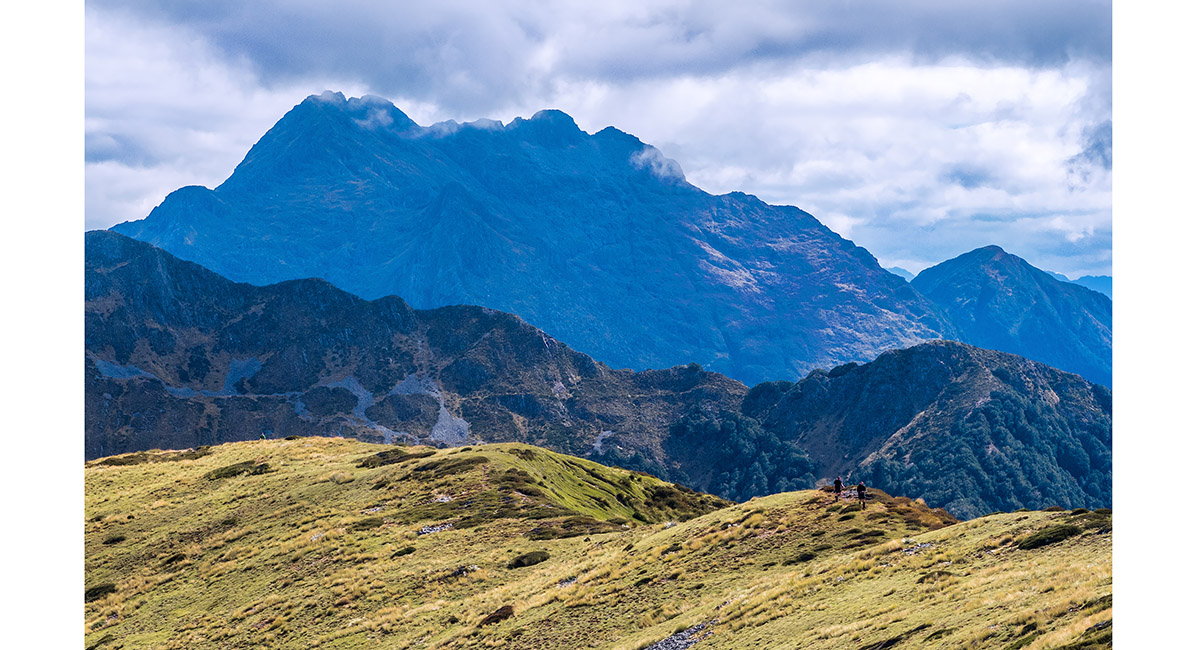
Approaching the saddle beneath Mt Patriarch. The route down below the bush line to Kiwi Saddle is right

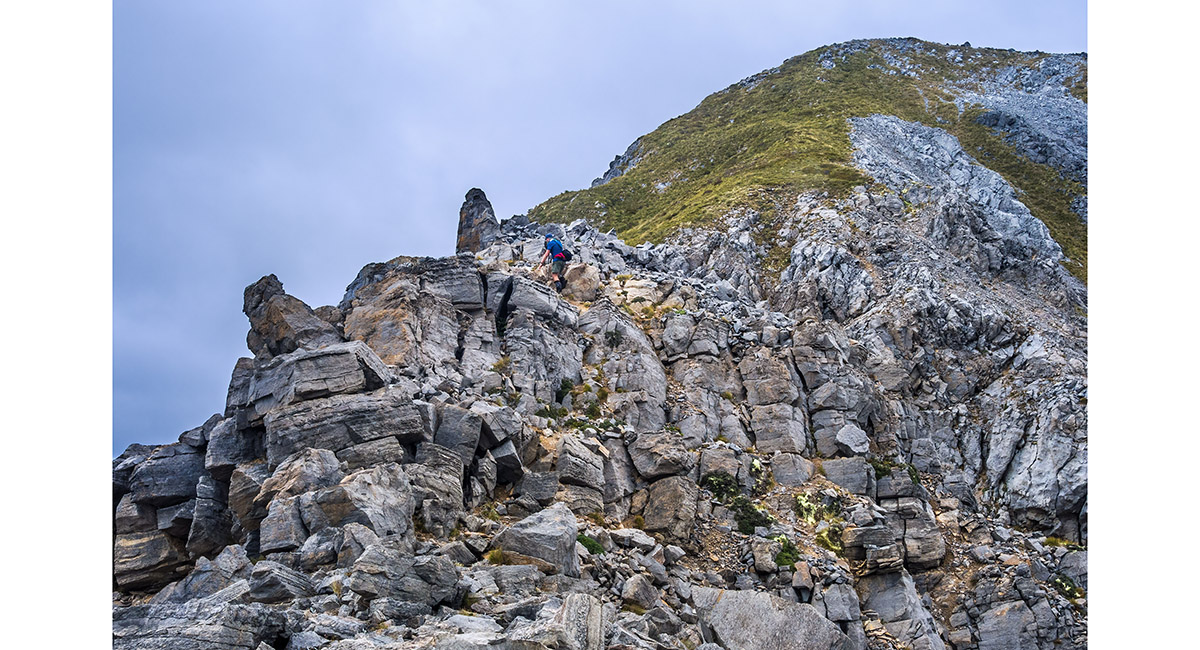
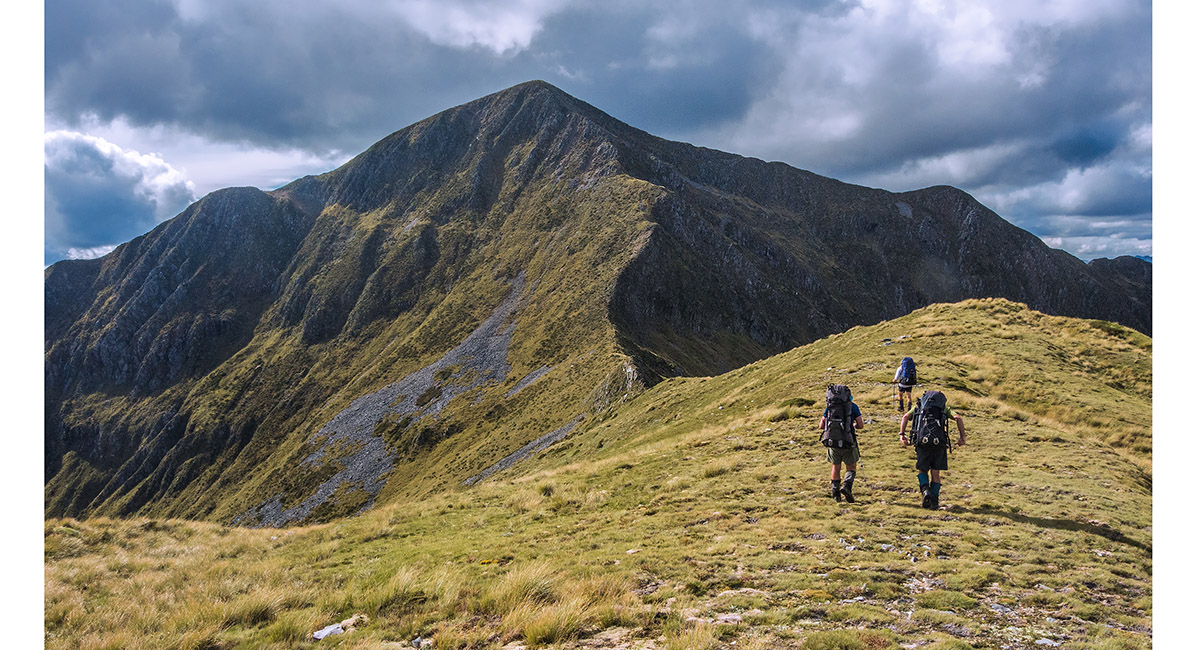
Ascending Mt Patriarch, here at about 1,600m


A view south from Mt Patriarch's 1,701m summit to its 1,692m summit (left) and the trig point beyond that

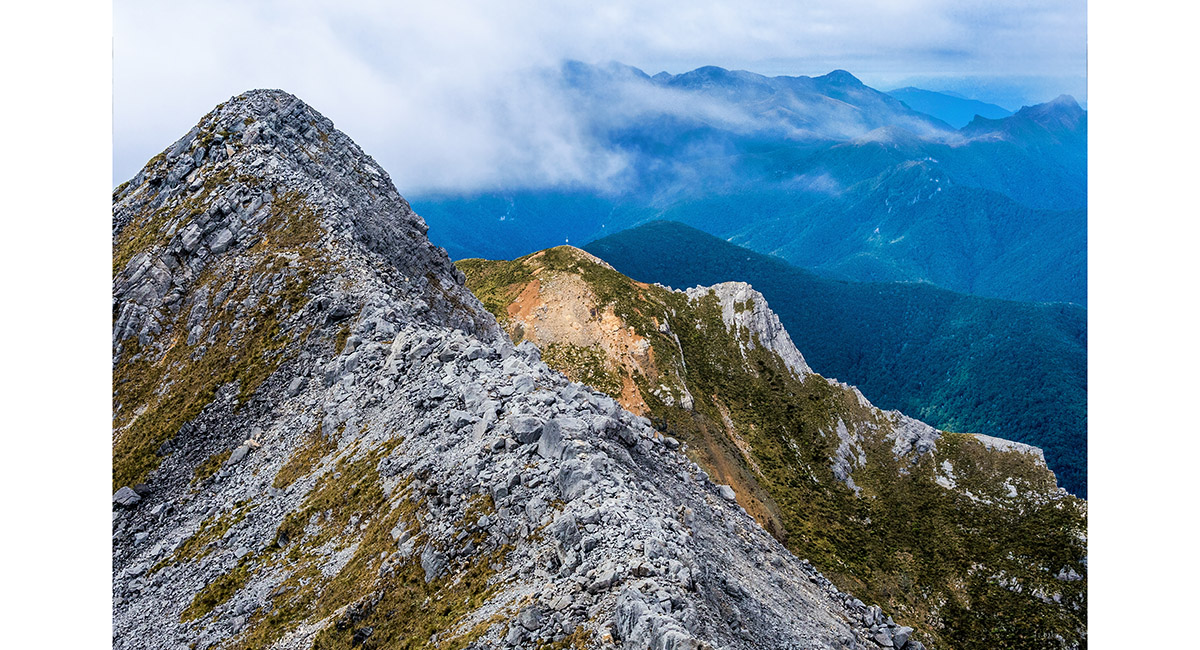
A view south from Mt Patriarch's 1,701m summit to its 1,692m summit (left) and the trig point beyond that


A summit view from Mt Patriarch. The ridge stretching right is the Arthur Range. The ridge leading left gives access to Kiwi Saddle and Luna Ridge

Descending Mt Patriarch, with the Arthur Range stretching right

Leaving the saddle at about 1,350m beneath Mt Patriarch, heading towards Kiwi Saddle. Mt Luna (1,630m) is left of centre on the skyline

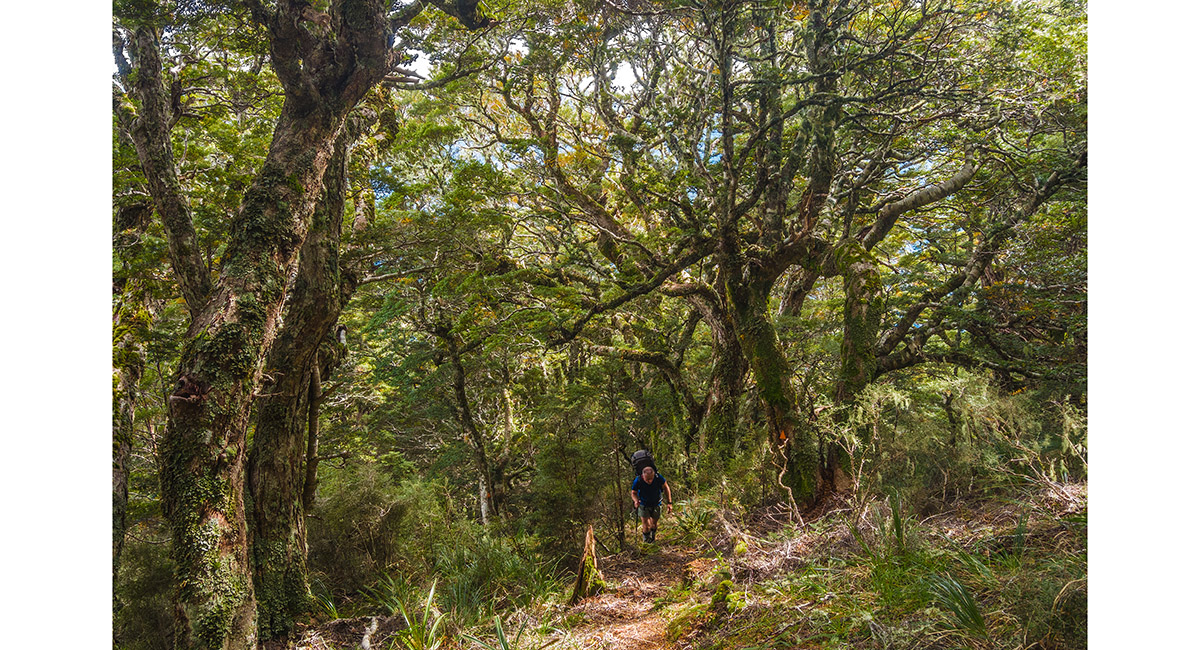
In the bush at about 1,150m, above Kiwi Saddle

Another inquisitive local checks me out

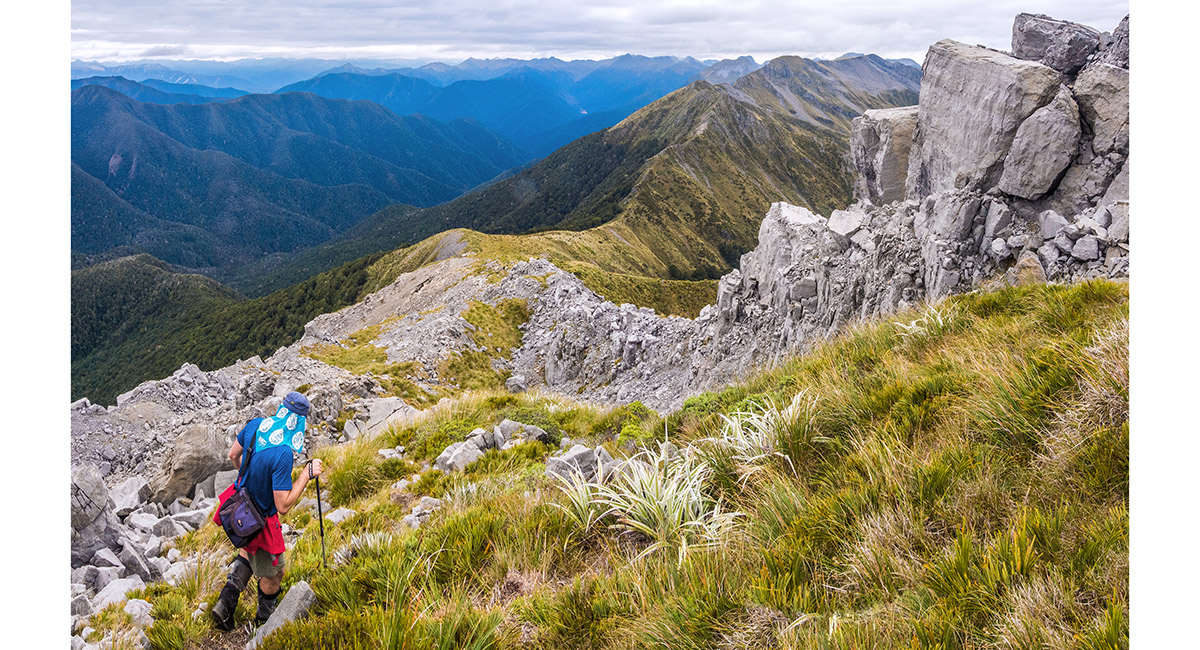
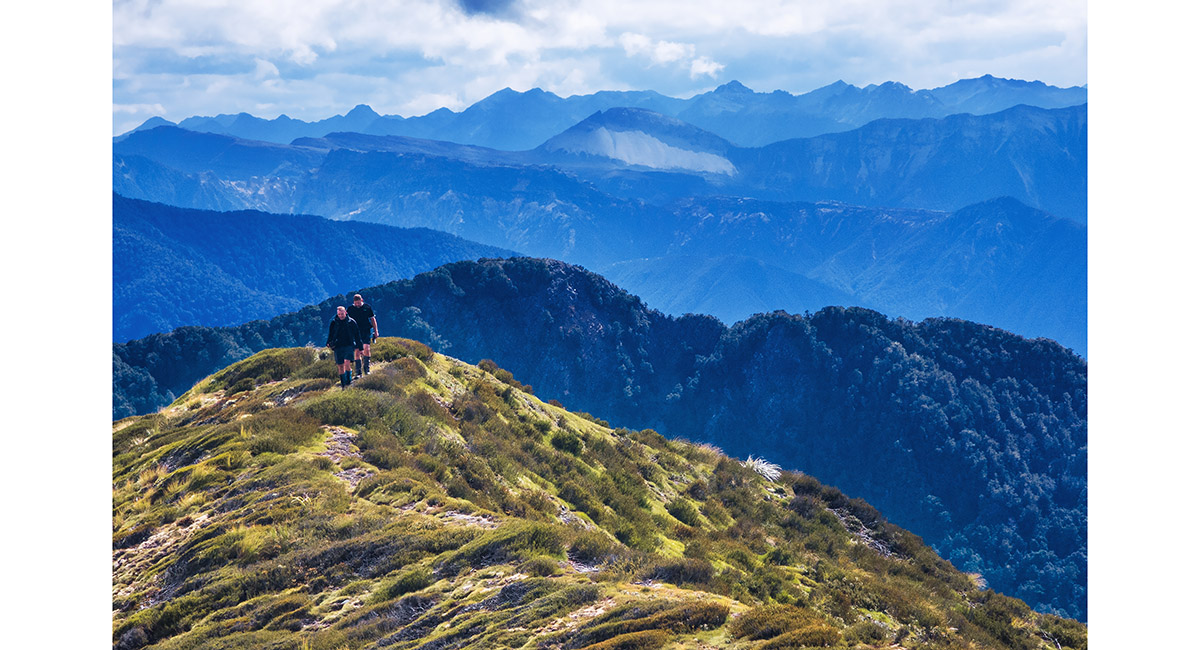
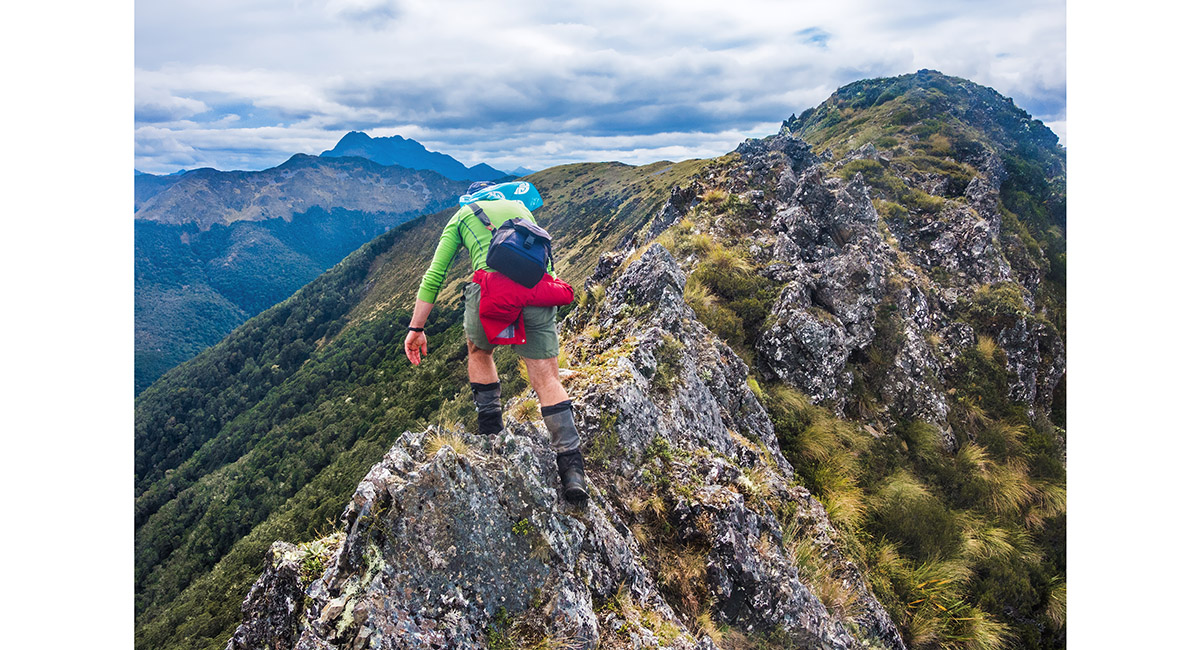
Breaching the tree line to the west of Kiwi Saddle, with Mt Patriarch left

Breaching the tree line to the west of Kiwi Saddle, with Mt Patriarch right and the Arthur Range, stretching left as far as Mt Baldy

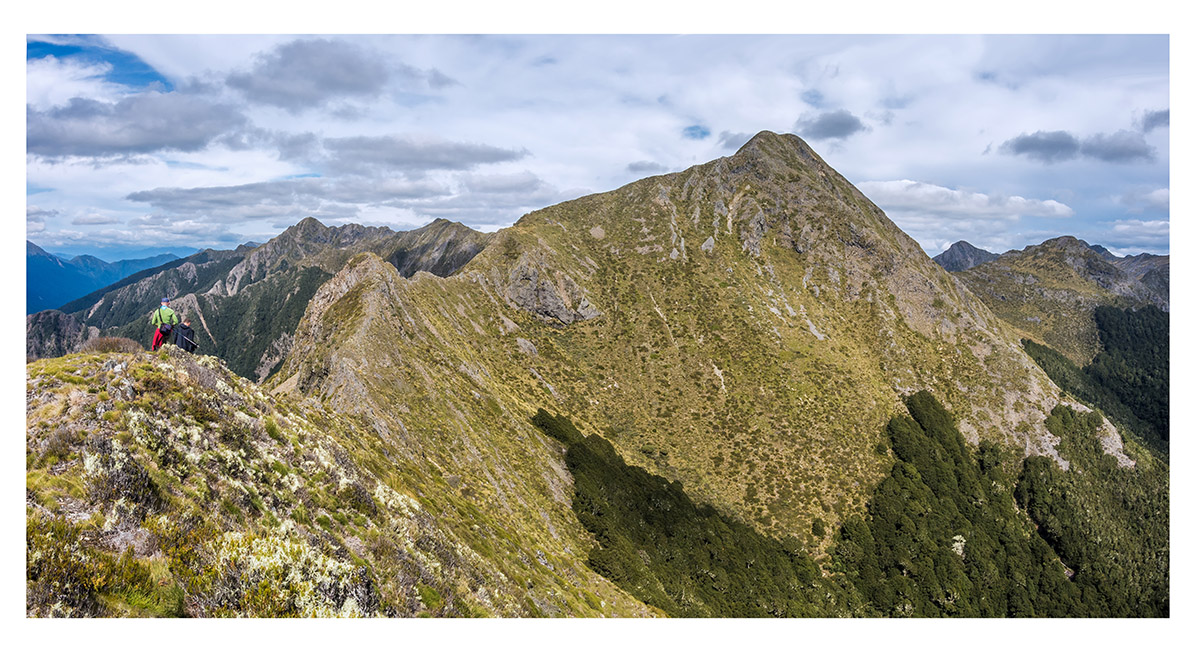
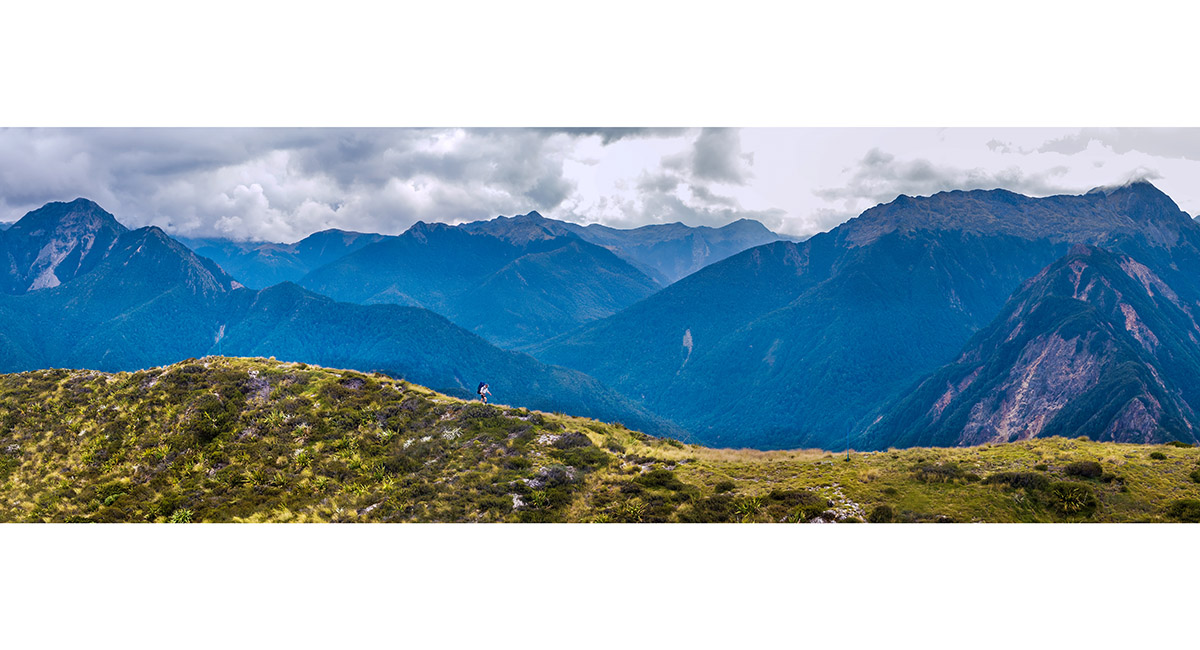
Looking west to a steep section of ridge leading to a point at about 1,500m. From there we sidled right, beneath the 1,578m peak at centre, to the 1,400m saddle beneath Mt Luna (1,630m - far right)


Ascending the steep section to 1,500m

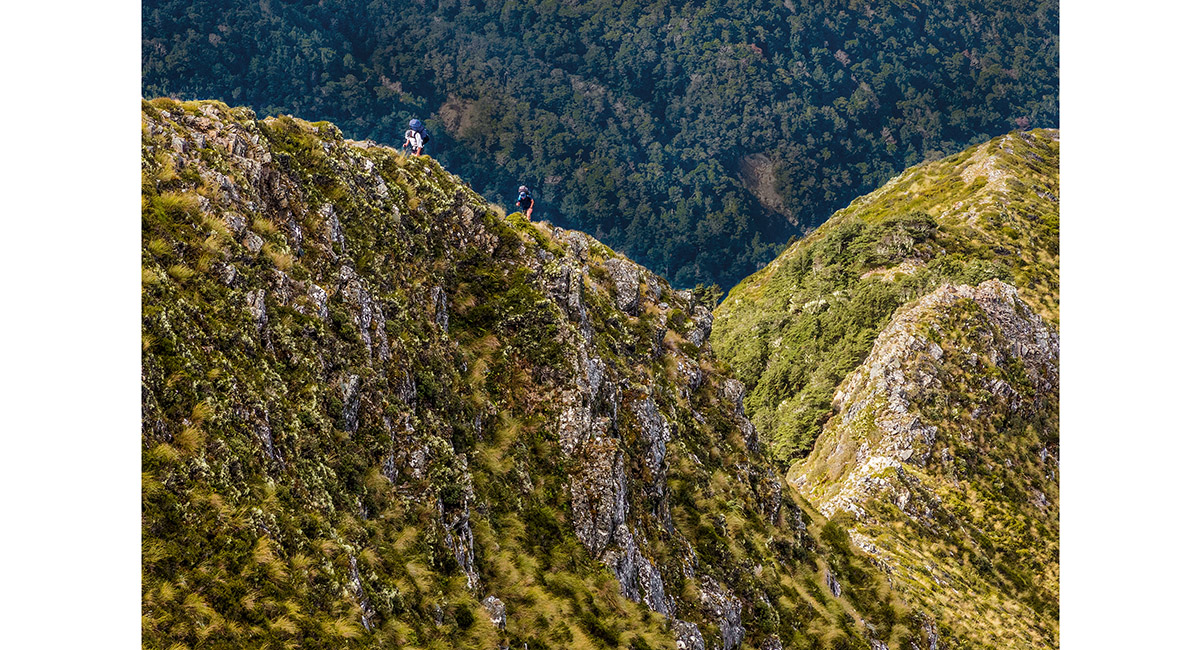
Ascending the steep section to 1,500m


Ascending the steep section to 1,500m. The Arthur Range spans the skyline, with Mt Baldy centre

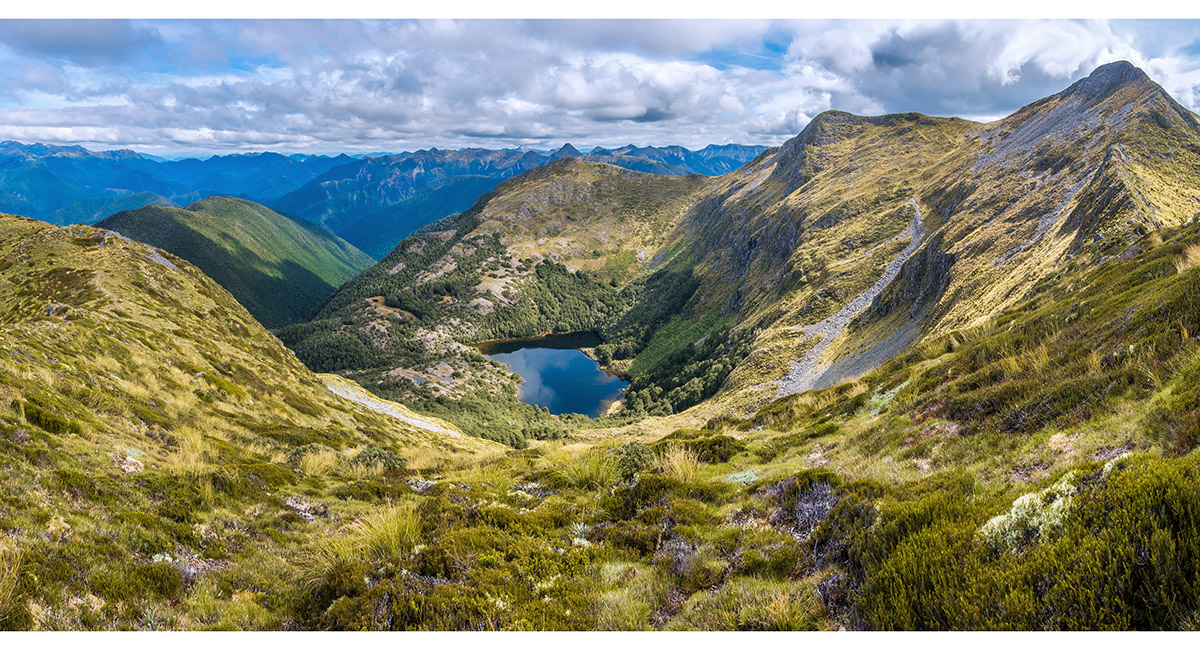
Looking south west to Luna Lake (1,220m)

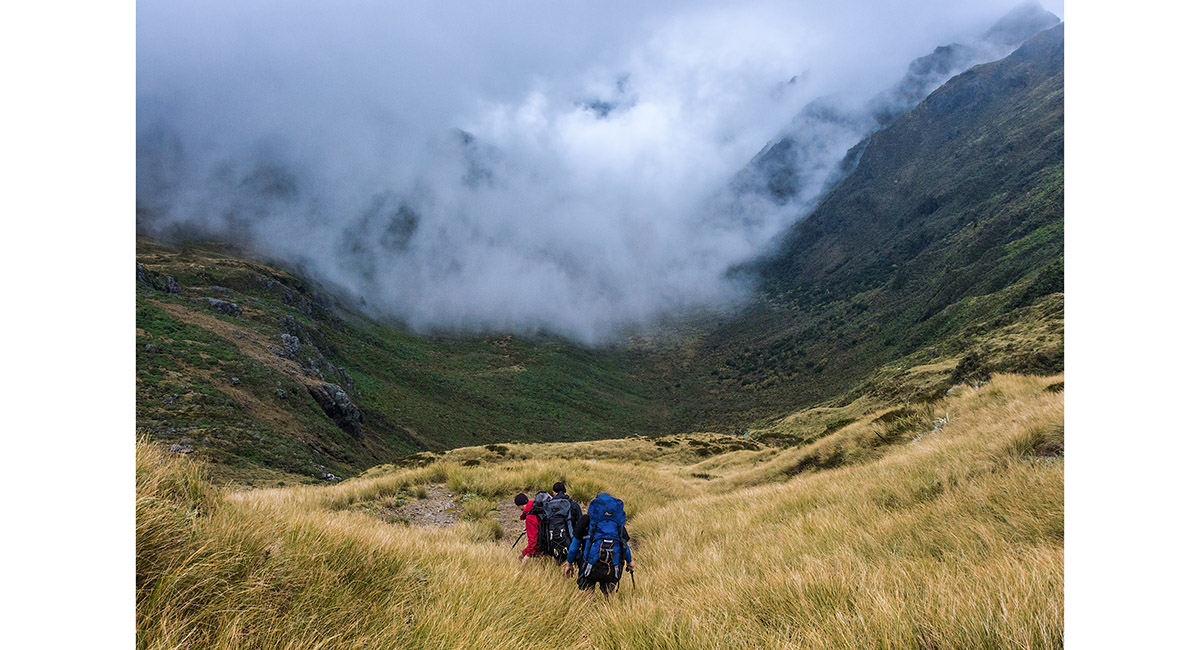
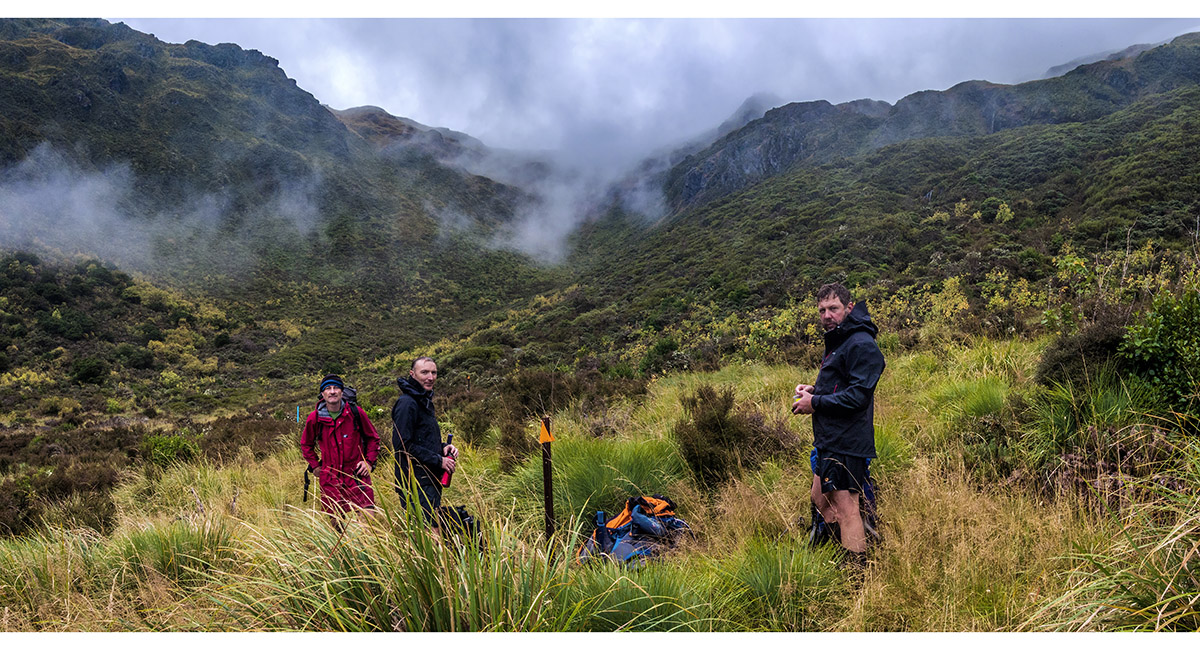
Approaching the 1,400m saddle beneath Mt Luna. From here we descended left into the Stone Creek valley

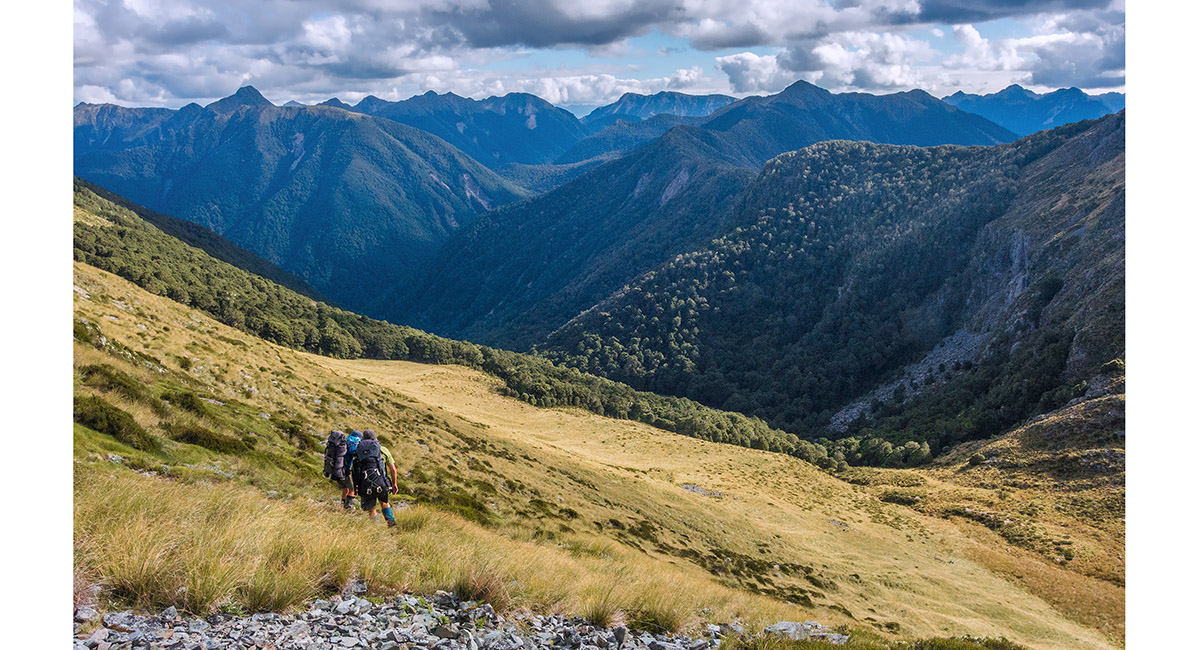
Descending southwest to the head of Stone Creek

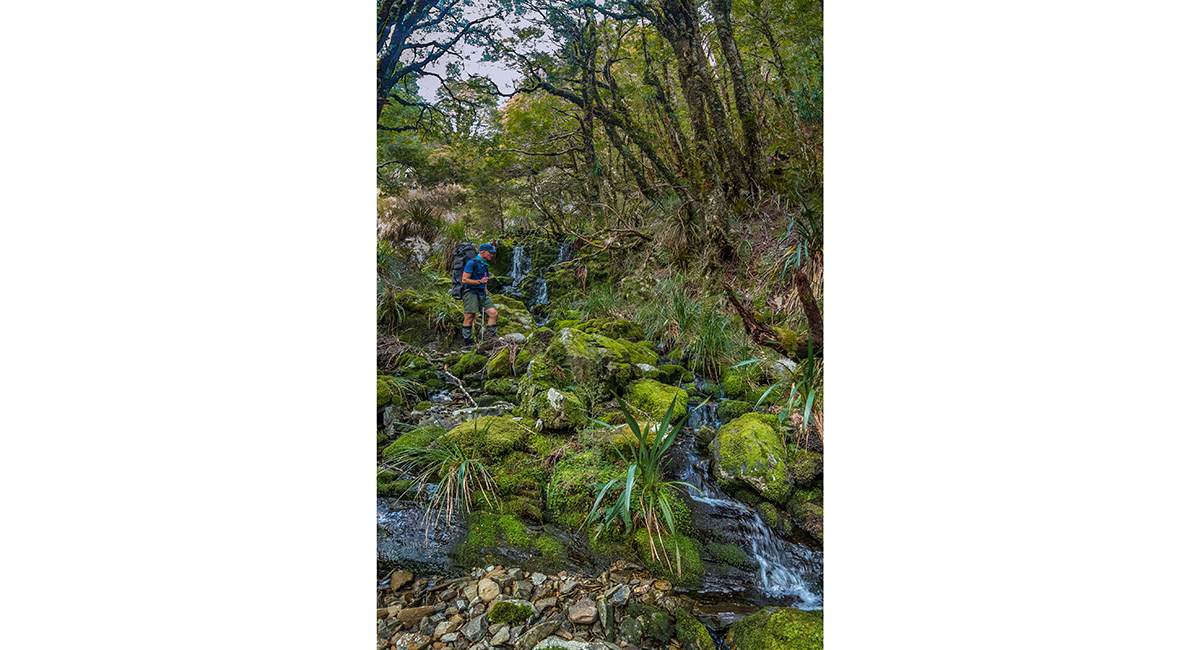
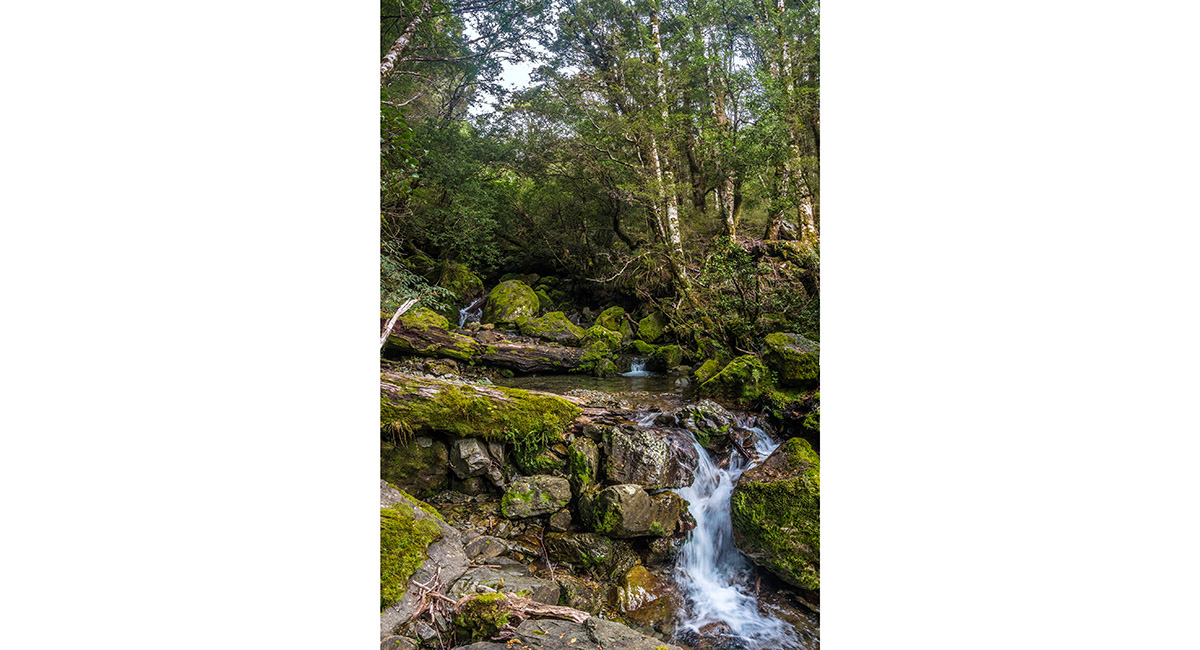
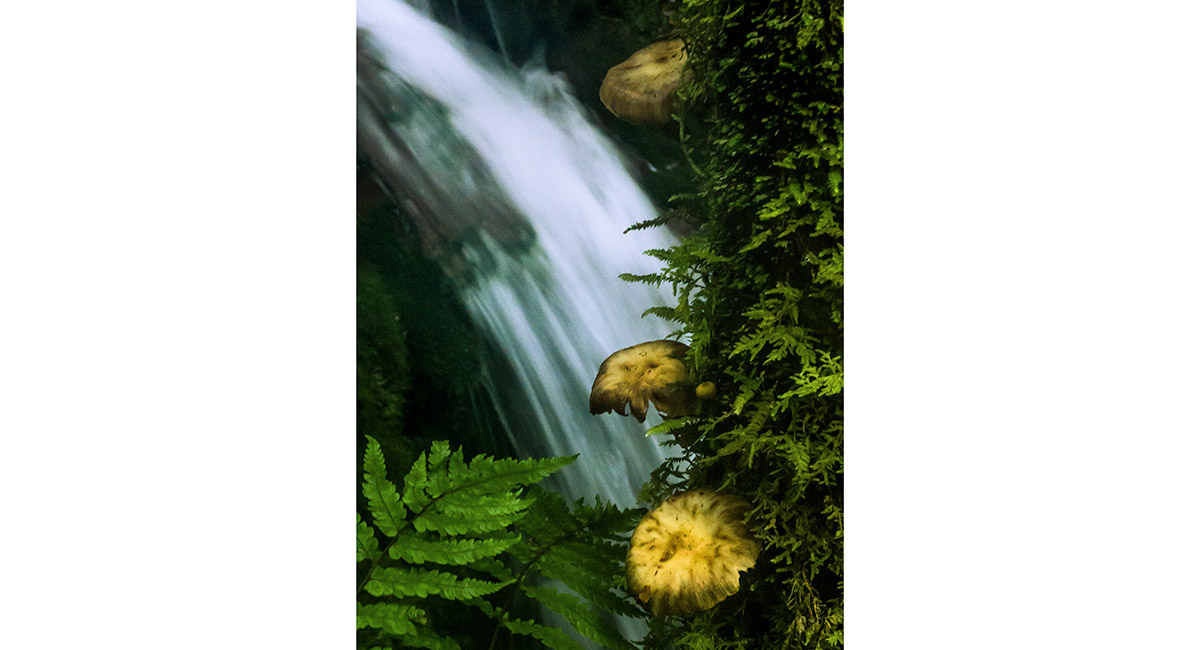
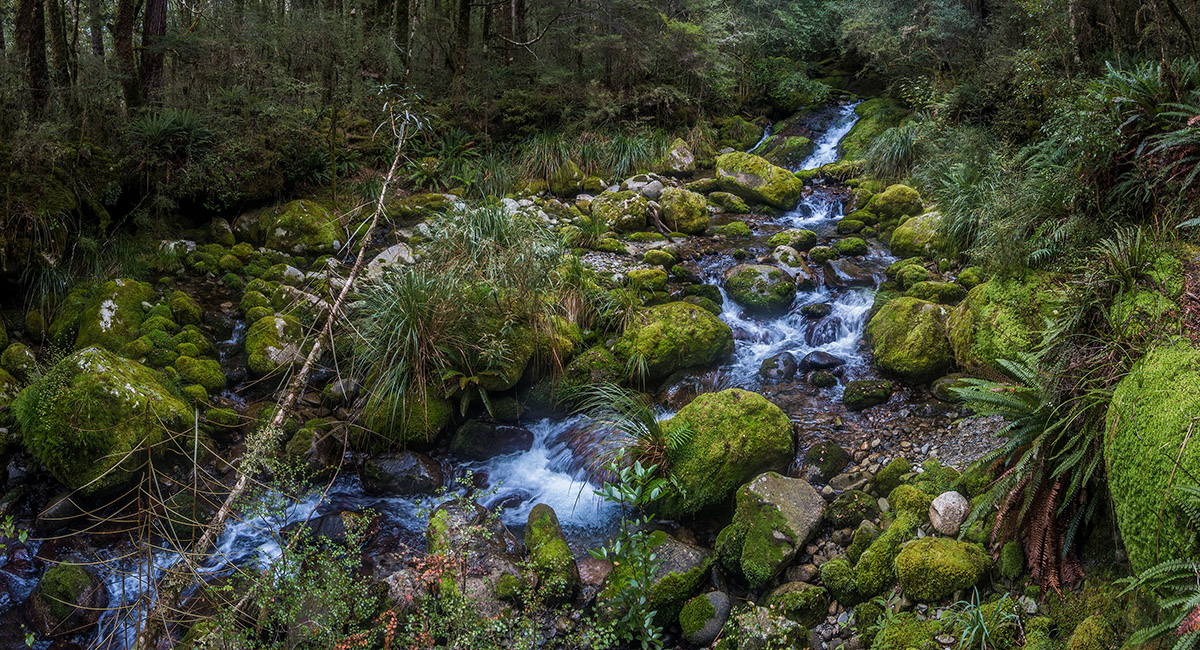
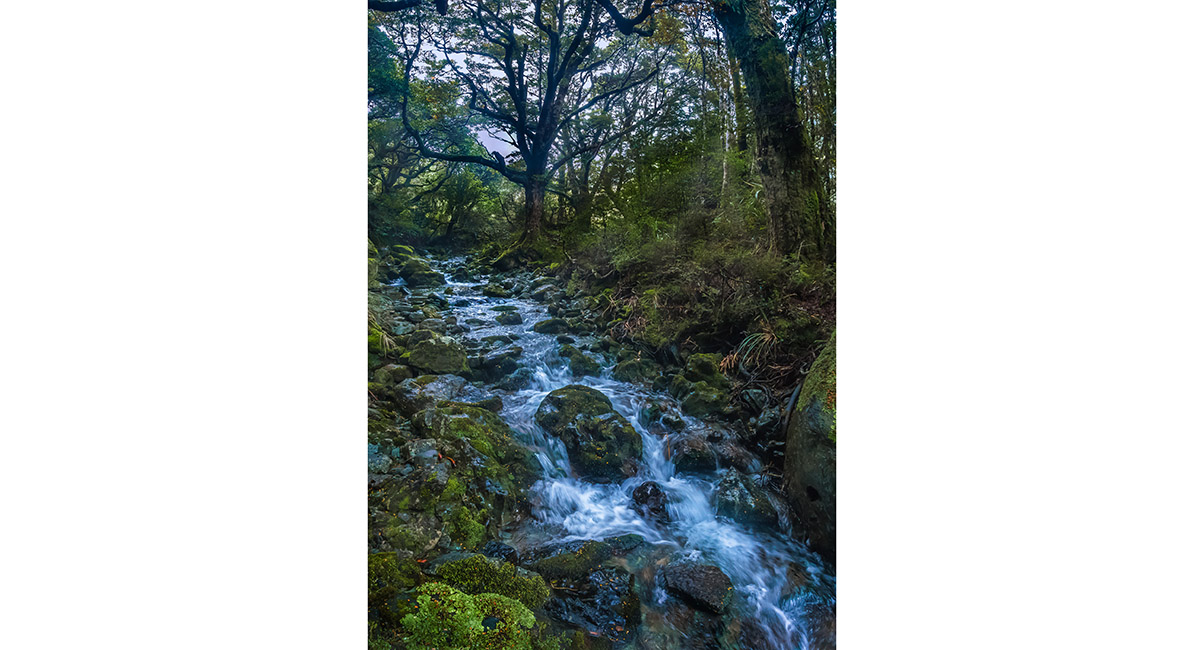
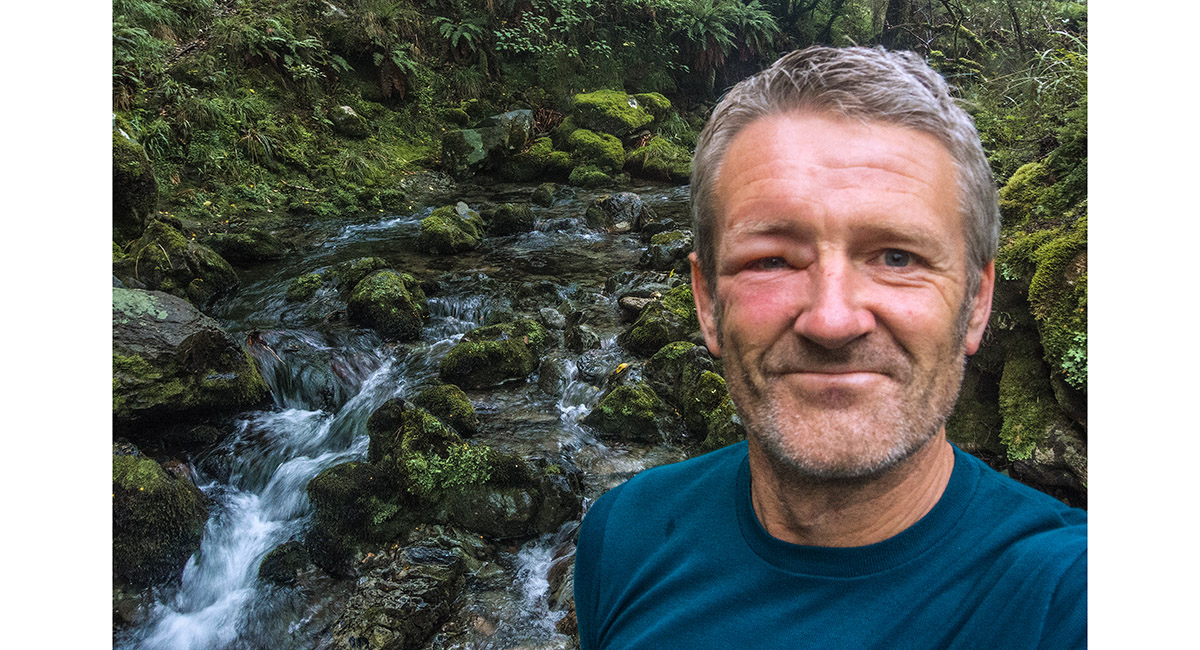
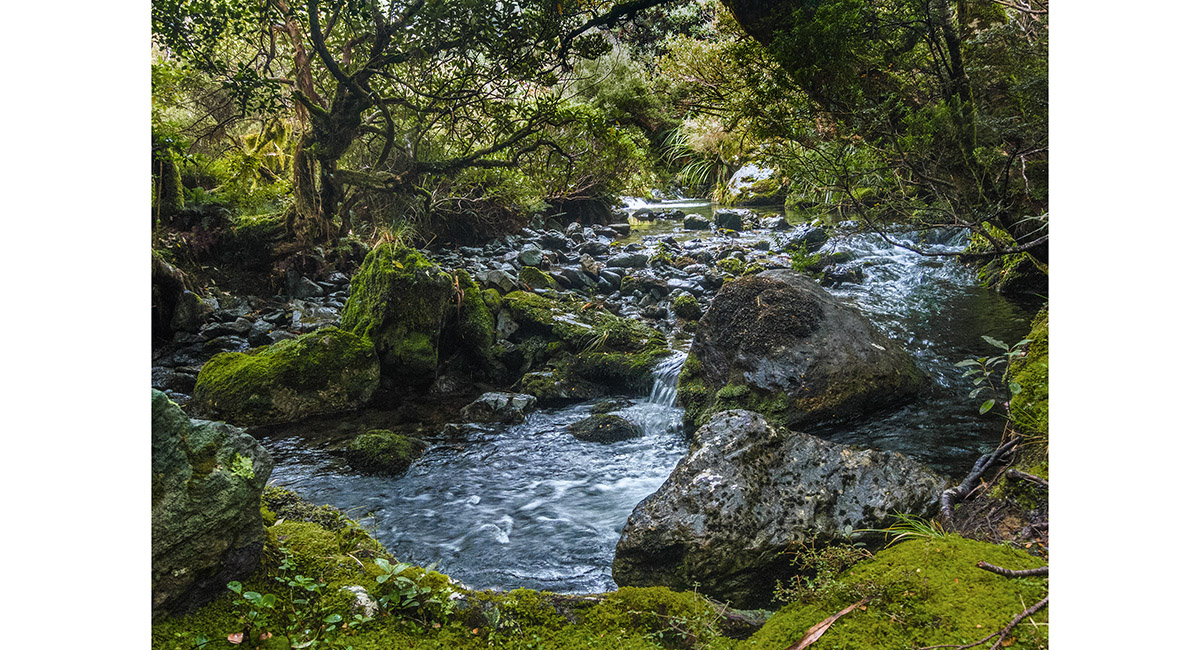
One of many beautiful waterfalls beneath the tree line along Stone Creek

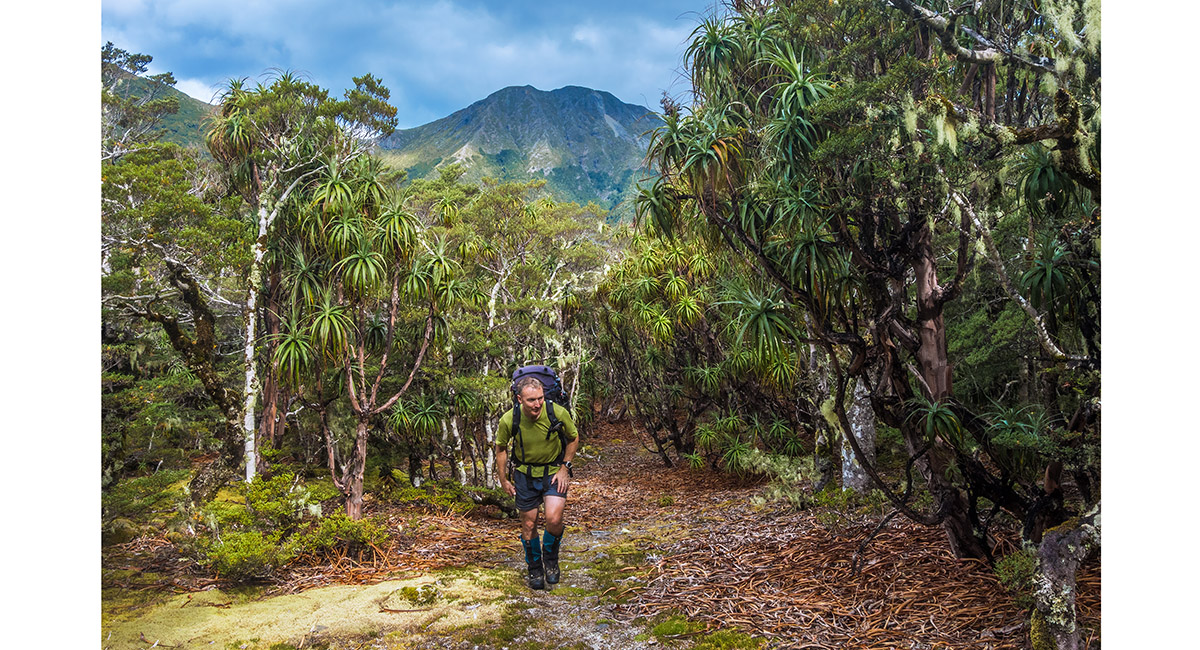
Heading into the bush, with Mt Luna behind

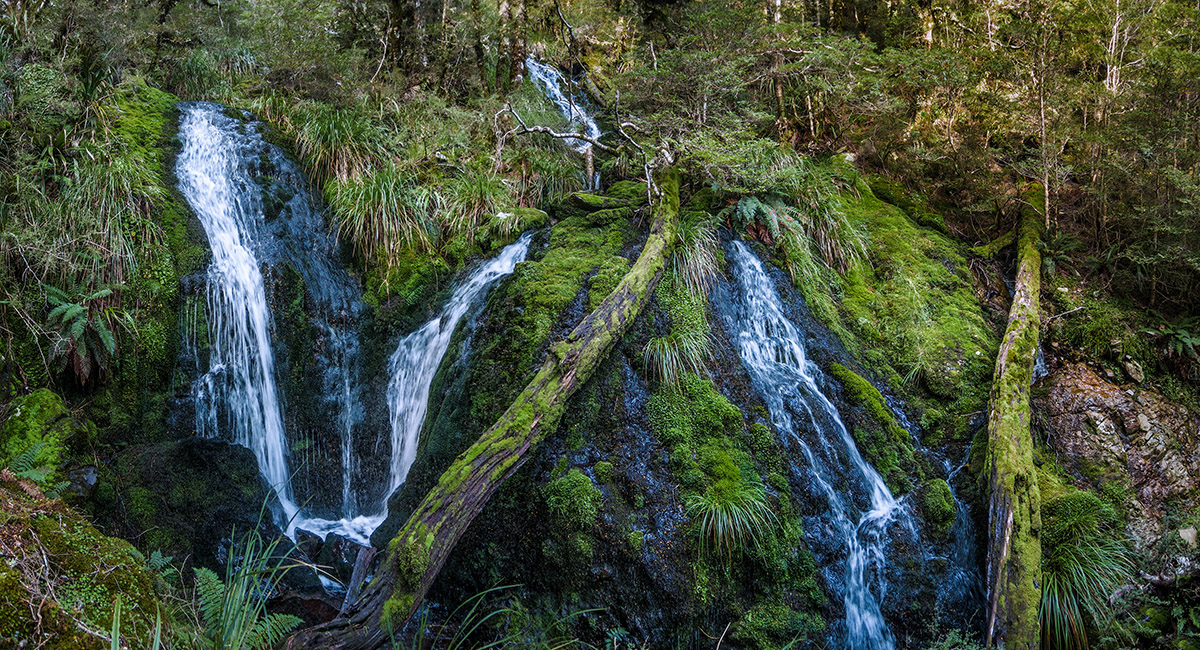
One of many beautiful waterfalls beneath the tree line along Stone Creek

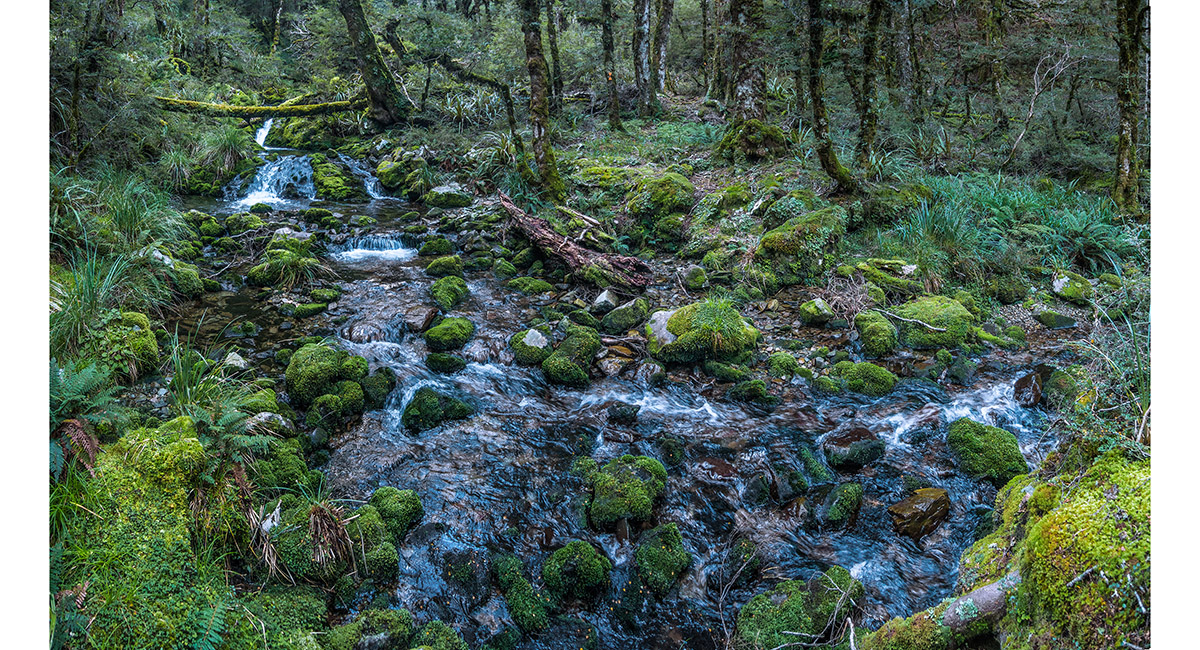
A section of Stone Creek at about 1,000m


A log bridge spanning Stone Creek

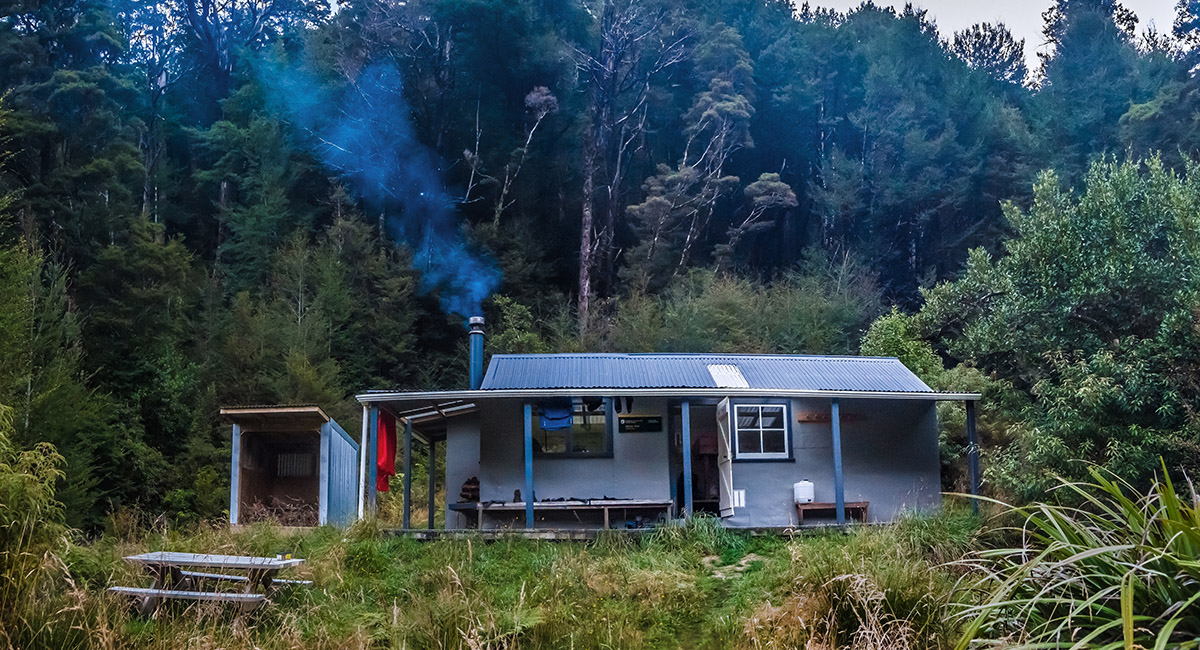
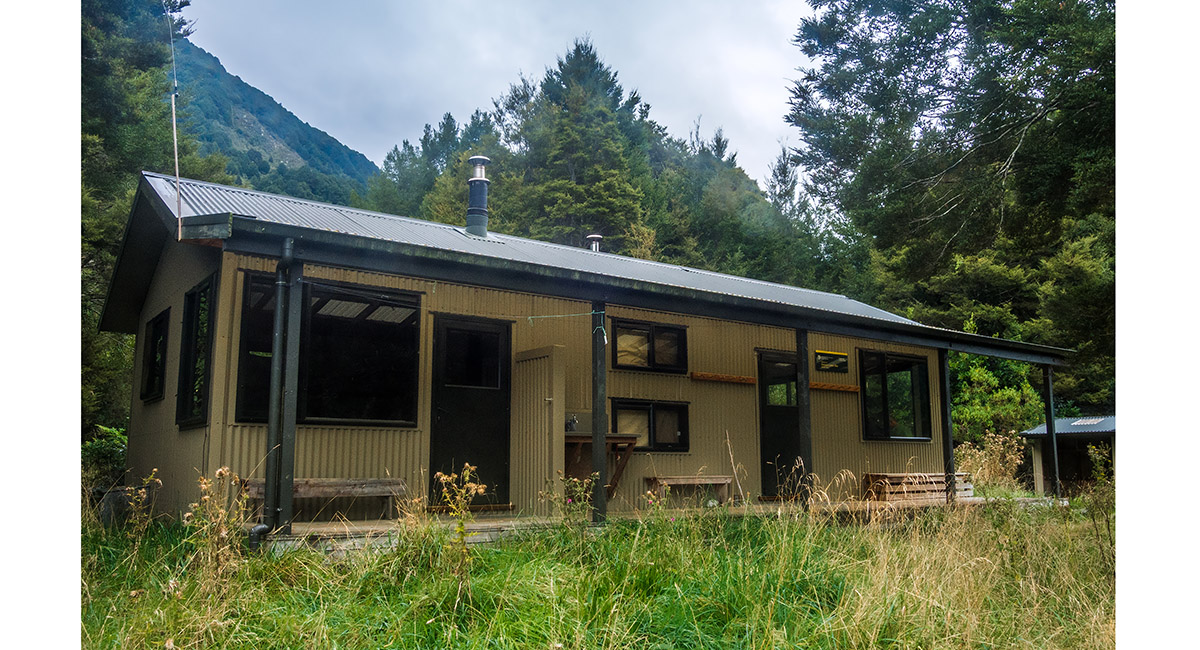
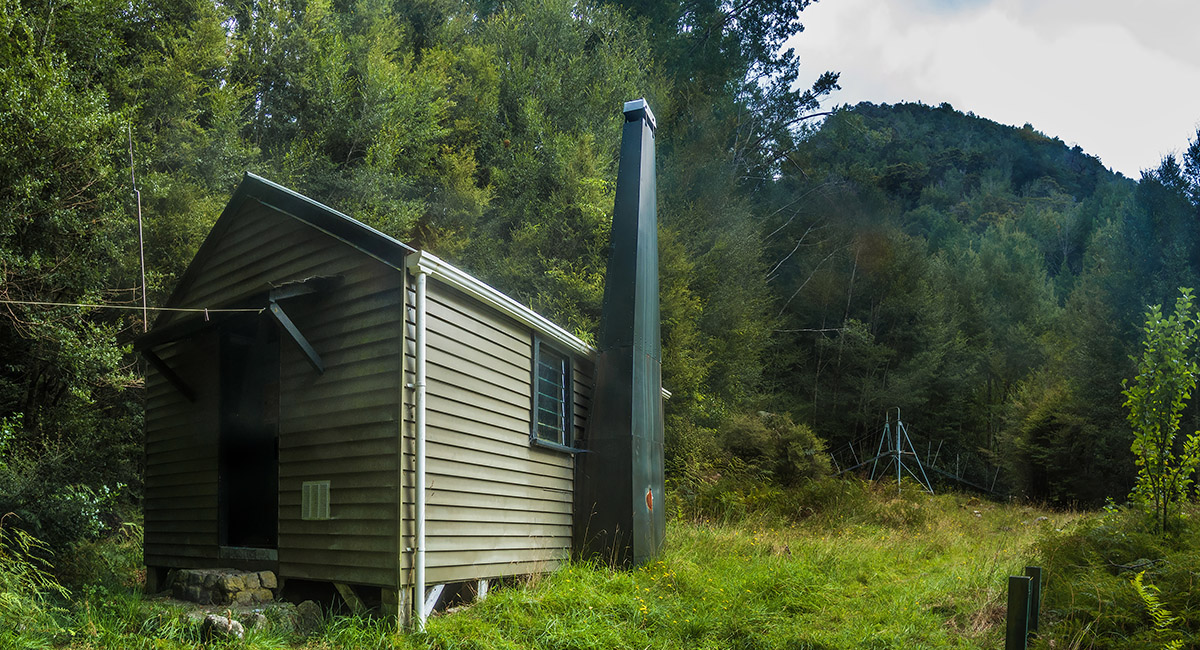
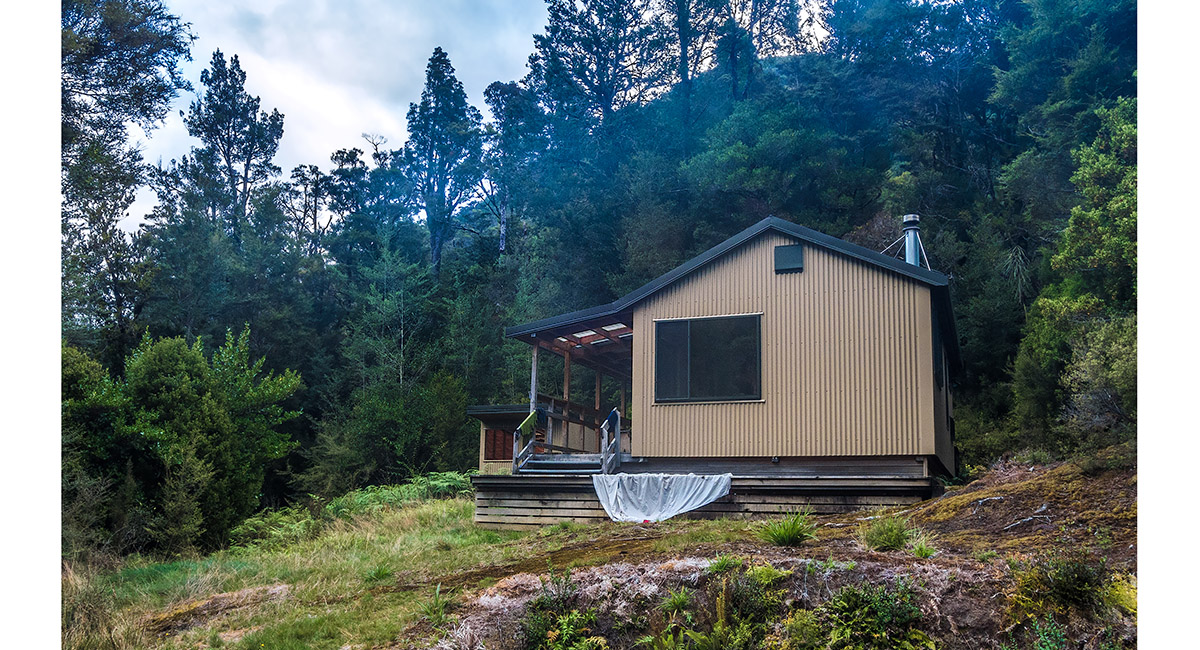
Stone Hut (640m)

Stone Hut (640m)

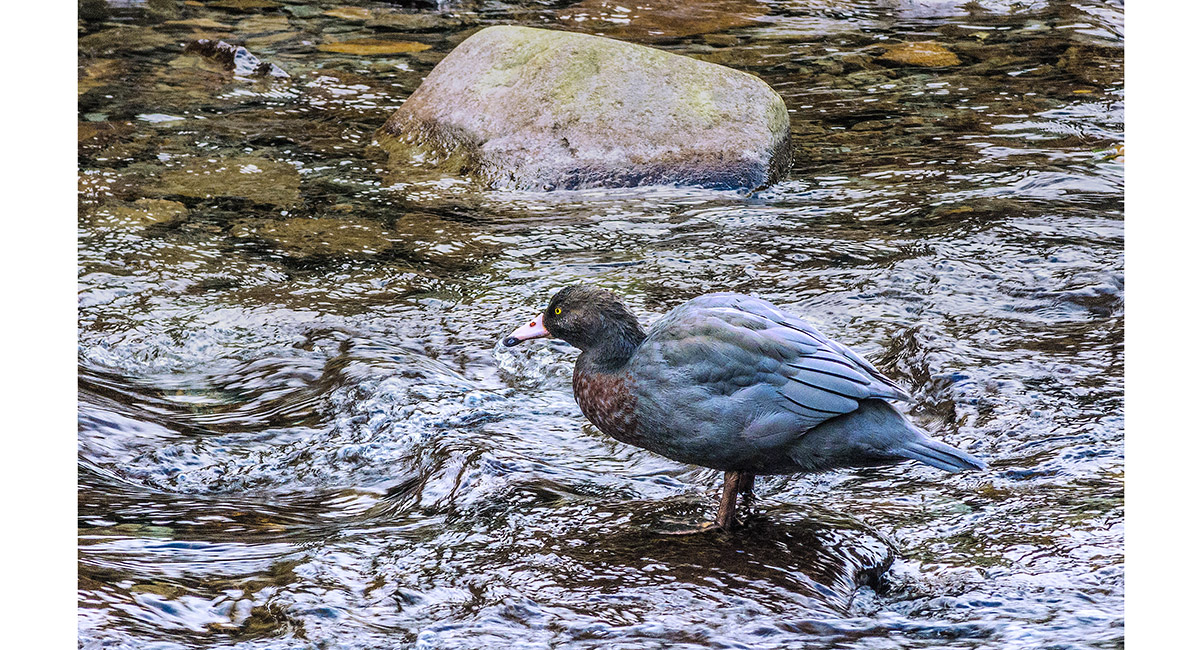
A Blue Duck, one of a pair living at the junction of Stone Creek and the Wangapeka River, near Stone Hut

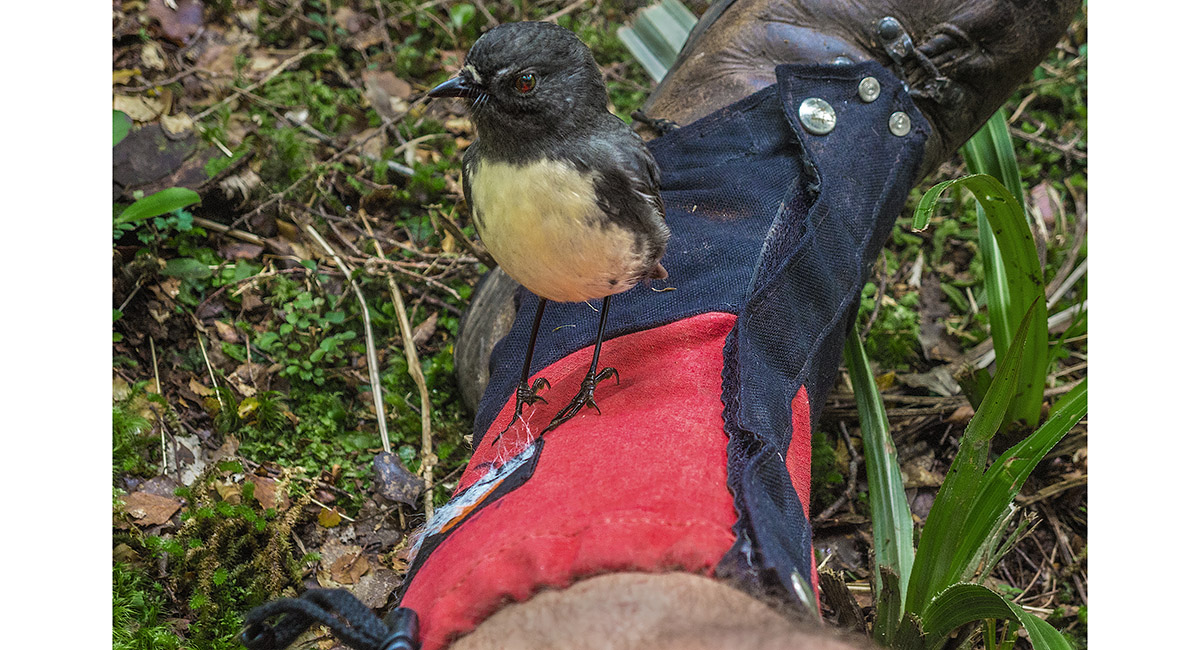
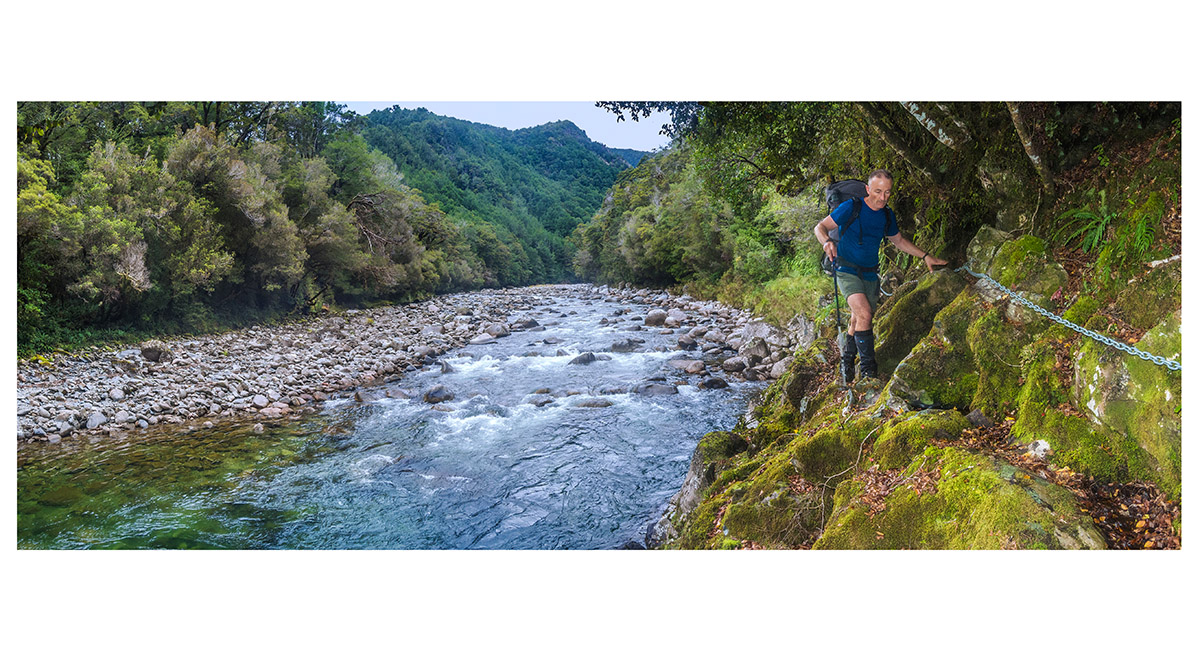
An extra close encounter on the trail between Stone Hut and Wangapeka Saddle

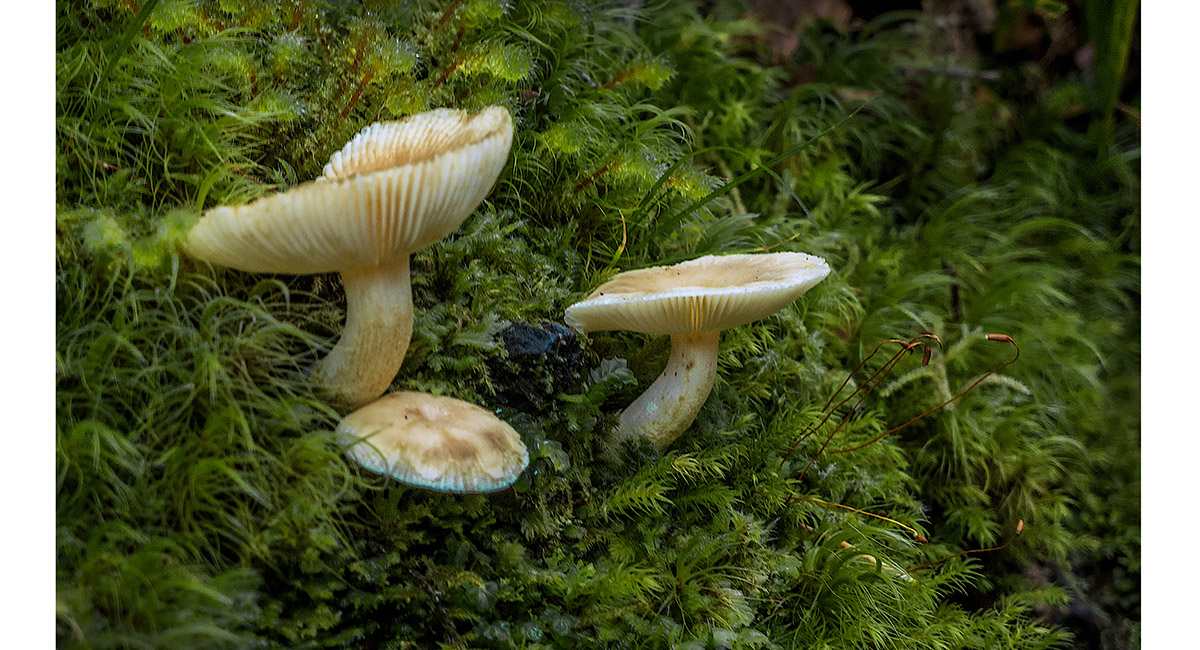
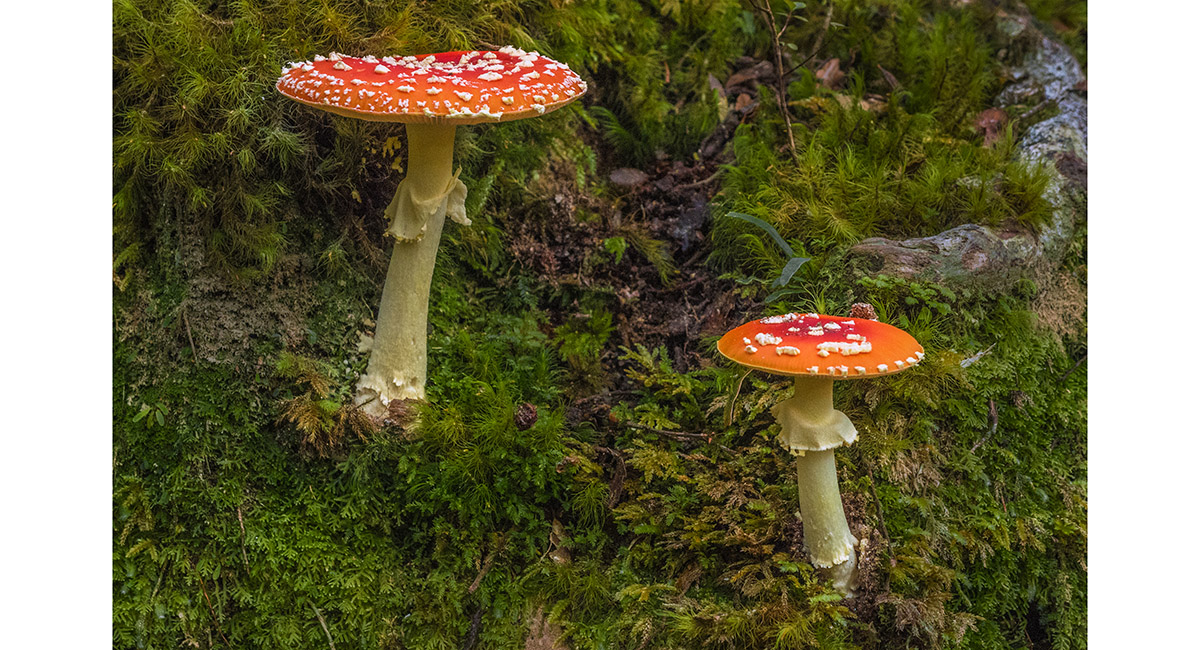
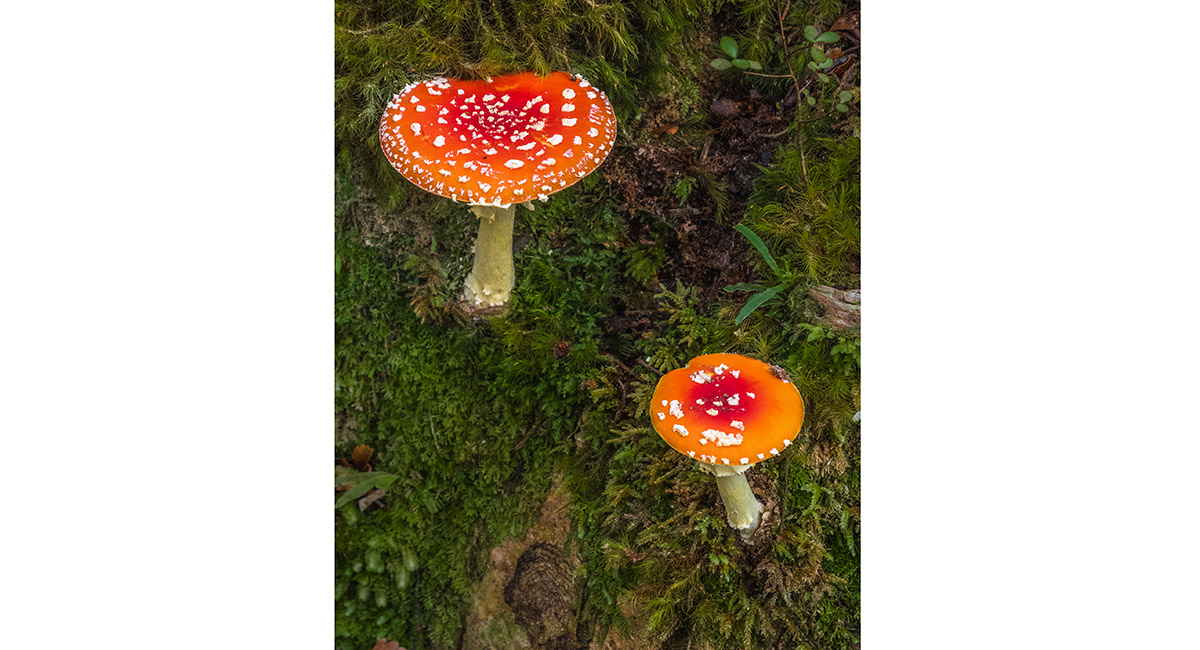
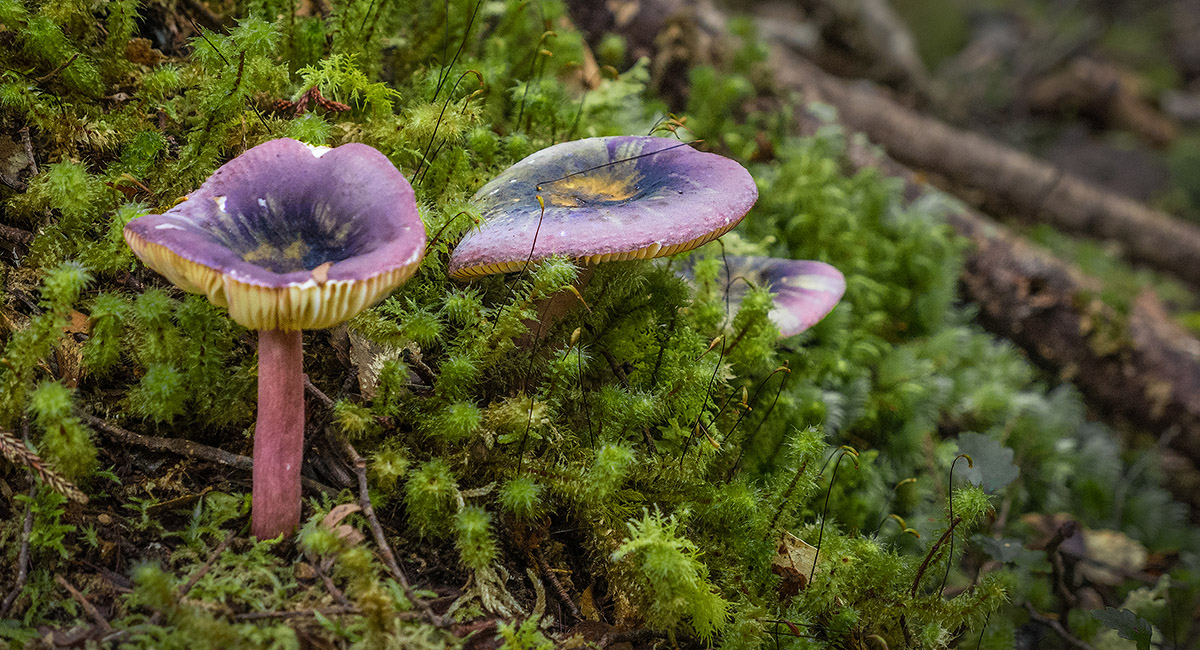
Fungi beside the trail between Stone Hut and Wangapeka Saddle

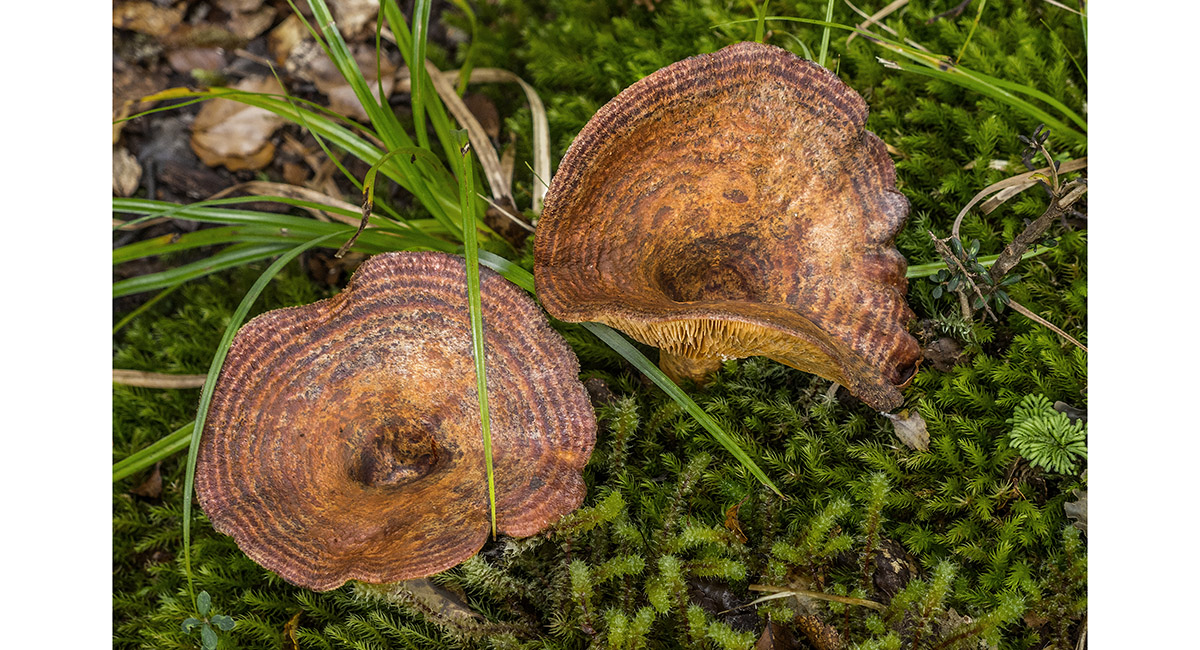
Fungi beside the trail between Stone Hut and Wangapeka Saddle

A waterfall on the Wangapeka River, between Stone Hut and Wangapeka Saddle

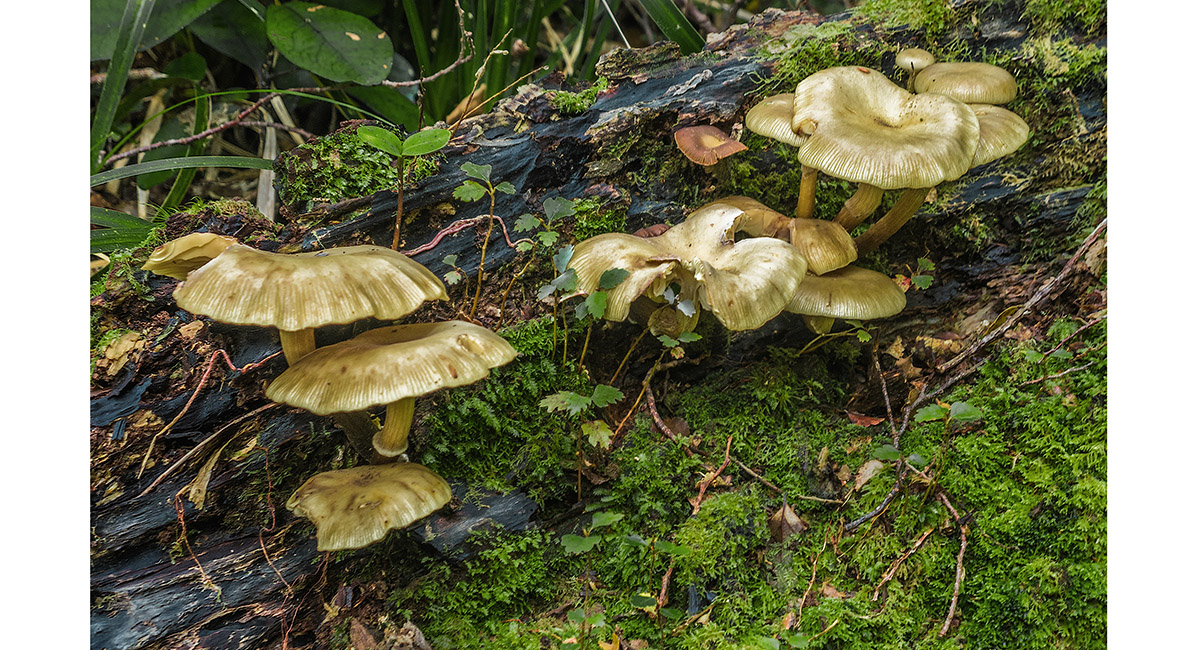
Fungi beside the trail between Stone Hut and Wangapeka Saddle

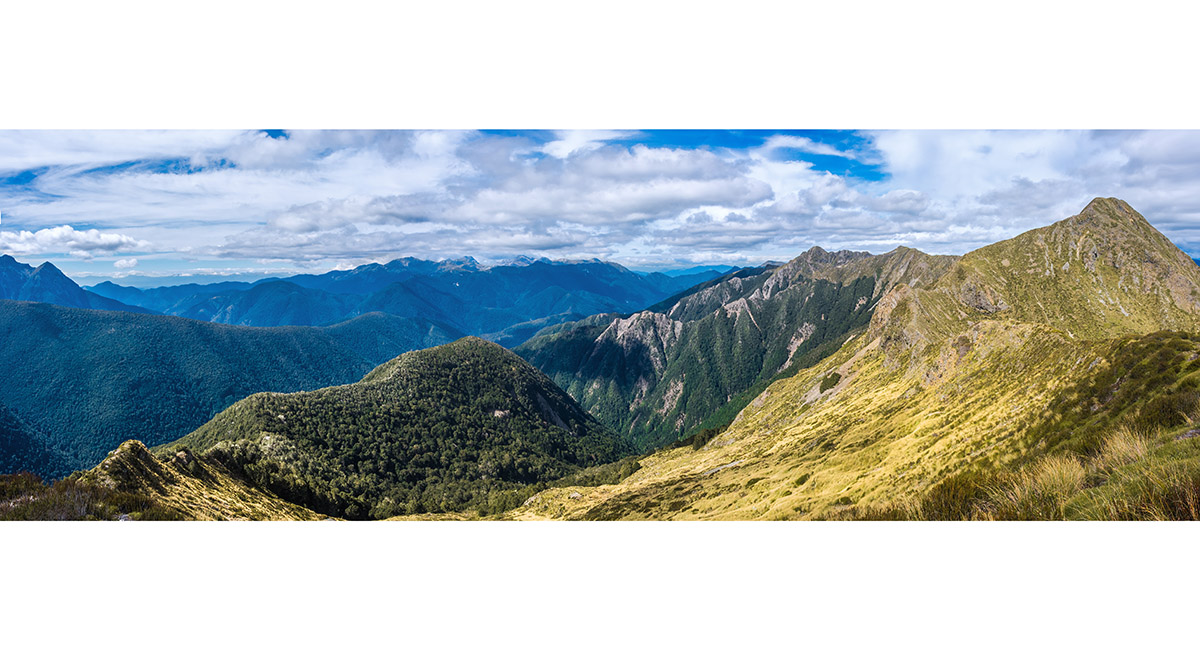
A view south to Mt Owen, from 1,400m on the ridge above Wangapeka Saddle, leading to Nugget Knob (1,502m - far right)

A view south to Mt Owen (1,875m right) and Mt Bell (1,857m - centre), from 1,400m on the ridge above Wangapeka Saddle, leading to Nugget Knob (1,502m)

Looking north, back along the ridge to Mt Kendall (1,762m)

Looking northeast, back along the ridge

Approaching the narrower section of ridge beneath Nugget Knob

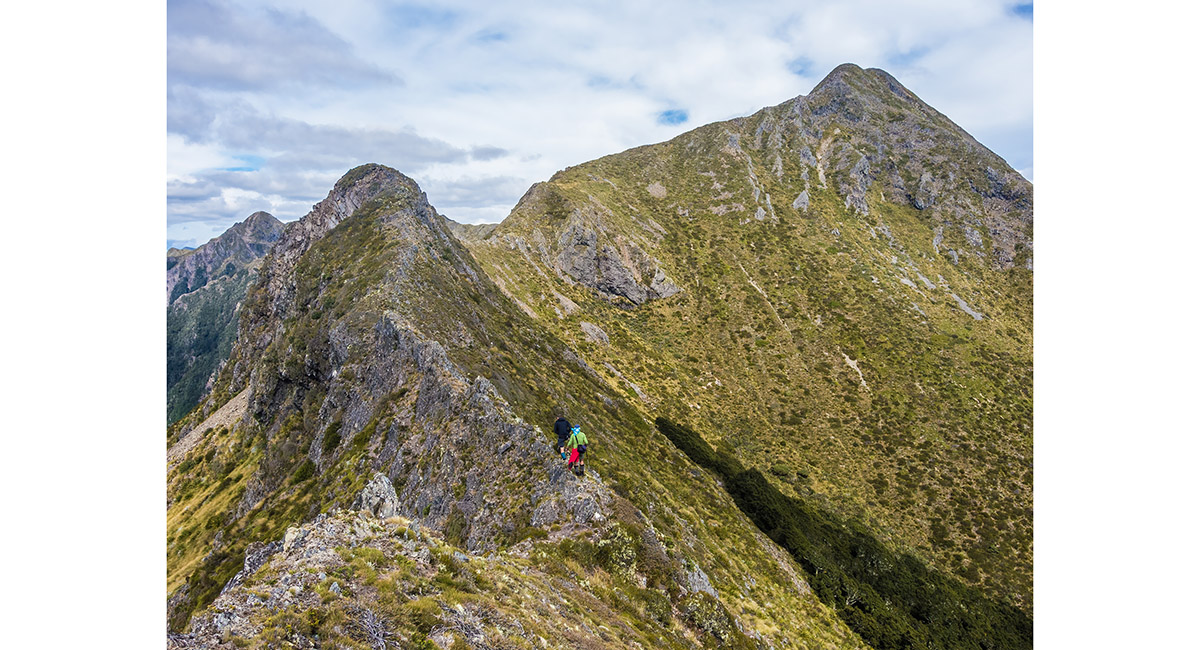
Approaching the narrower section of ridge beneath Nugget Knob

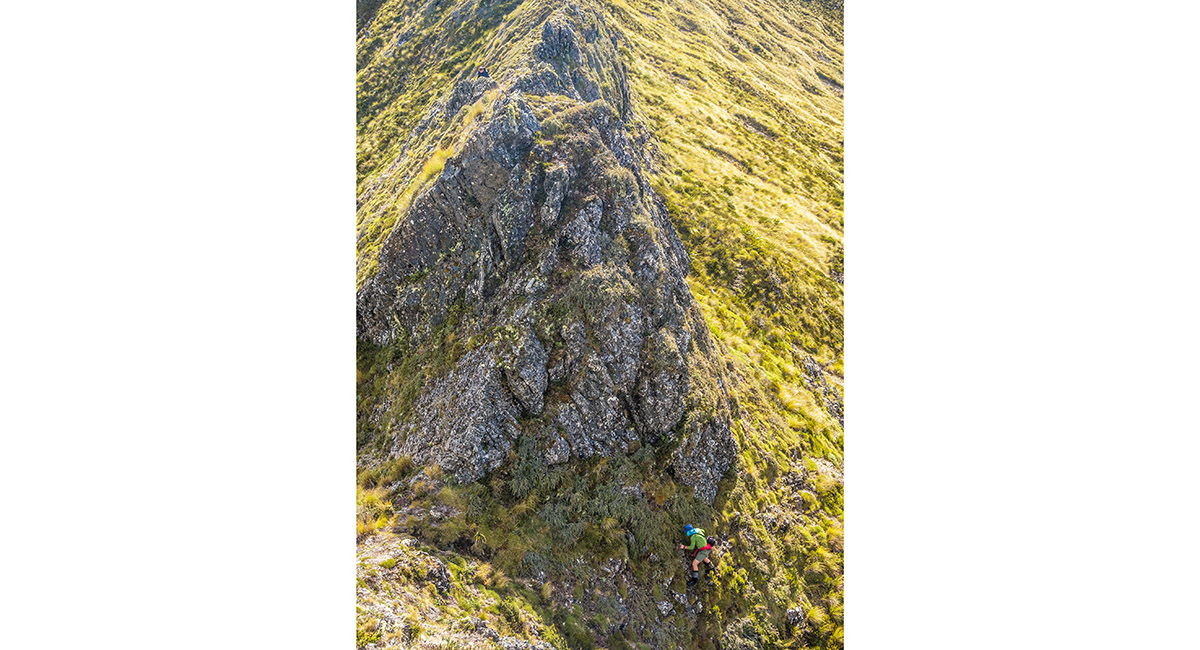
A little crux section on the ridge. The steep ridge descent is actually straight forward once you know it

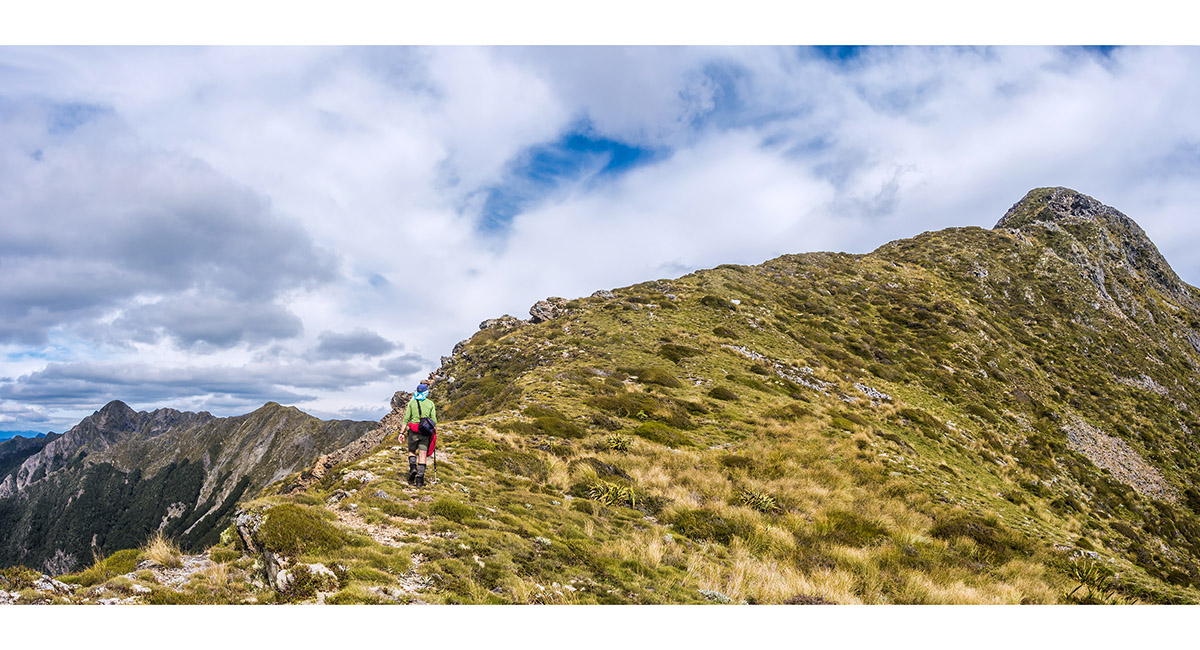
At about 1,450m on Nugget Knob

Looking southwest along the flat 1,500m top of Nugget Knob

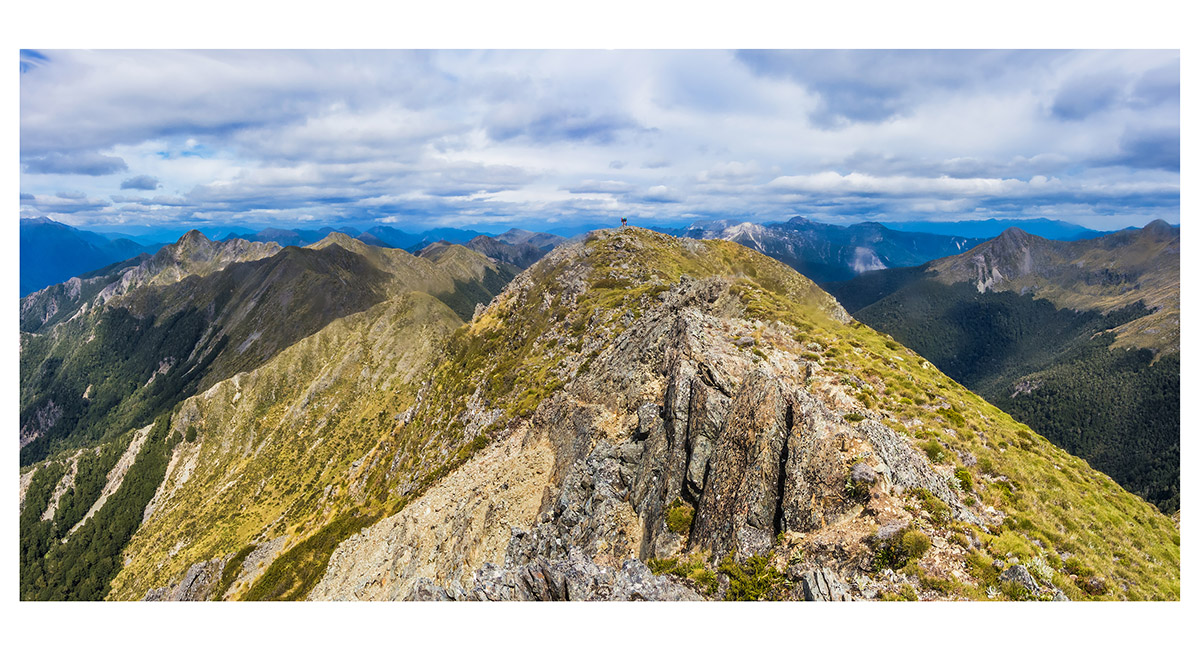
Looking north from Nugget Knob, back along the approach ridge. Wangapeka saddle is in the dip left of centre, with the Biggs Tops and Mt Kendall beyond. Mt Patriarch is far right

Retracing our steps off Nugget Knob. Mt Patriarch far right

Retracing our steps off Nugget Knob. Mt Kendall top left

Heading northwest above Wangapeka Saddle towards Biggs Tops

Breaching the tree line at about 1,200m, looking northwest to Biggs Tops (1,384m)

Looking southwest from near our tarn camp on Biggs Tops

Looking west from near our tarn camp on Biggs Tops. The Scarlett Range is far left, then Mt Herbert and Mt Kendall is far right

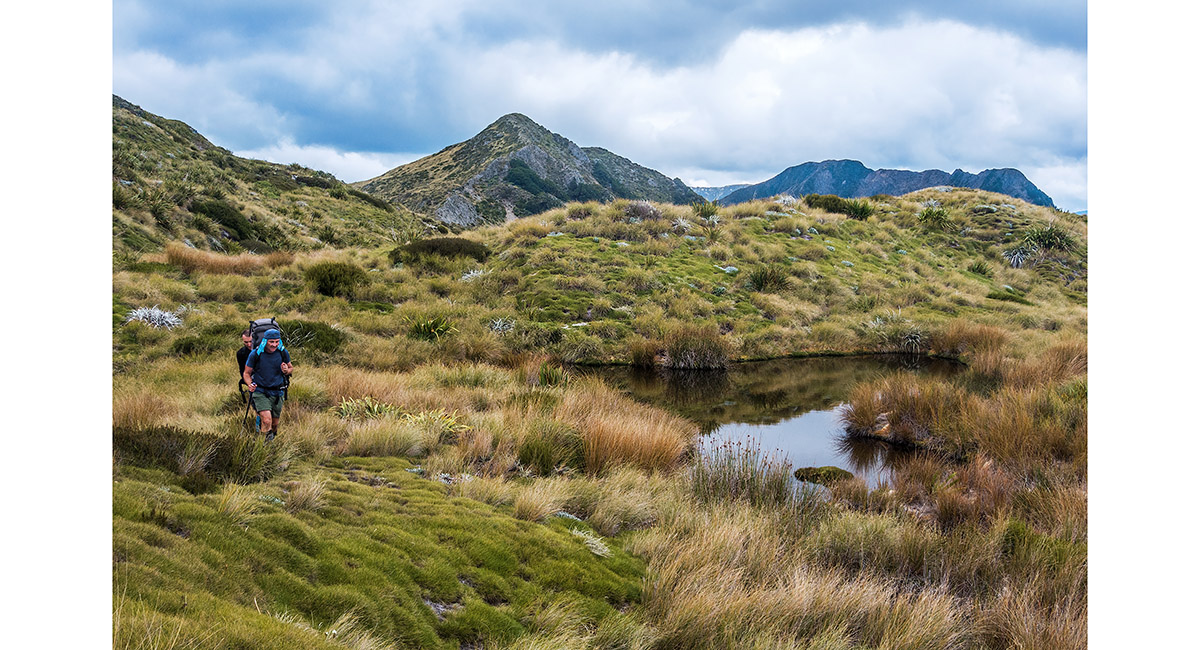
Approaching our tarn camp at 1,300m, with Biggs Tops (1,384m) behind

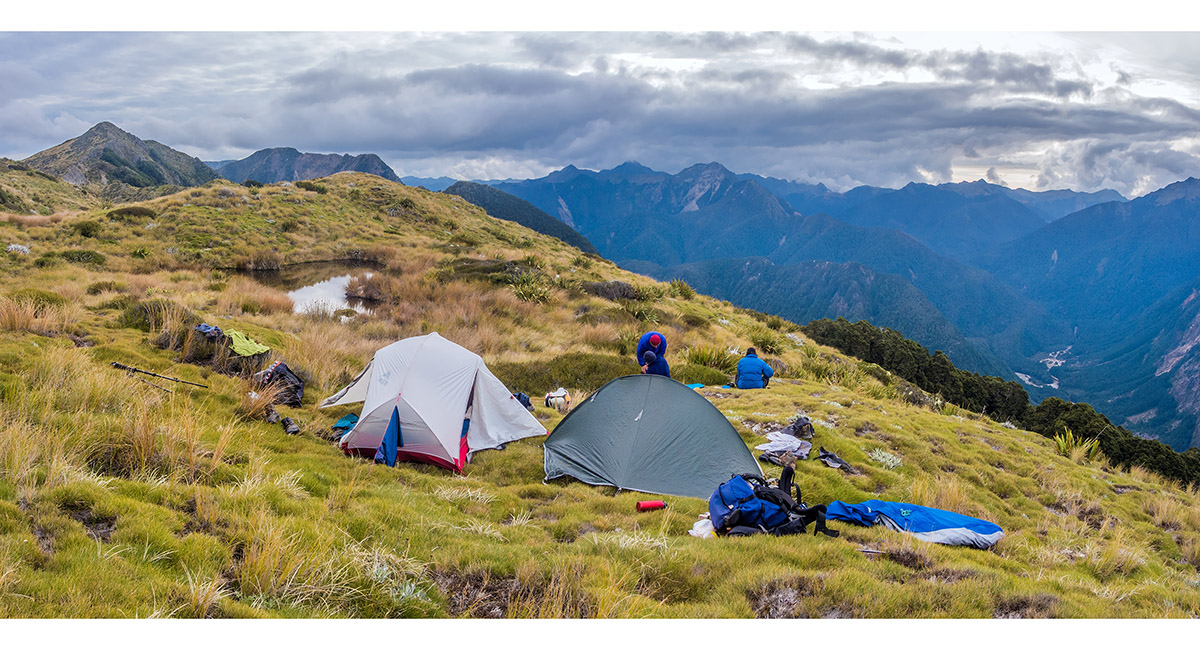
Setting up tarn camp at 1,300m, with Biggs Tops (1,384m) far left

Tarn camp at 1,300m, Biggs Tops


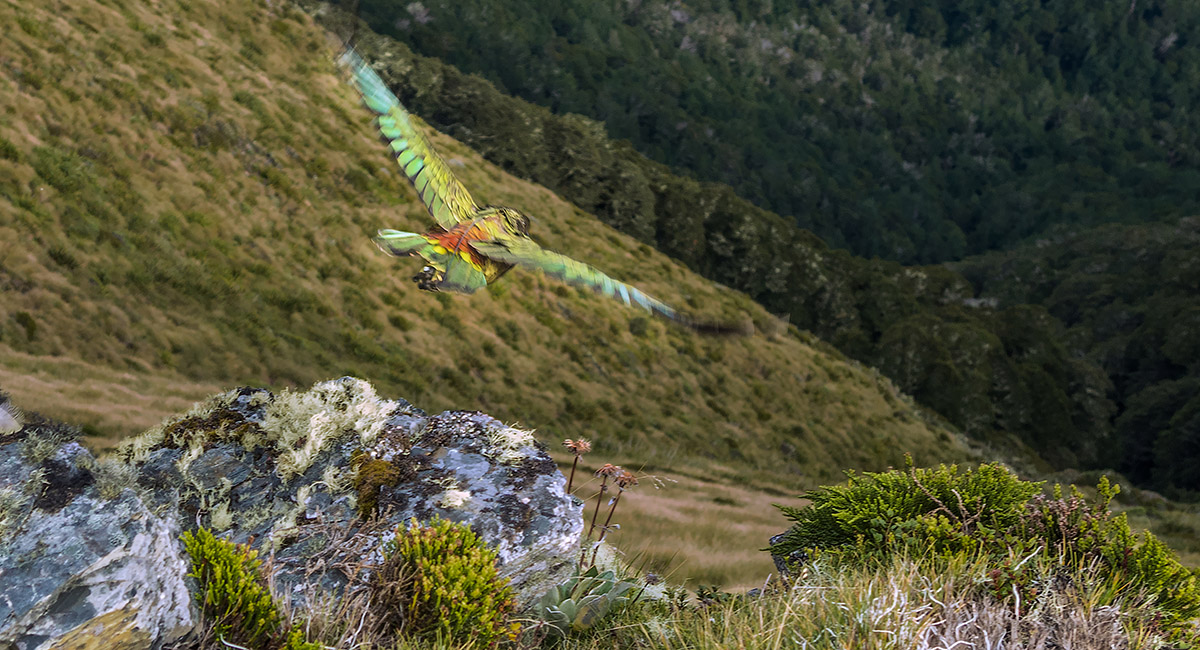
Another variety of local pays a call

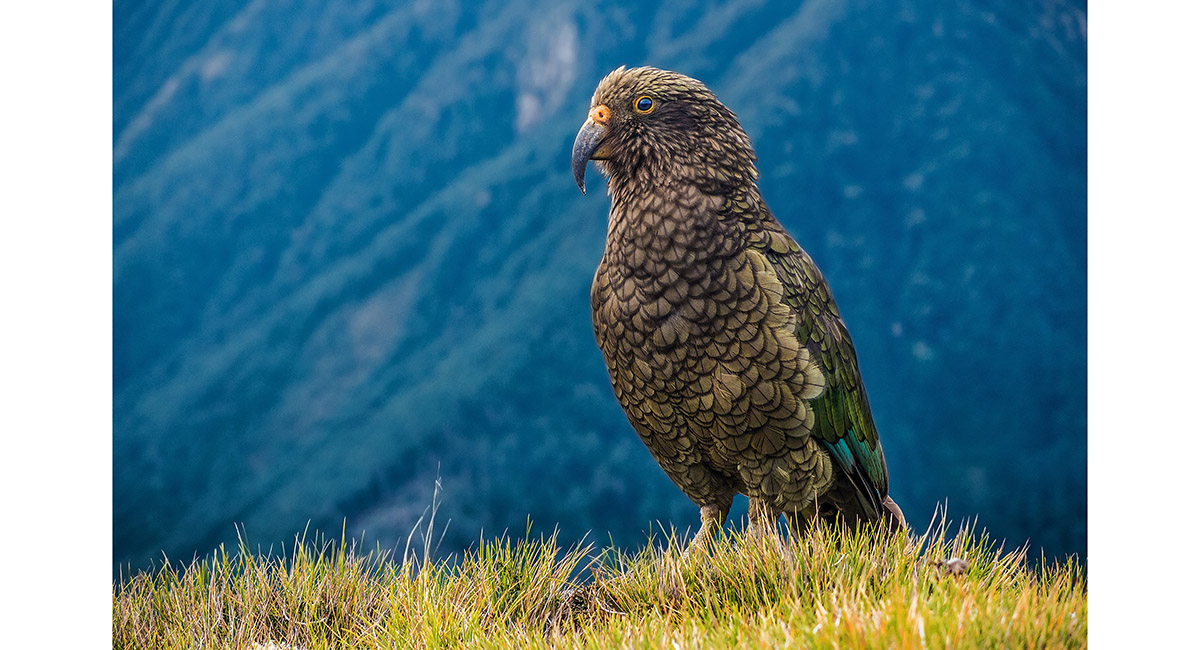
Another variety of local pays a call


Mt Kendall (1,771m) at dusk

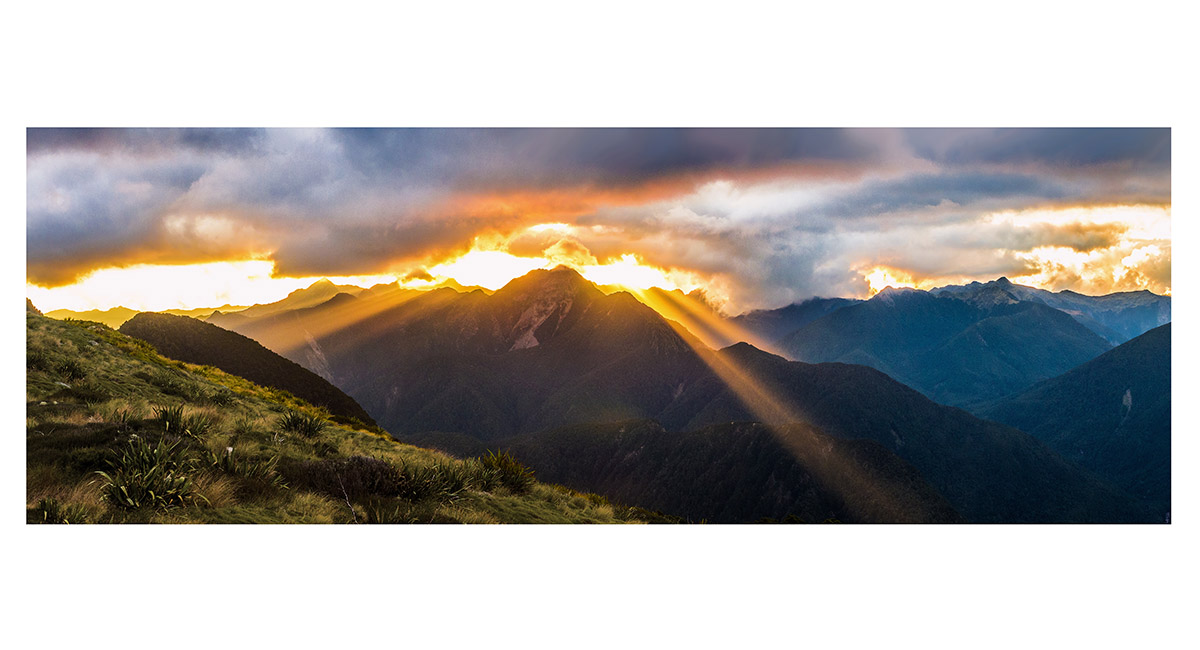
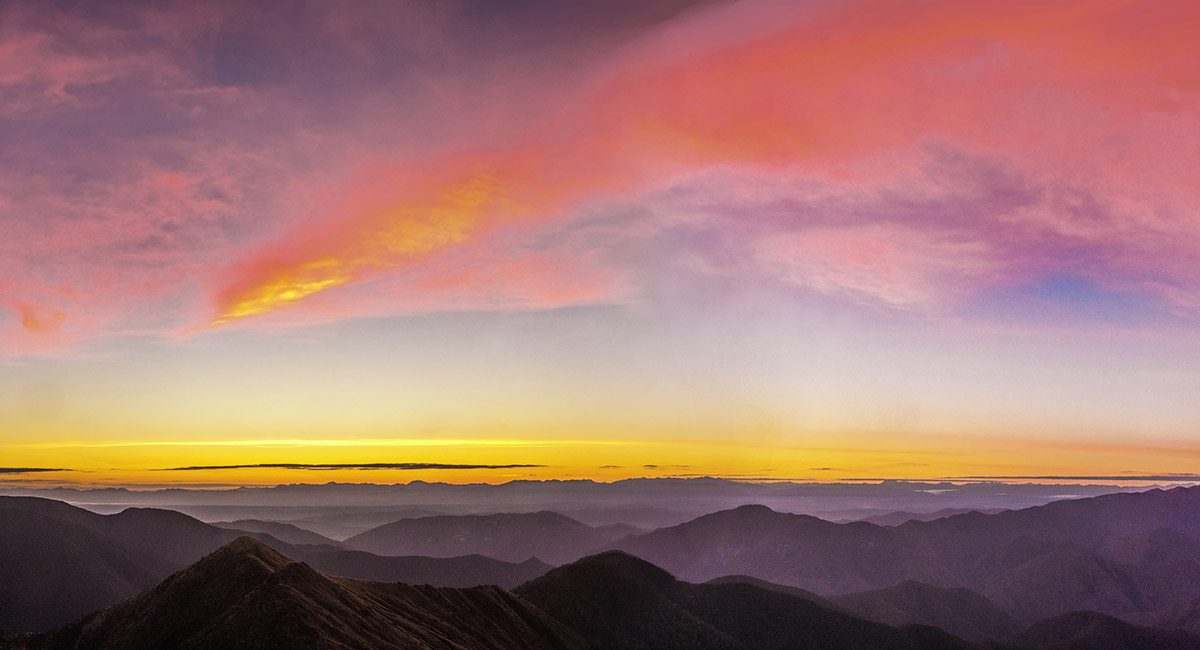
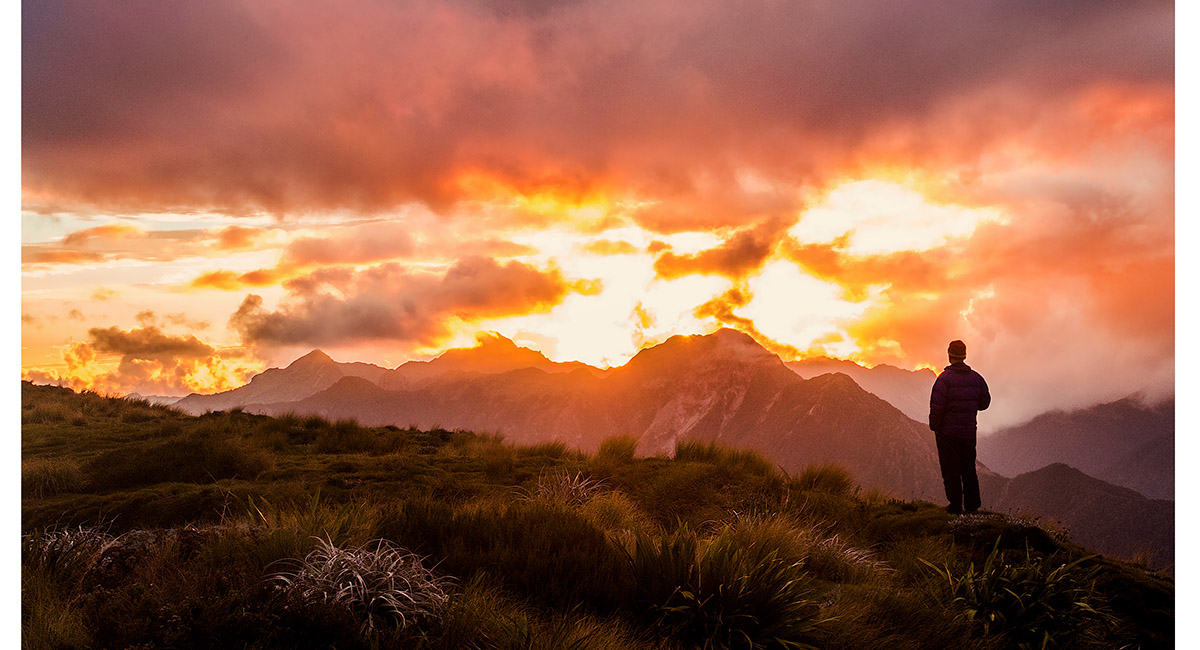
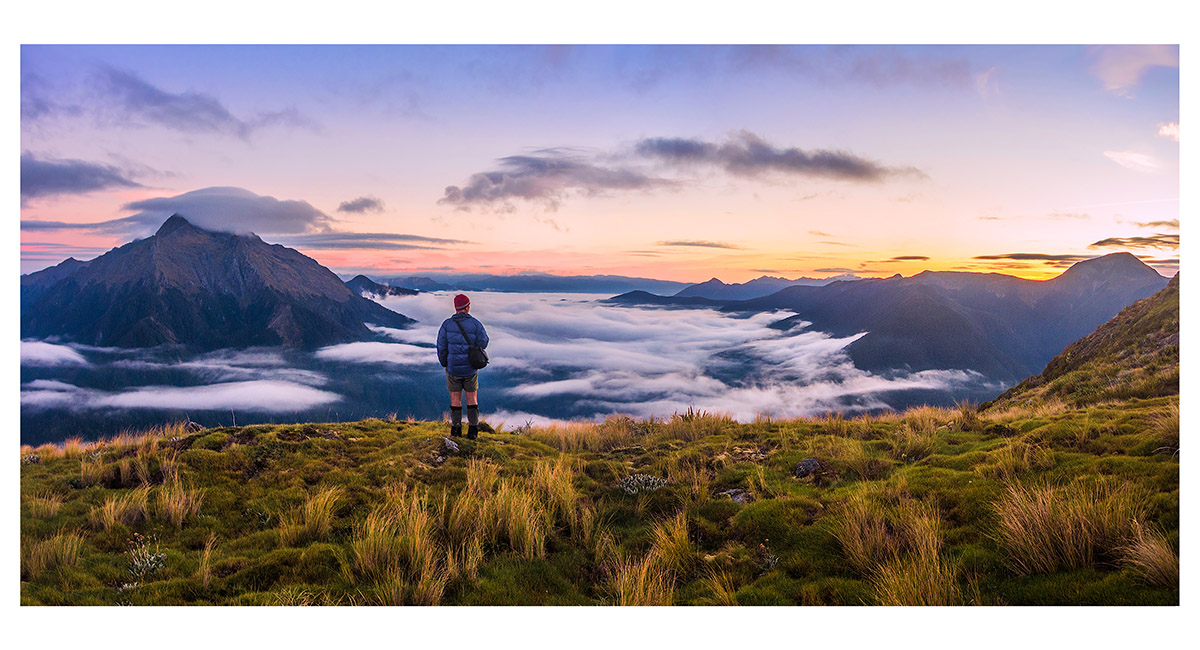
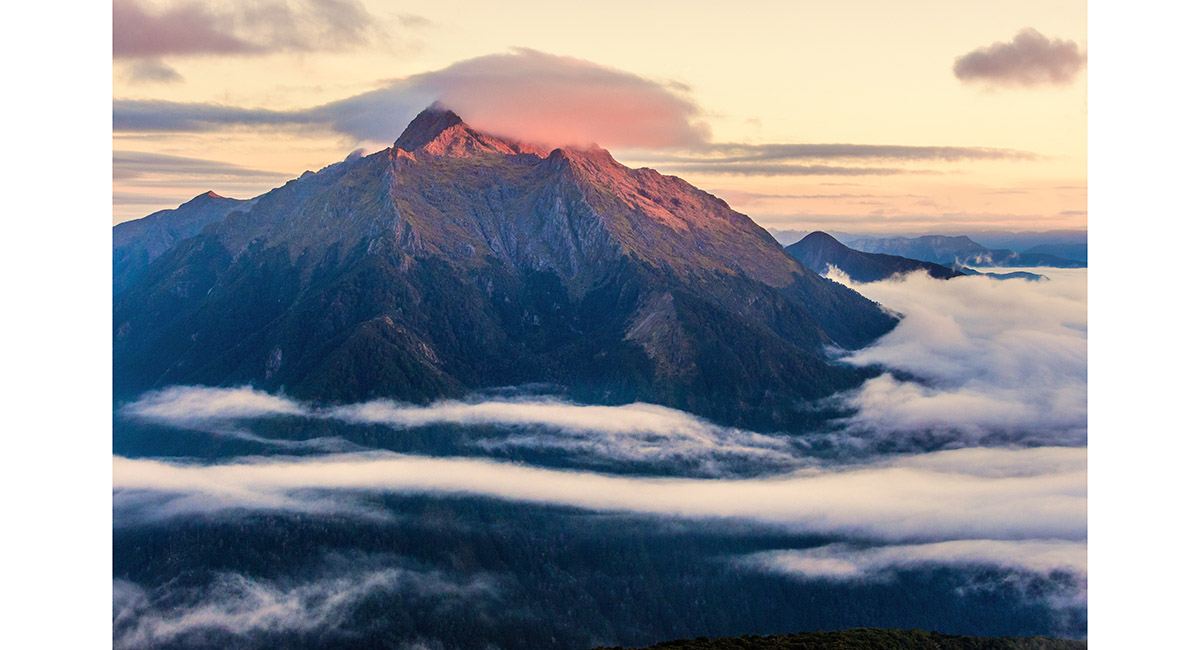
A stunning light show unfolds at sunset over the Scarlet Range, perhaps revealing the reason for its name

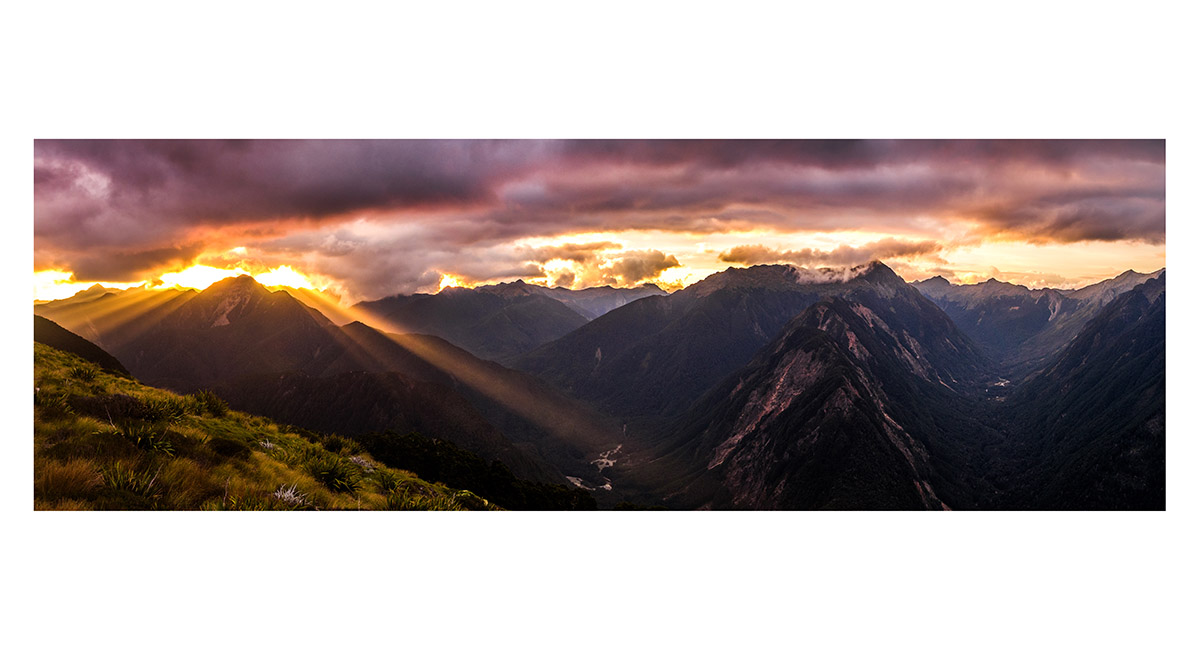
A stunning light show unfolds at sunset over the Scarlet Range and Mt Herbert

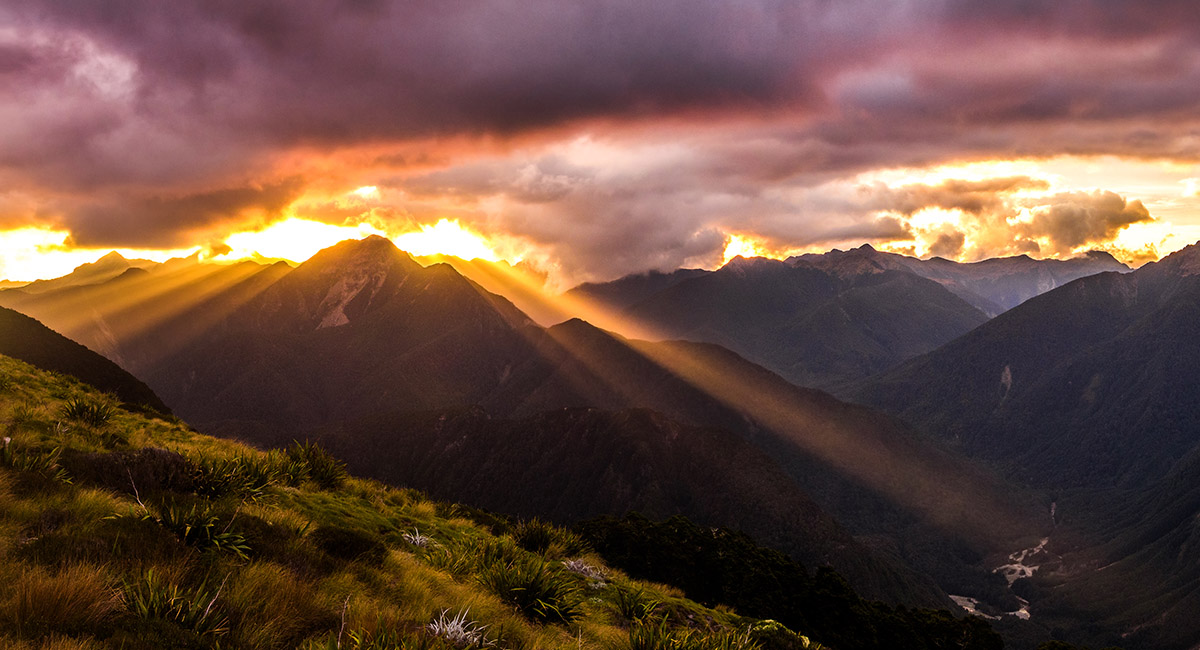
A stunning light show unfolds at sunset over the Scarlet Range, perhaps revealing the reason for its name

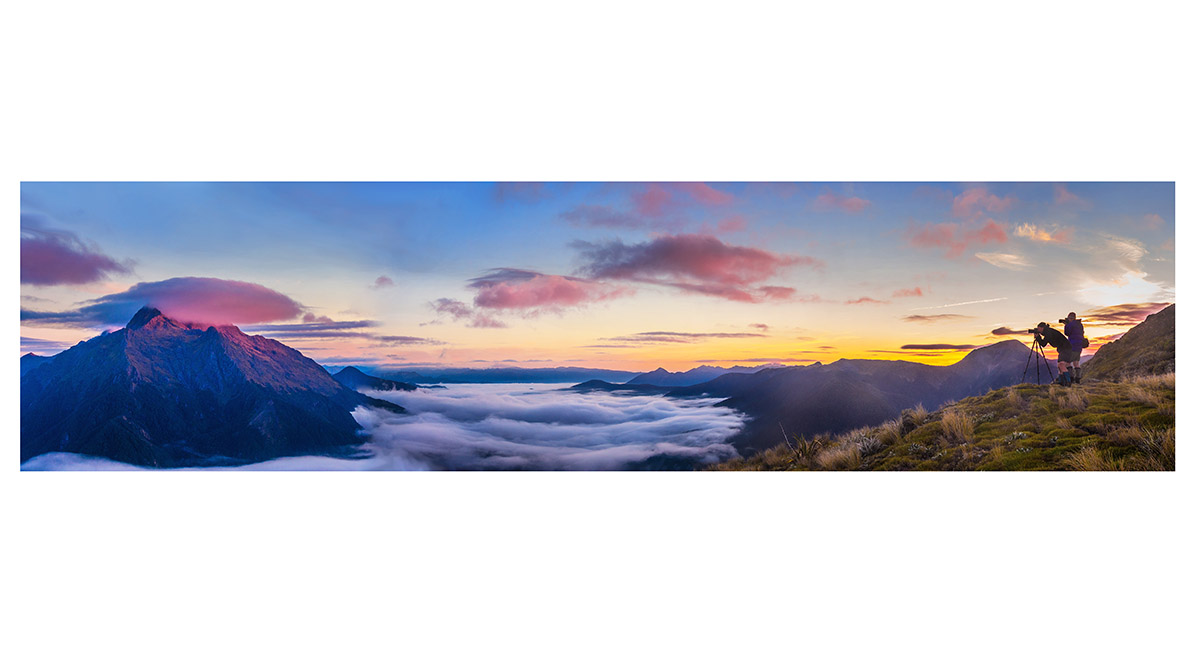
The Scarlet Range at sunset

The Scarlet Range at sunset


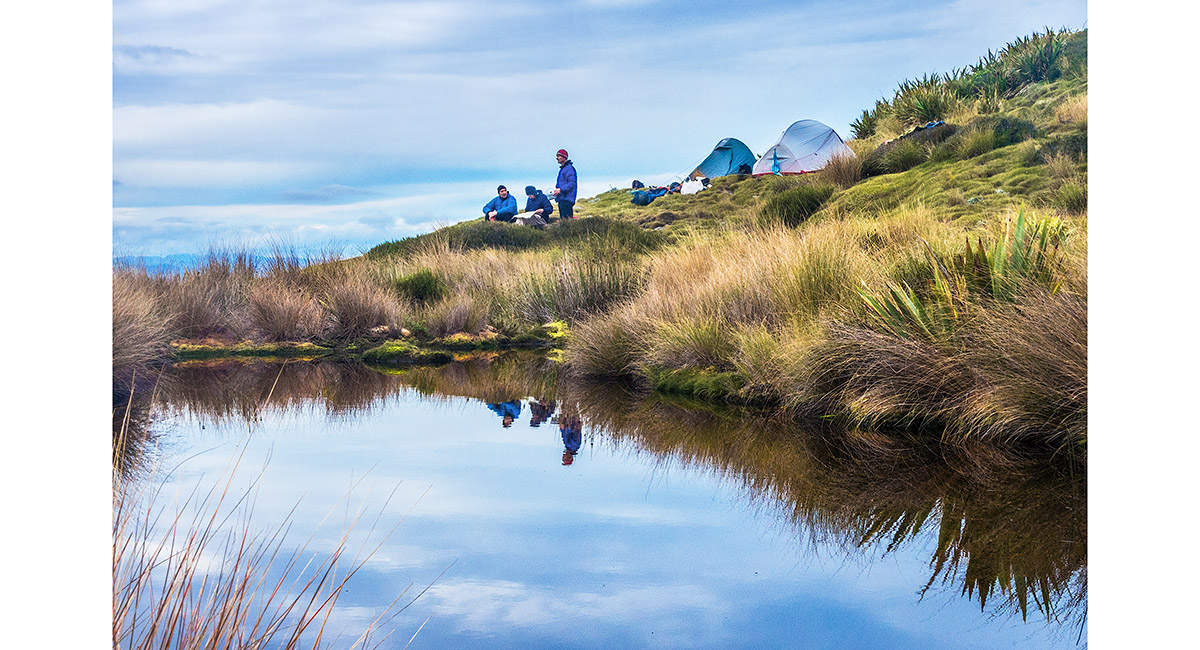
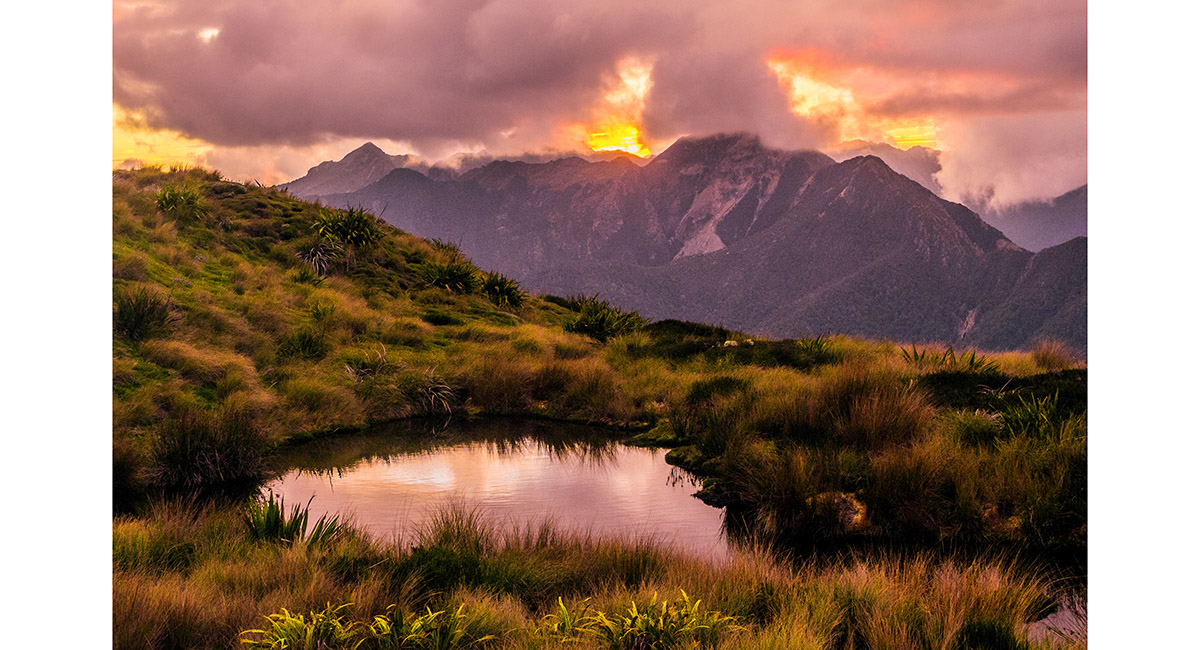
A dusk view across the tarn to our campsite and Mt Kendall

Dawn at tarn camp, looking to Biggs Tops (far left), the Scarlett Range, Mt Herbert and Mt Kendall (far right)

Above tarn camp at dawn, looking northeast, with Mt Kendall left and Mt Luna right


Above tarn camp at dawn, looking northeast, with Mt Kendall left

The answer to why we climb hills - above tarn camp at dawn, looking northeast, with Mt Kendall left and Mt Luna right

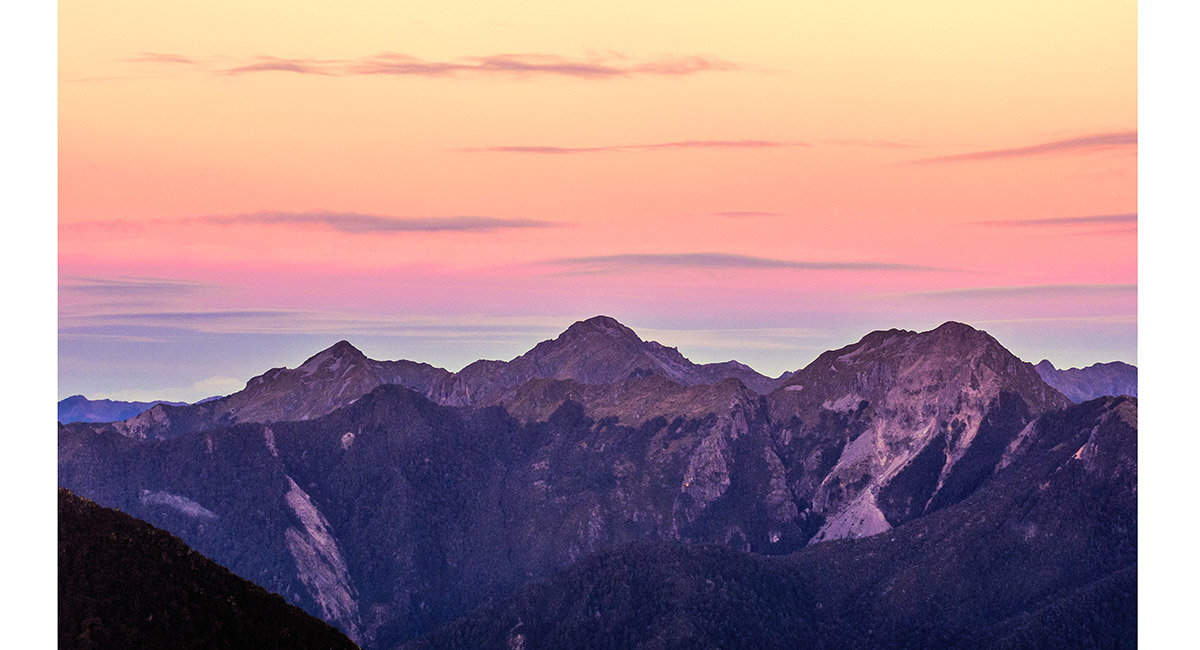
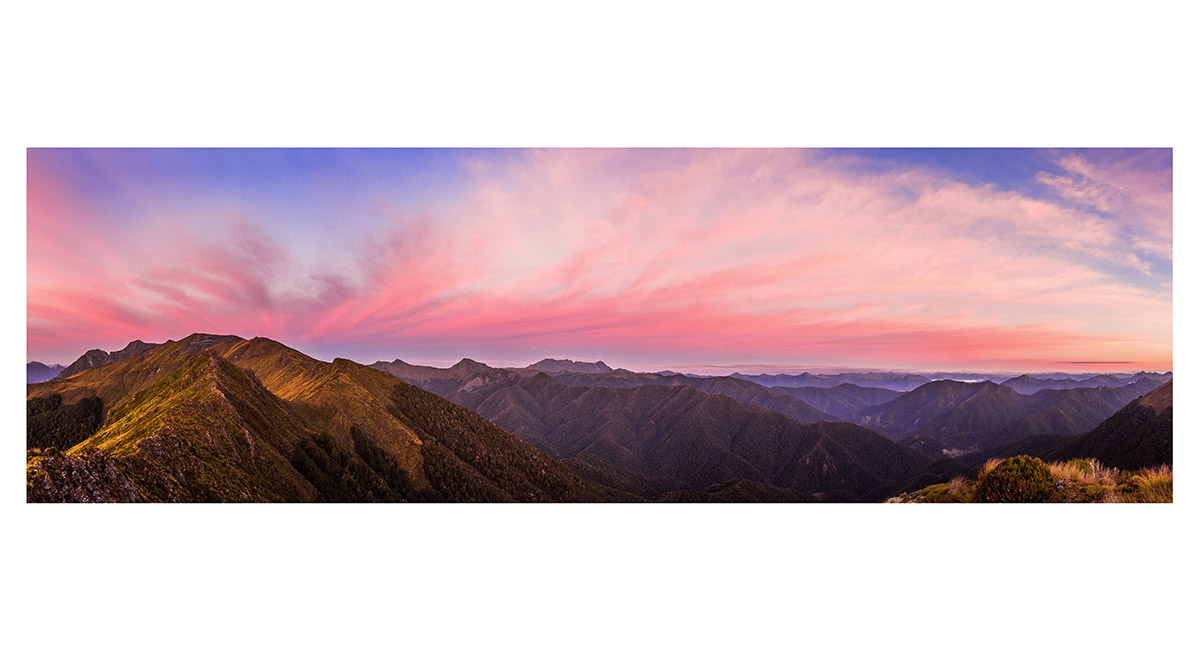
The Scarlett Range, still living up to its name, at dawn

Mt Kendall at dawn, viewed from tarn camp

A photographer's dream, looking to Biggs Tops (far left), the Scarlett Range, Mt Herbert and Mt Kendall (far right)

Looking northwest in the direction of Kakapo Saddle

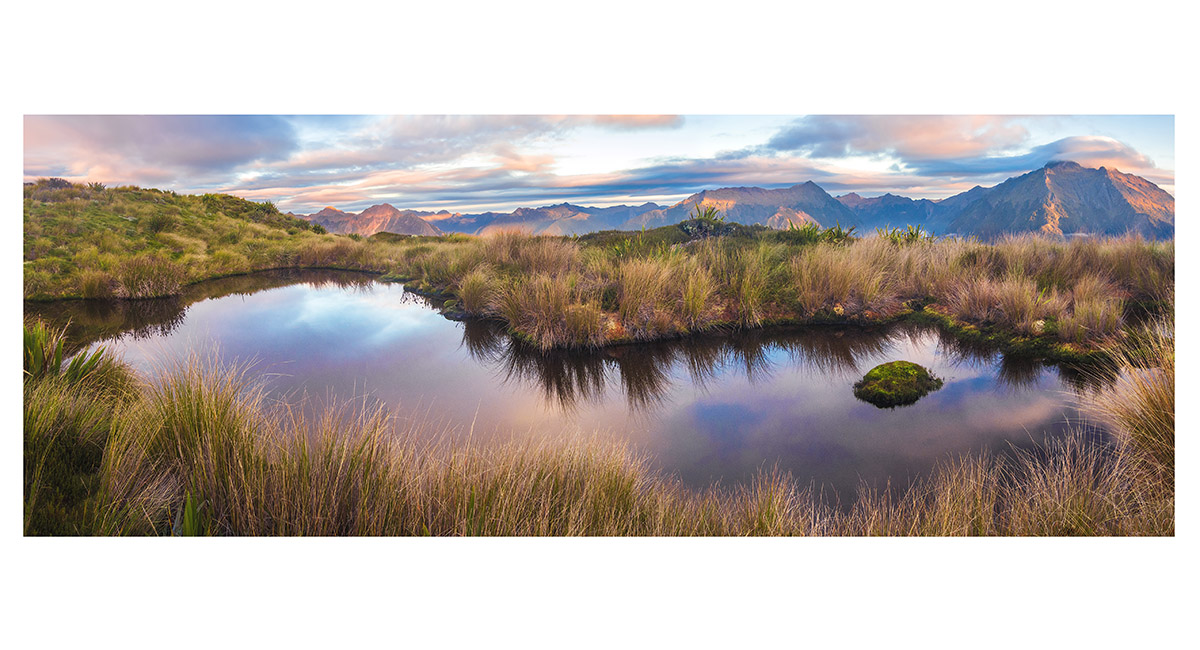
Looking across the tarn to the Scarlett Range (left), Mt Herbert and Mt Kendall (far right)

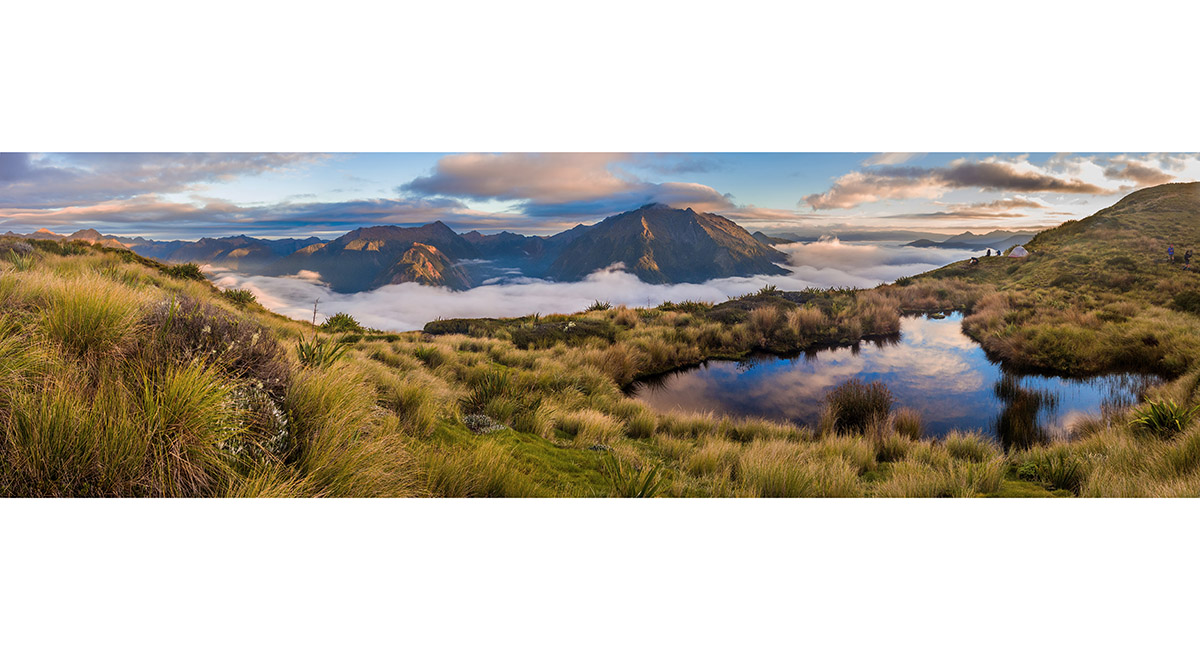
Looking across the tarn to the Scarlett Range (left), Mt Herbert and Mt Kendall (right)

Looking across the tarn to Mt Kendall (left) and our campsite

Tarn camp (1,300m) on Biggs Tops, sunrise

Fungi in the bush below Biggs Tops, enroute to Trevor Carter Hut

Trevor Carter Hut (500m)

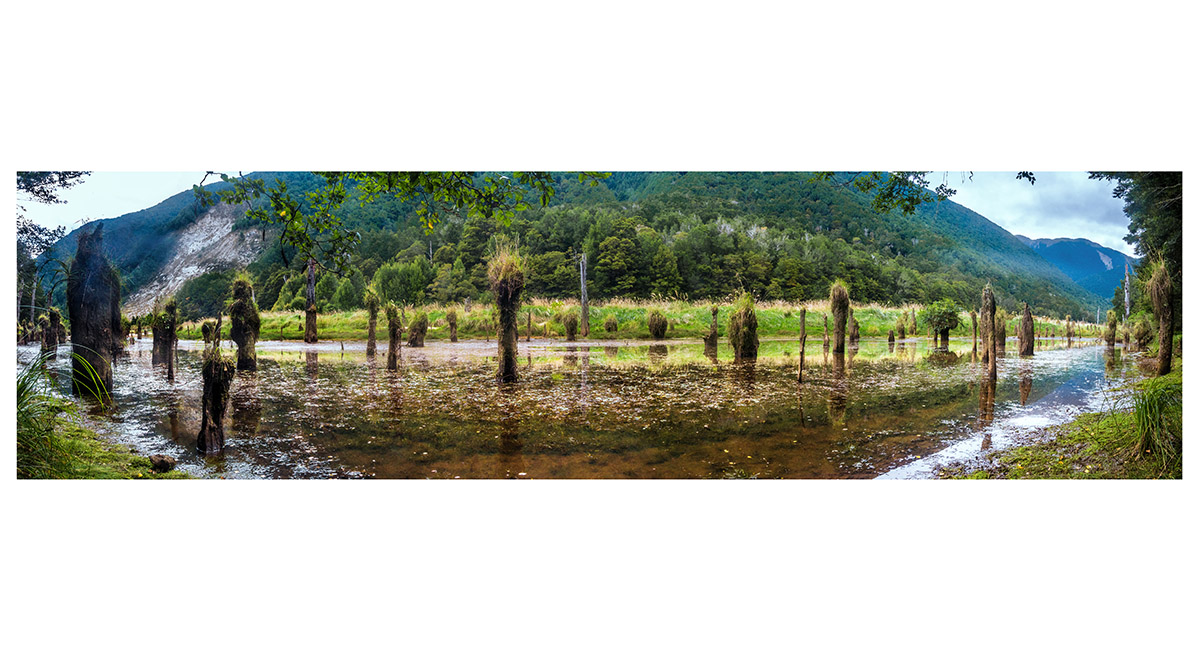
Dead tree stumps in a bog beside the Karamea River, on the trail north of Trevor Carter Hut

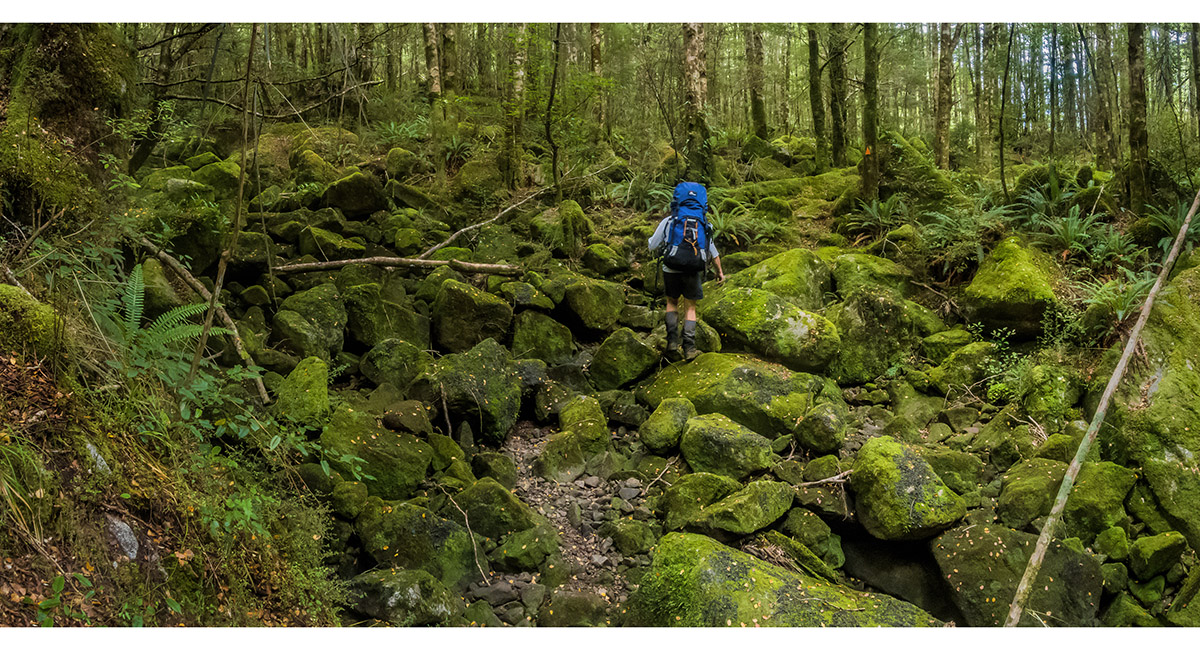
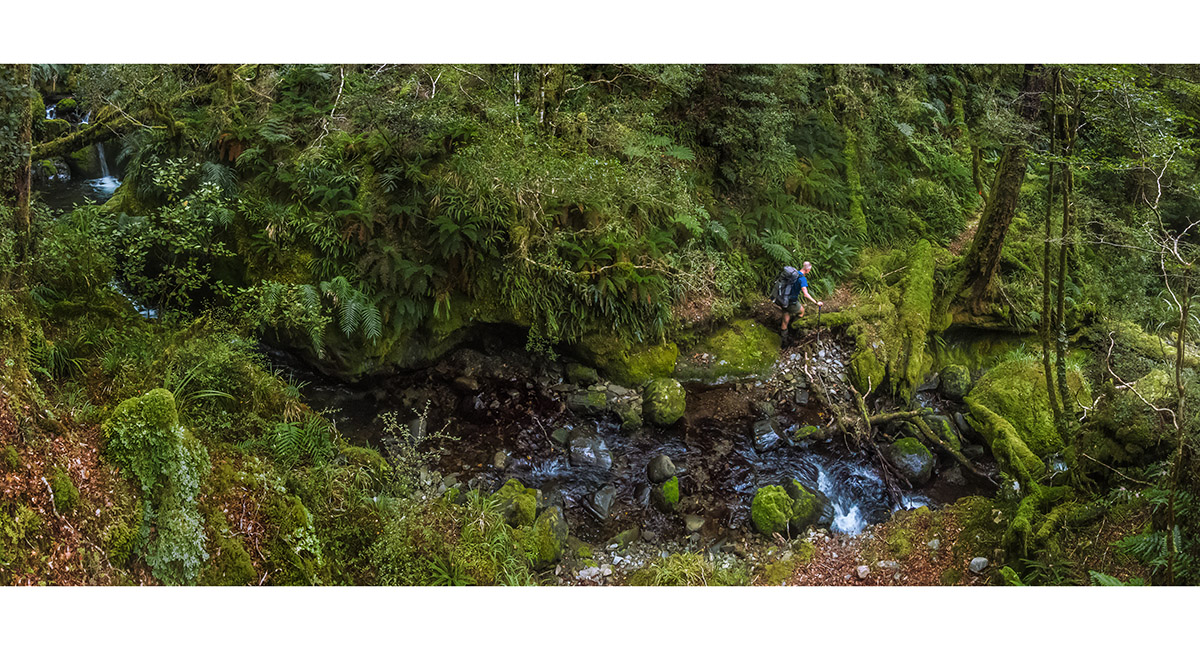
A moss-covered boulder field south of Thor Hut


A small waterfall beside the trail, south of Thor Hut

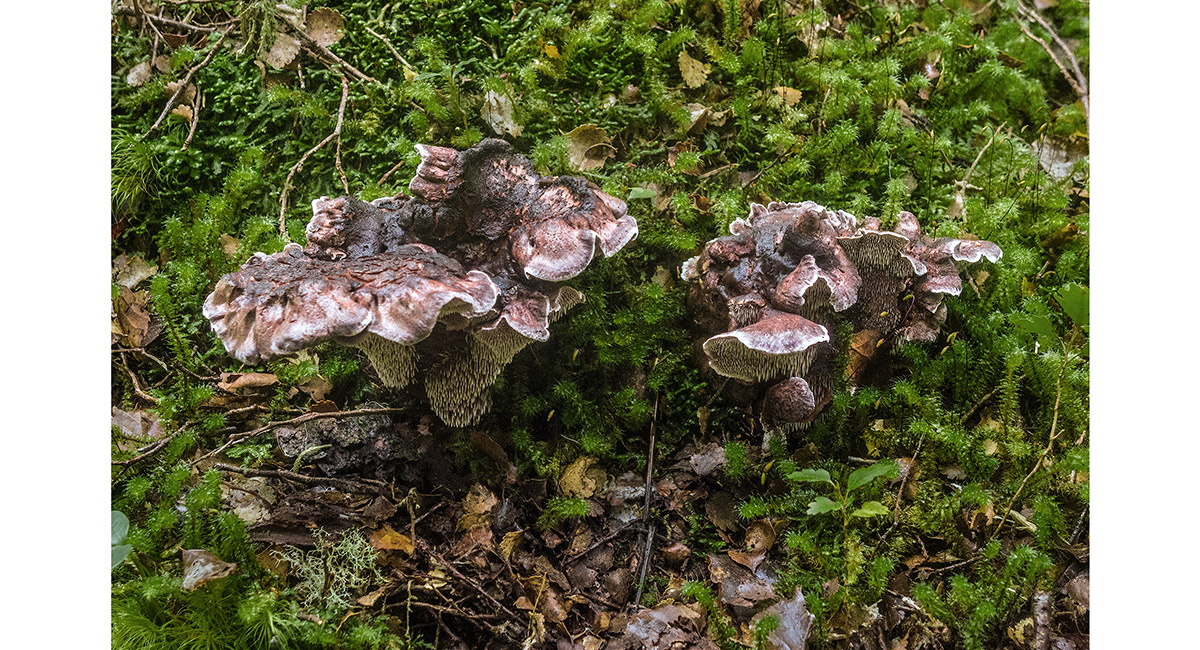
Fungi beside the trail, south of Thor Hut

A waterfall beside the trail, south of Thor Hut

Thor Hut (400m)

On the trail north of Thor Hut

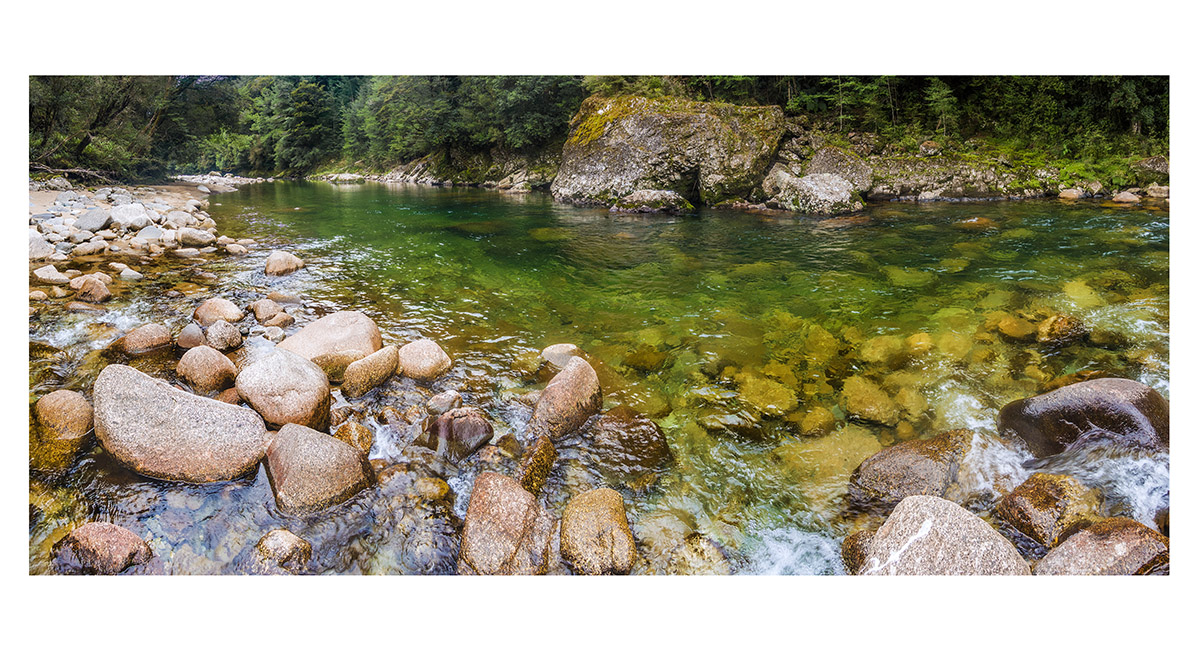
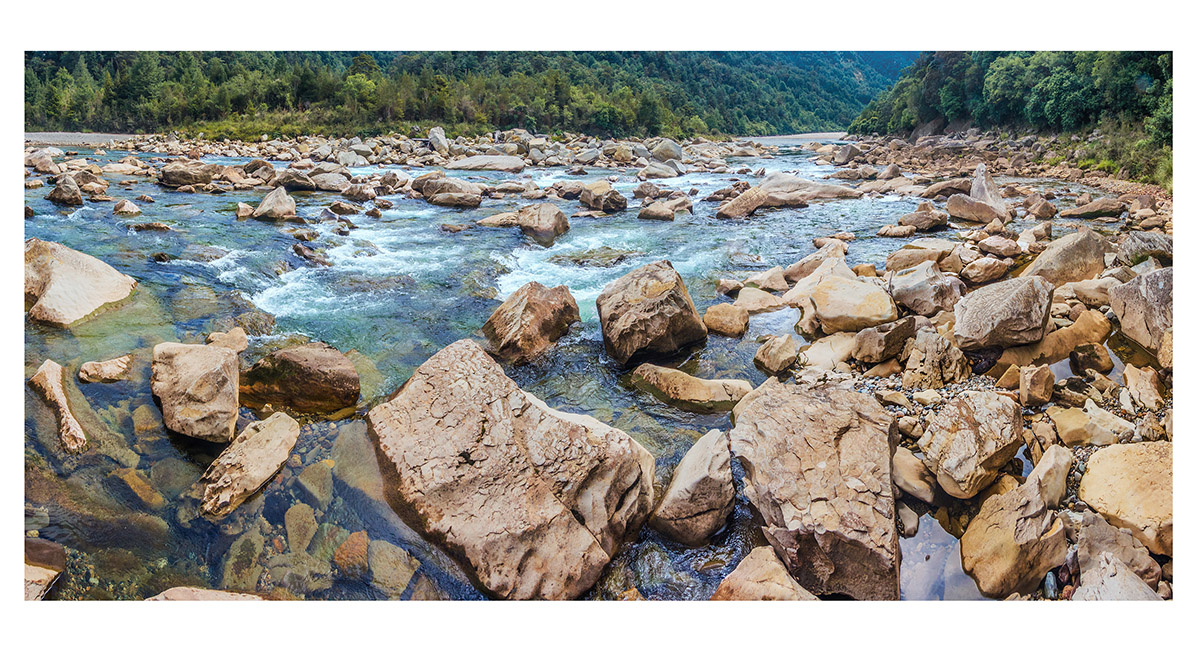
The Karamea River, north of Thor Hut

The Karamea River, not far from Venus Hut

Venus Hut (350m)

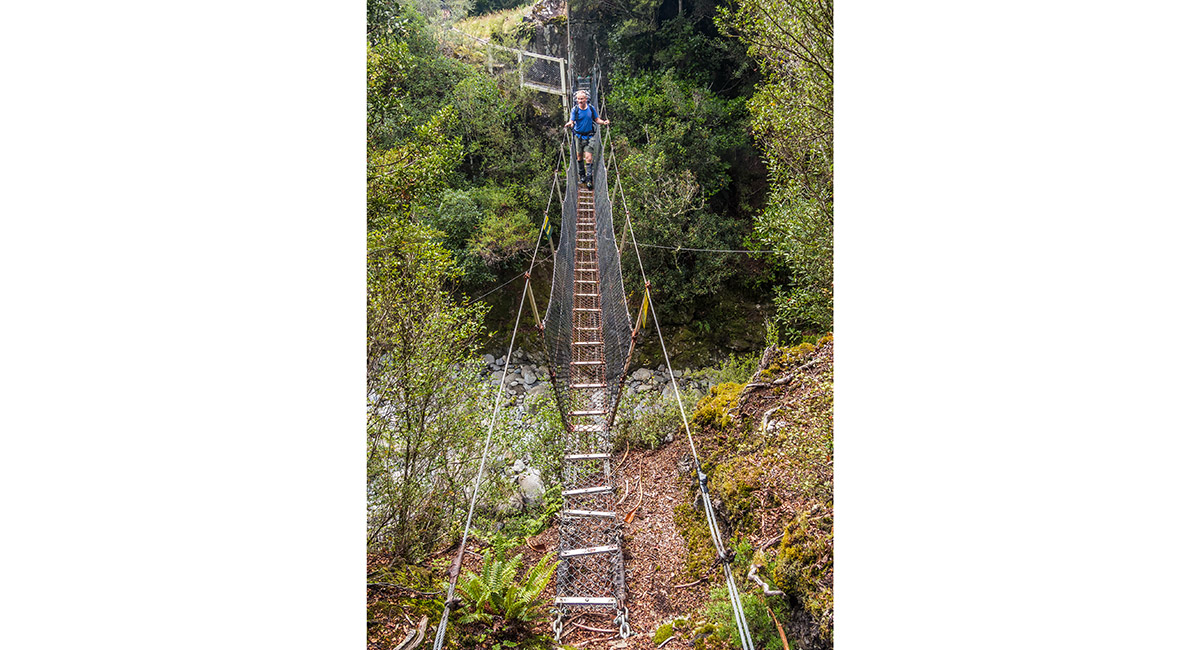
The suspension bridge crossing Venus Creek, just north of Venus Hut

Fungi beside the trail, north of Venus Hut

Fungi beside the trail, north of Venus Hut


The suspension bridge crossing Jupiter Creek, north of Venus Hut

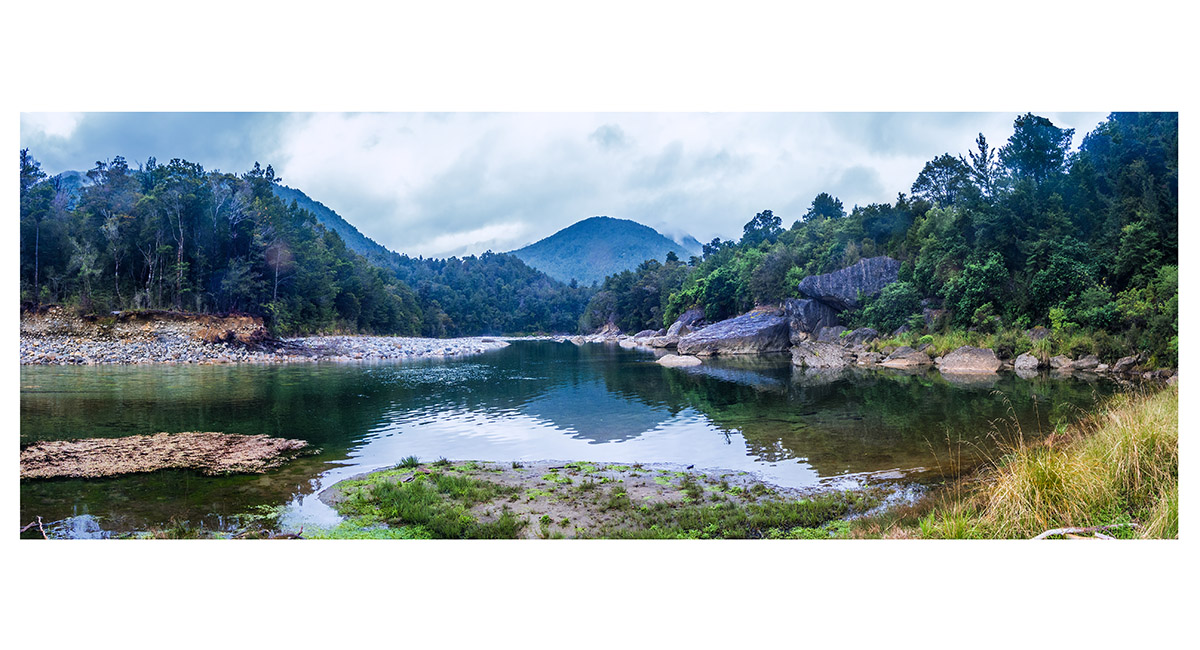
The Karamea River, south of Crow Hut

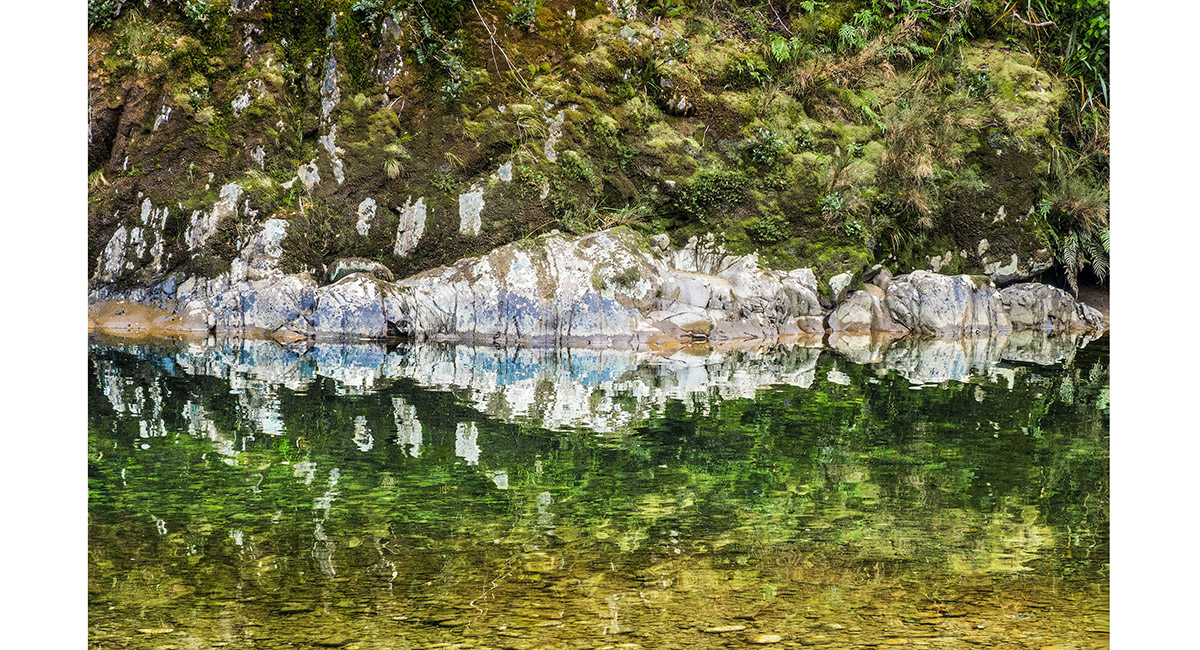
Kaleidoscopic mirror reflections on the Karamea River, south of Crow Hut

Crow Hut (300m)

The Karamea River, north of Crow Hut

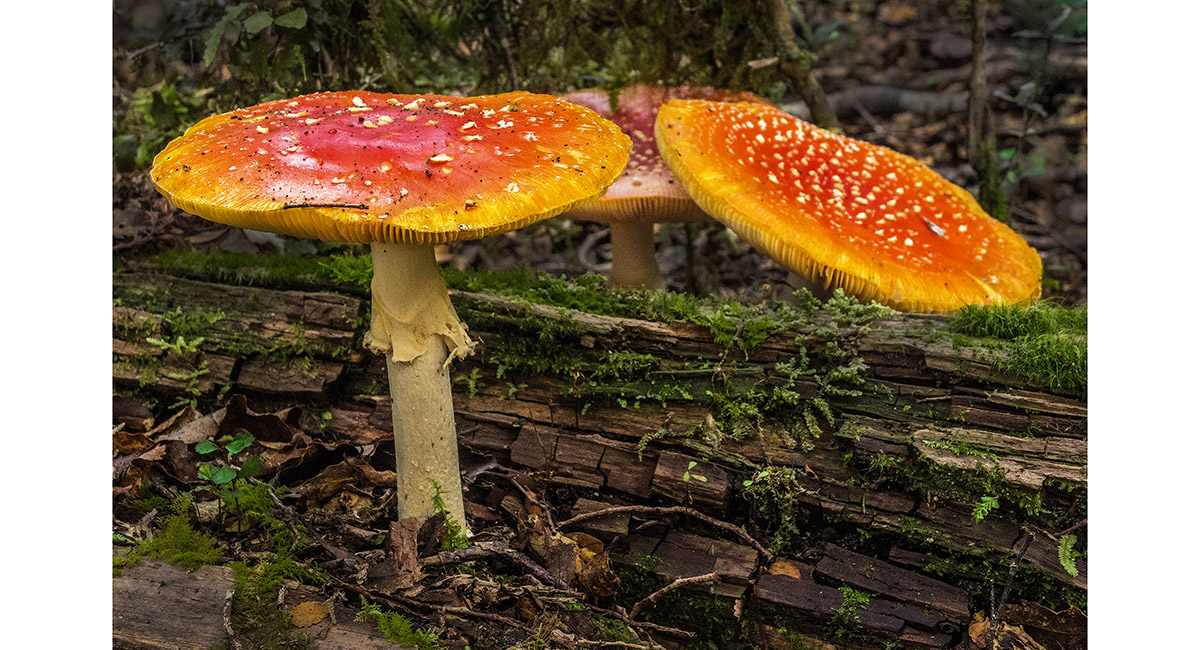
Fungi near the trail, north of Crow Hut

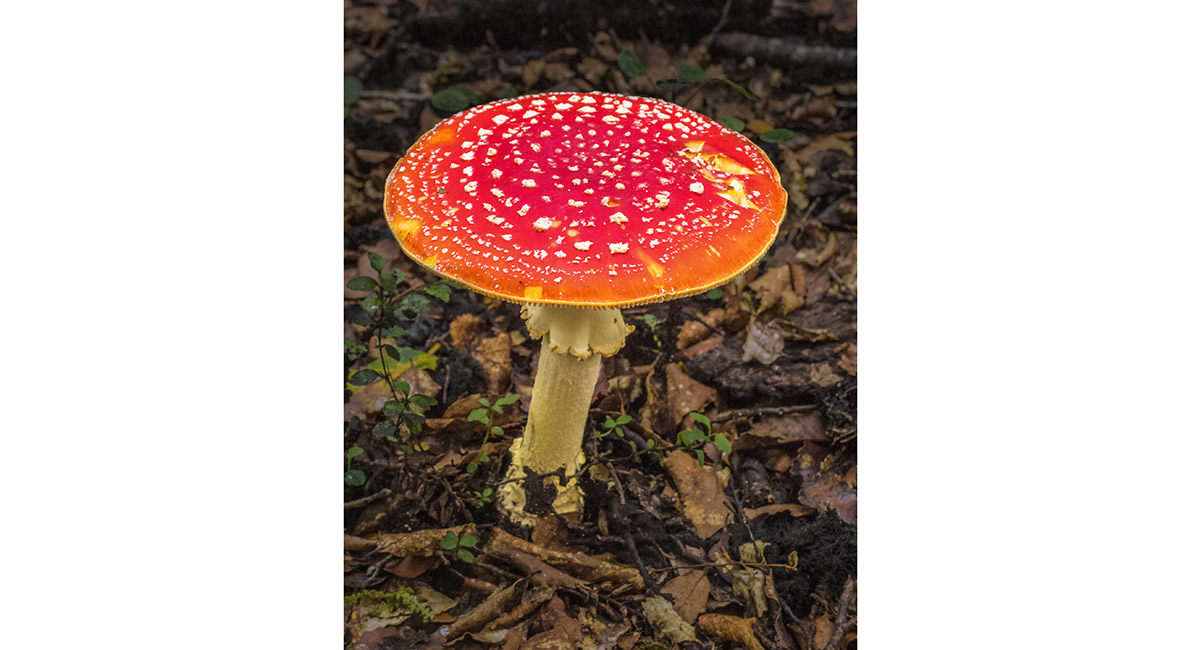
Fungi near the trail, north of Crow Hut


On the trail, north of Crow Hut

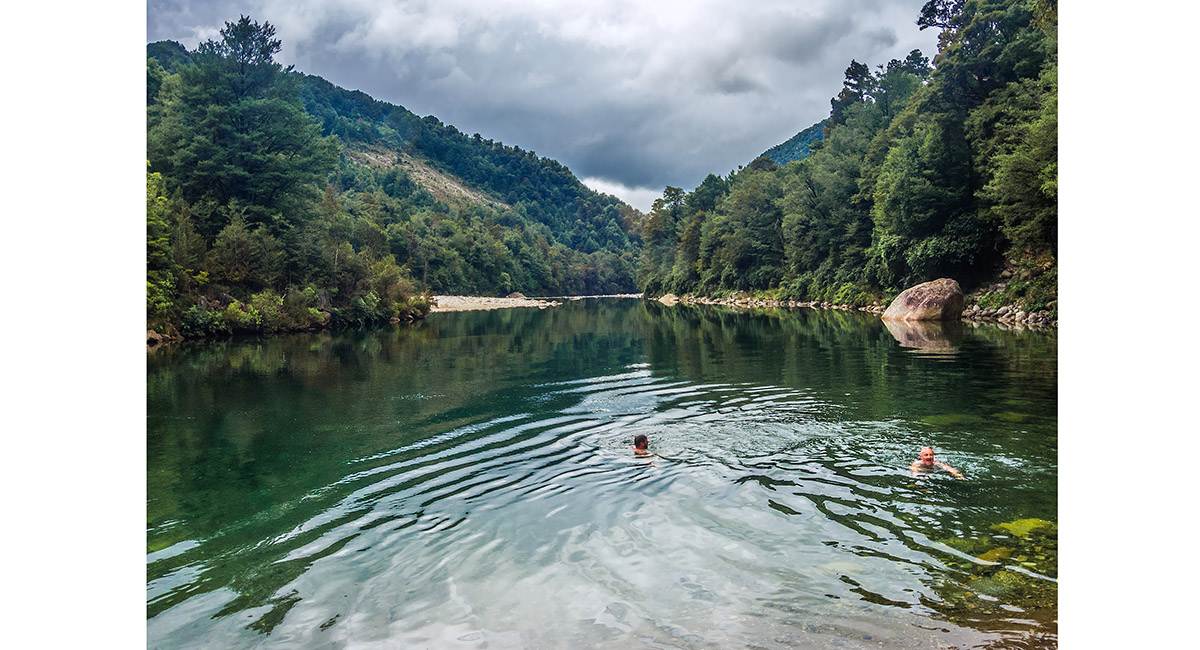
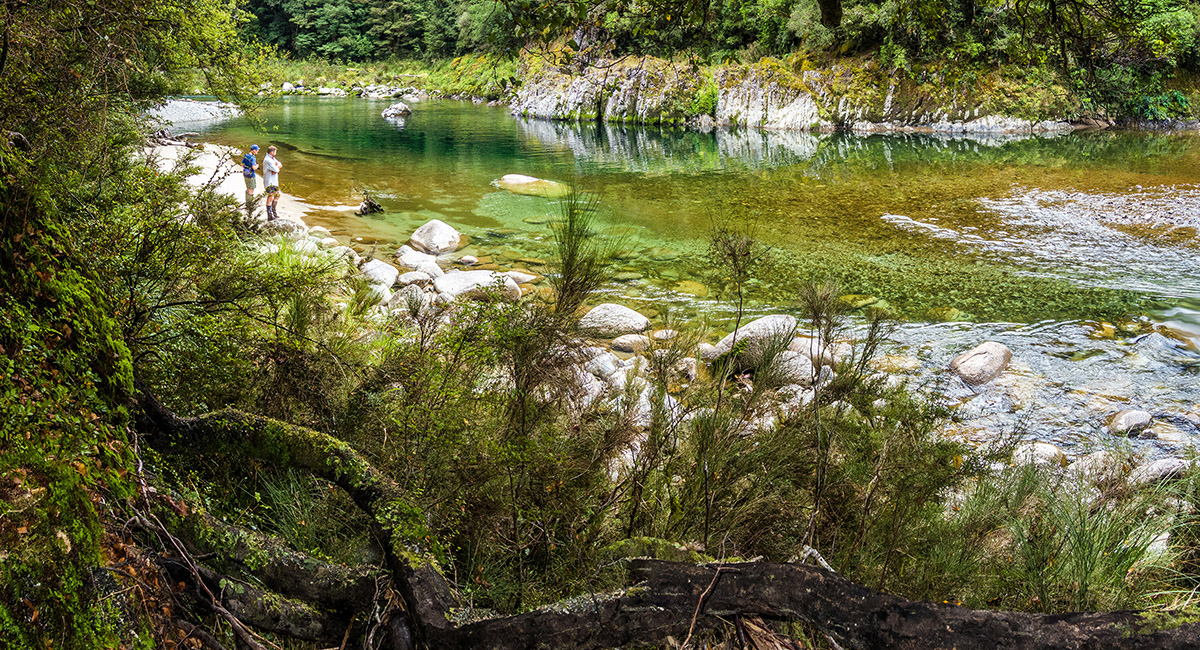
Taking a dip in the Karamea River, south of Karamea Bend Hut

The Karamea River, south of Karamea Bend Hut

Fungi beside the trail, south of Karamea Bend Hut

Karamea Bend Hut (270m)

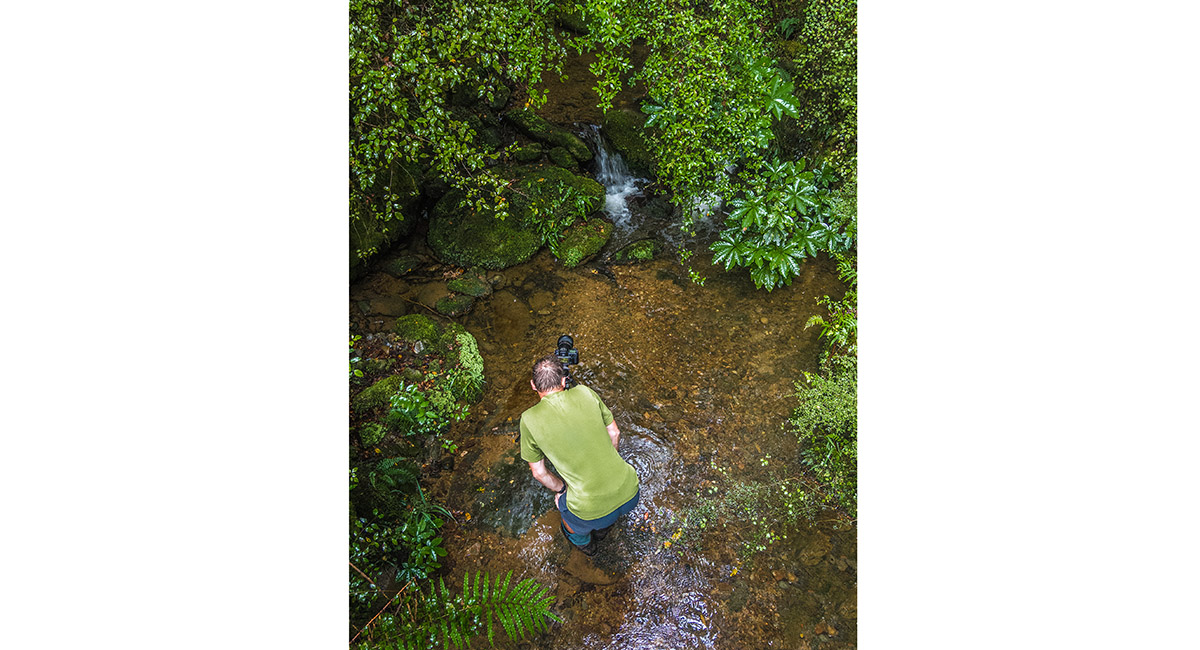
Steve putting his unfeasibly heavy tripod to good use

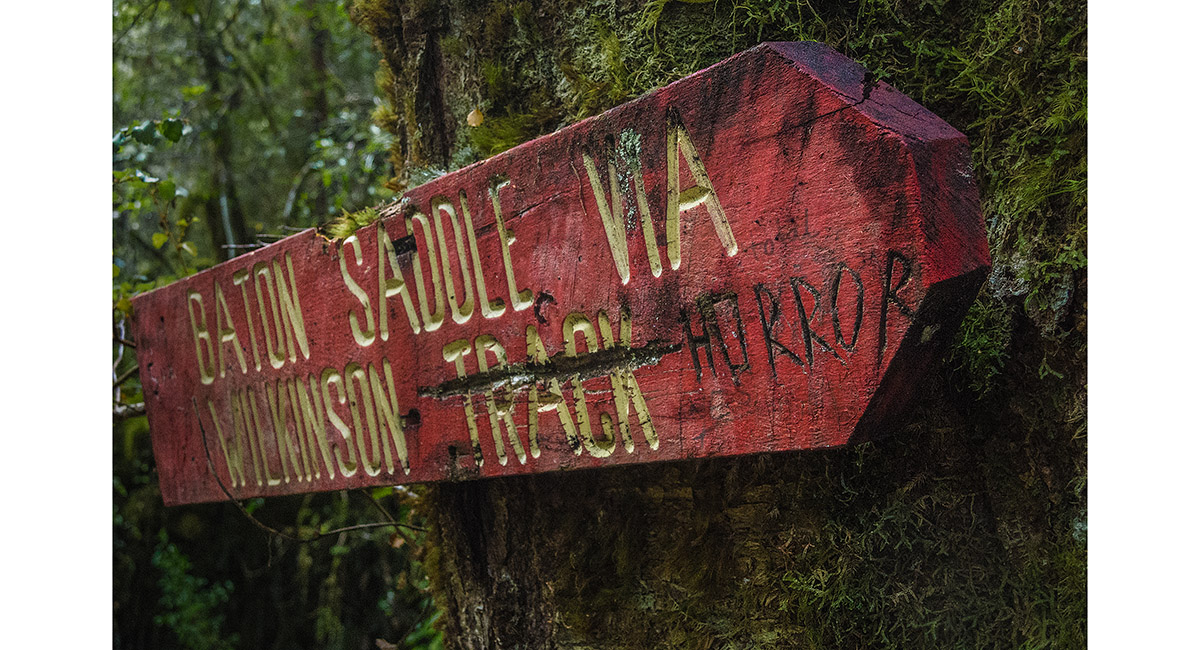
An apt warning as we commence our ascent (through wasp nests, stinging nettle and steep, slippery boulders) to Baton Saddle


Early in the Baton Saddle ascent, just before we reached the worst section of wasp and nettle infested trail (700m to 800m)


Shaun taking revenge on nettle clusters on an off trail section, where the actual trail was impassable due to nettles

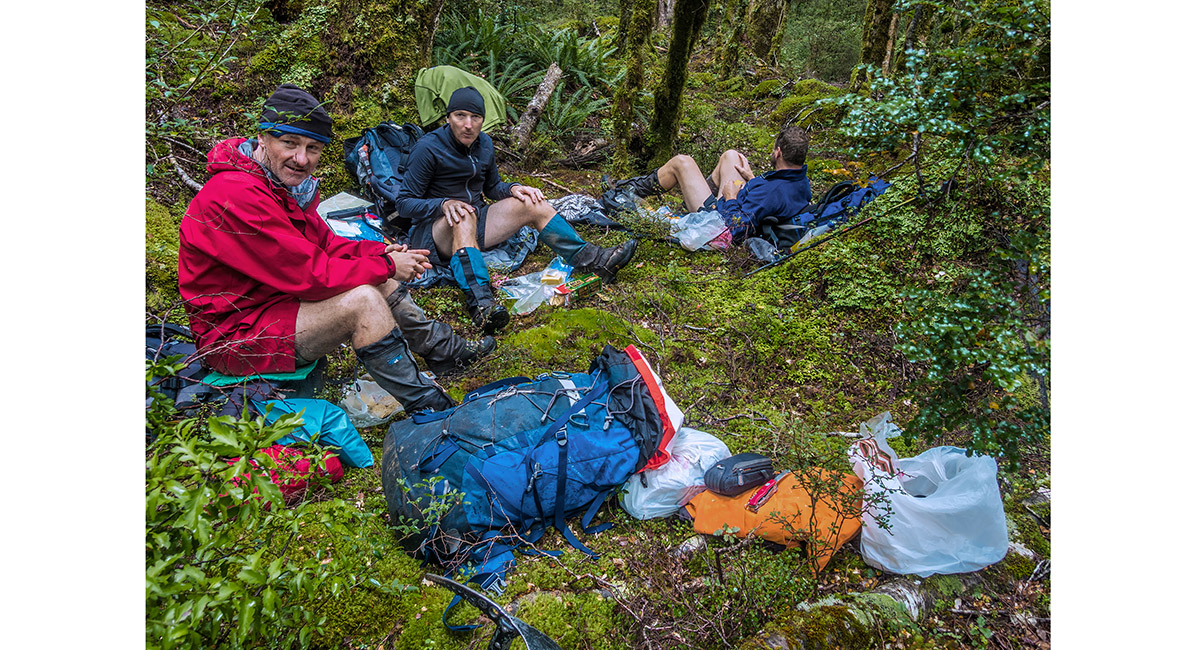
Through the worst section, having some lunch at about 1,000m

The view north from Baton Saddle (1,370m)

The view south from Baton Saddle (1,370m), a sea of Spaniards and deep tussock

Descending the south side of Baton Saddle

Descending the south side of Baton Saddle

The upper section of Baton River, beside Flanagan's Hut

The result of a wasp attack back in the worst section of the south side ascent to Baton Saddle

The upper section of Baton River, beside Flanagan's Hut

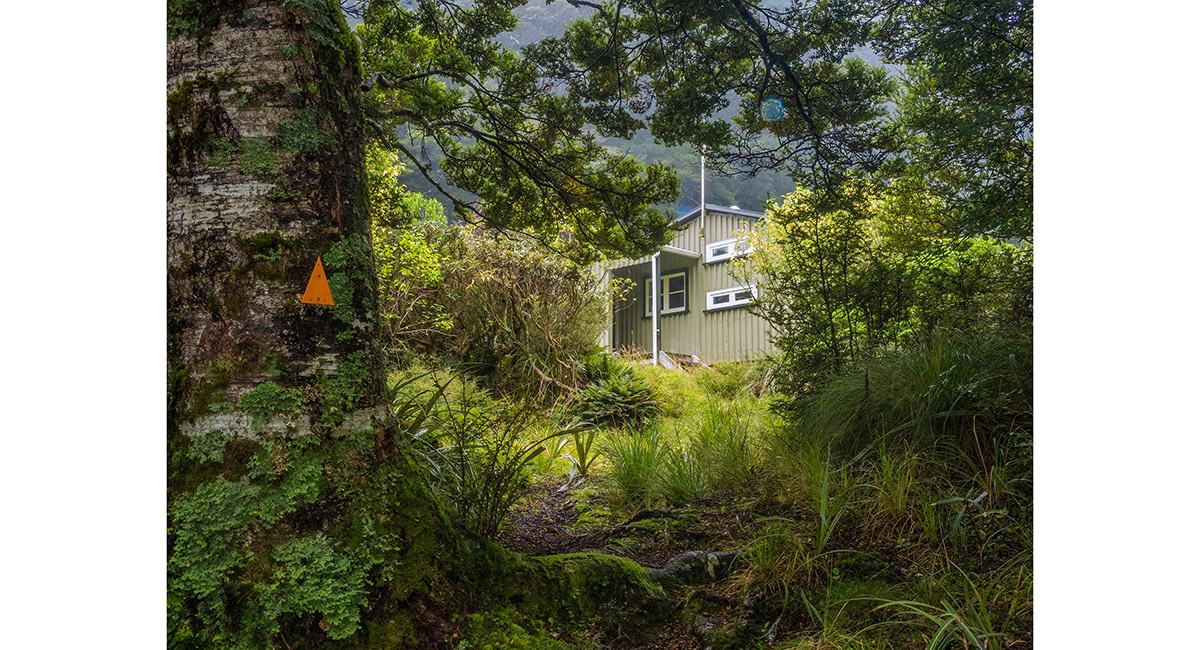
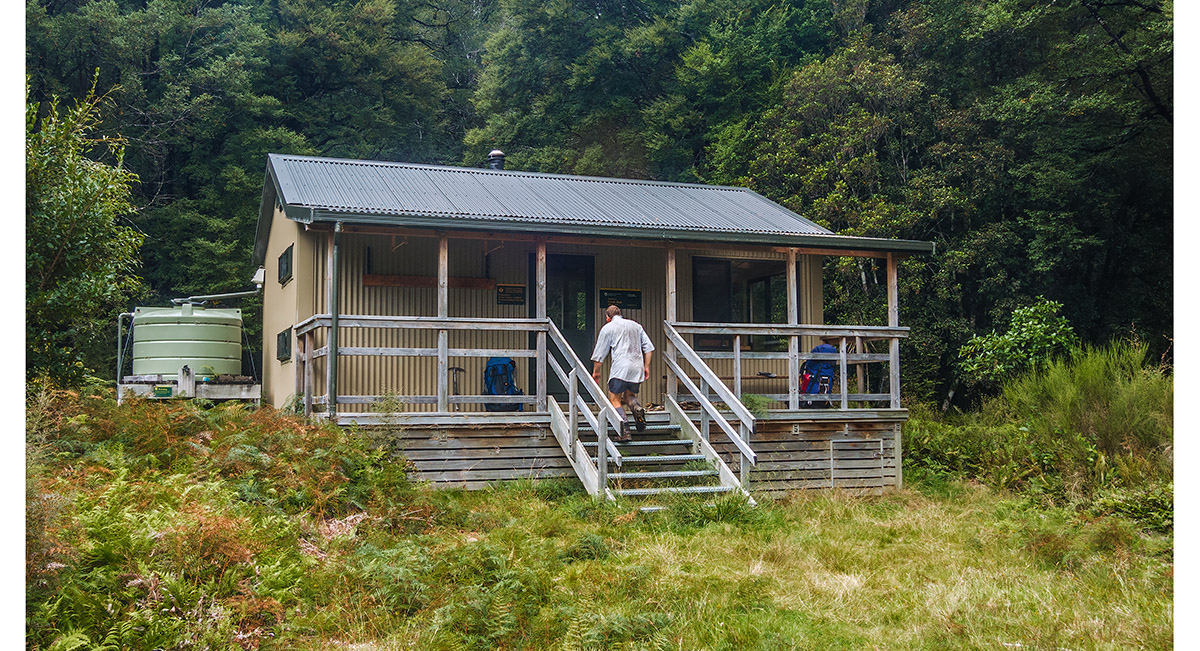
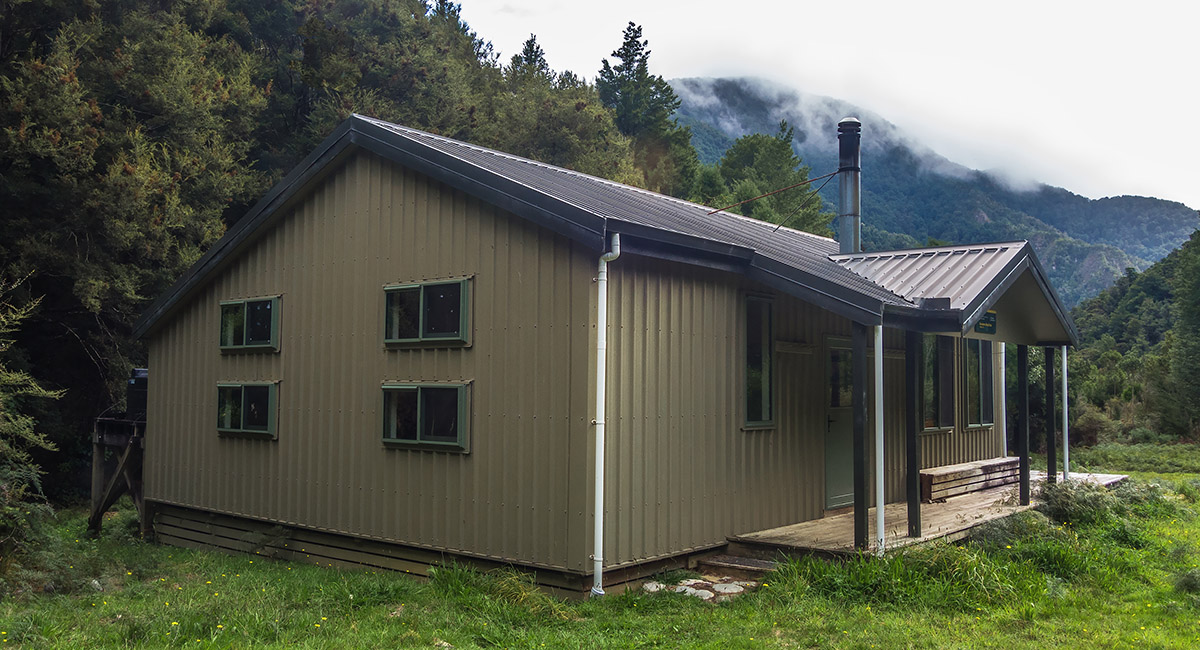
Flanagan's Hut (900m)

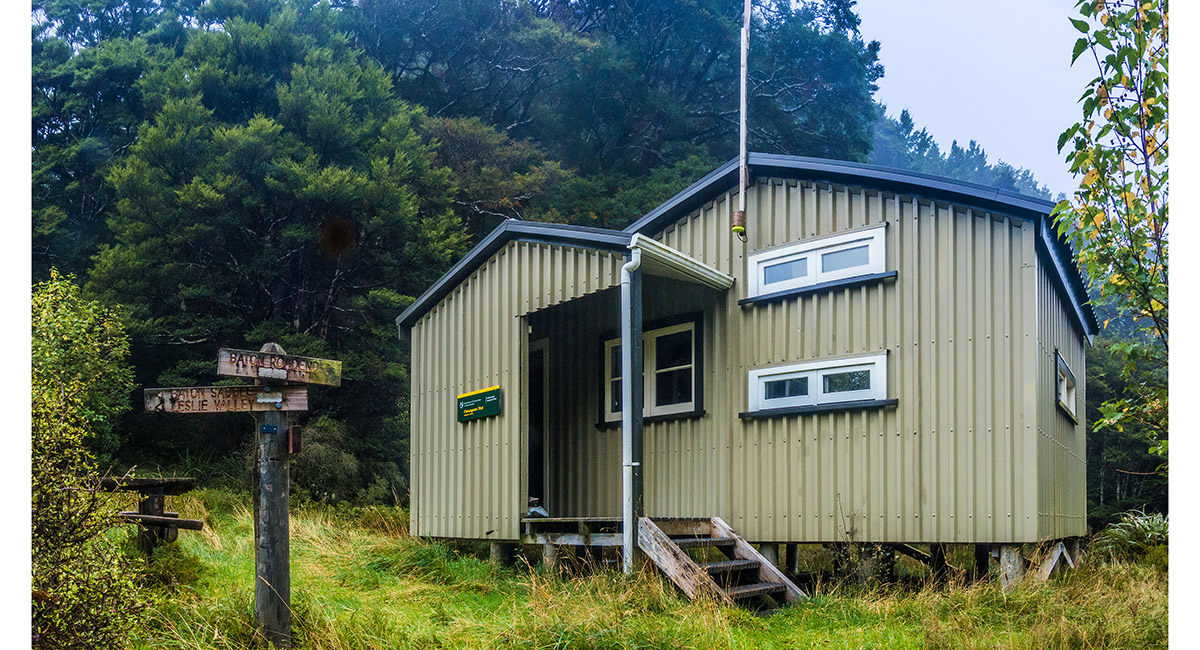
Flanagan's Hut (900m)

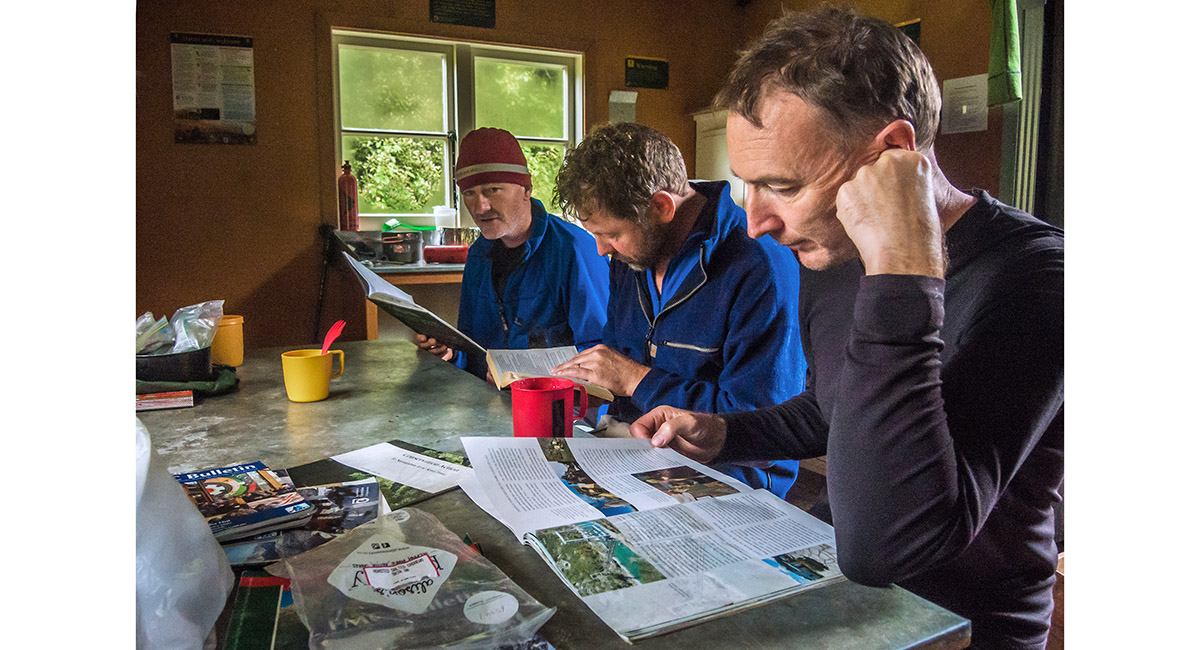
Inside Flanagan's Hut (900m)

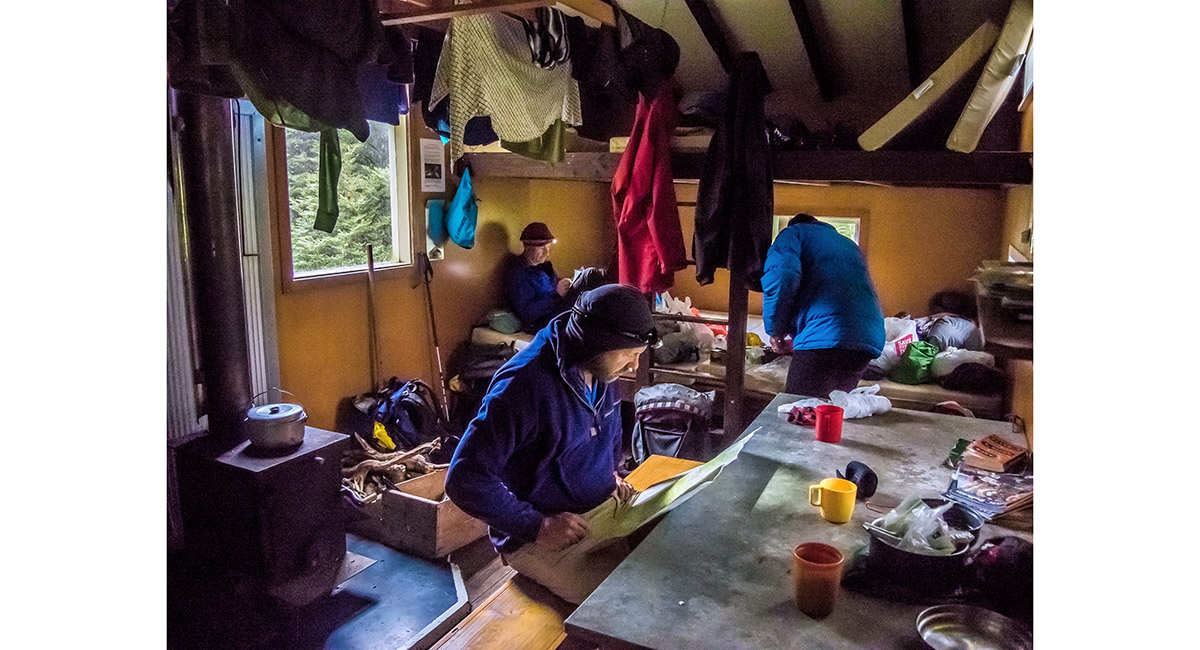
Inside Flanagan's Hut (900m)

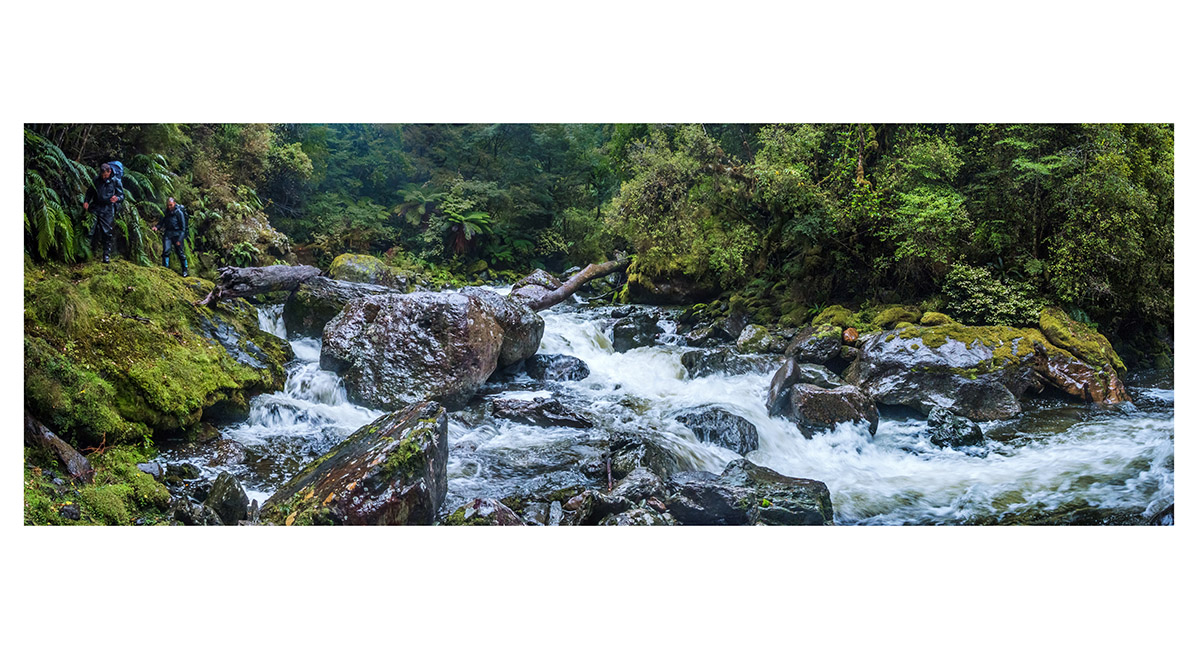
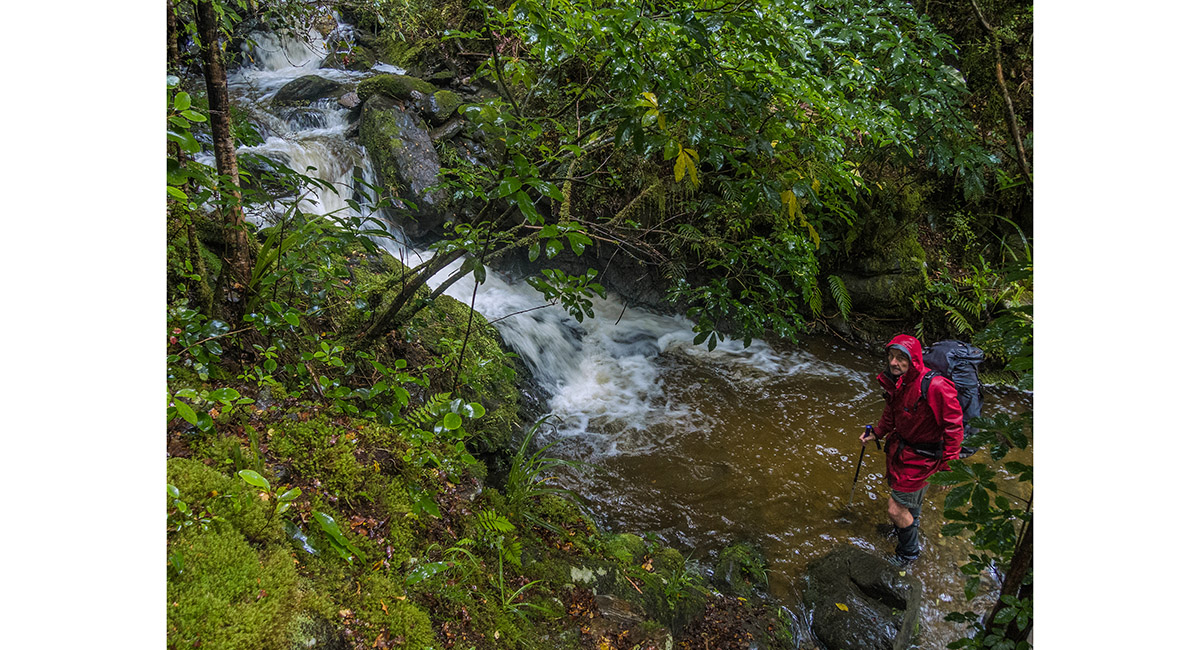
After steady overnight rainfall the many crossings of Baton River required to reach the trail head became a serious proposition

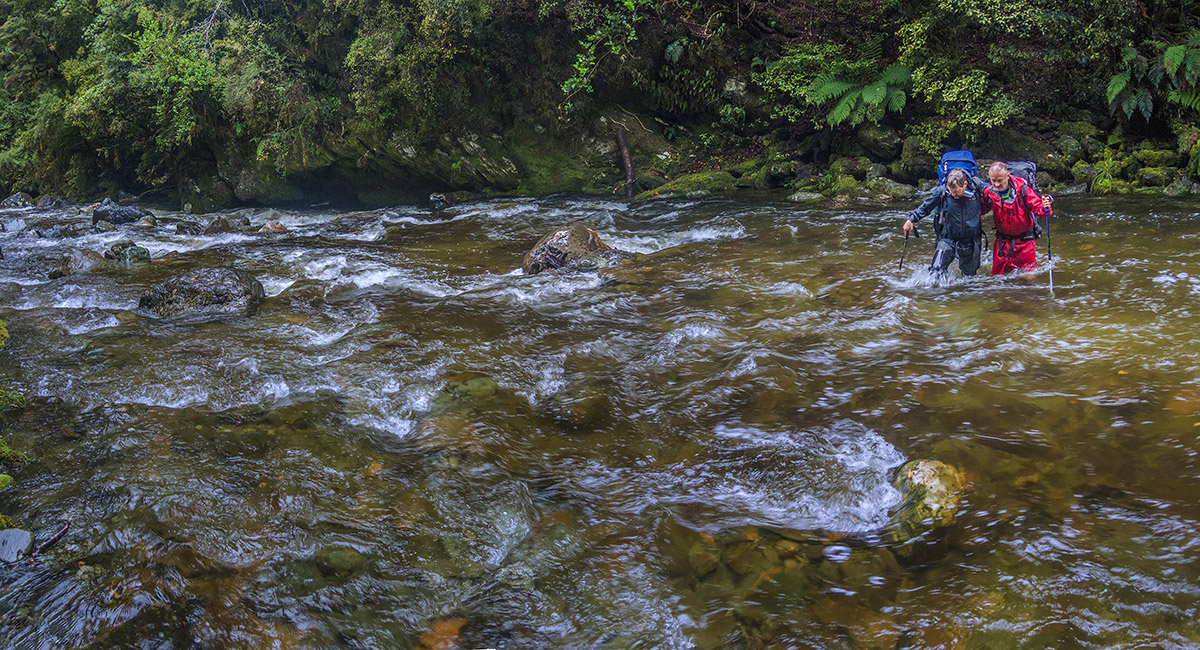
After steady overnight rainfall the many crossings of Baton River required to reach the trail head became a serious proposition


A steep, slippery section of the trail below Flanagan's Hut

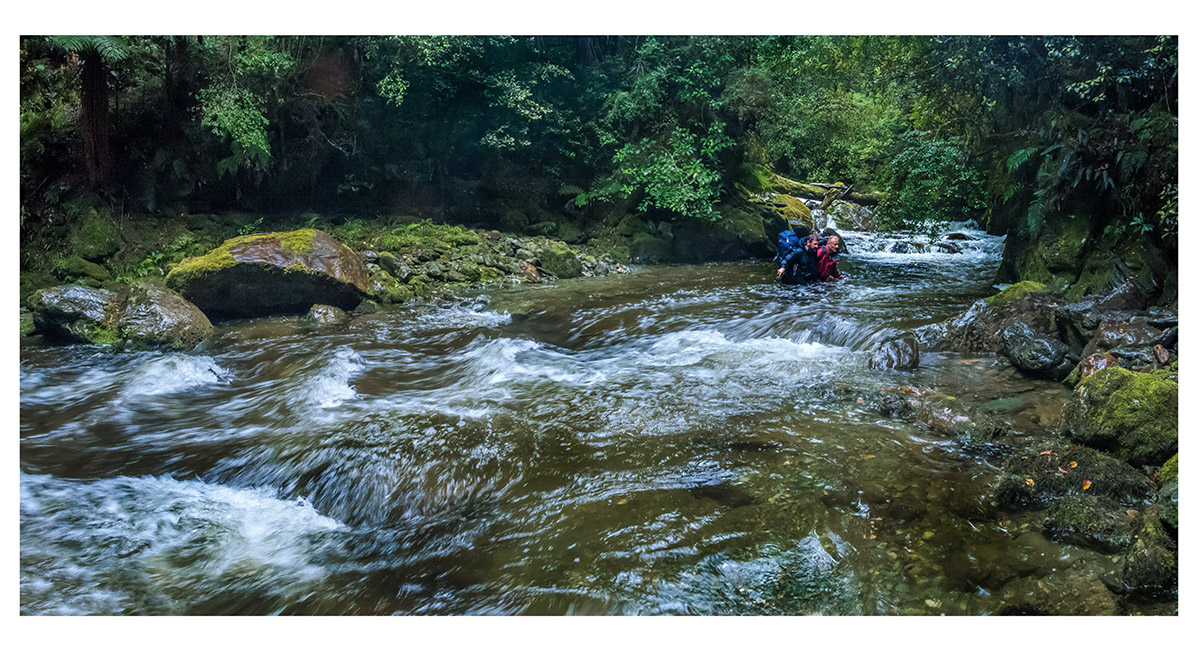
After steady overnight rainfall the many crossings of Baton River required to reach the trail head became a serious proposition

A tributary stream near the end of the trail, at about 300m


The view from the suspension bridge crossing Baton River, where the 4WD trail is reached

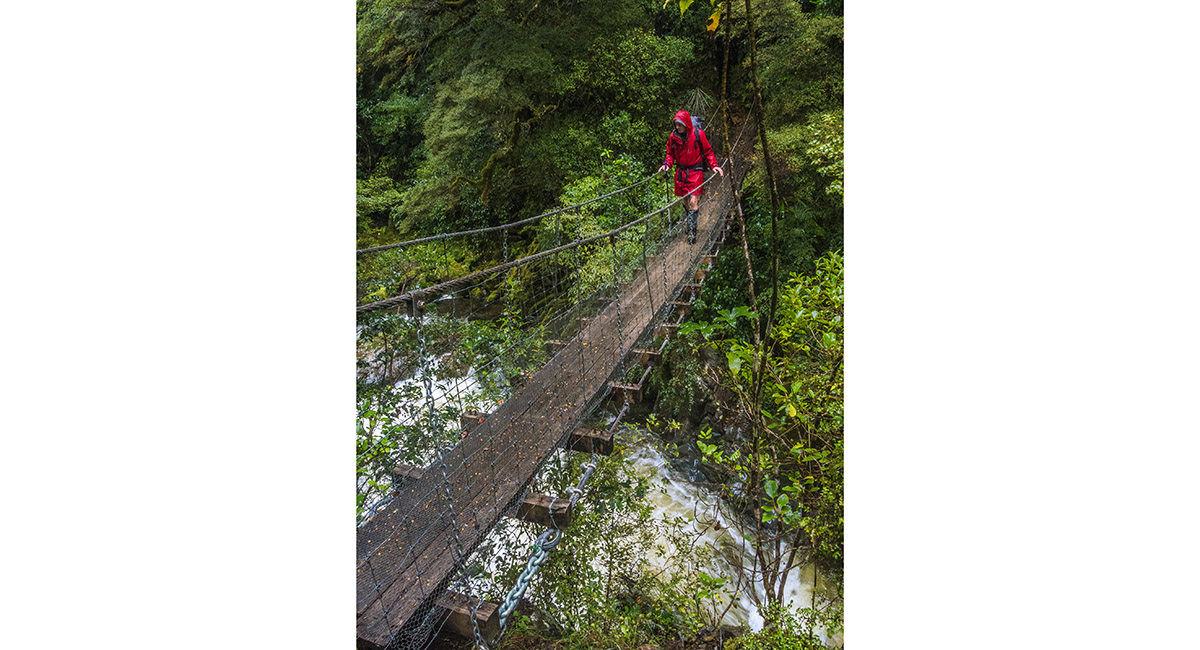
Crossing the suspension bridge spanning Baton River, where the 4WD trail is reached


Out a day early to avoid being trapped by swollen rivers, but now we had to sort a lift back to Nelson. Nothing for it but to start walking down the gravel of Baton Valley Road until we could pick up a cell phone signal. After a few kms we were lucky to meet a local farmer who gave us a lift for another 12 or more kms to the signal point - whew!

Read about it
Birdlife resurgence in the Kahurangi Vertigo Mar 18
Trip evolution in the Kahurangi Vertigo April 18
Escape from the Spaniards Wilderness Magazine Sep 18
Between two rivers Wilderness Magazine Nov 18
![]()
To order a print or web resolution file of any image you see in this slide show, just right click the image, click “Copy Image URL” and paste in to the “Your message” box of our Contact Us form. Please also note, for each image, if you want a print or web resolution file. We will get back to you as soon as possible to confirm price and payment details.
Open Contact Us in a new window to paste Image URL(s) easily