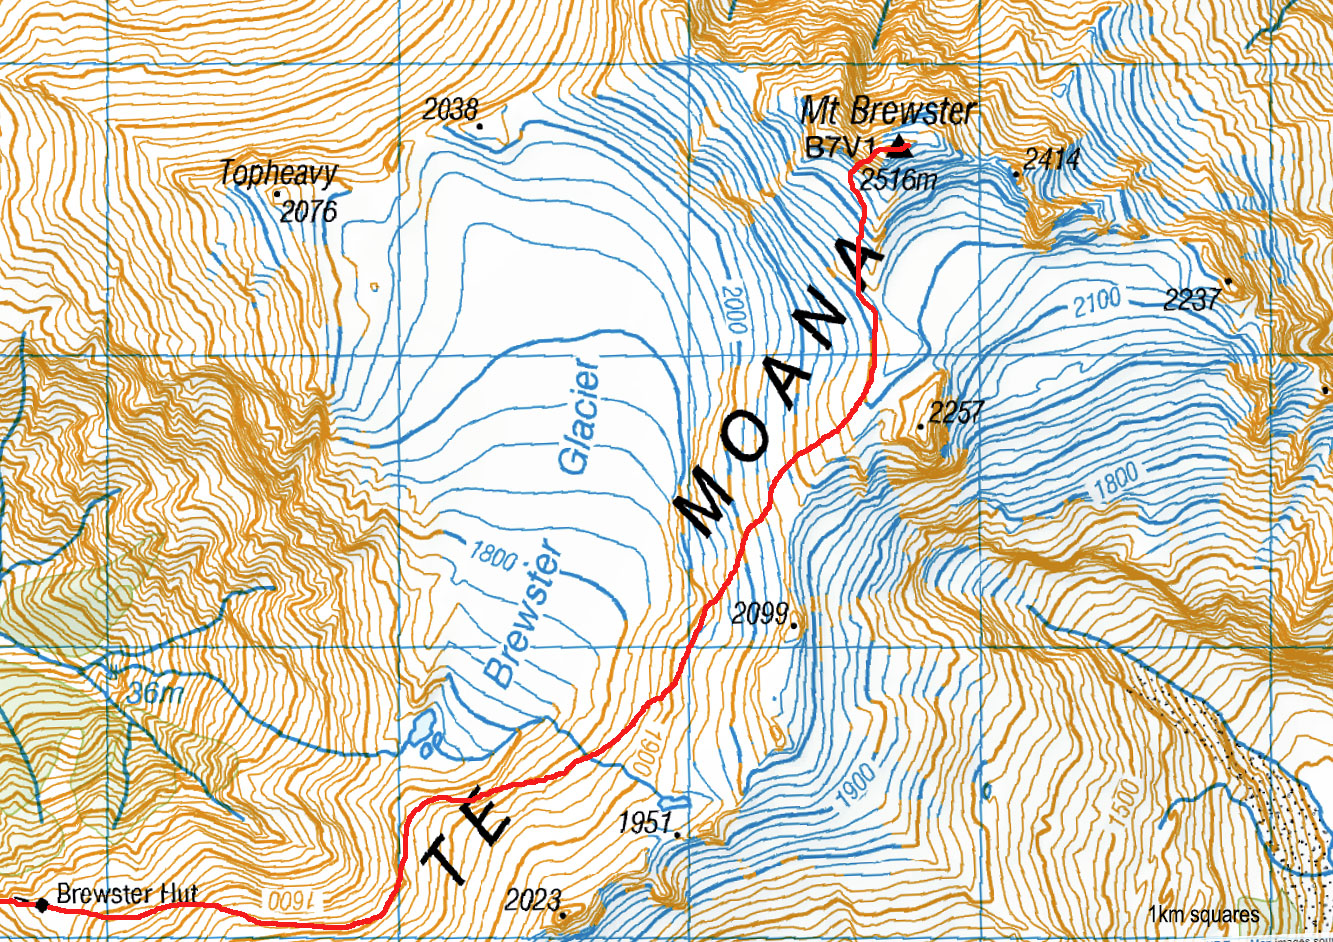
Mt Brewster via SW face, October 2018
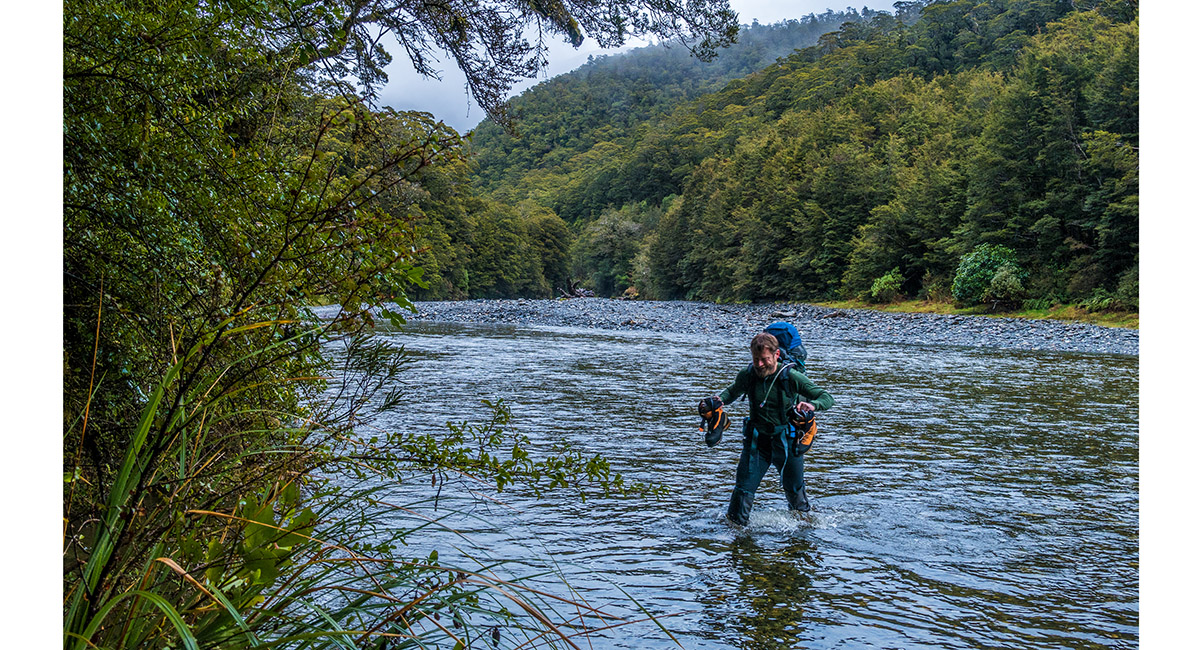
The obligatory wade across Haast River, right at the start of the trail (490m) up to Brewster Hut (1,440m)


On the root covered trail to Brewster Hut


It was wet from drizzle and snow melt, making the going slippery


Above the treeline at about 1,350m, below Brewster Hut

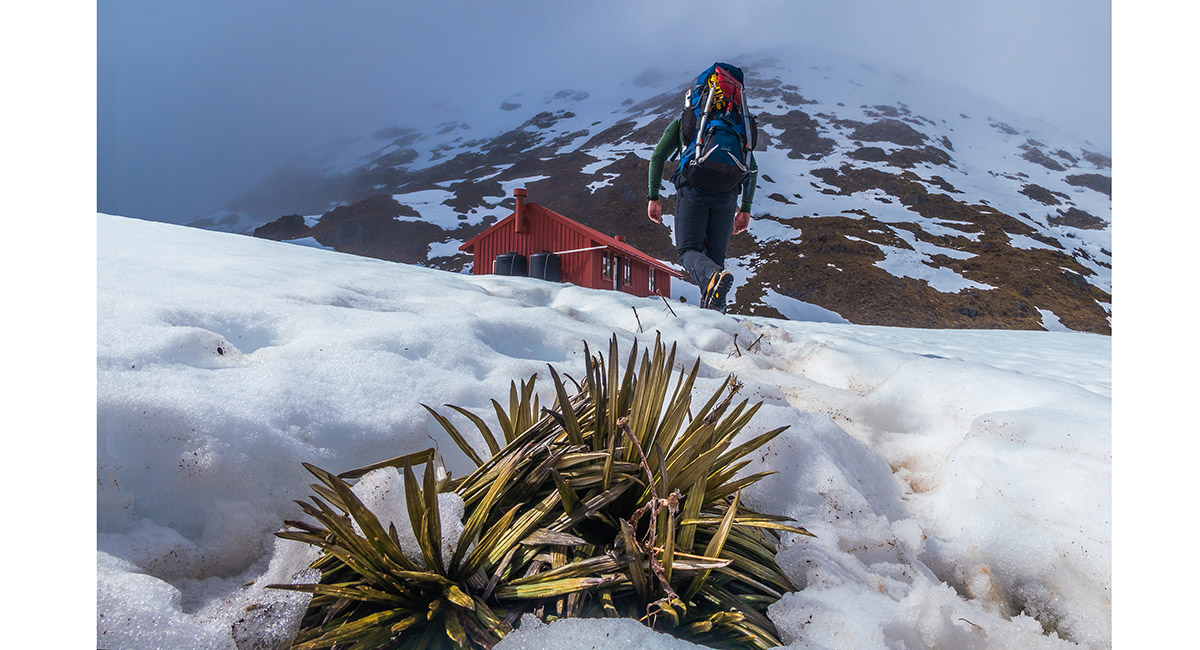
Breaching the snowline, just as we reached Brewster Hut (1,440m)


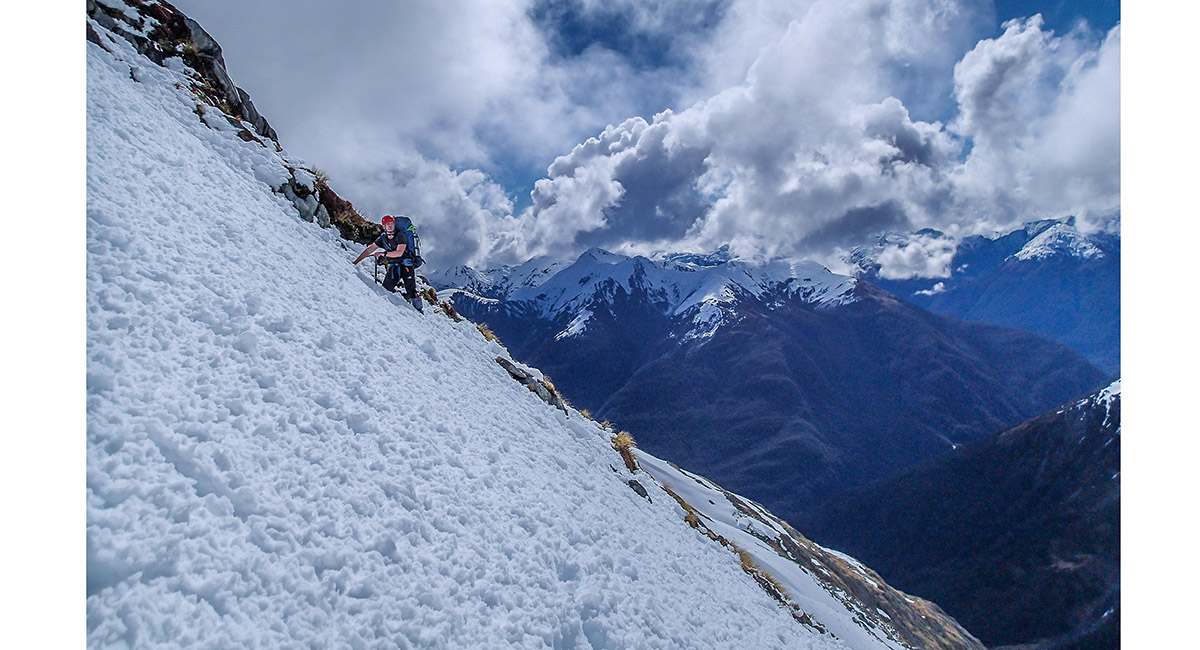
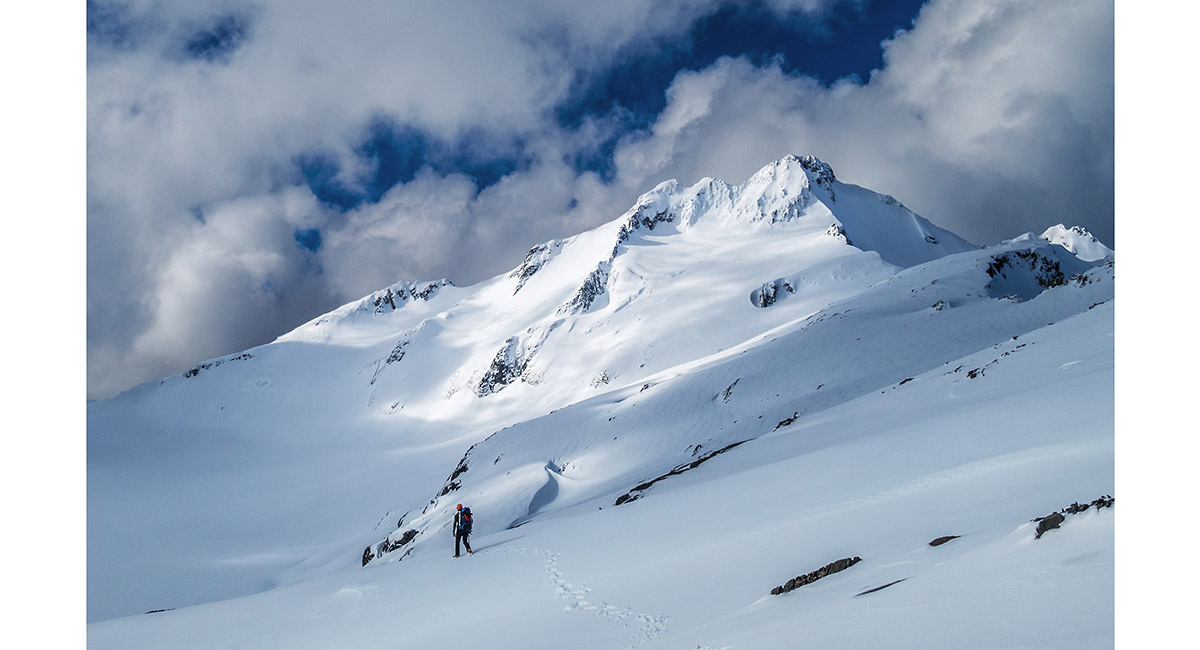
Climbing above Brewster Hut towards the 1,650m traverse contour

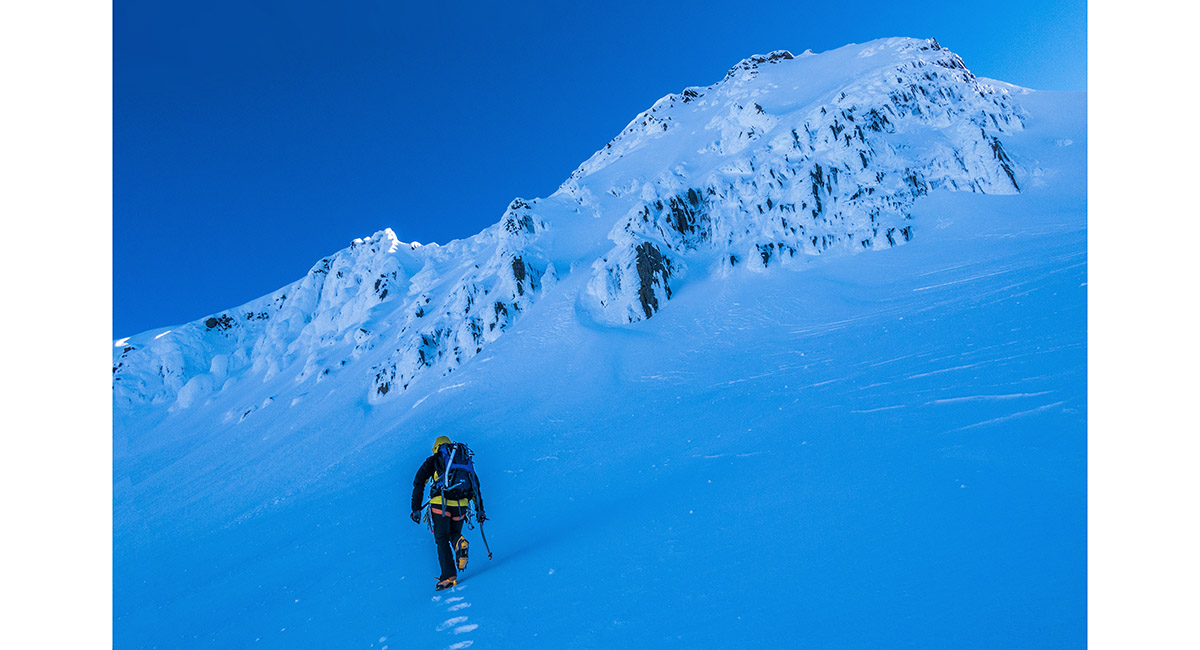
The snow was very soft by afternoon, with a lot of avalanche debris around - making for arduous going with heavy packs (Photo Piotr Nowak)

At about 1,800m on the approach to Mt Brewster, with Brewster Glacier down to the left

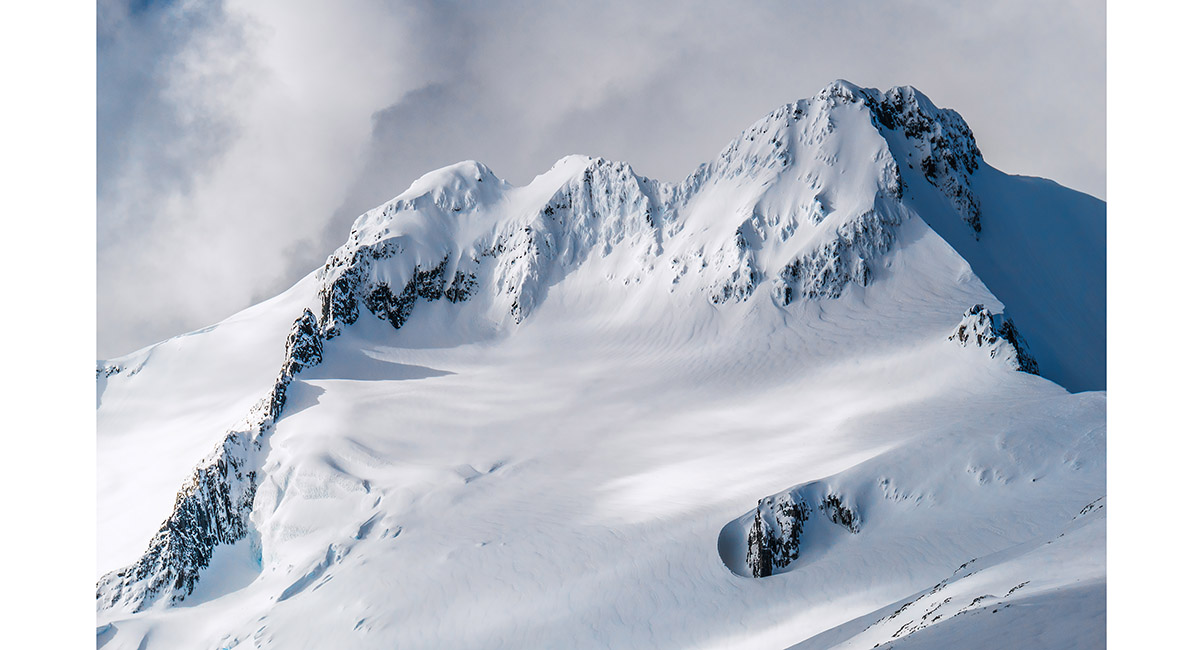
In late afternoon we got our first glimpse of the mountain and its south west face

Nearing our campsite at 1,900m, with Mt Brewster behind

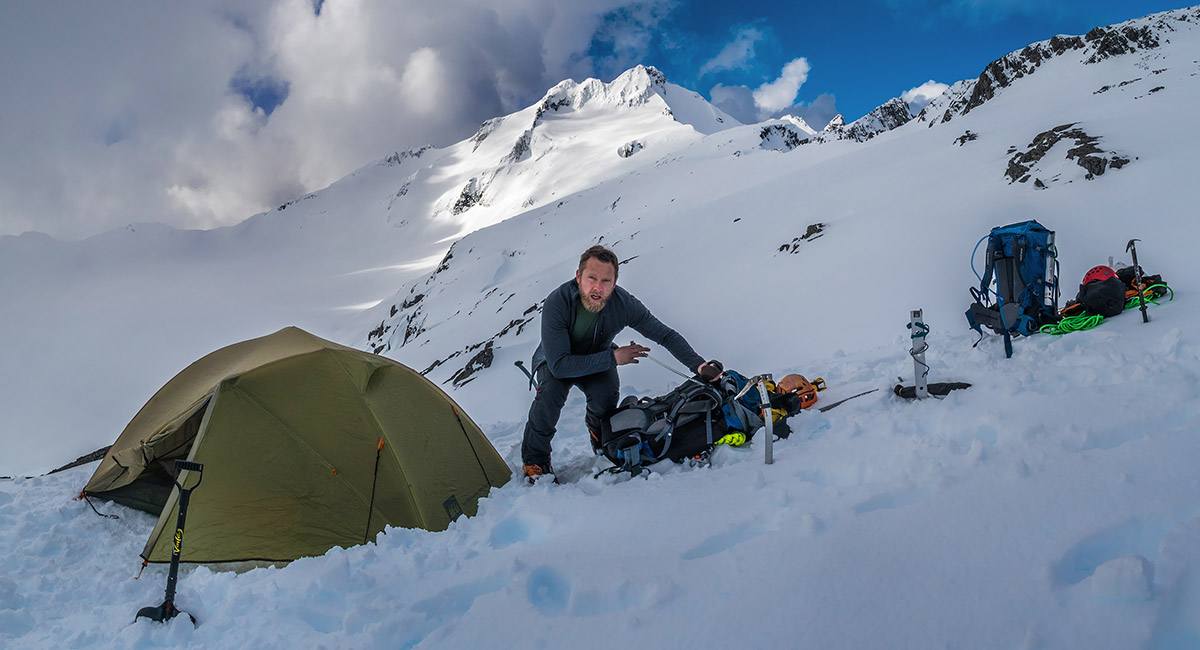
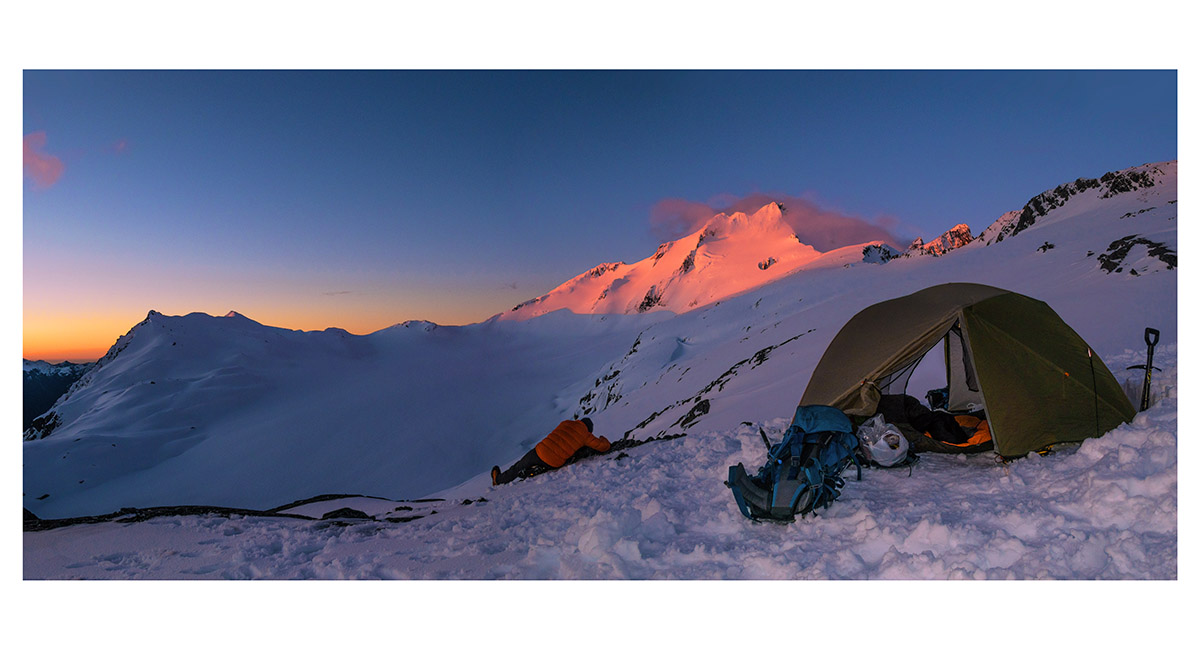
At camp (1,900m)

Room with a view - Mt Brewster ahead

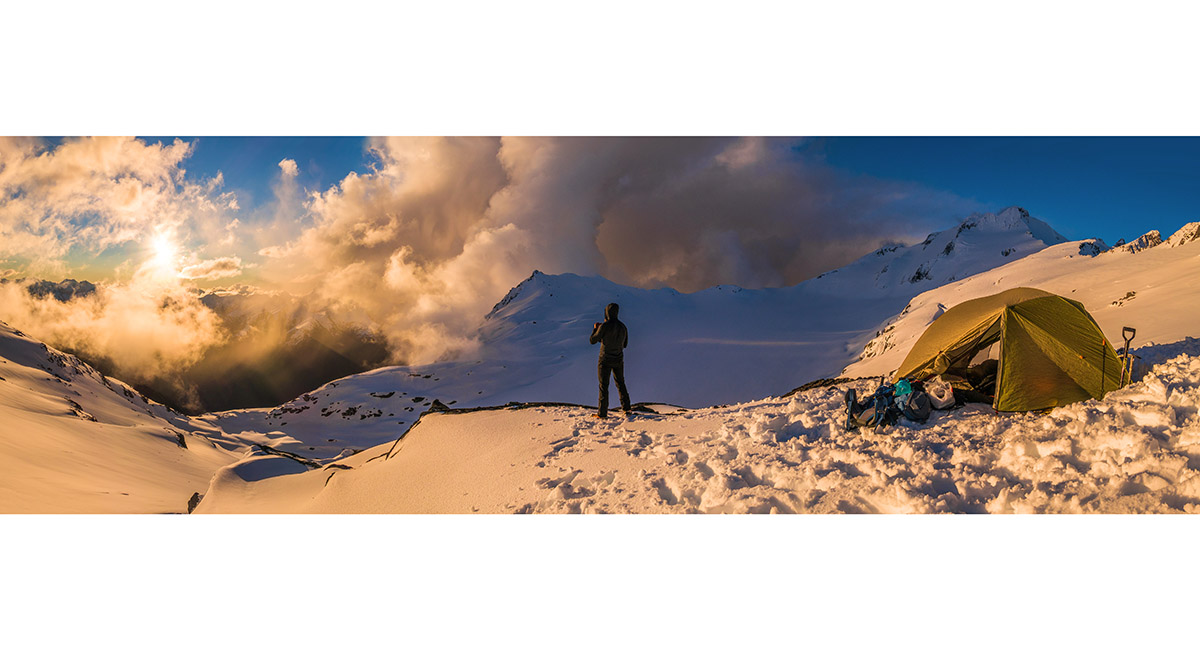
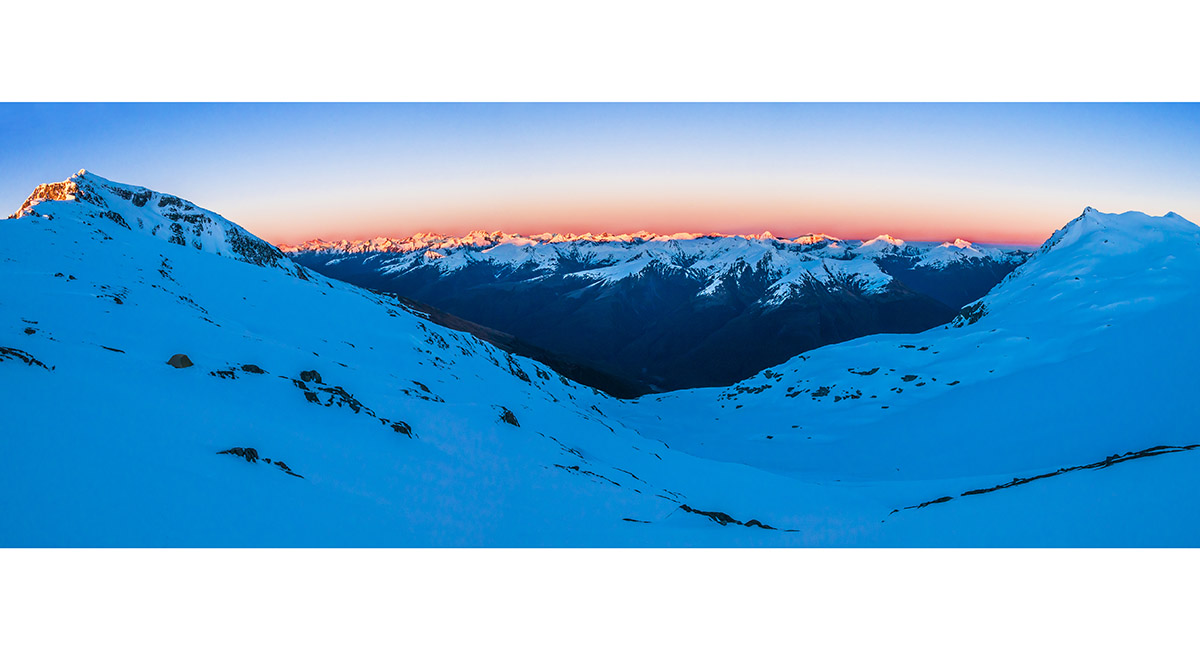
The weather began clearing properly at sunset. Here Top Heavy (2,076m) is centre and Brewster (2,515m) right


The south west face of Mt Brewster. Our route went almost straight up to just left of the sunlit high point. The true summit lies a little further to the right, also partly sunlit


Mt Brewster and Top Heavy at sunset

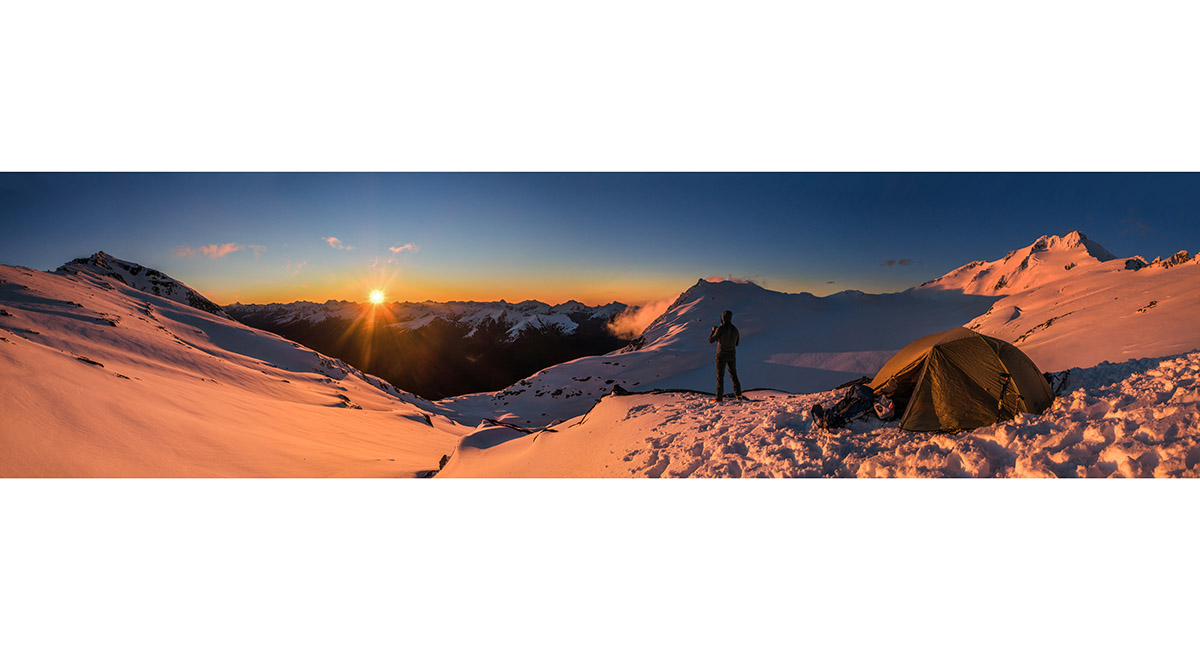
From right - Mt Brewster, Top Heavy and Mt Armstrong (2,174m) at sunset

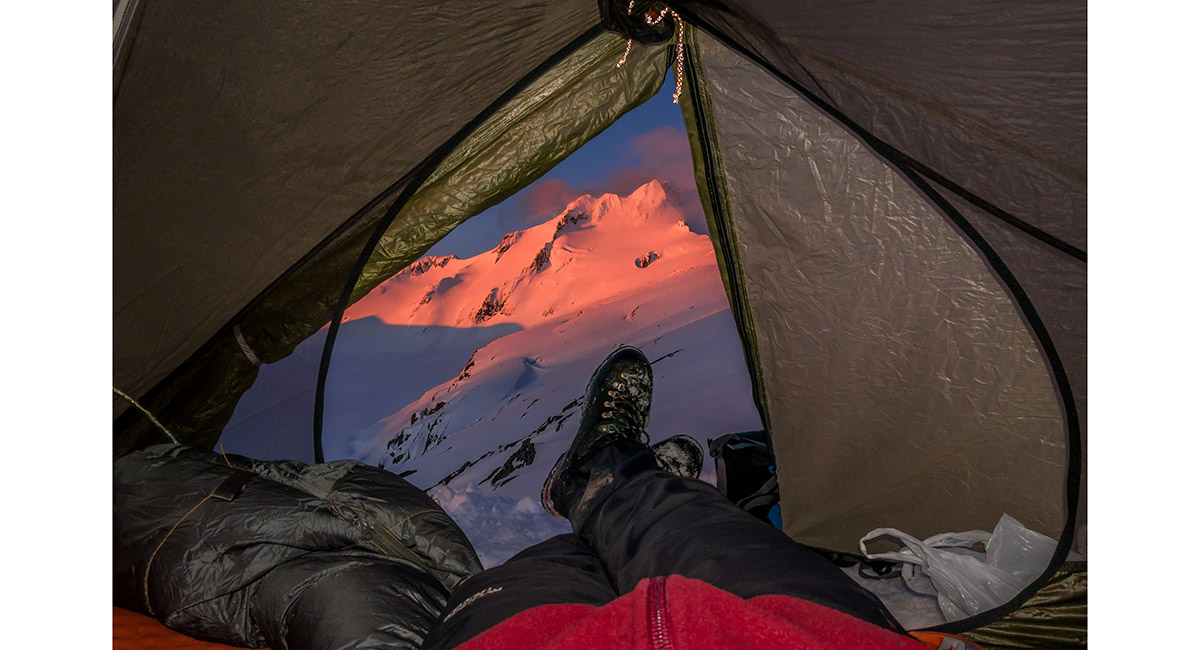
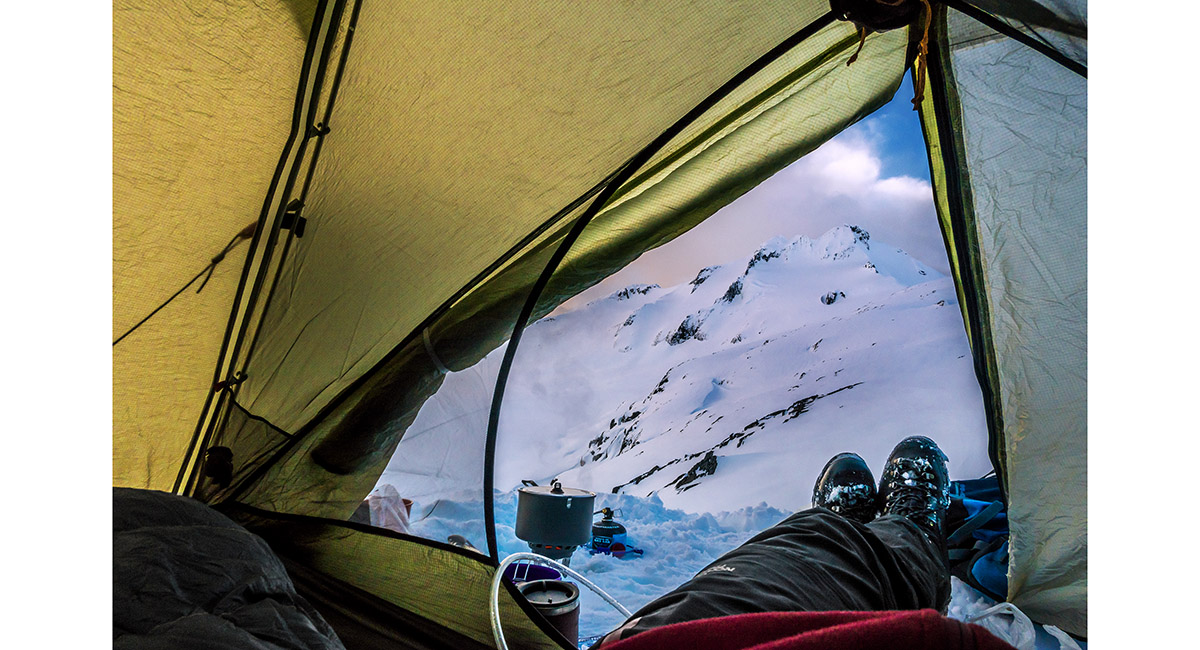
Room with an even better view

Our destination for tomorrow holds the last of the day's sunlight

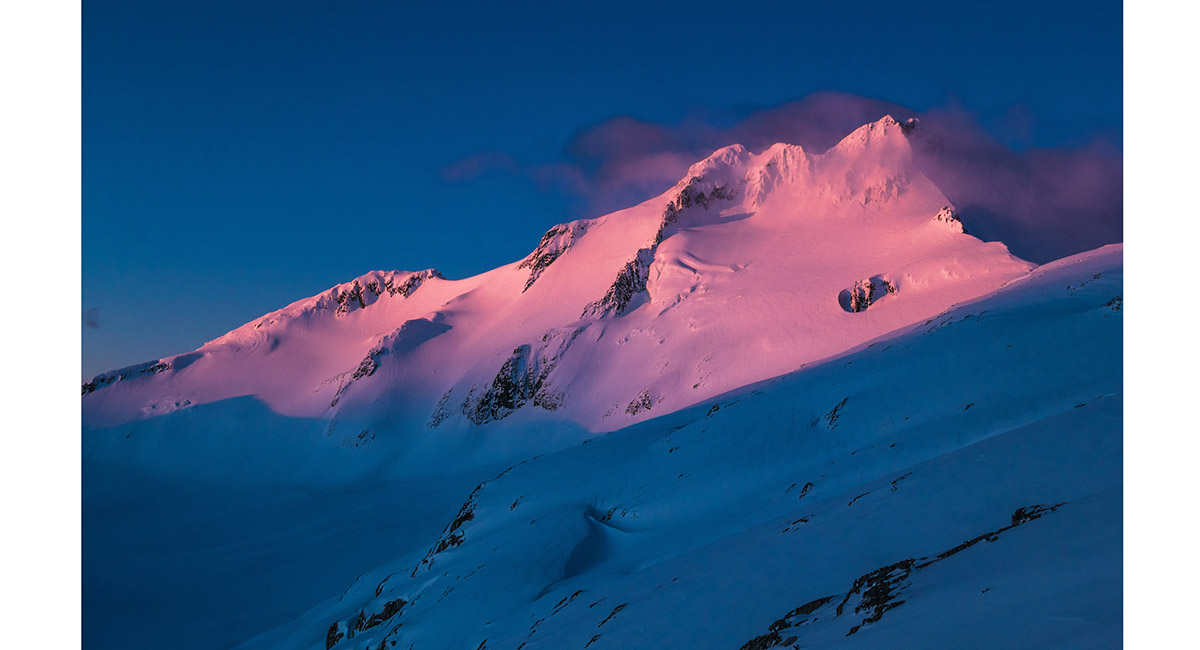
Alpenglow on Mt Brewster


Alpenglow on Mt Brewster and Top Heavy

There was a freeze overnight - my boots, despite being stowed inside our tent, were frozen solid. Dawn was clear and calm

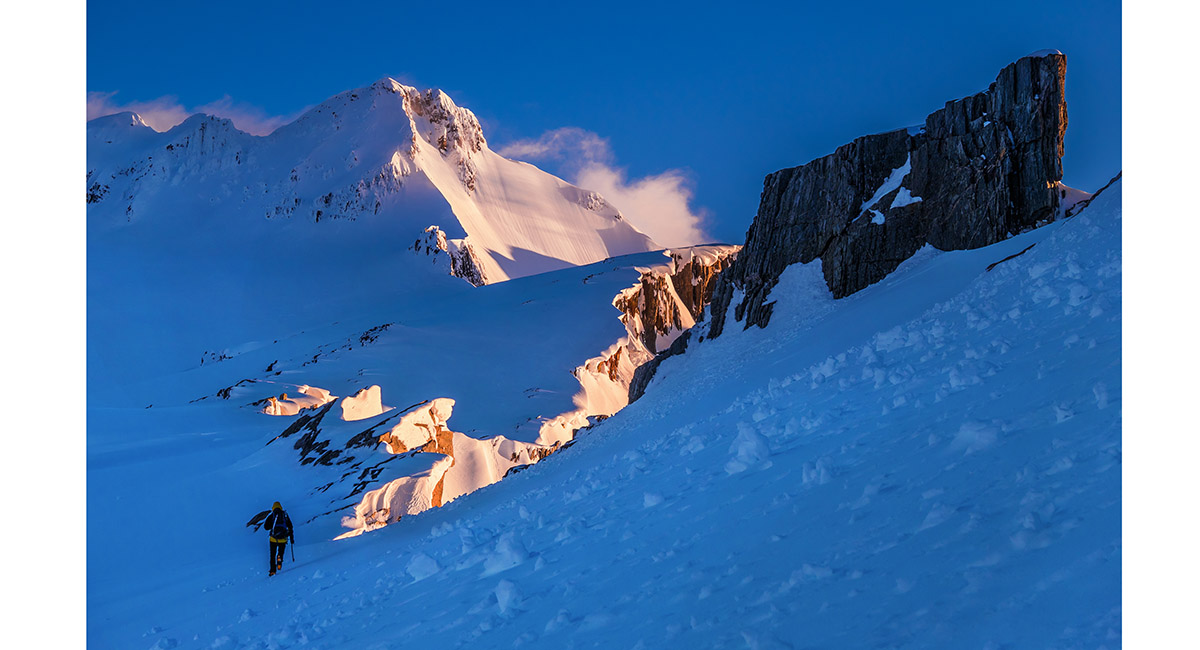
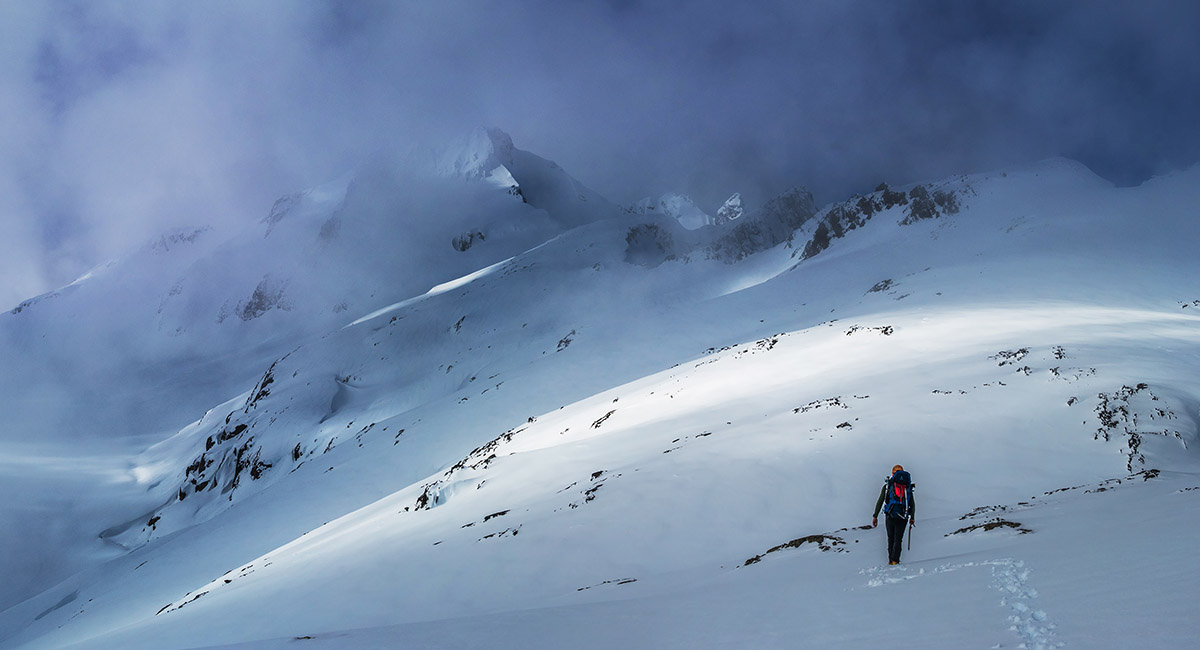
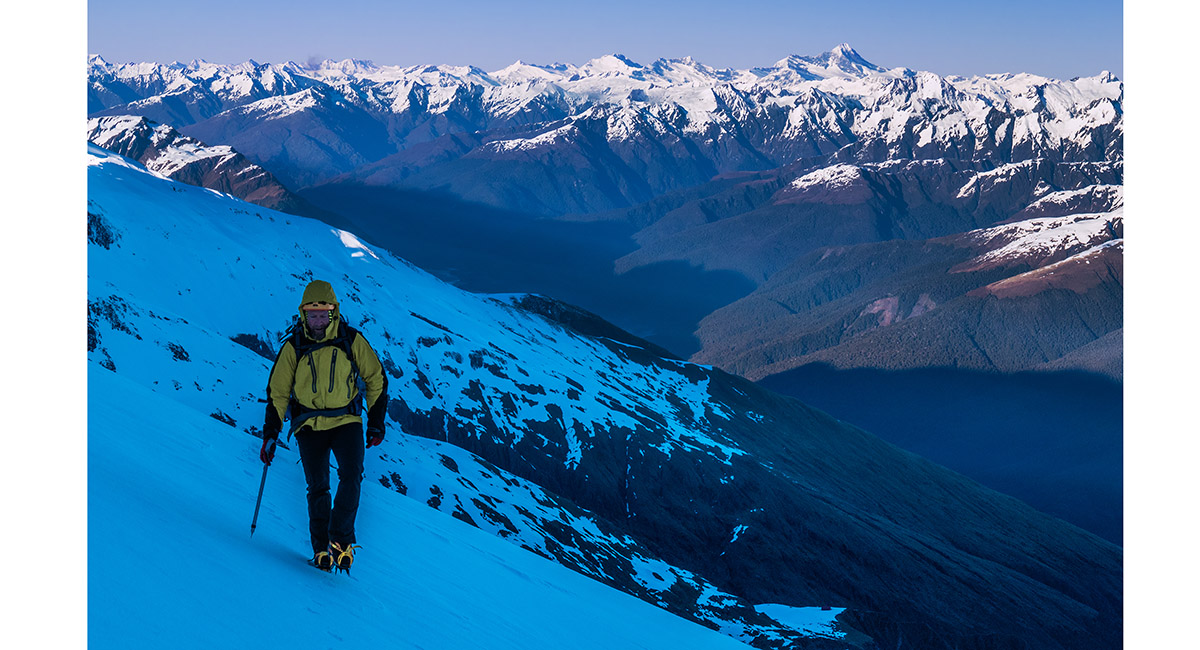
At about 2,100m on our way to the base of the south west face


At about 2,100m on our way to the base of the south west face

From 2,200m, looking east across the south east face

From 2,200m, looking south west to Mt Armstrong

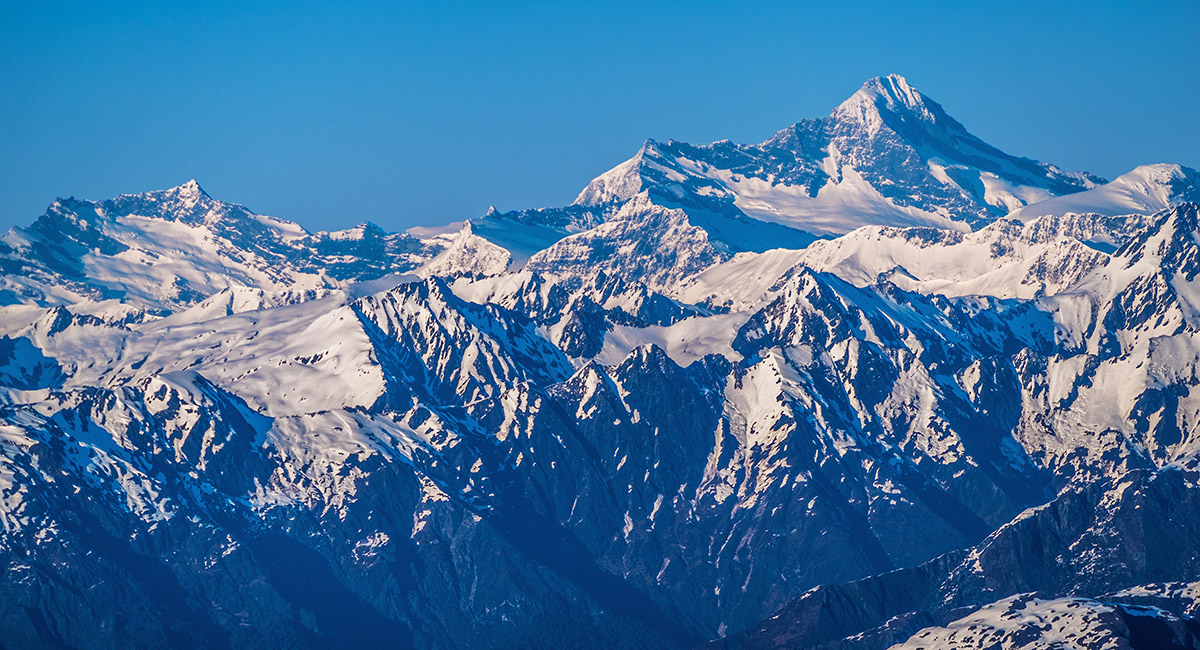
A view of Mt Aspiring from beneath Brewster's south west face

A view of Mt Aspiring from beneath Brewster's south west face

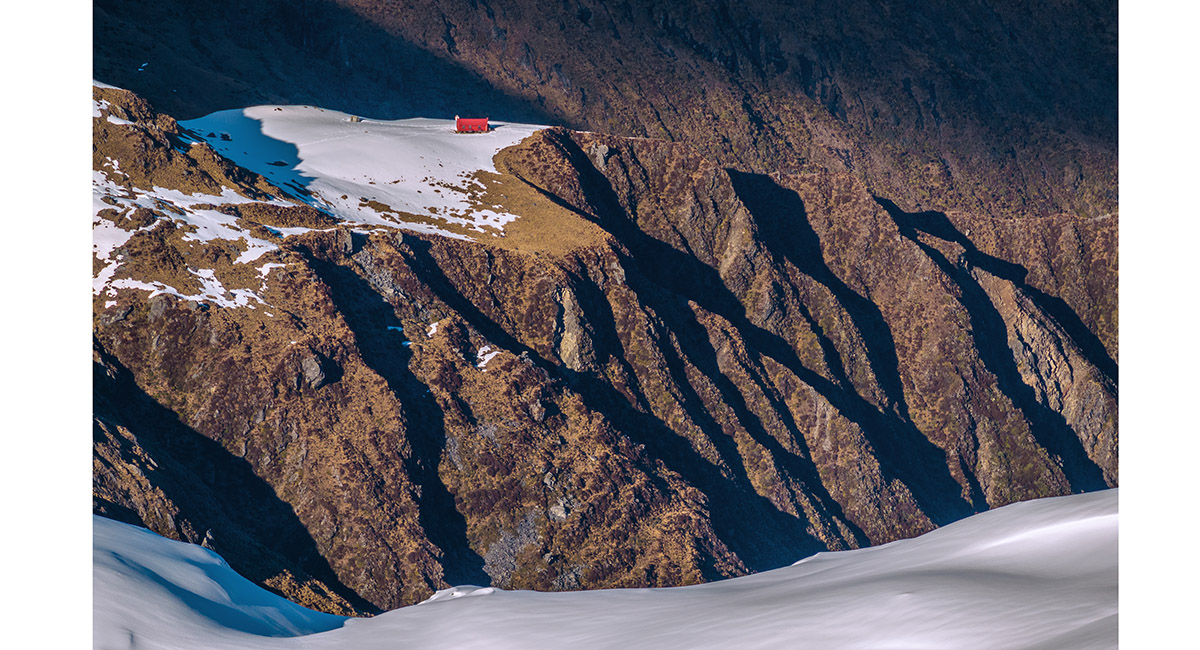
A view of Brewster Hut from beneath Brewster's south west face

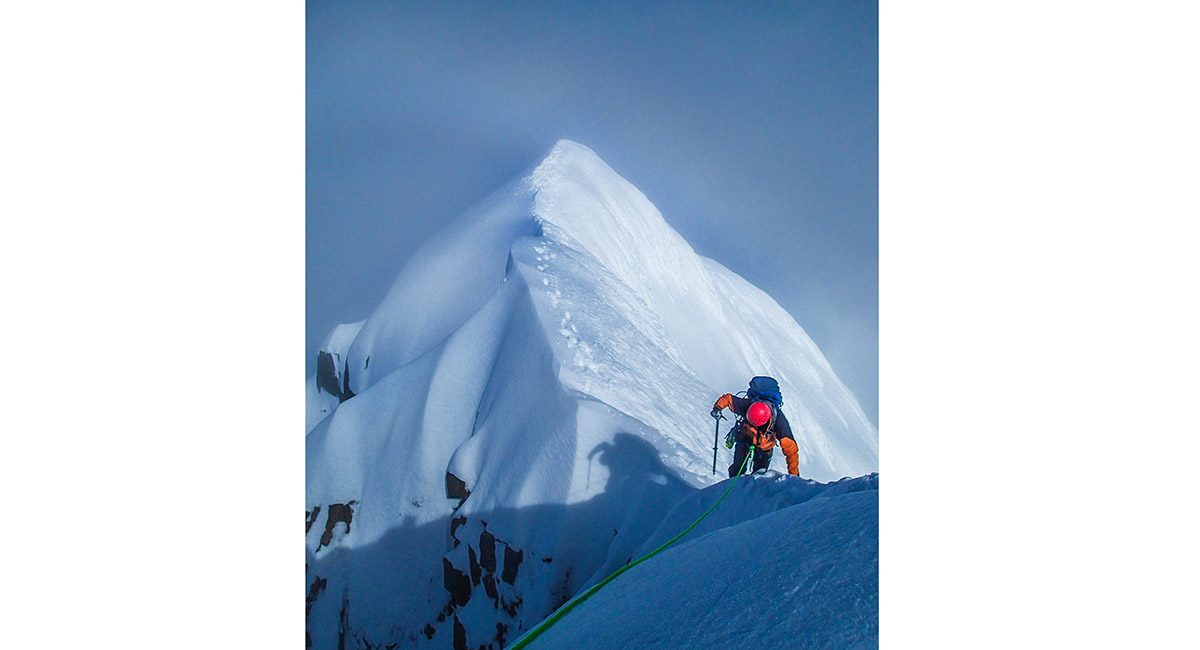
Heading to the entry point (at 2,360m) to the south west face

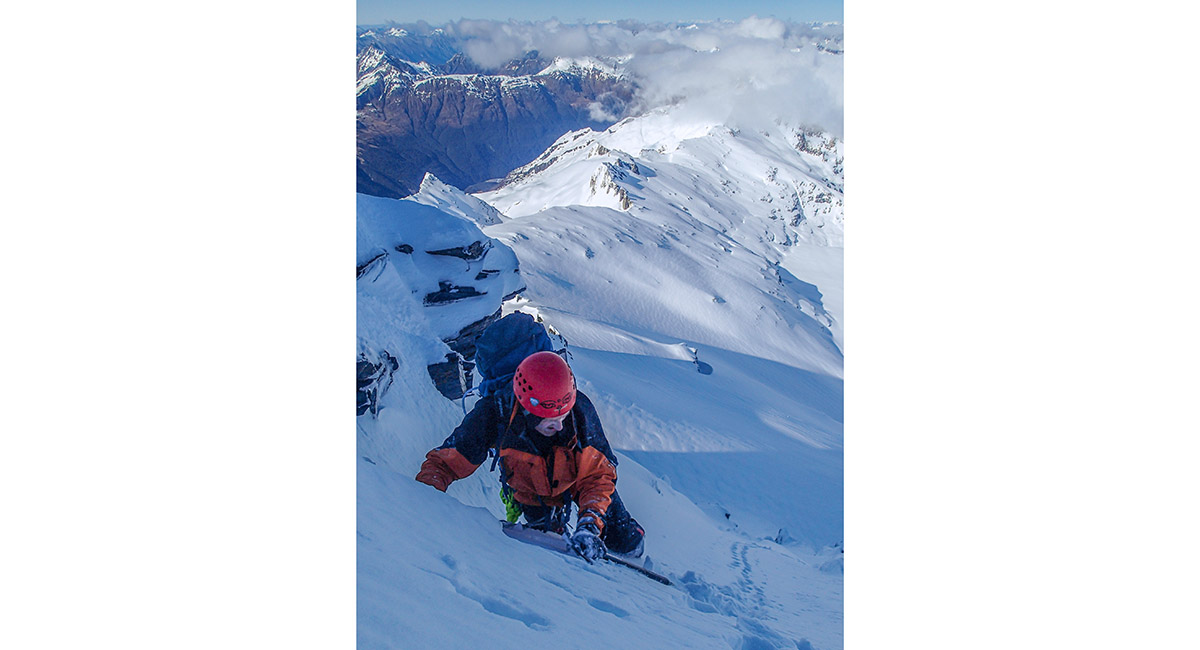
At about 2,400m on the south west face


At about 2,450m on the south west face

Just below the summit ridge, where we exited the southwest face at about 2,480m (Photo Piotr Nowak)

Pleased to put the yawning drop of the south west face behind me for the time being (Photo Piotr Nowak)


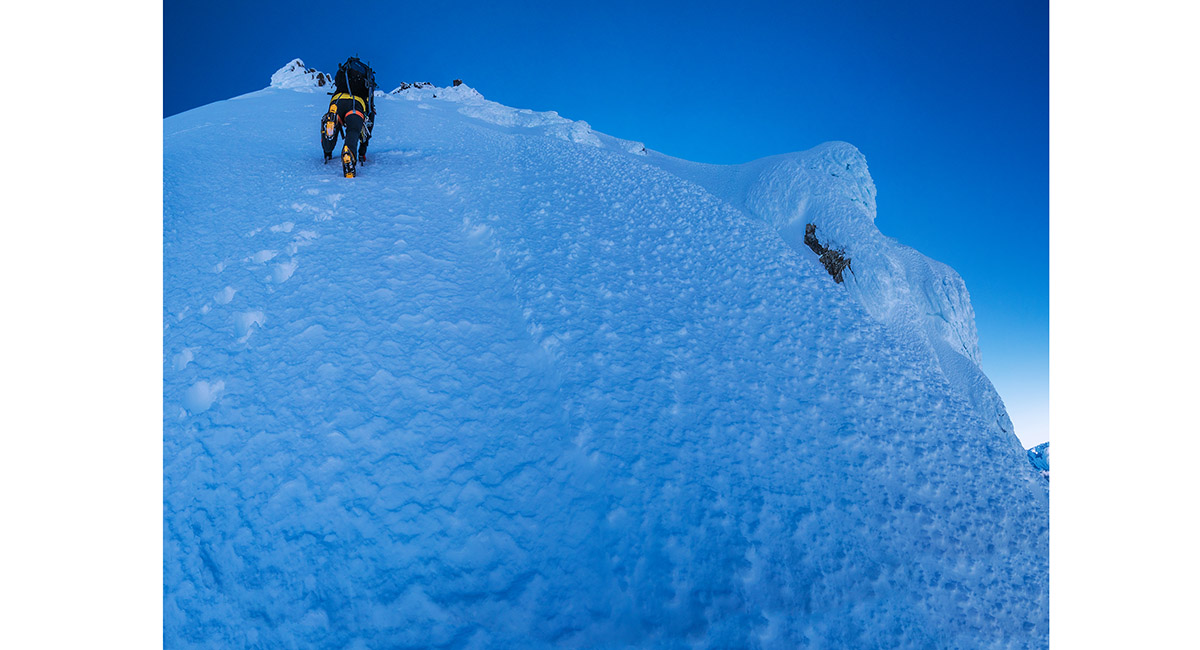
From the summit ridge, looking back down the 180 or so metres of the south west face


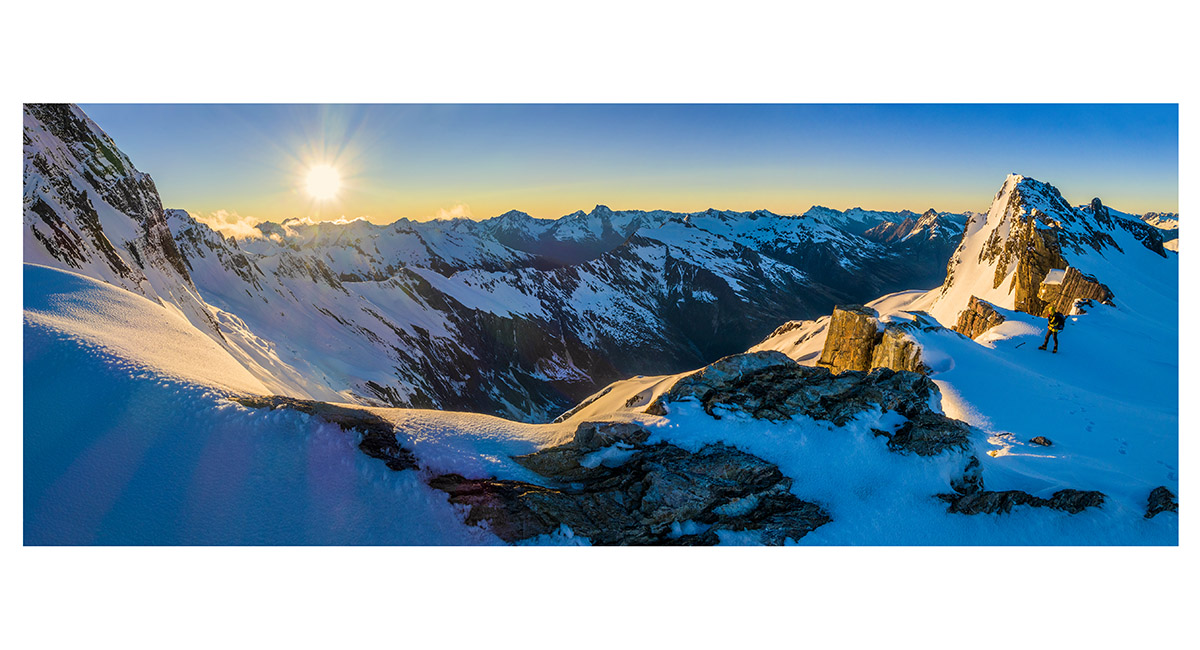
A view from nearly 2,500m, north west along the main ridge of Mt Brewster. This is the only shot this way either of us took before whiteout conditions made it impossible (Photo Piotr Nowak)


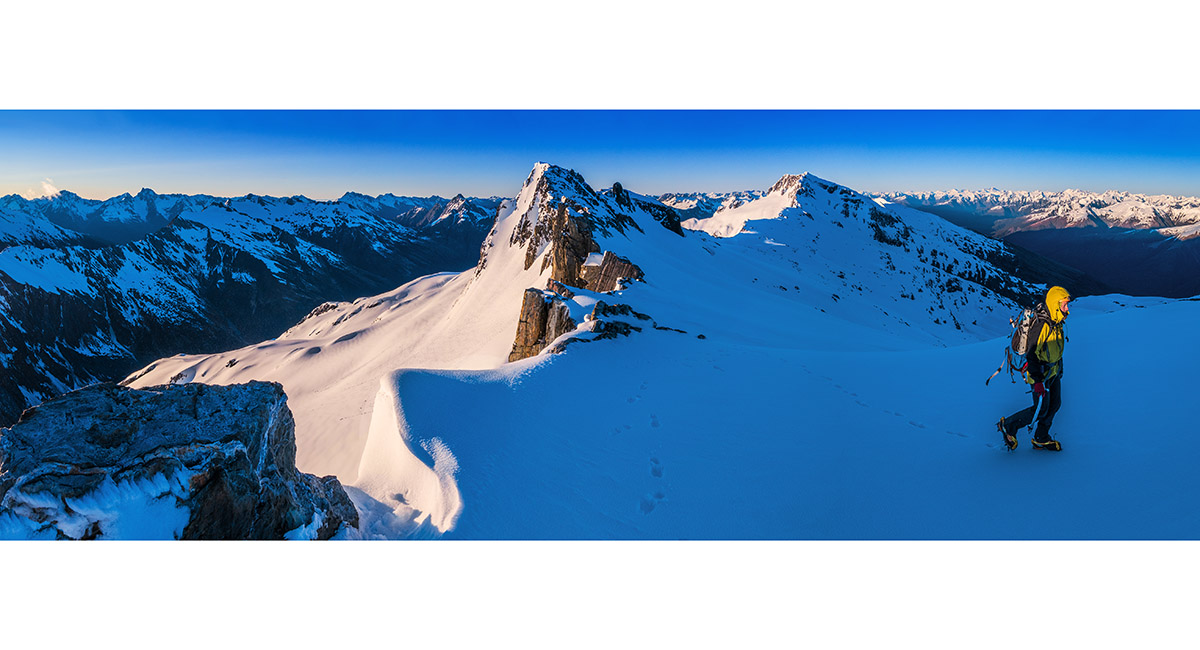
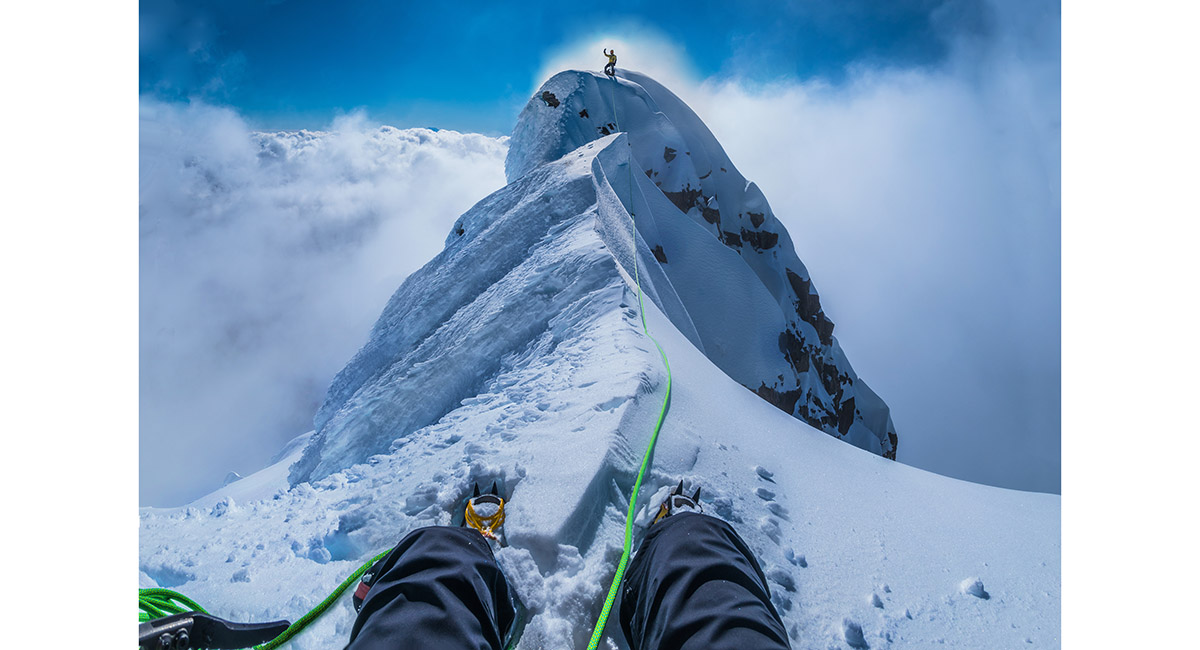
Climbing east towards the high point before the true summit

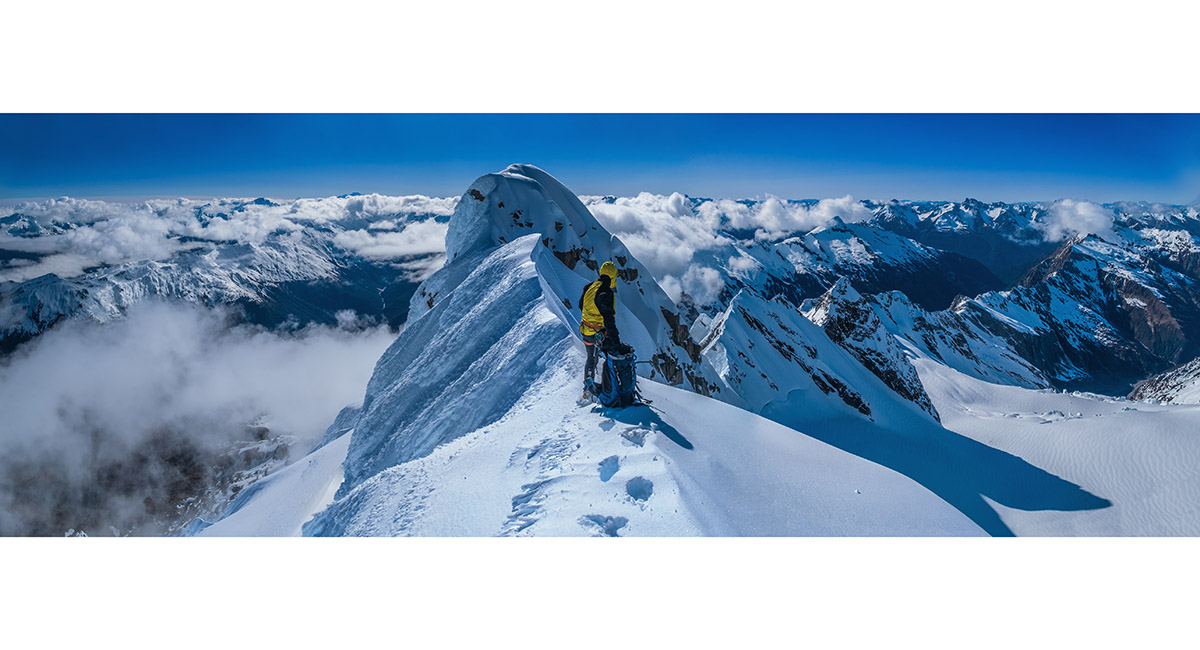
At 2,500m, with a short final pitch required to pass a highly exposed knife edge between us and the true summit

Piotr enjoying having reached the true summit, viewed from my belay stance

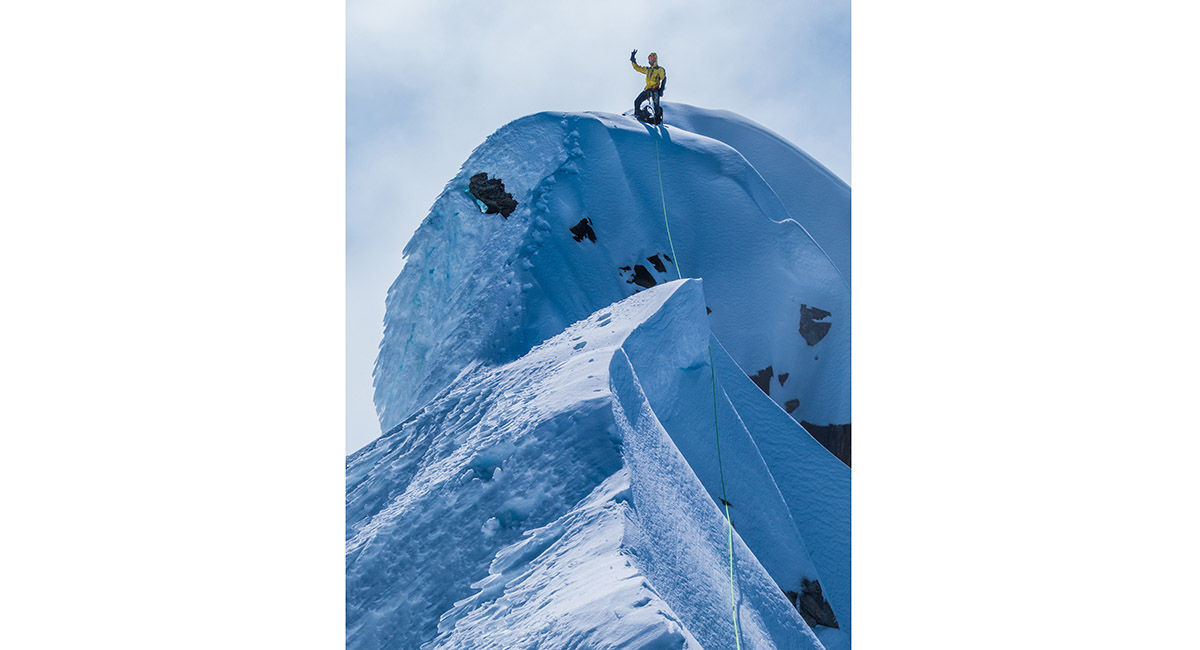
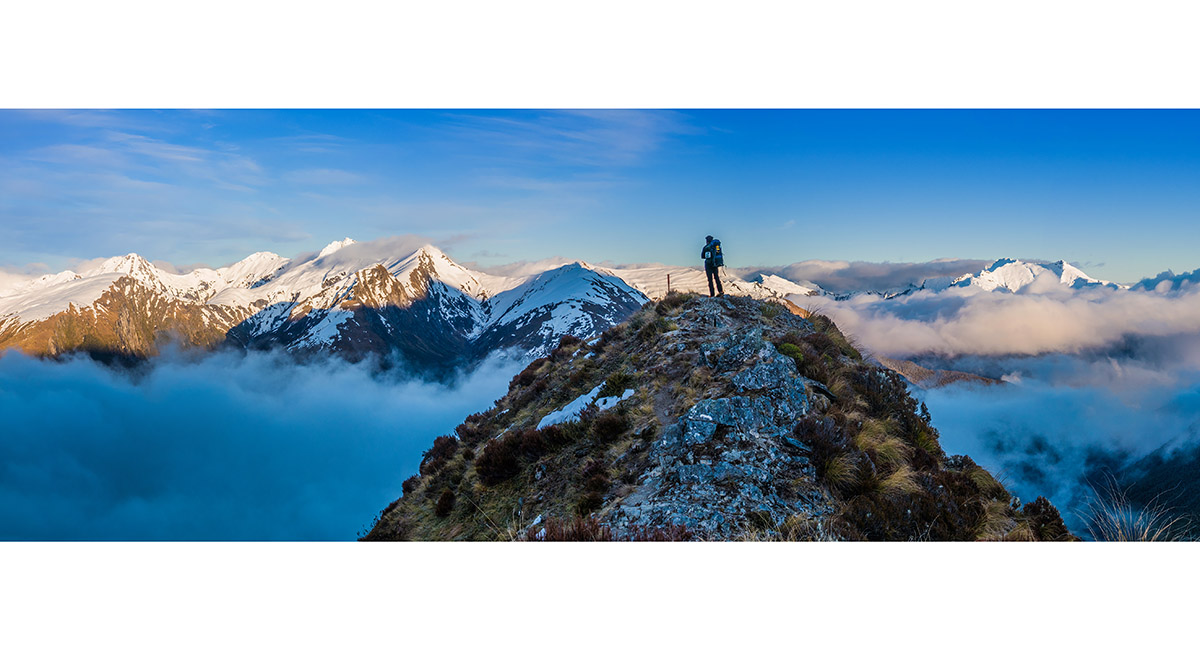
Piotr on the summit of Mt Brewster (2,515m)

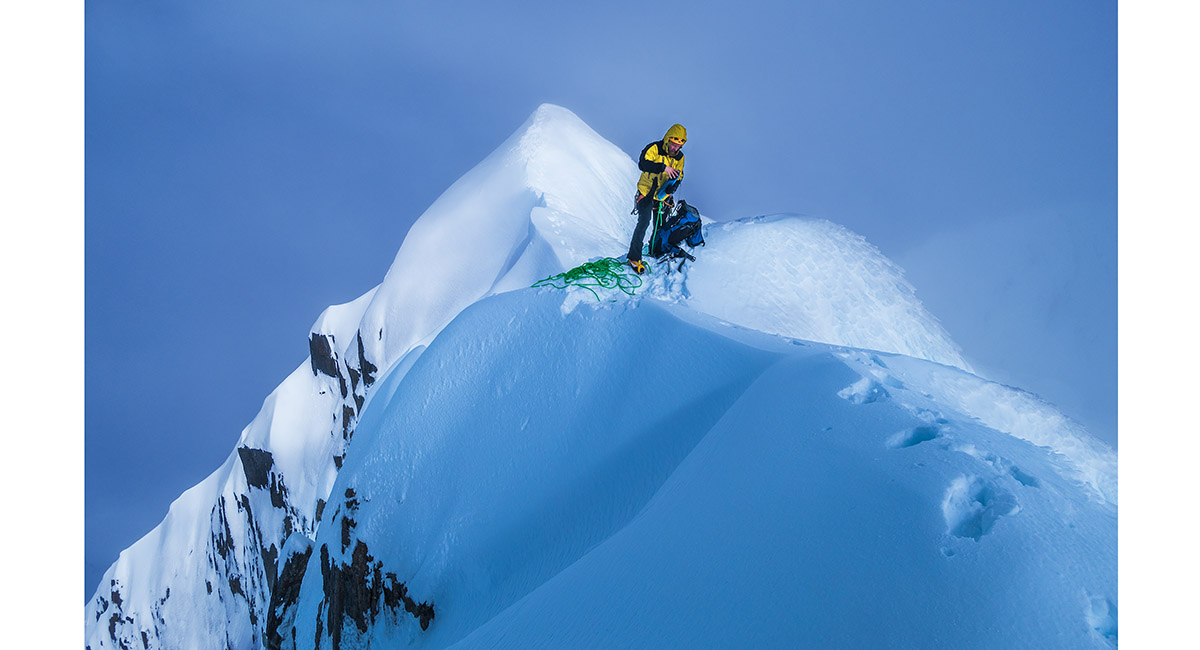
My view from the summit, back to Piotr's belay point.

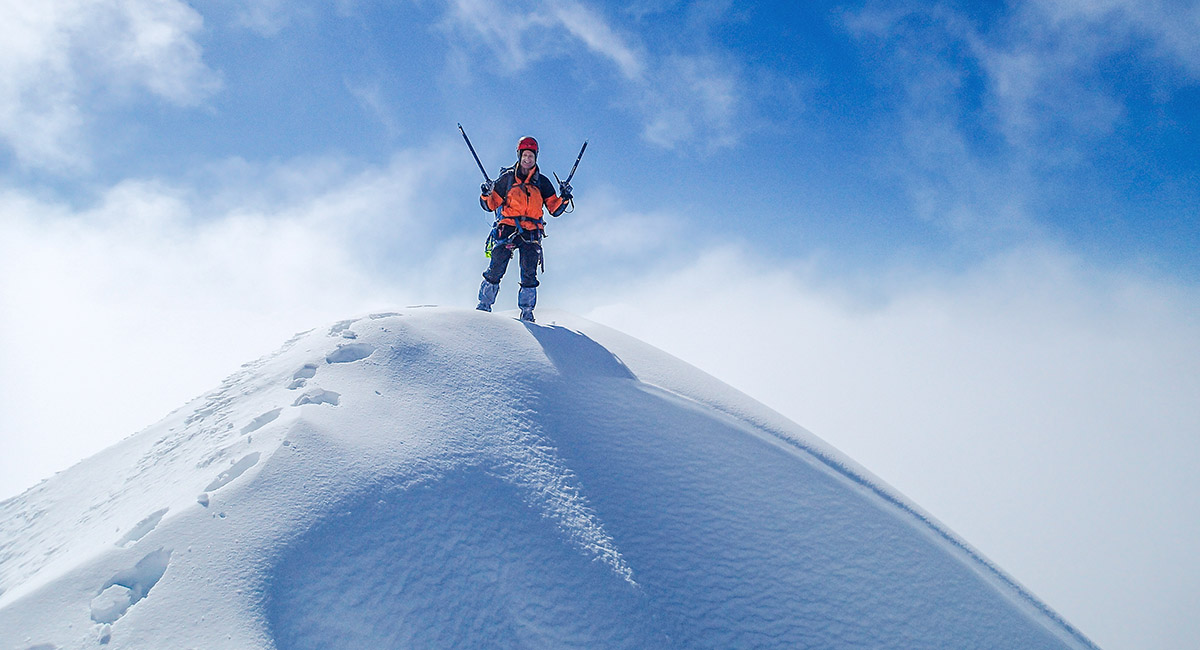
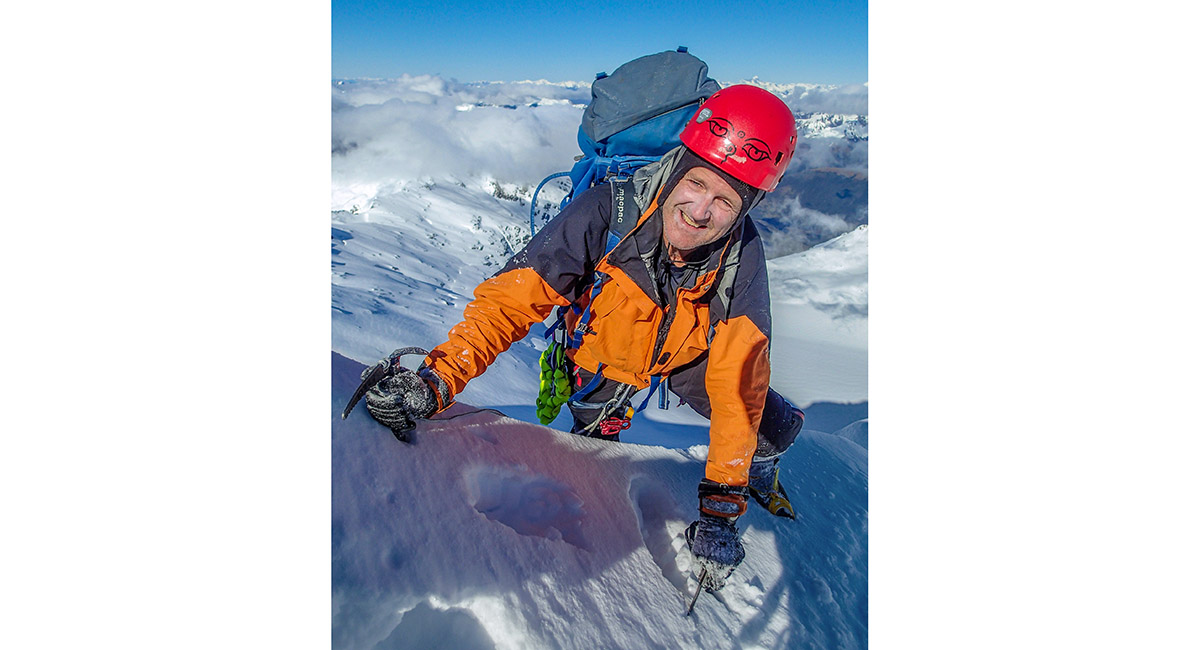
On top of Mt Brewster (Photo Piotr Nowak)

The descent down narrow snow was a delicate affair. I was very glad of the rope (Photo Piotr Nowak)

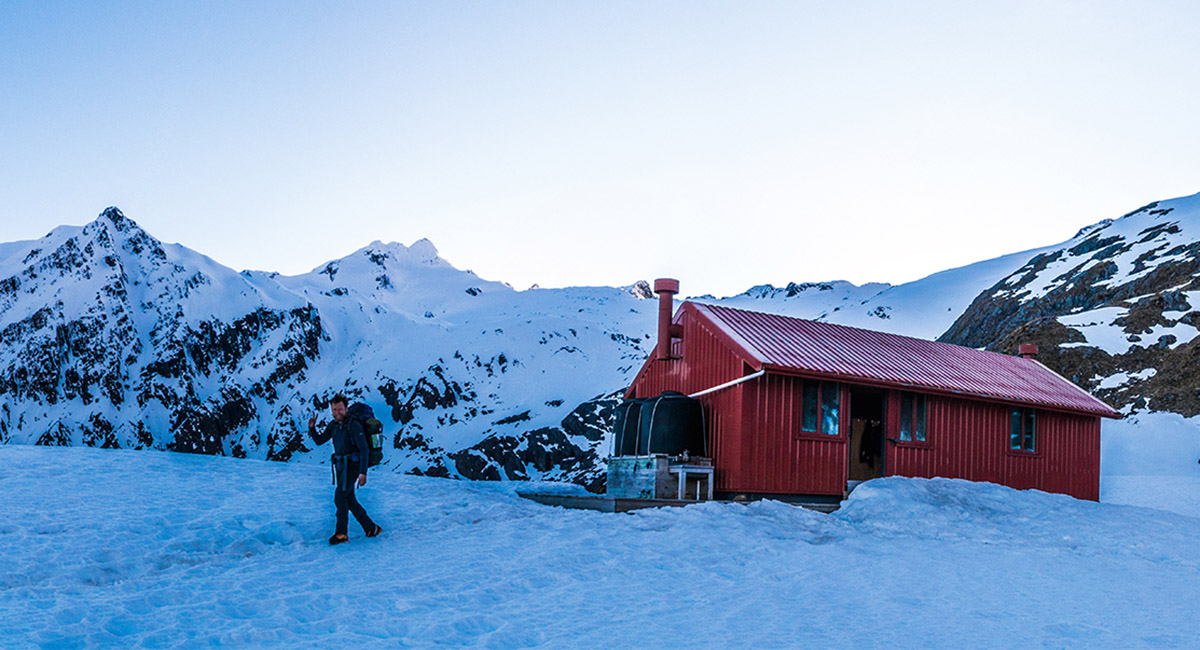
Next morning, as we departed a very full Brewster Hut, with Mt Brewster and Top Heavy behind

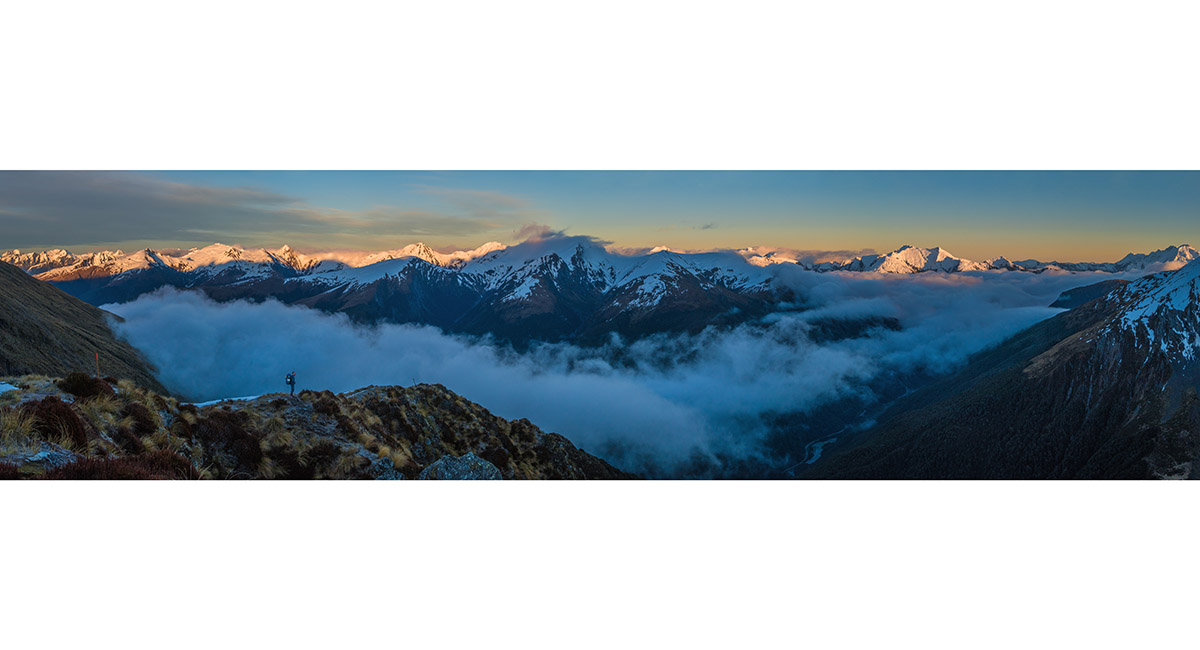
Our view west to the main divide, on the descent above the treeline

Our view west to the main divide, on the descent above the treeline


Fantail Falls, a 2 minute walk from the trail head and car park

Read about it – Not the perfect freeze Vertigo Nov 18 Back on Brewster Wilderness Magazine Oct 20
![]()
To order a print or web resolution file of any image you see in this slide show, just right click the image, click “Copy Image URL” and paste in to the “Your message” box of our Contact Us form. Please also note, for each image, if you want a print or web resolution file. We will get back to you as soon as possible to confirm price and payment details.
Open Contact Us in a new window to paste Image URL(s) easily