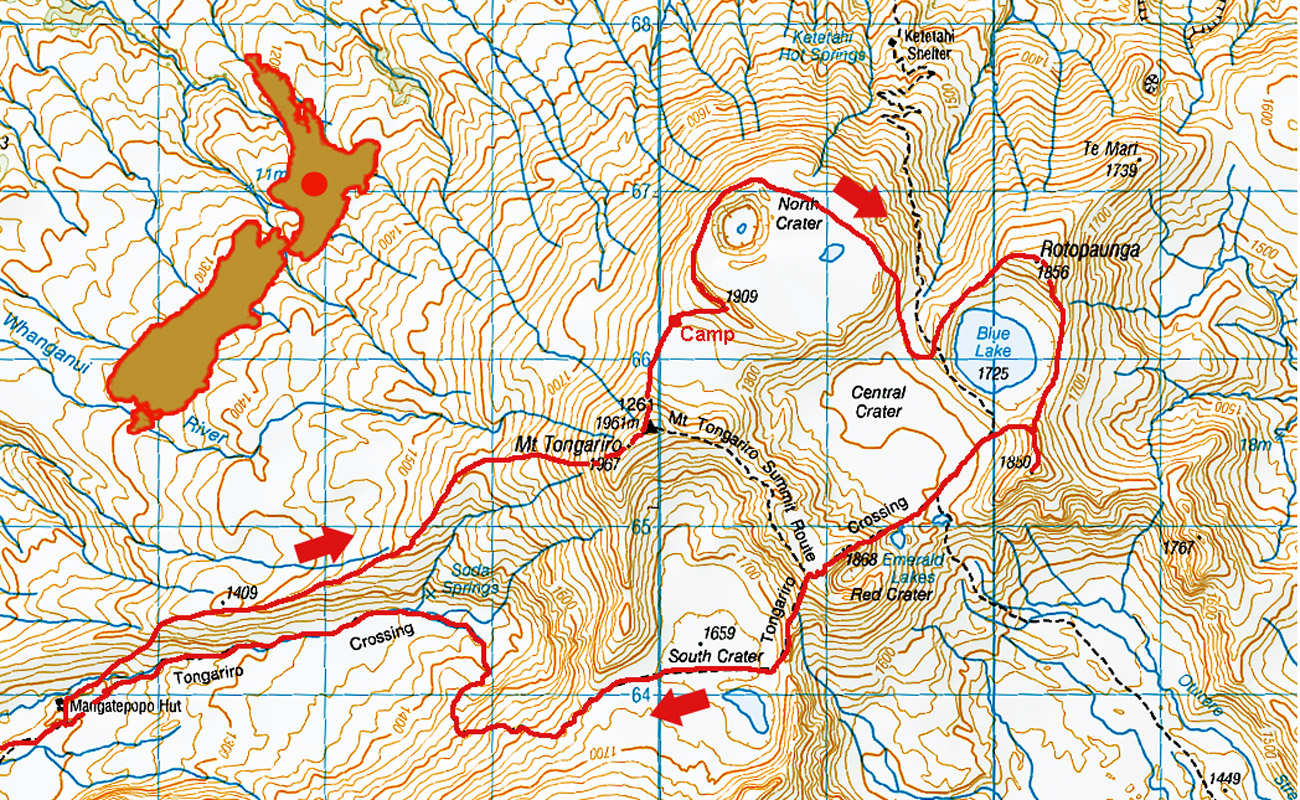
Tongariro crater circuit, August 2017

Tongariro (left) and Ngauruhoe, from the south end access road to the Tongariro Crossing

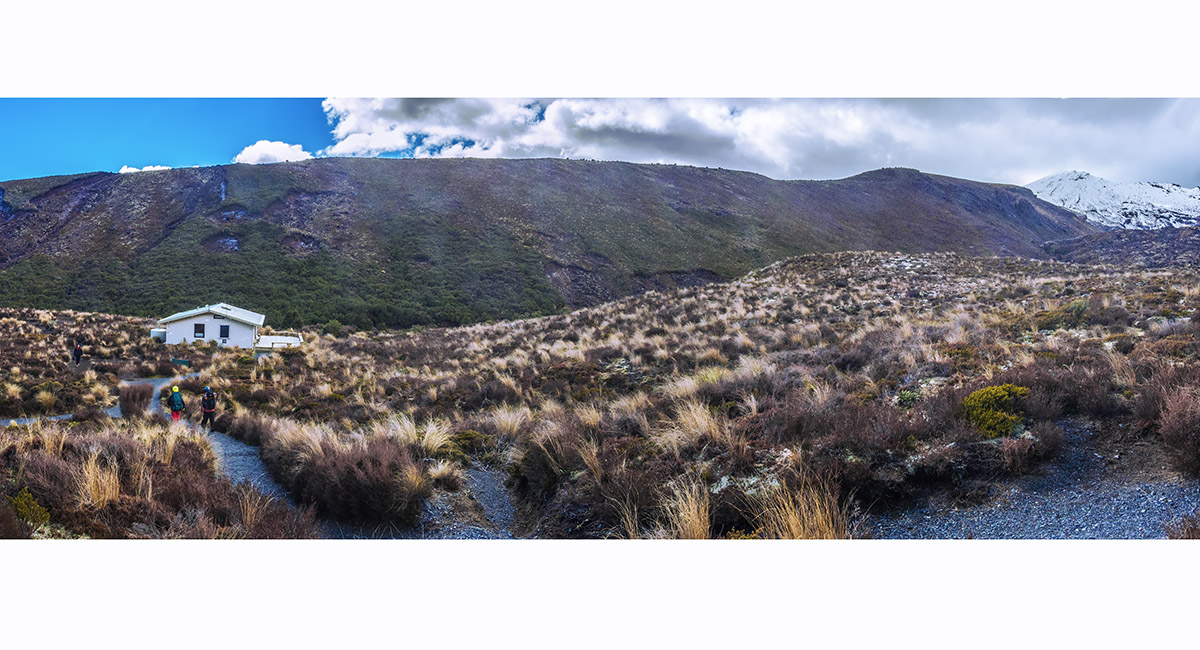
Mangatepopo Hut (1,190m) and the ridge leading to the summit of Tongariro

At about 1,400m, looking to Tongariro (left) and Ngauruhoe


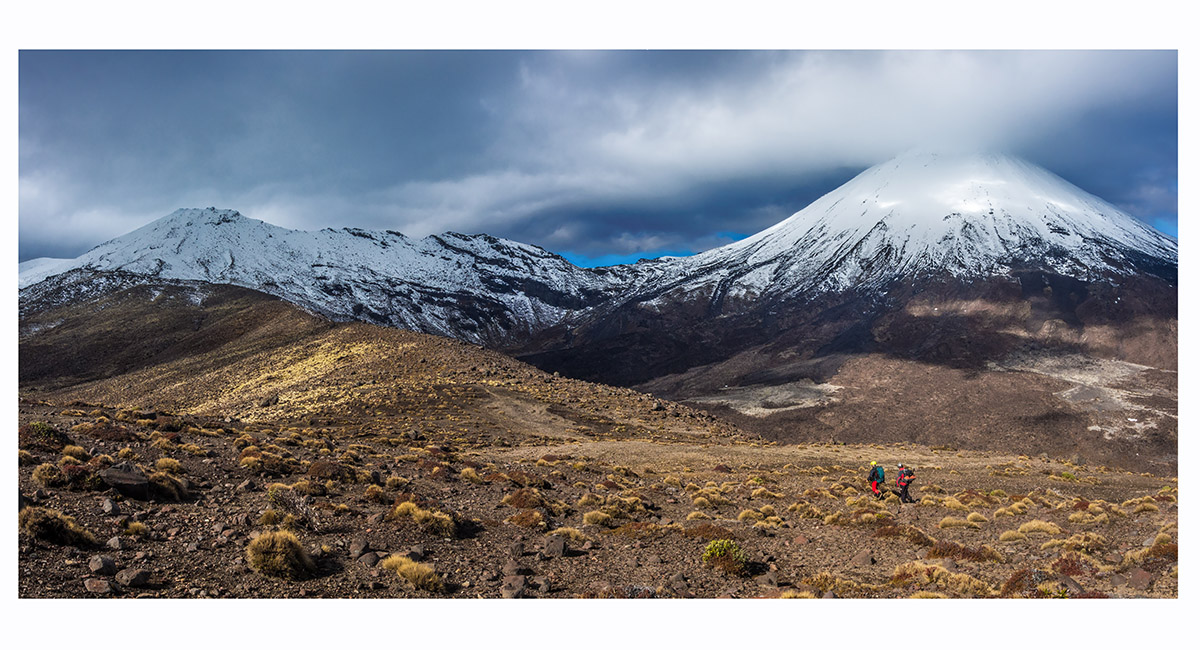
At about 1,700m, looking to Ngauruhoe (left) and Ruapehu

At about 1,800m, looking to Ngauruhoe (left) and Ruapehu


Mount Ruapehu (2,797m)

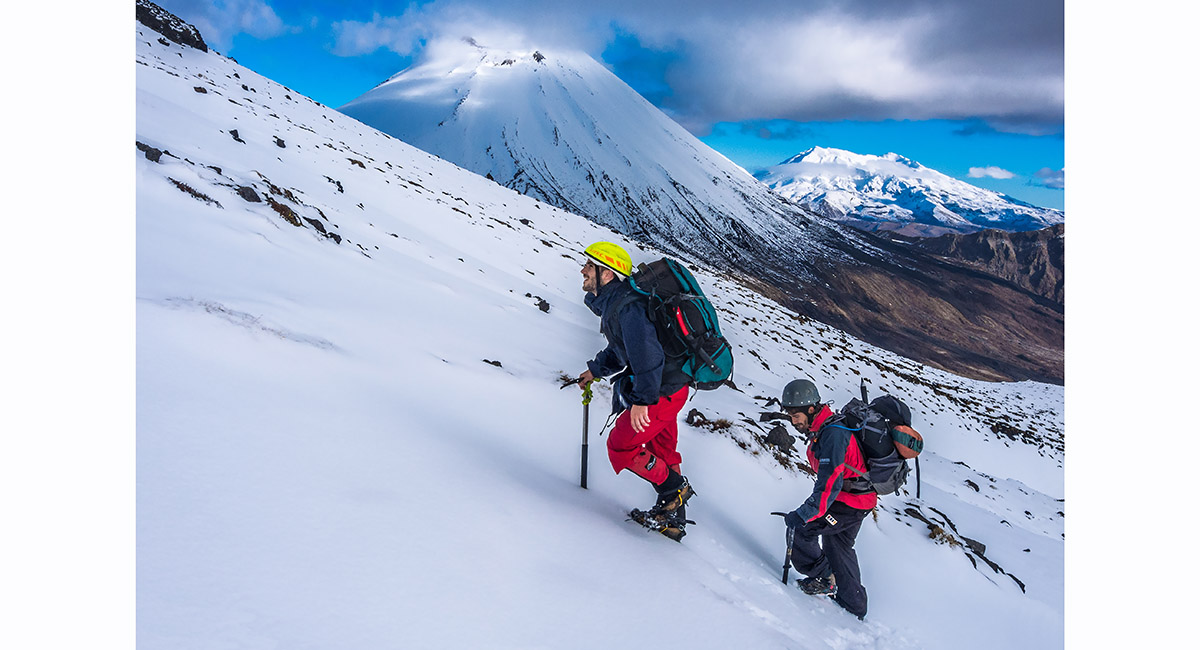
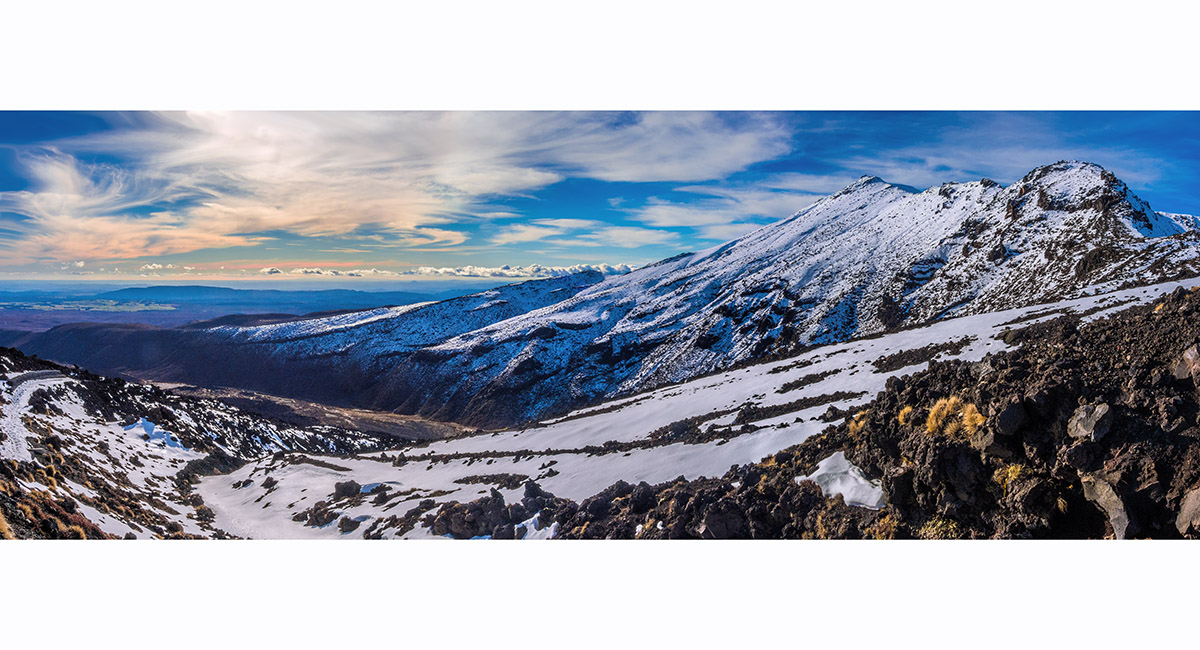
At about 1,900m, with Ruapehu behind


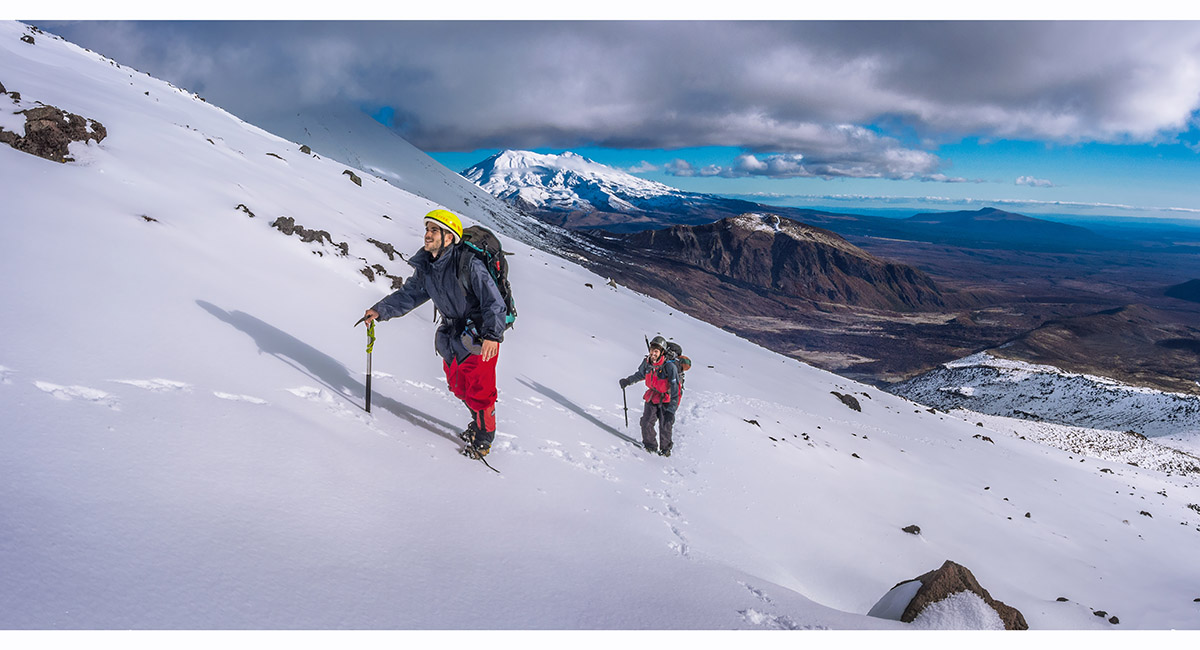
On the summit ridge of Tongariro at about 1,950m


Just beneath the summit of Tongariro


On Tongariro's summit (1,967m), with Ngauruhoe (2,287m) behind

On Tongariro's summit (1,967m)


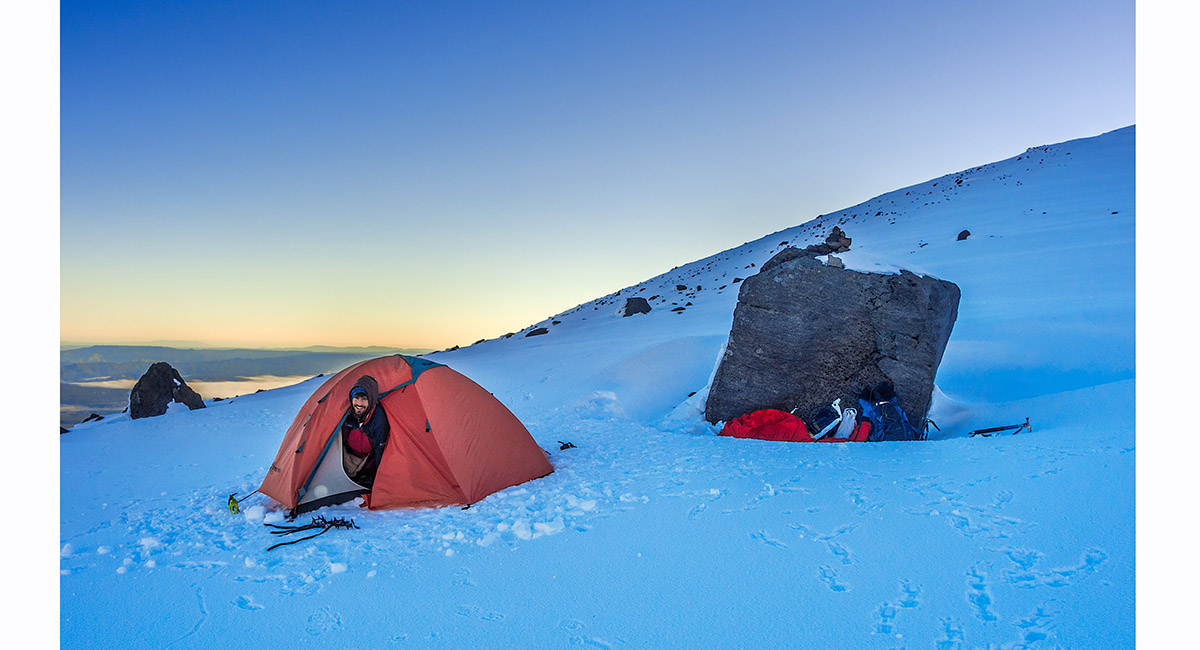
Sunset at our camp (1,820m) between Tongariro and the North Crater rim

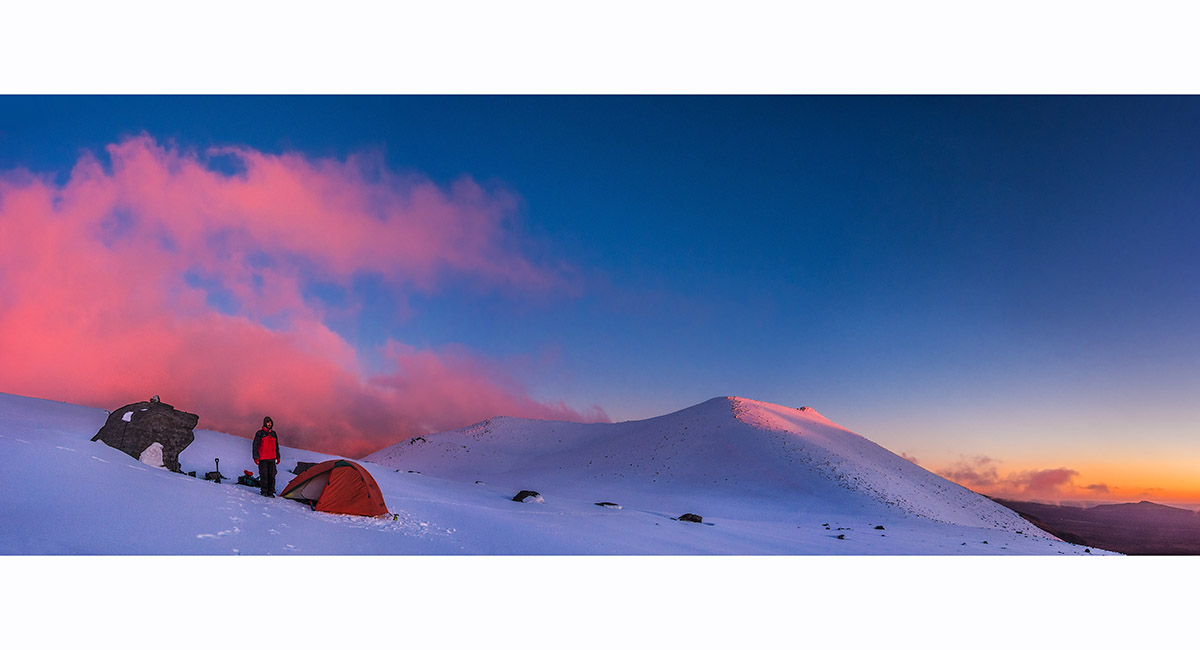
Sunset at our camp (1,820m) between Tongariro (behind) and the North Crater

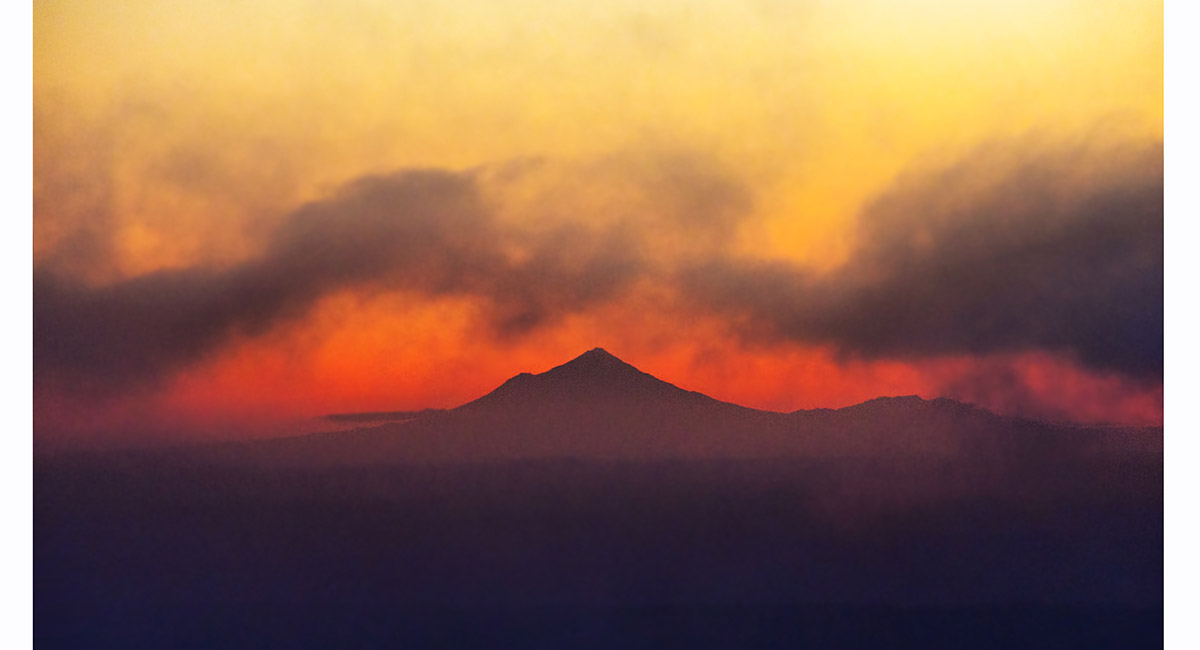
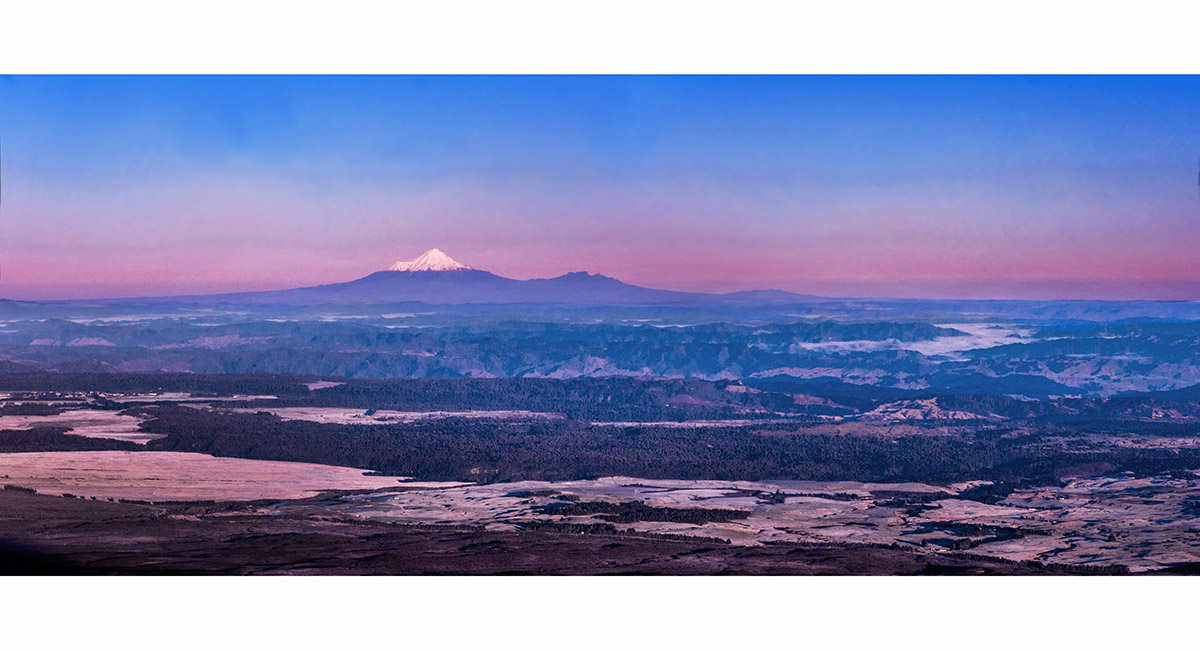
Mount Taranaki from our campsite, sunset

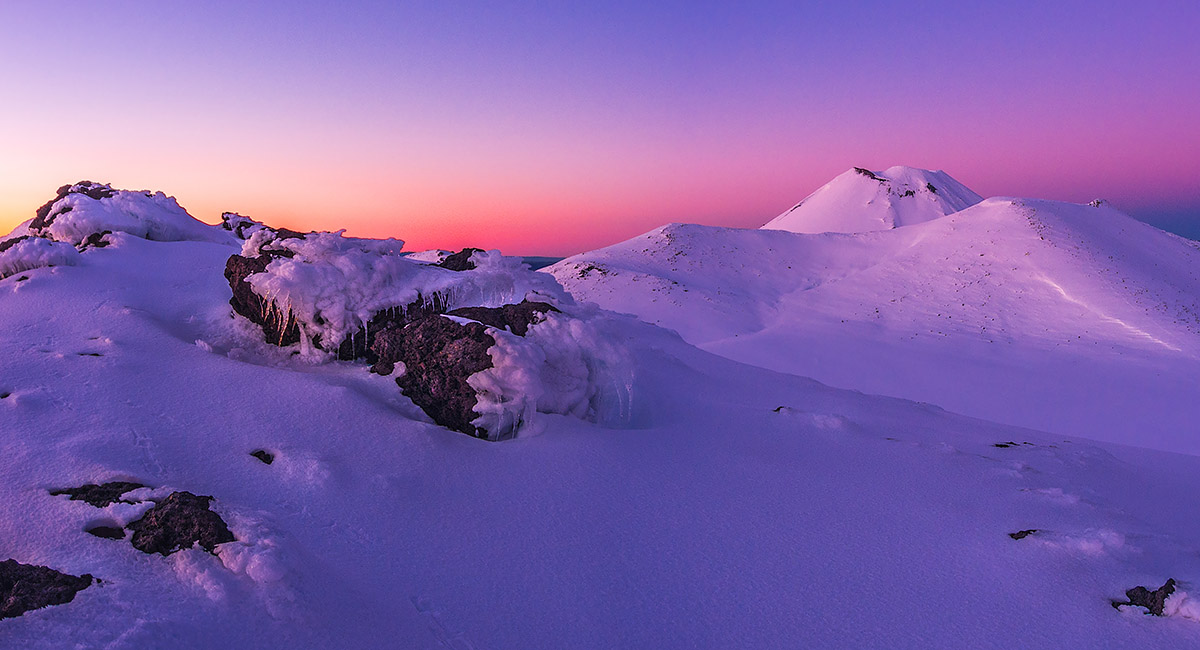
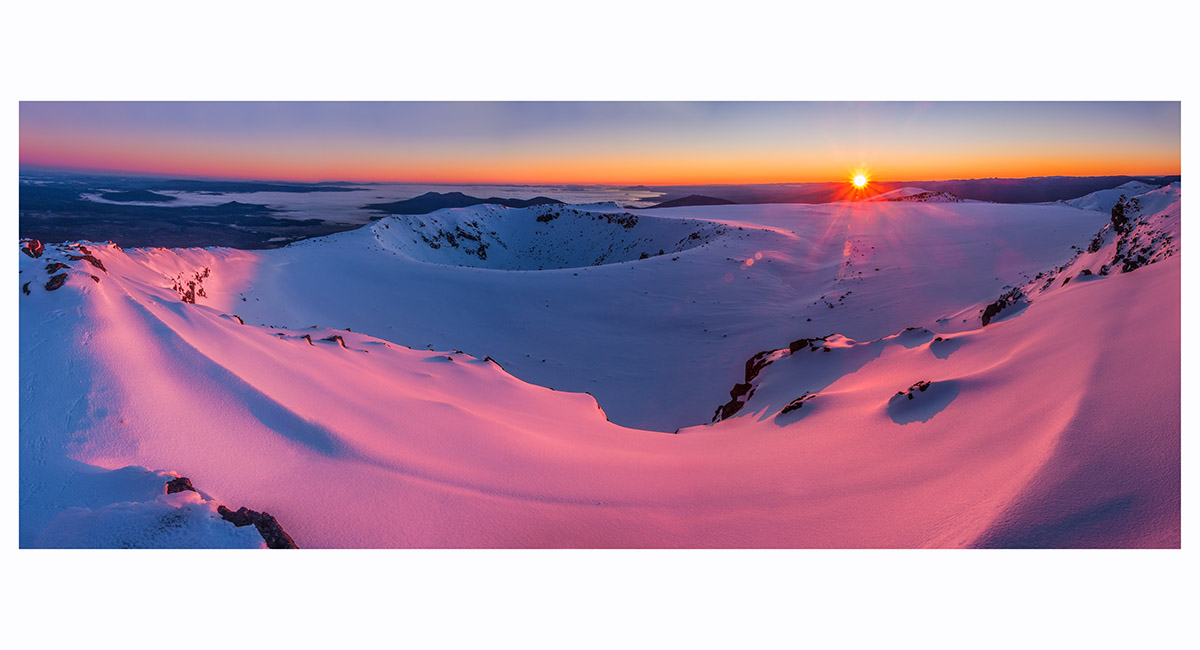
Dawn on North Crater's southern rim (1,909m). Tongariro's (1,967m) and Ngauruhoe's (2,287m) summits behind


Dawn on North Crater's southern rim (1,909m), looking northwest

Dawn on North Crater's southern rim (1,909m), looking northwest

Dawn on North Crater's southern rim (1,909m), looking north

Dawn on North Crater's southern rim (1,909m), looking north


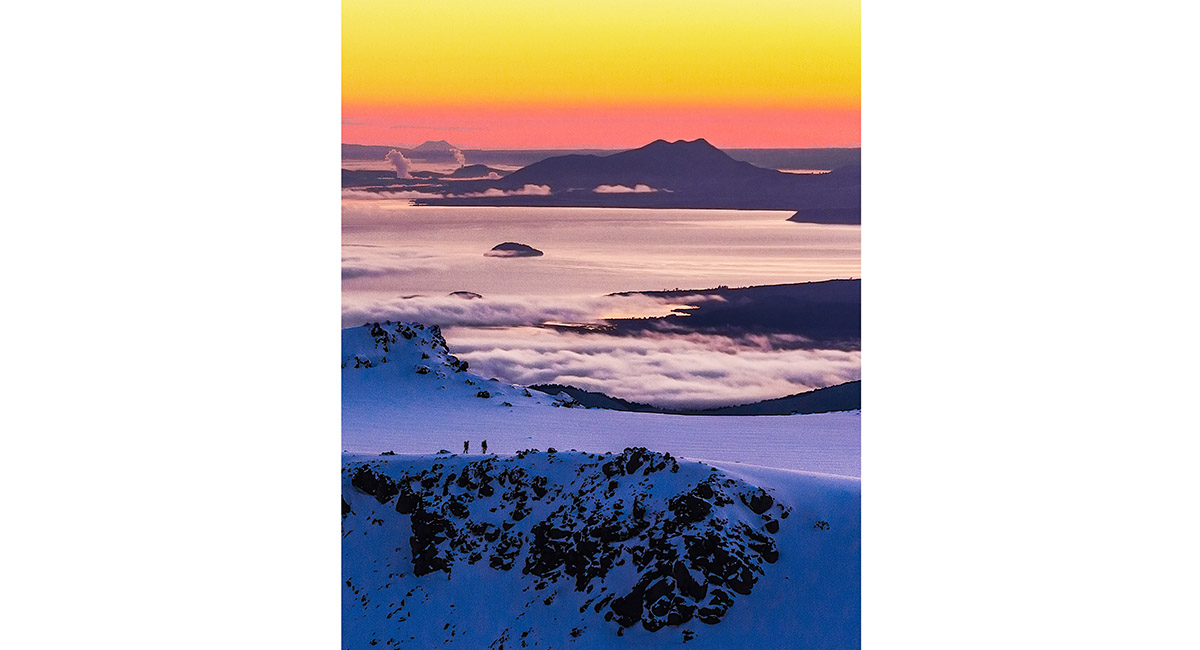
Dawn on North Crater's southern rim (1,909m), looking east

Mount Taranaki at dawn, from North Crater's southern rim

Our camp (1,820m) between Tongariro and the North Crater rim, waiting for the sun to warm things up

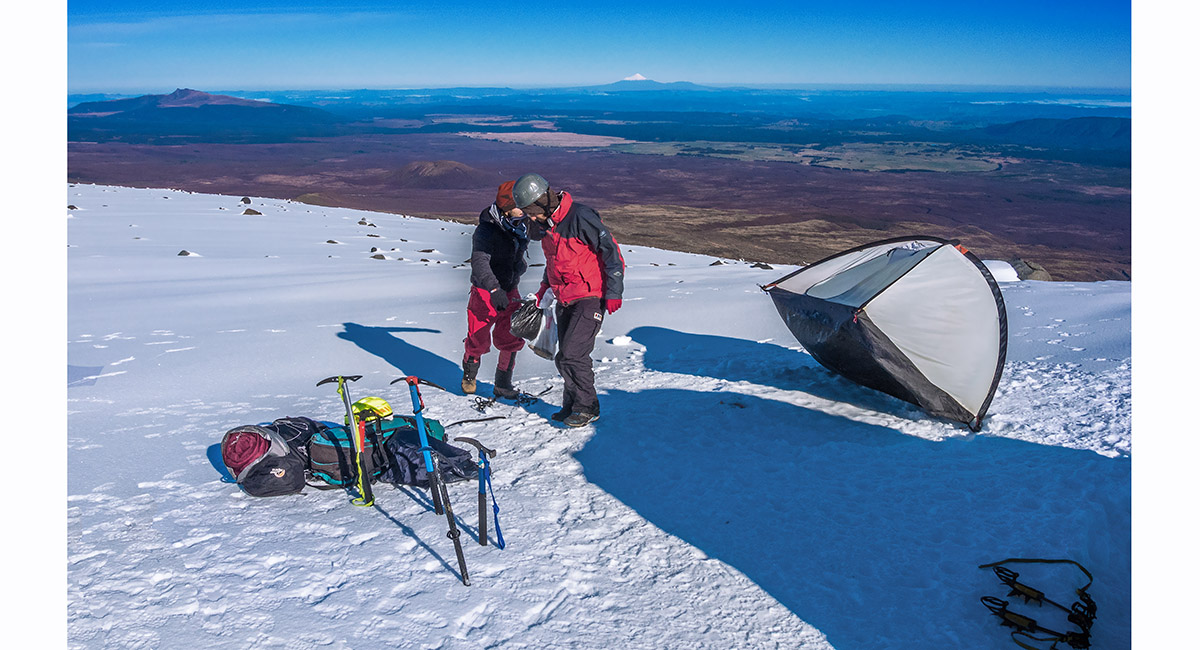
Relieved of its fly, our tent tries to make its escape in the morning breeze

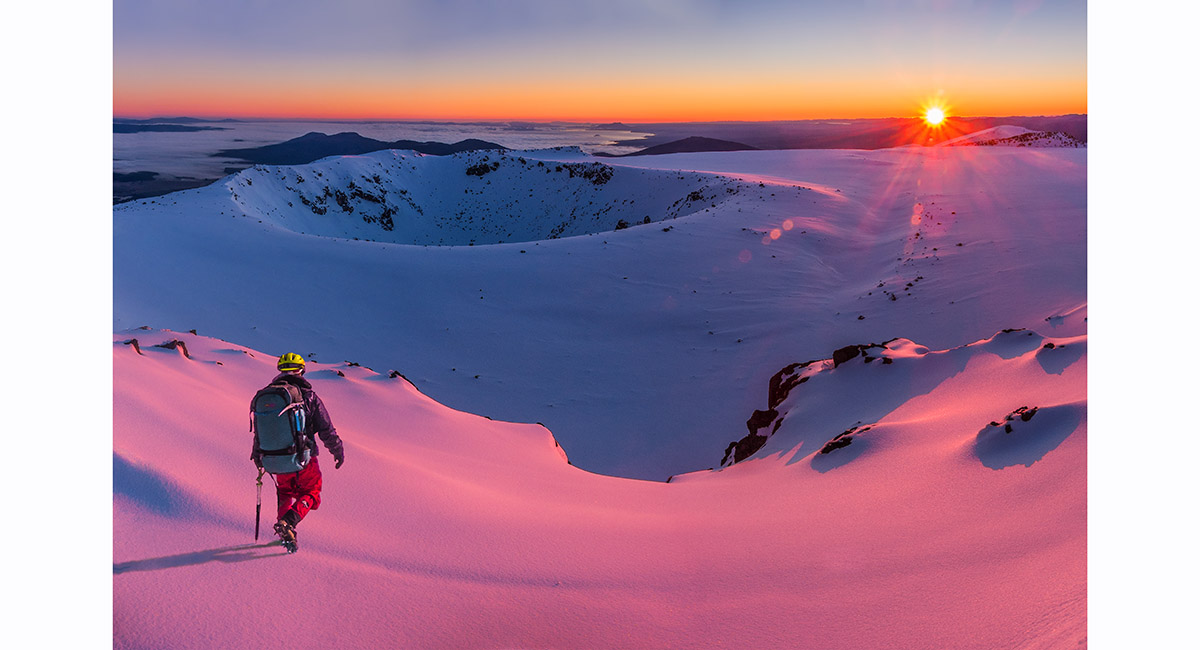
Back on North Crater's southern rim

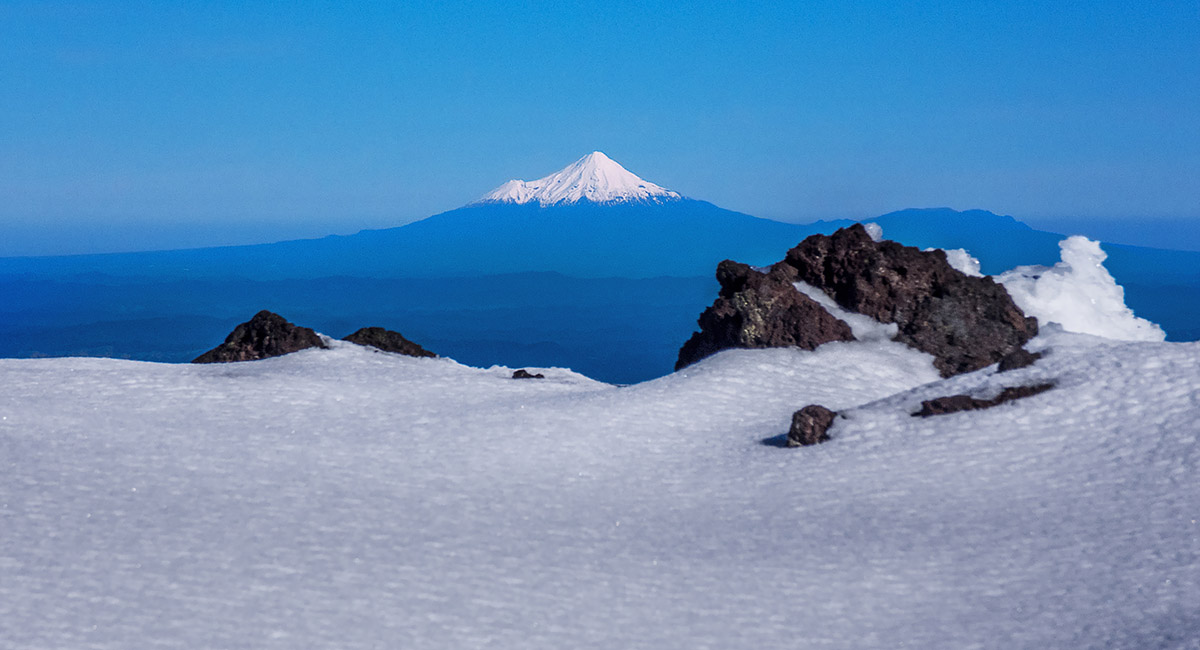
Mount Taranaki from North Crater's rim

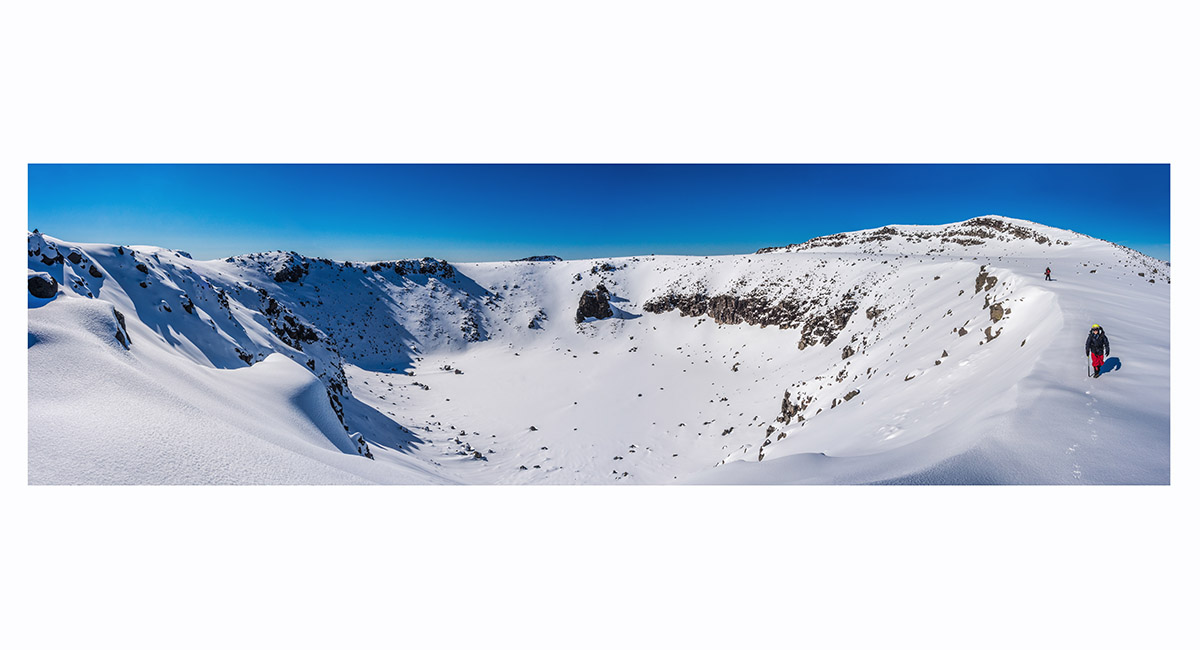
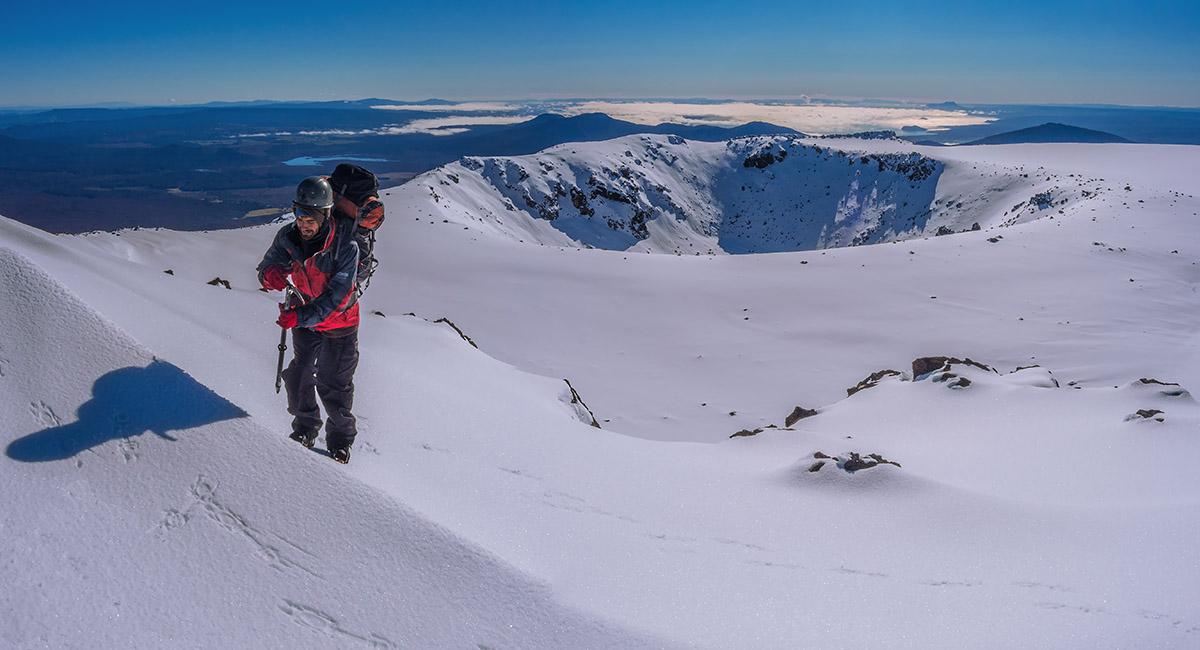
North Crater

Making our way around North Crater, with Mount Taranaki in the distance

Making our way around North Crater, with Ngauruhoe's summit behind

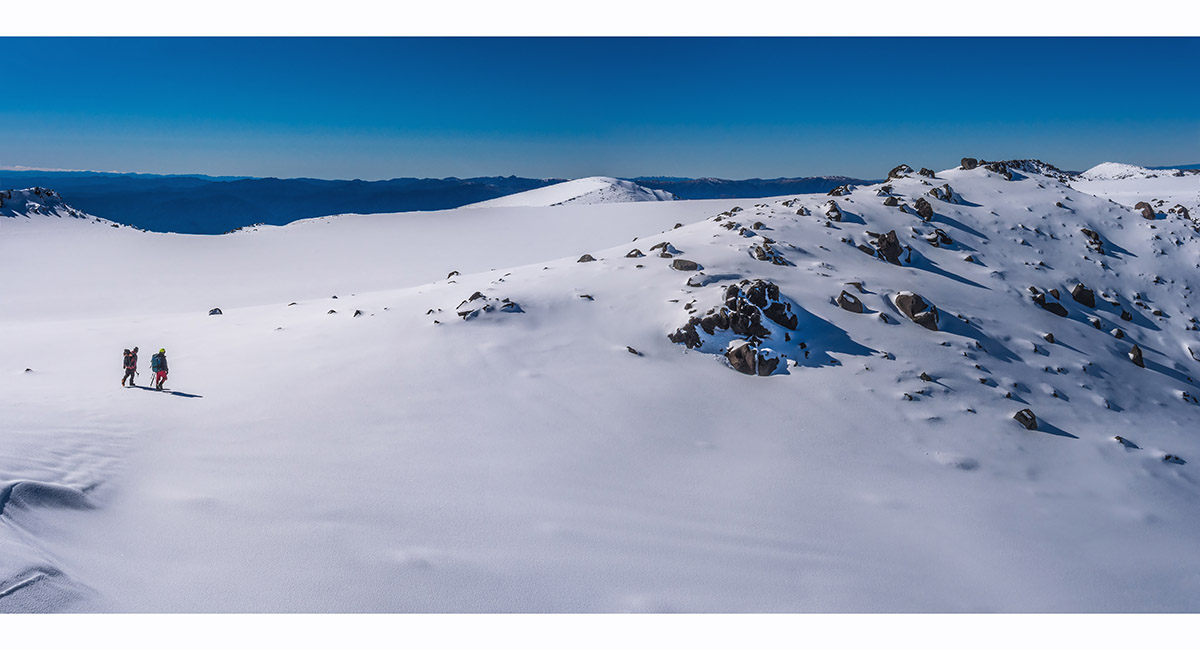
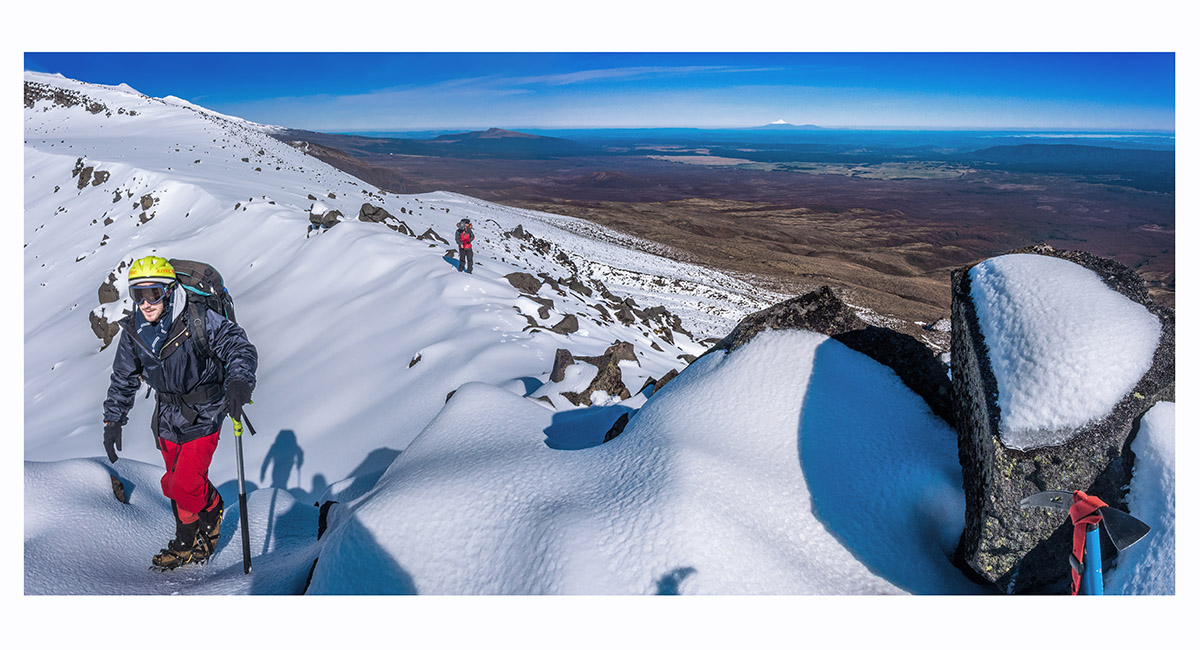
The wide flat expanse (1,850m) to the northeast of North Crater

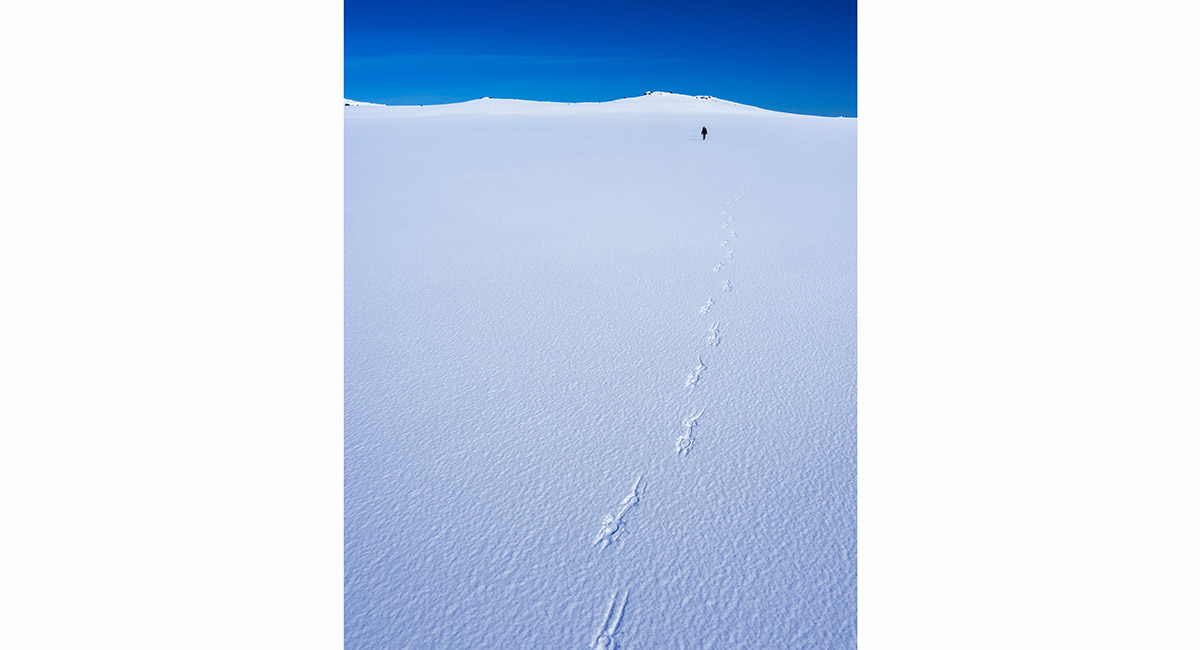
The wide flat expanse (1,850m) to the northeast of North Crater

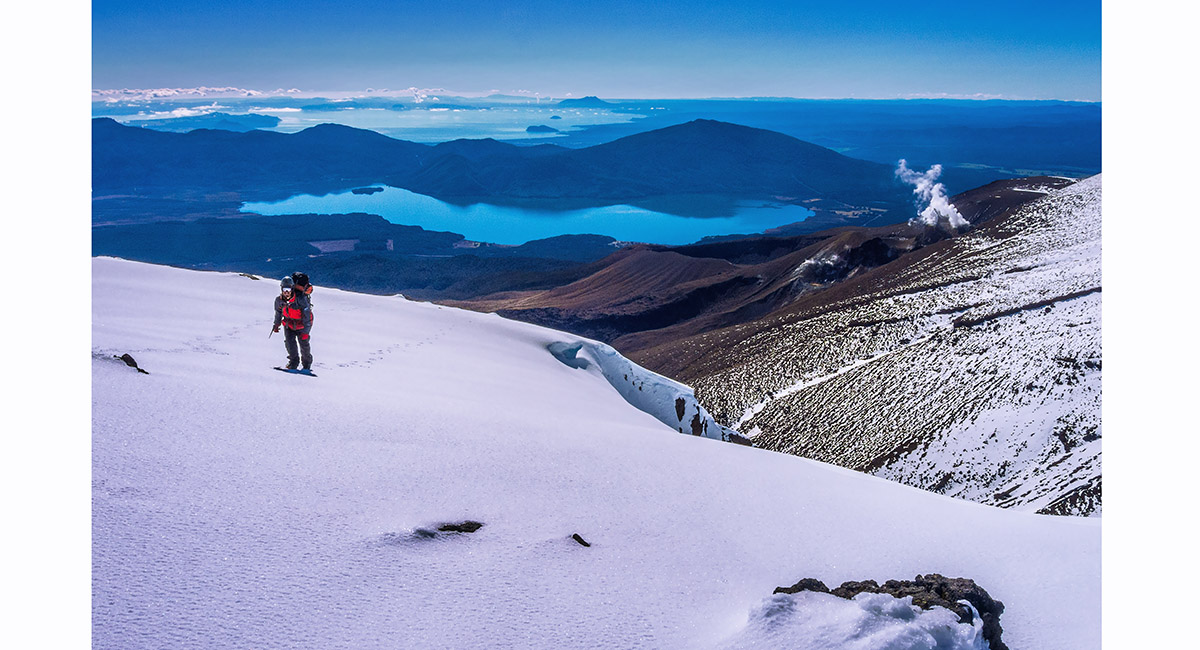
At the east side of the North Crater Plateau, looking towards Ketetahi and Lake Taupo

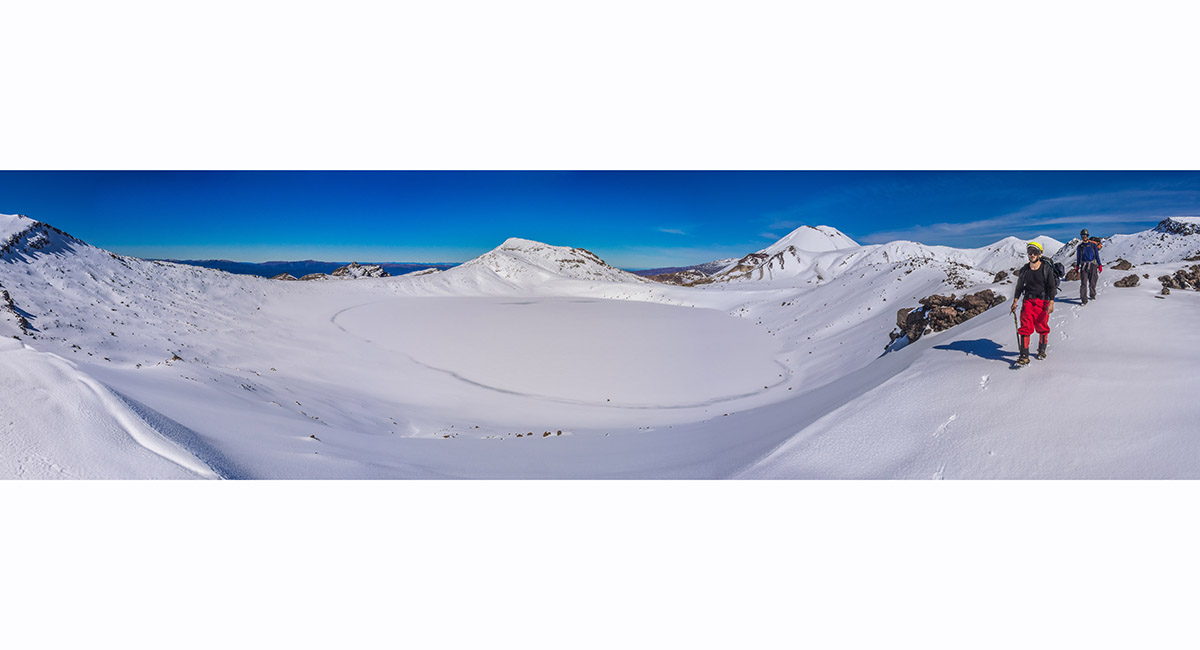
Looking southeast to the Blue Lake and Rotopaunga (1,856m, left)

Descending the steepest section on this route, off North Crater Plateau to the Tongariro Crossing's northern exit trail

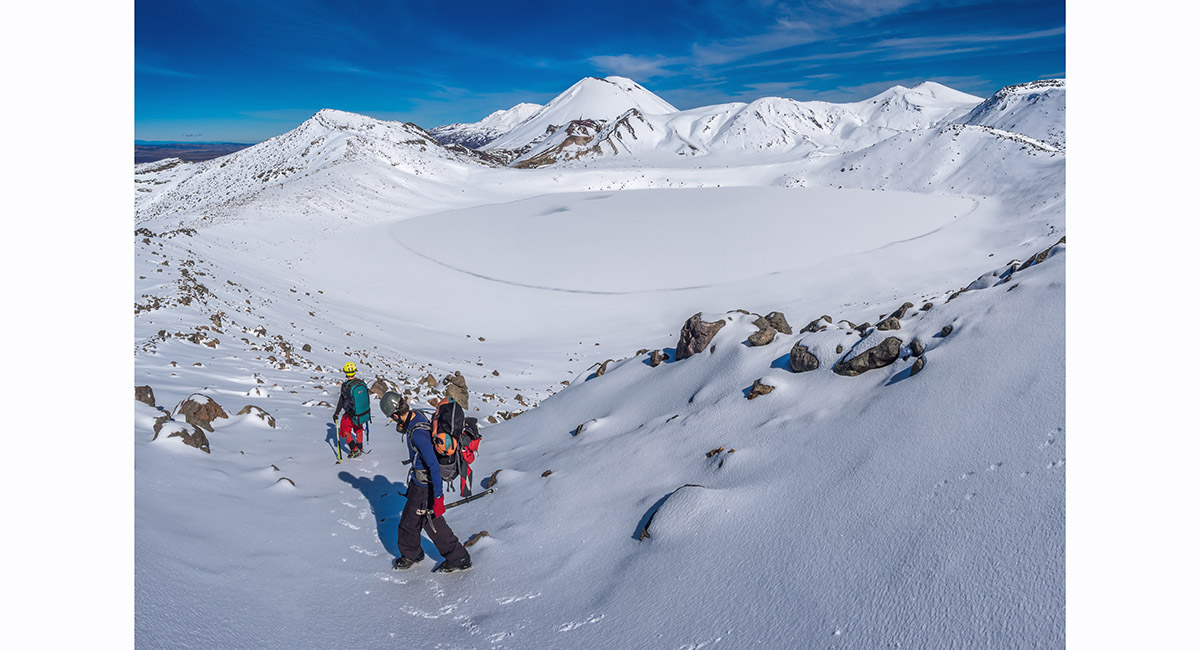
On the western rim of Blue Lake, heading up towards Rotopaunga


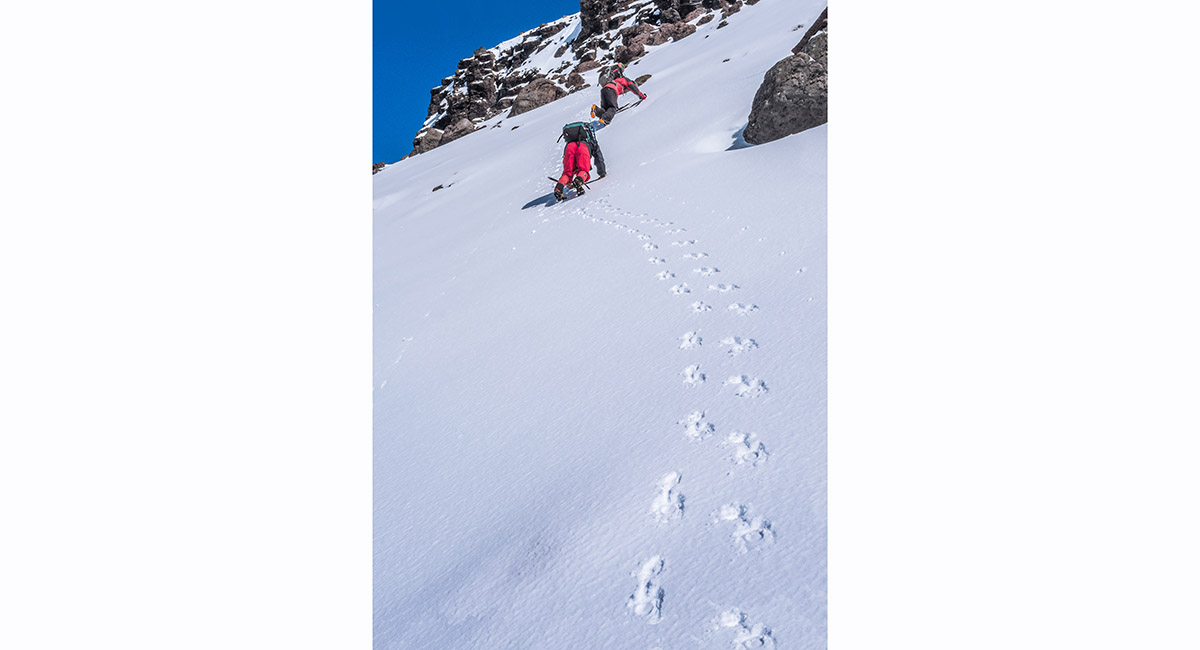
Tackling a short steep icy section coming off Rotopaunga, as we circled Blue Lake on the eastern side

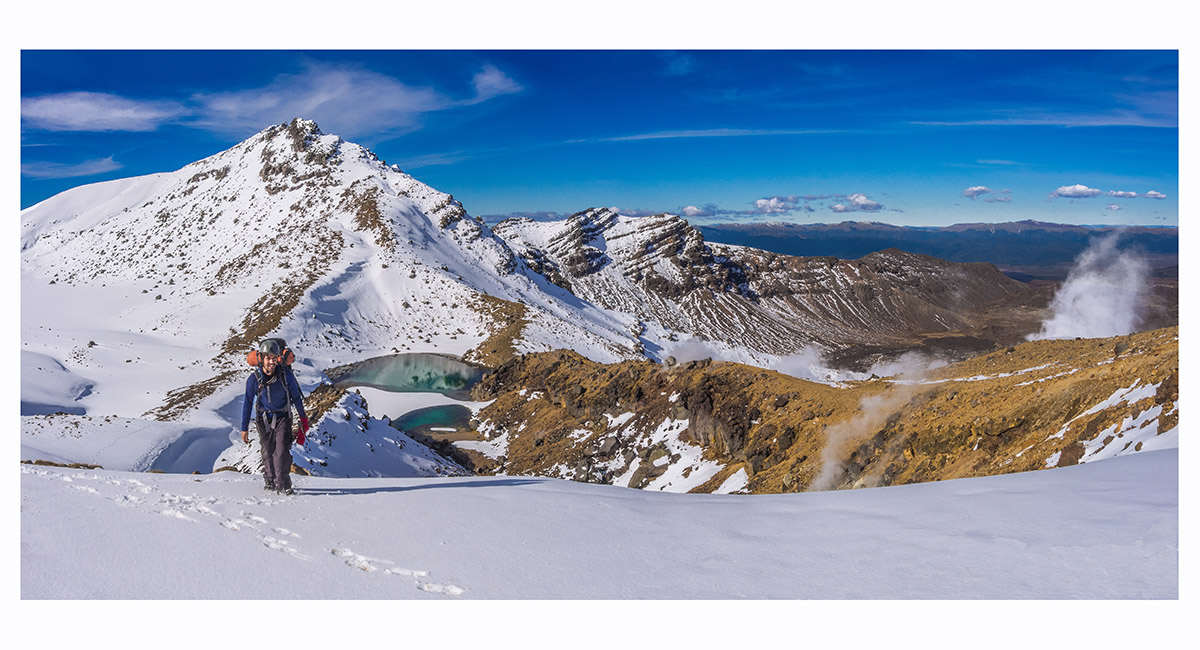
Heading around the eastern side of Blue Lake, with Red Crater, Ngauruhoe and Ruapehu ahead


Heading around the eastern side of Blue Lake with, from left, Ruapehu, Red Crater, Ngauruhoe and Tongariro ahead


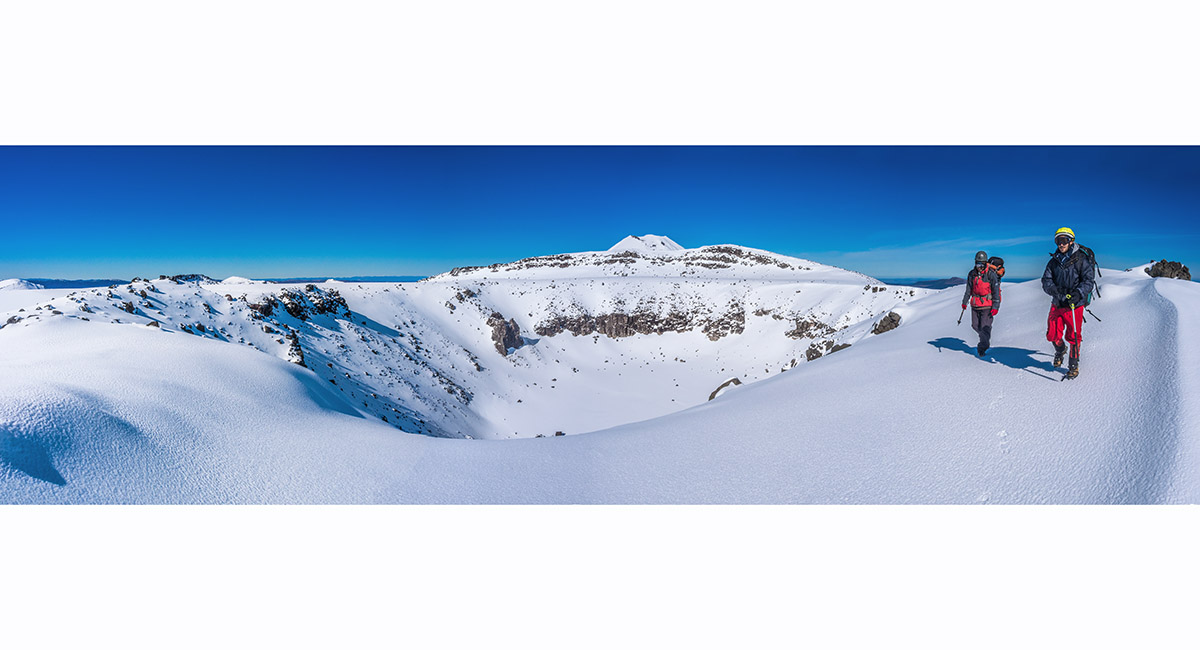
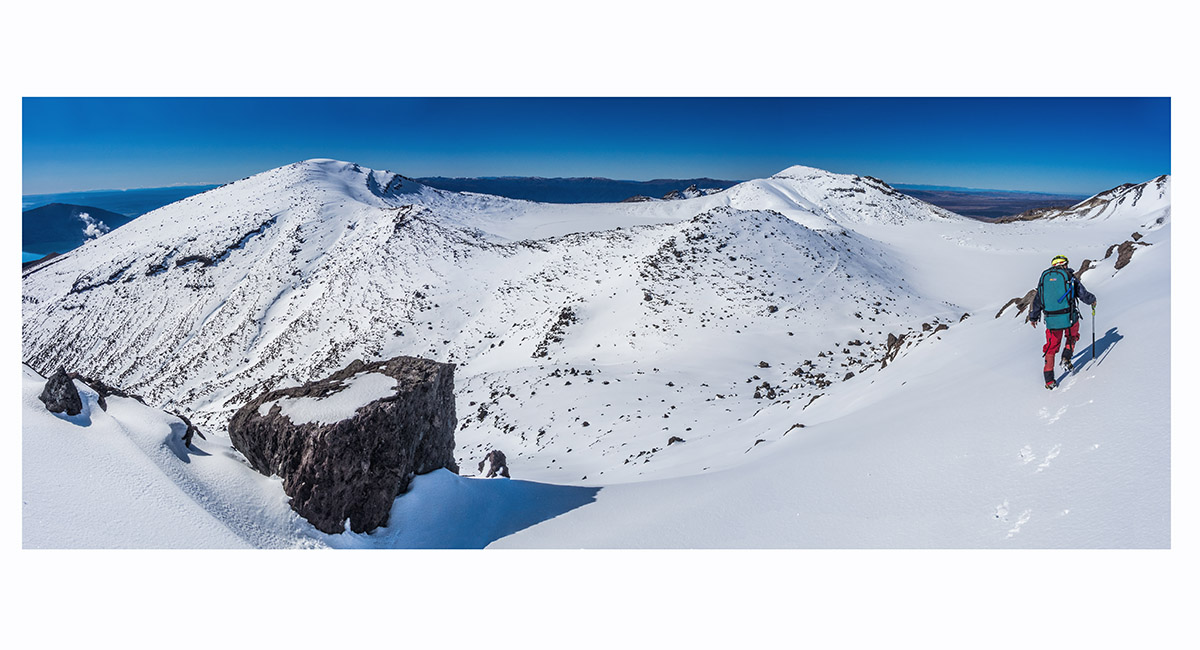
On the 1,850m high point beyond the southern end of Blue Lake, looking southwest to Red Crater, Ngauruhoe and Ruapehu


On the 1,850m high point beyond the southern end of Blue Lake looking southwest to, from left, Ruapehu, Ngauruhoe, Red Crater, Tongariro, North Crater Plateau and Rotopaunga. Central Crater and Blue Lake are in the foreground


Our lunch spot on the un-named 1,850m high point south of Blue Lake

From left - Ruapehu, Ngauruhoe and Red Crater

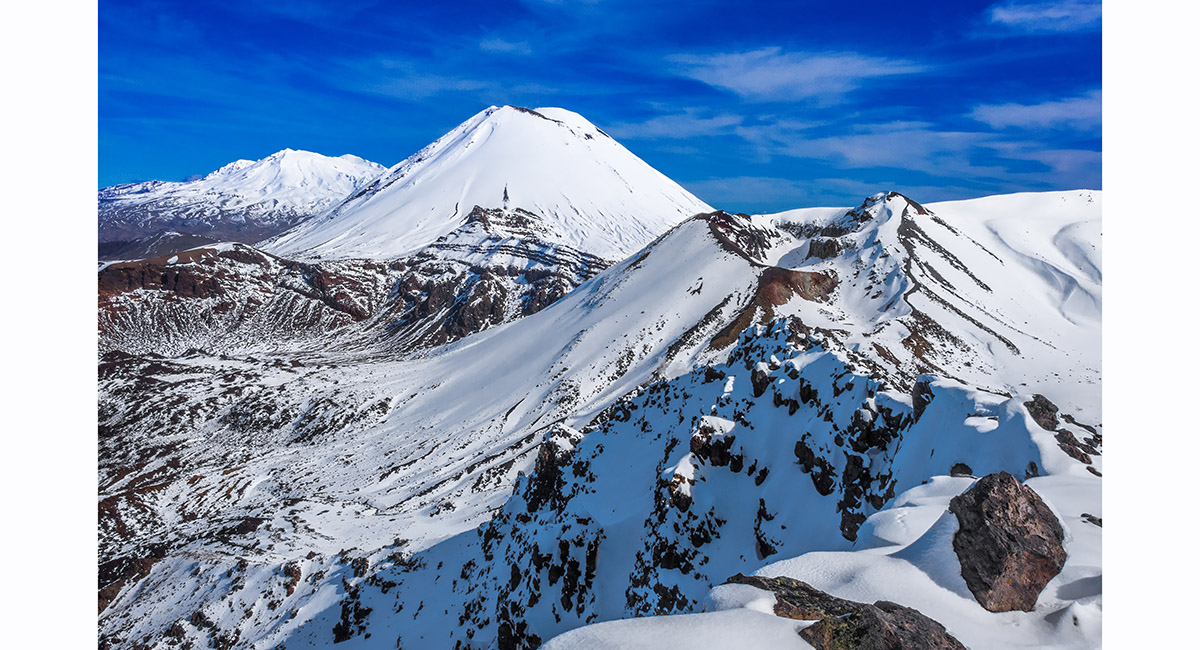
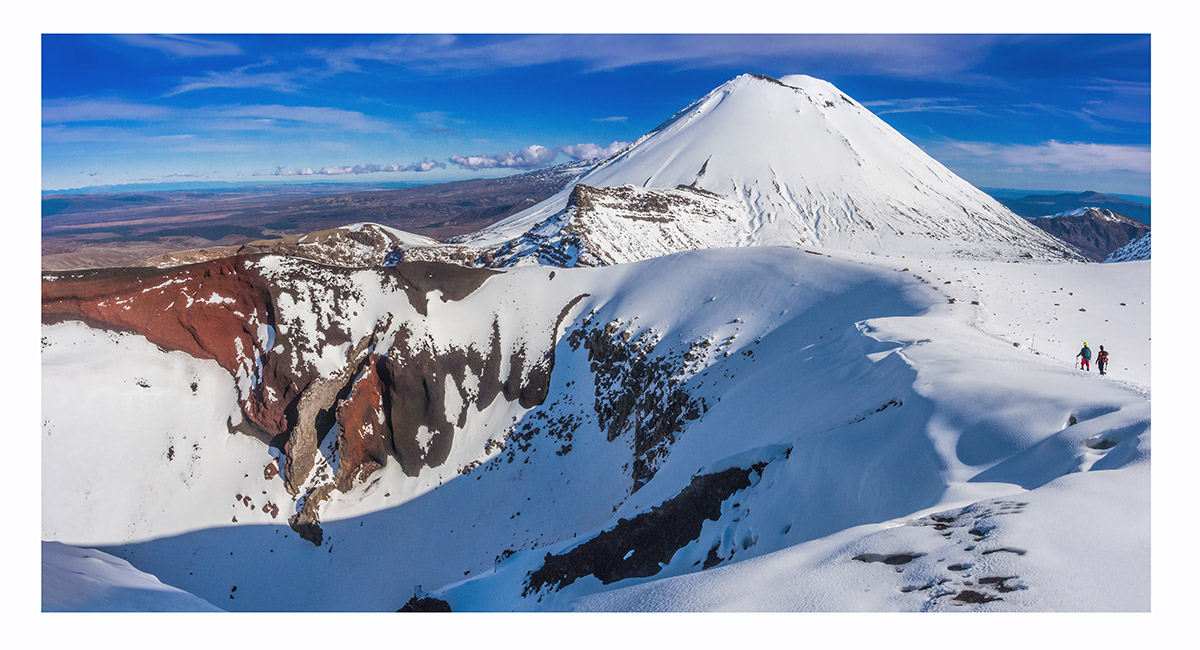
Red Crater and Ngauruhoe

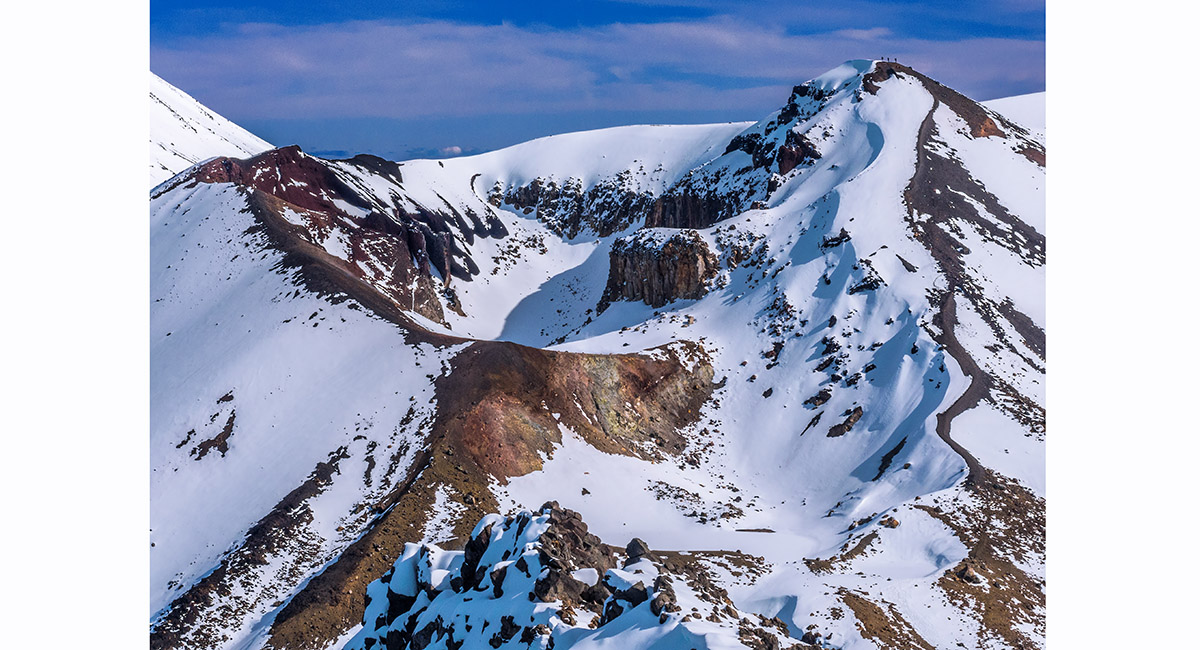
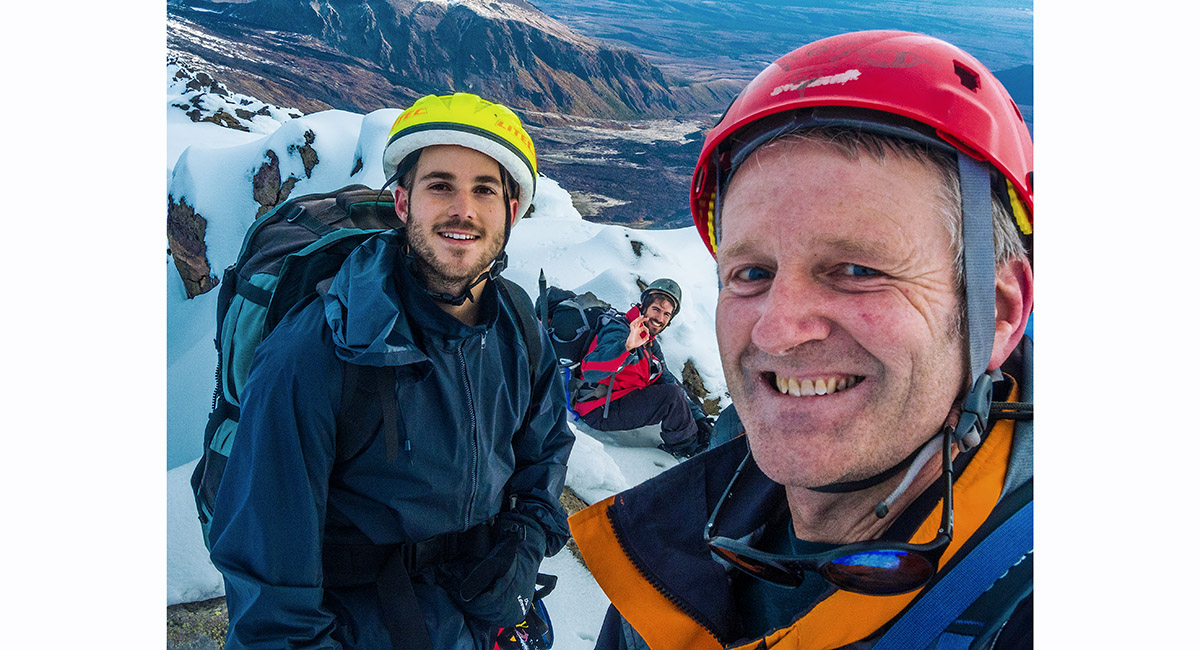
Red Crater, with three tiny figures enjoying the view from the top

Nearing the top of Red Crater (1,868m), with the un-named 1,850m high point behind

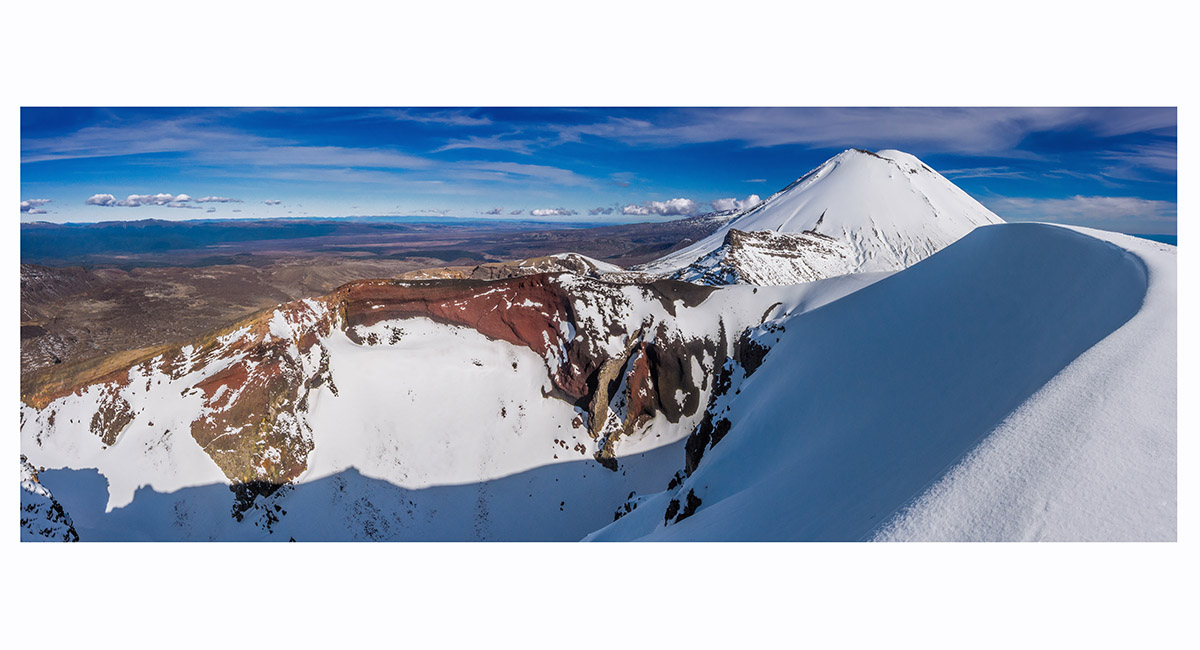
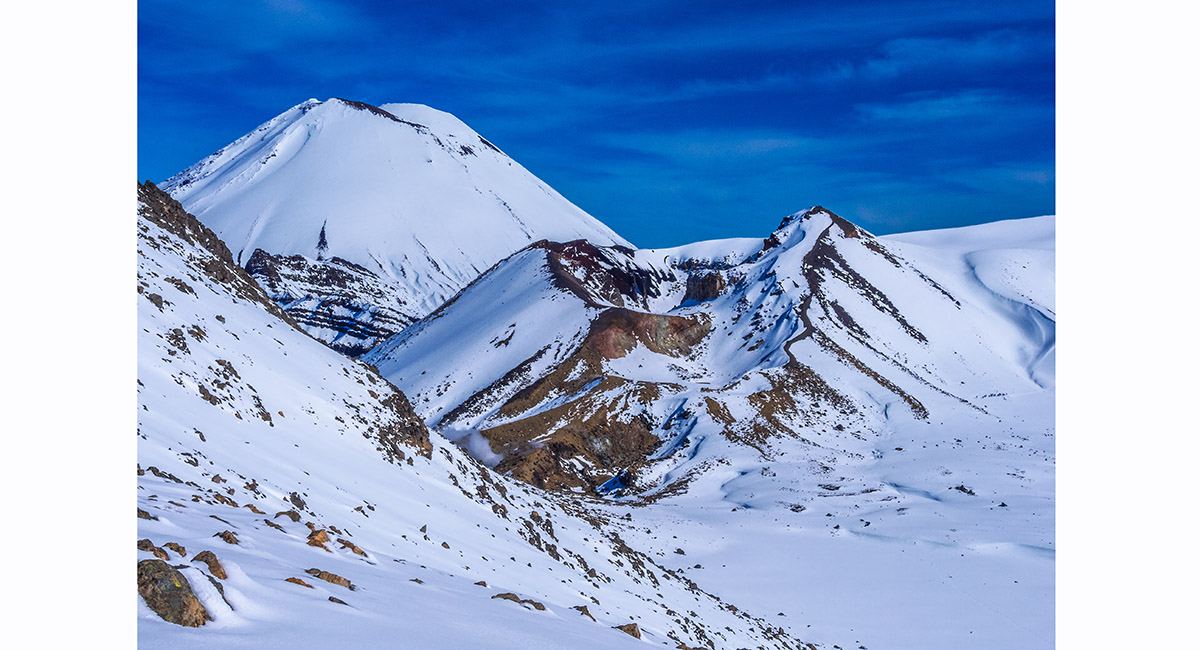
A view south across Red Crater to Ngauruhoe

A view south across Red Crater to Ngauruhoe


A view north from Red Crater to, from left, North Crater Plateau, Rotopaunga and the un-named 1,850m high point. Central Crater and Blue Lake are in the foreground


Dropping off Red Crater towards South Crater and Ngauruhoe

Tongariro and the ridge leading down to Mangatepopo Stream and Hut, viewed from the east on the southern section of the Tongariro Crossing

Read about it
Crater country Vertigo Sep 17 Early bird Wilderness Magazine Oct 17 Craters in the snow Wilderness Magazine Aug 18 Captivating Photography Sep Oct 2023
![]()
To order a print or web resolution file of any image you see in this slide show, just right click the image, click “Copy Image URL” and paste in to the “Your message” box of our Contact Us form. Please also note, for each image, if you want a print or web resolution file. We will get back to you as soon as possible to confirm price and payment details.
Open Contact Us in a new window to paste Image URL(s) easily