Northern Circuit, February 2017
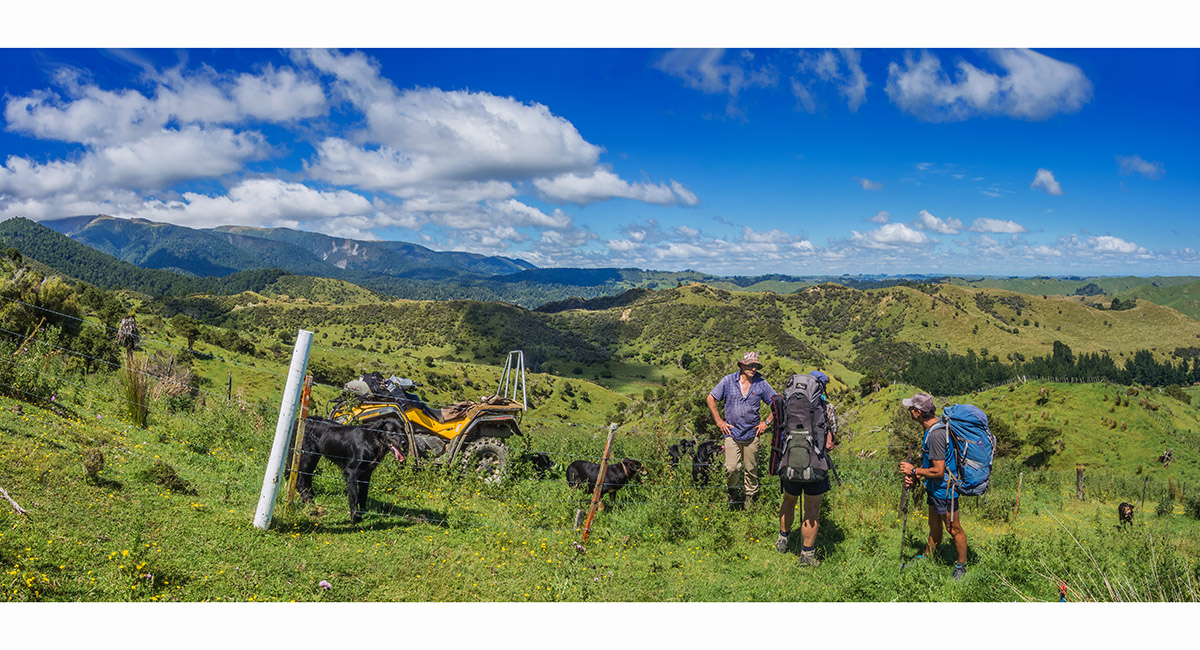
Chatting with Richard Gorringe and his dog team, below the point where the trail crosses from his farm into the Ruahine Forest Park. It's important to seek Richard's permission before heading in to/out from Purity Hut - call 06 382 5856


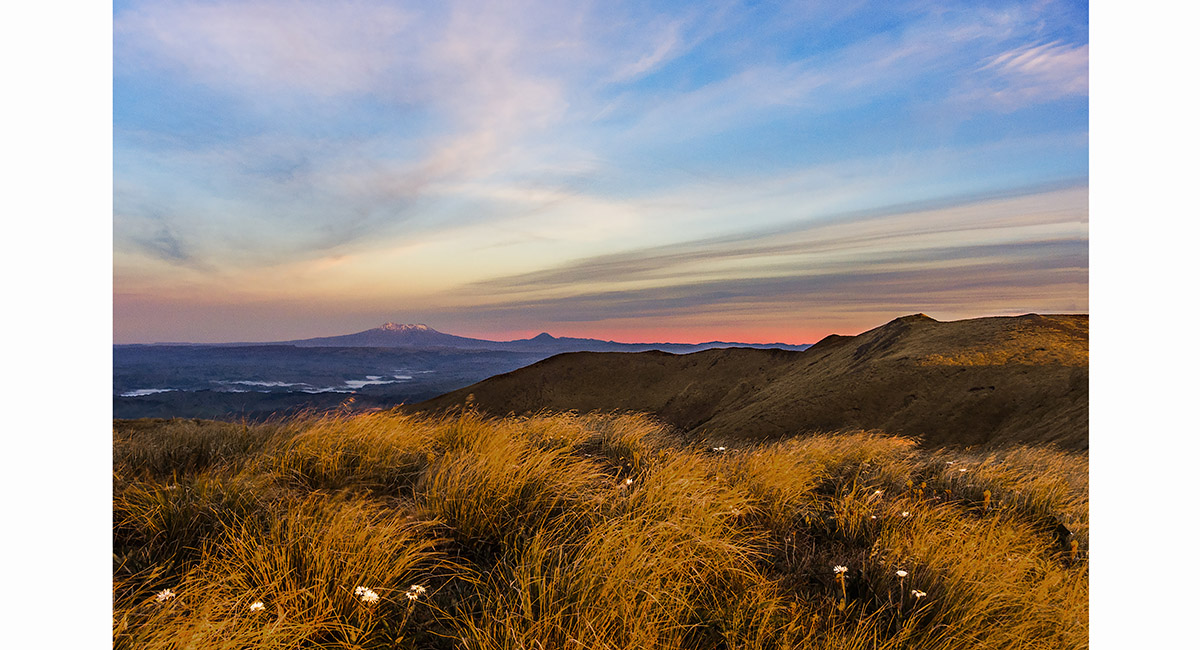
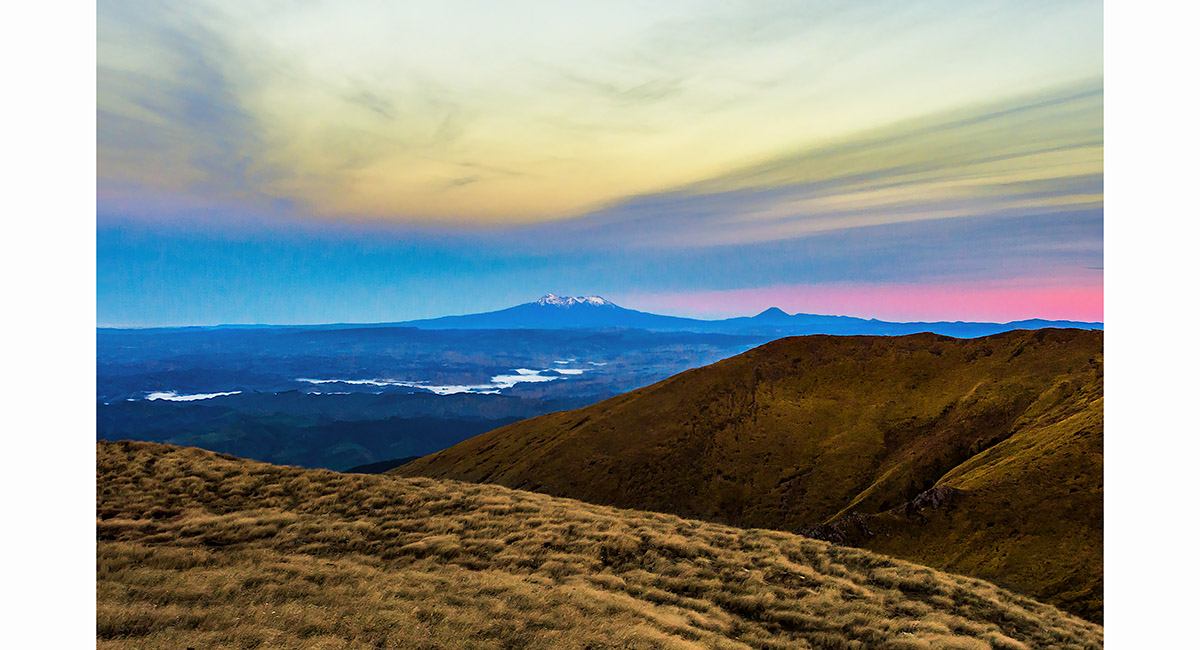
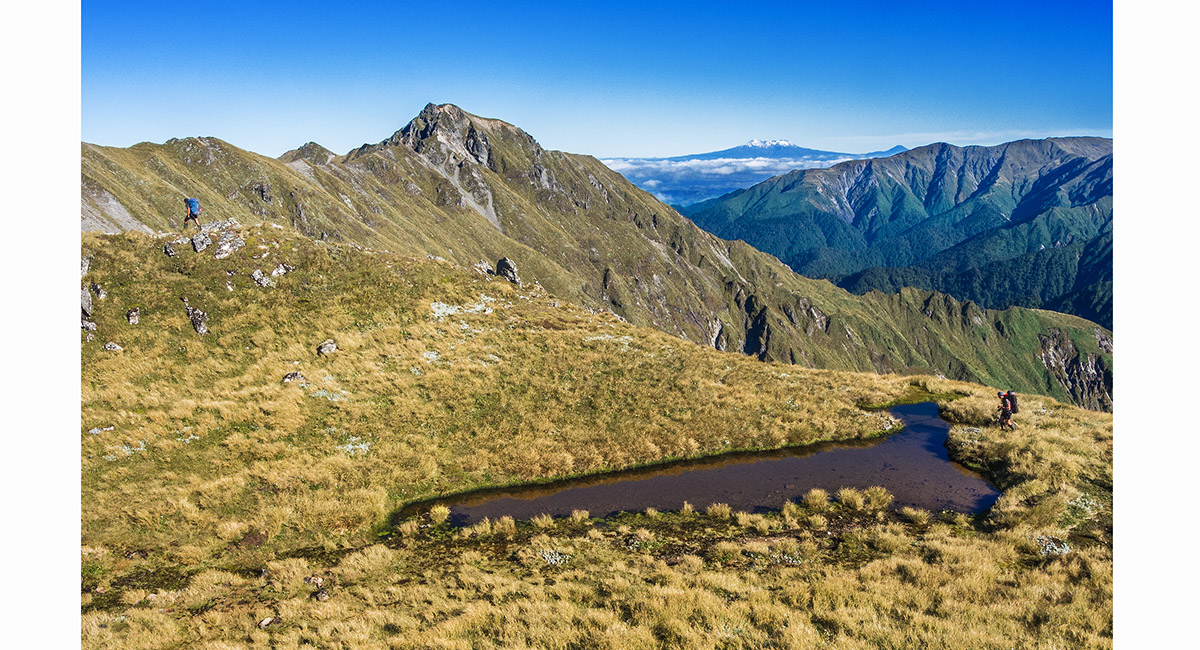
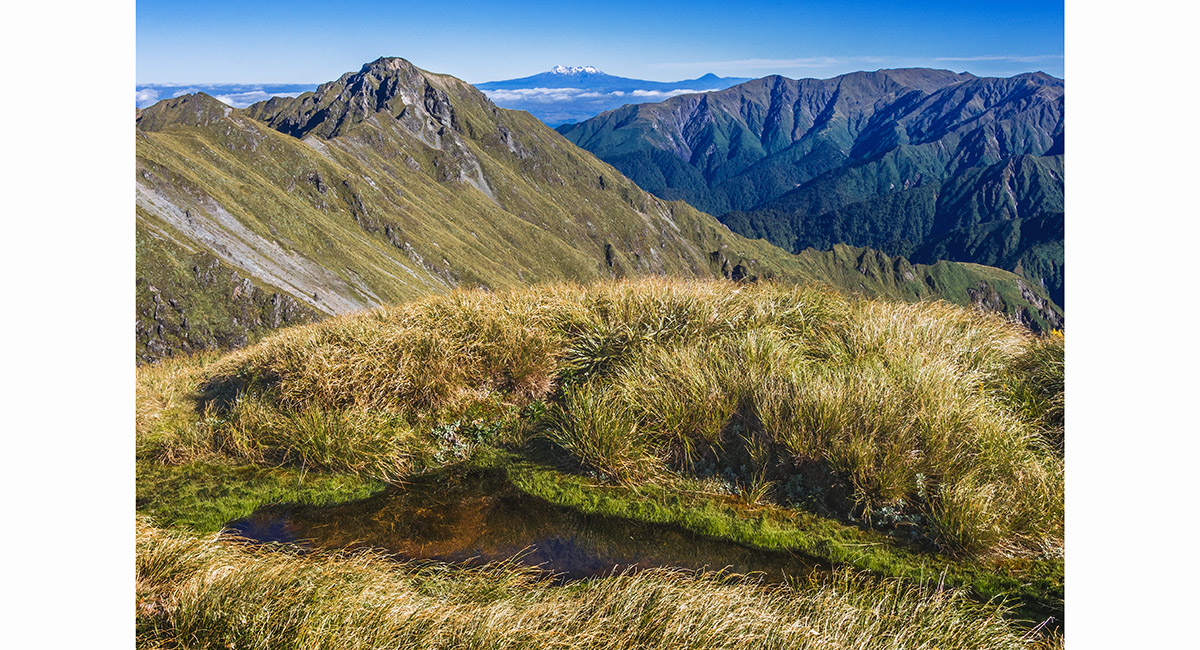
The view northwest, just into the treeline, to Mounts Ruapehu and Ngauruhoe

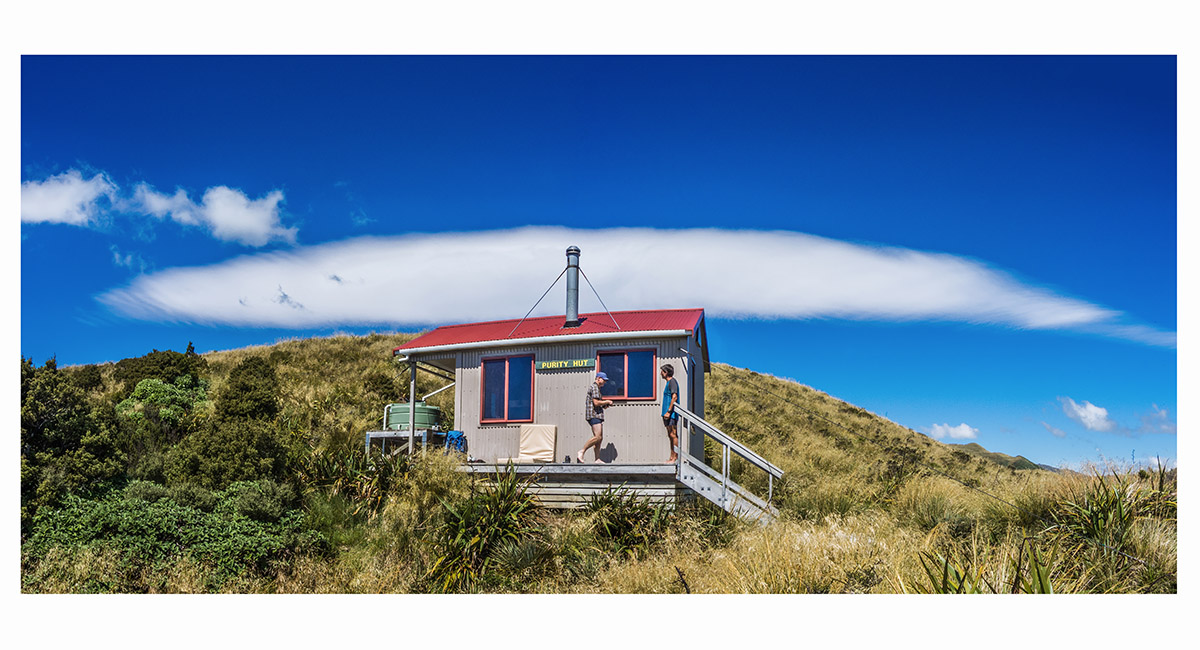
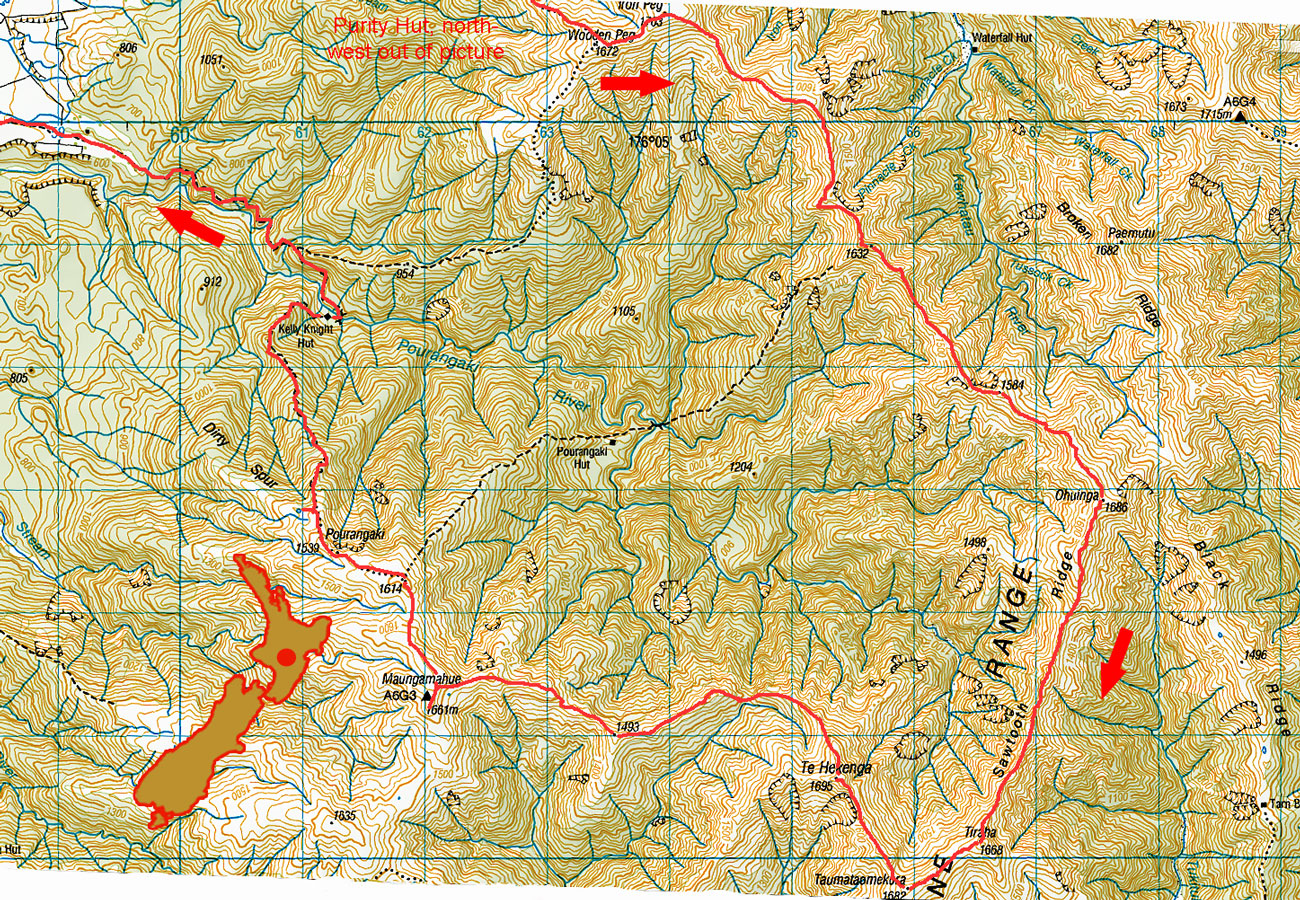
Purity Hut (1,320m)


Mounts Ruapehu and Ngauruhoe, viewed from Purity Hut


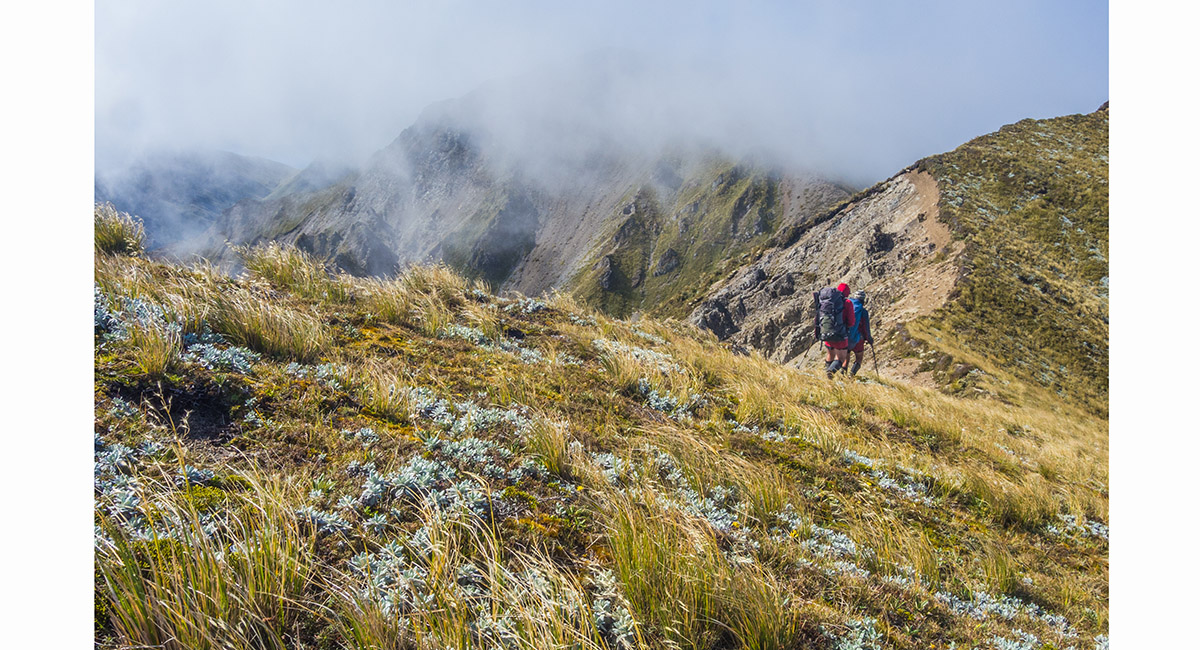
Flora on the broad ridge above Purity Hut

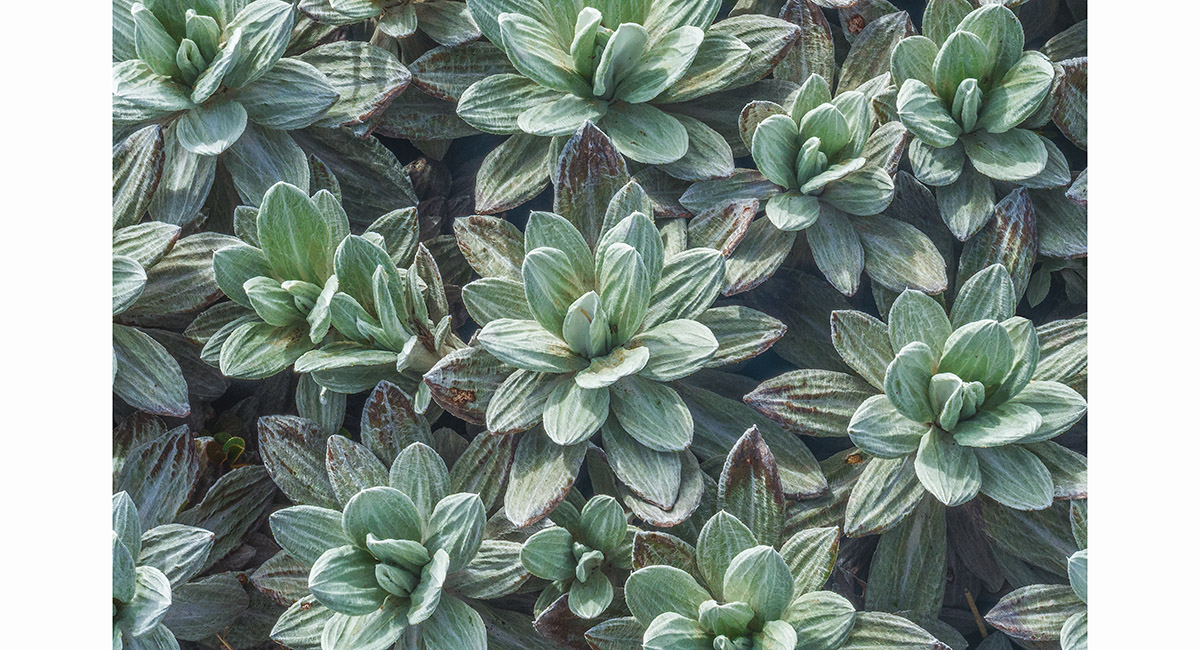
Ruahine flora - the white daisy, Celmisia incana

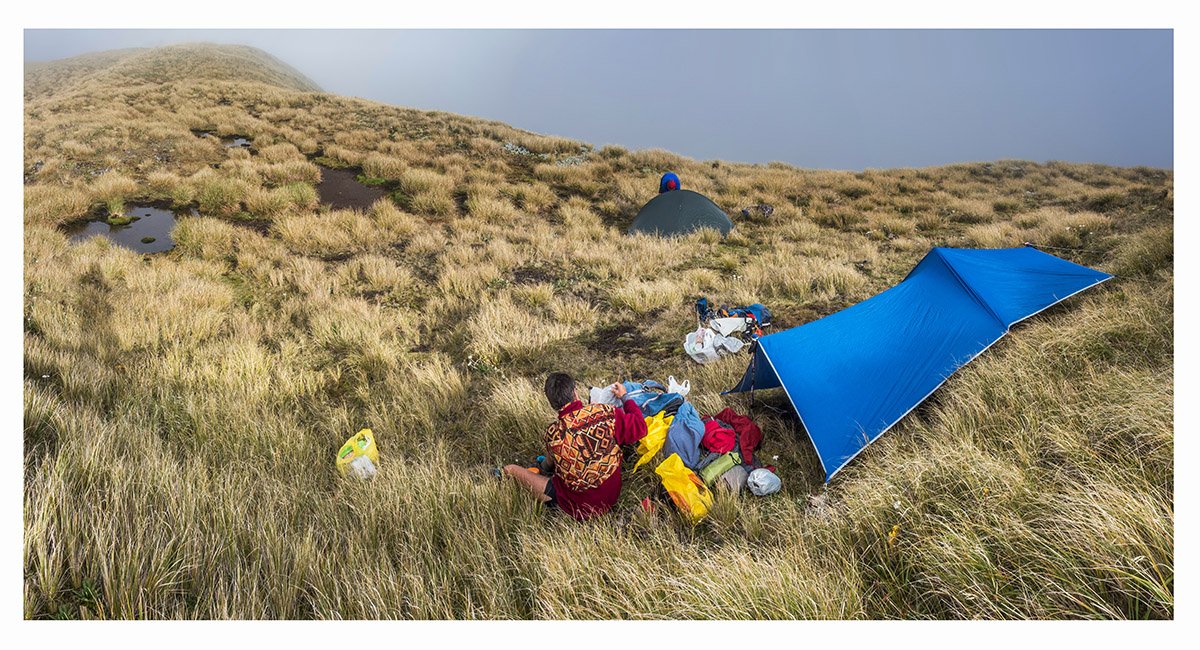
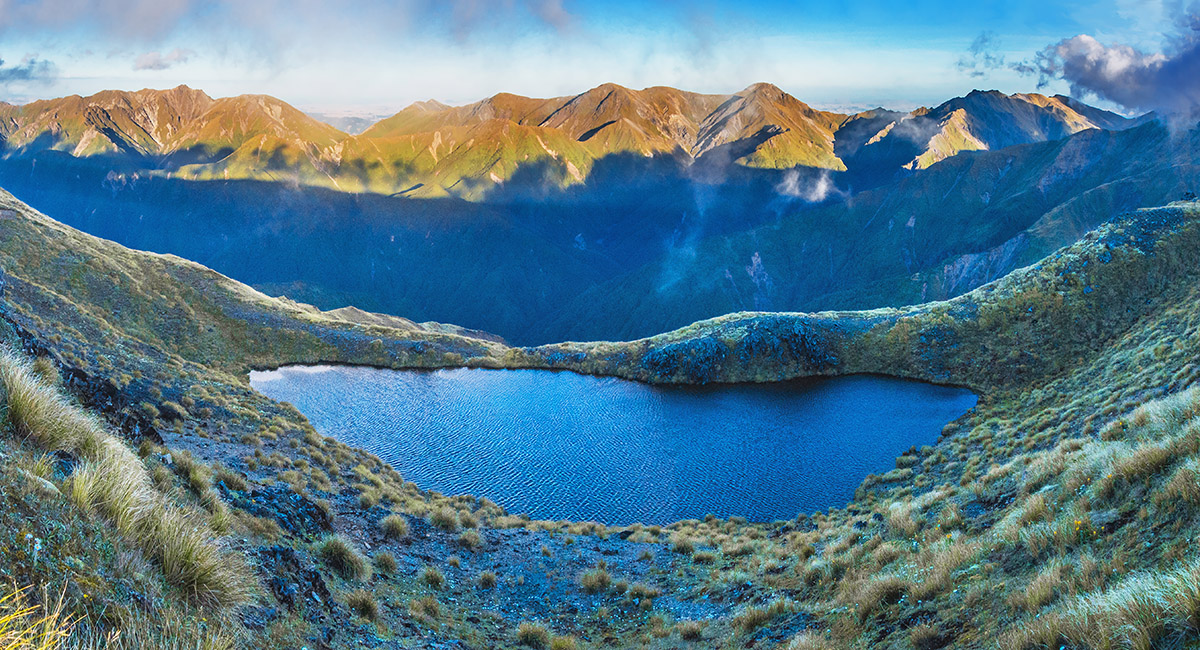
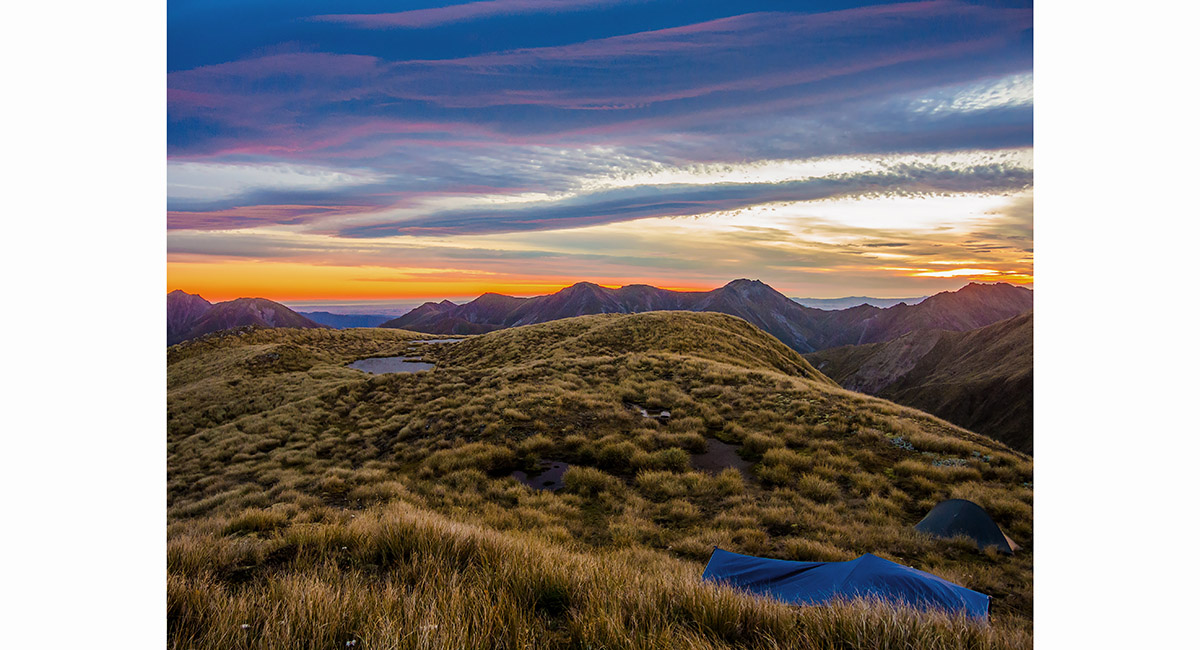
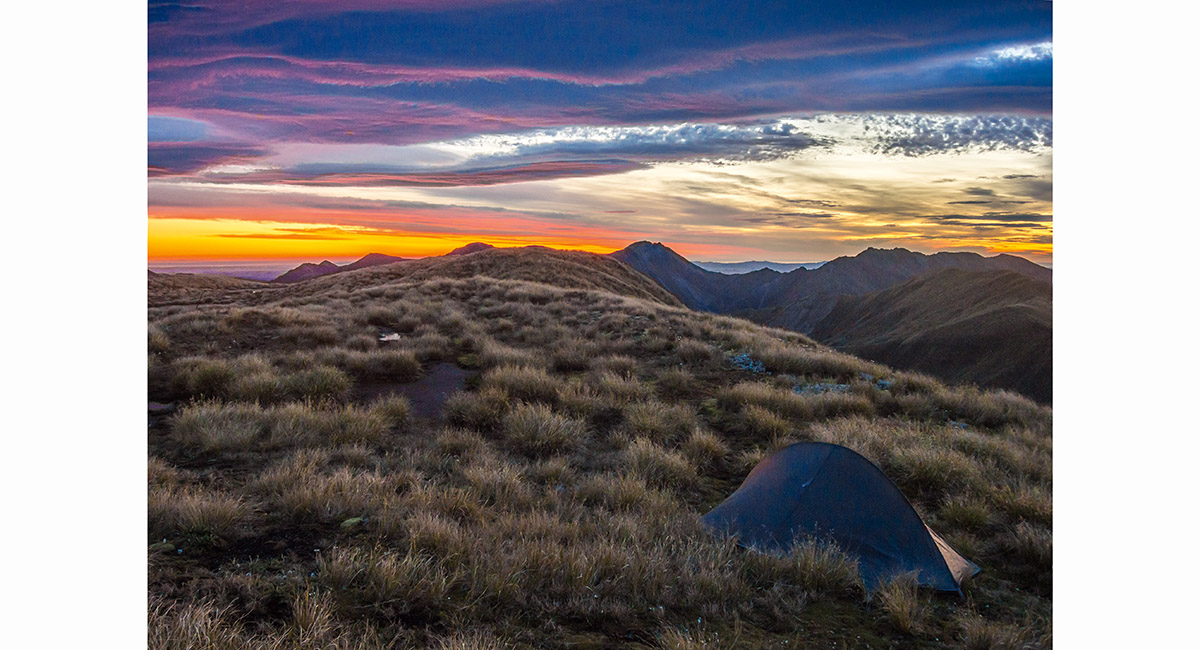
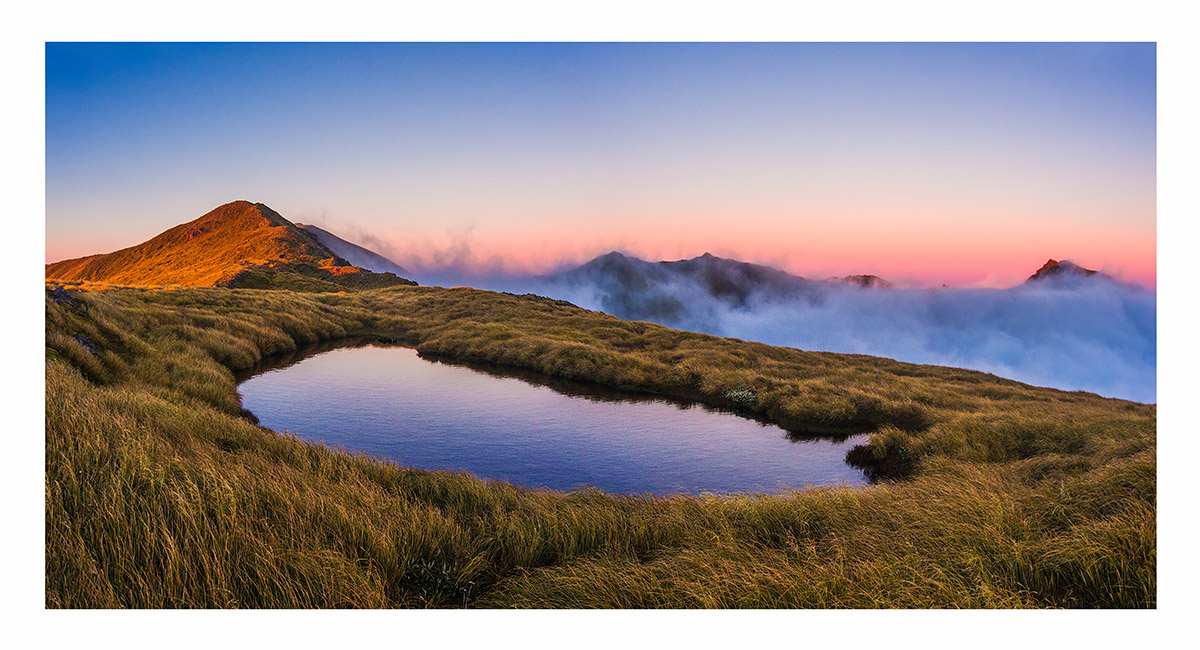
Our campsite on the first night, beside the tarns near Iron Peg (1,703m)

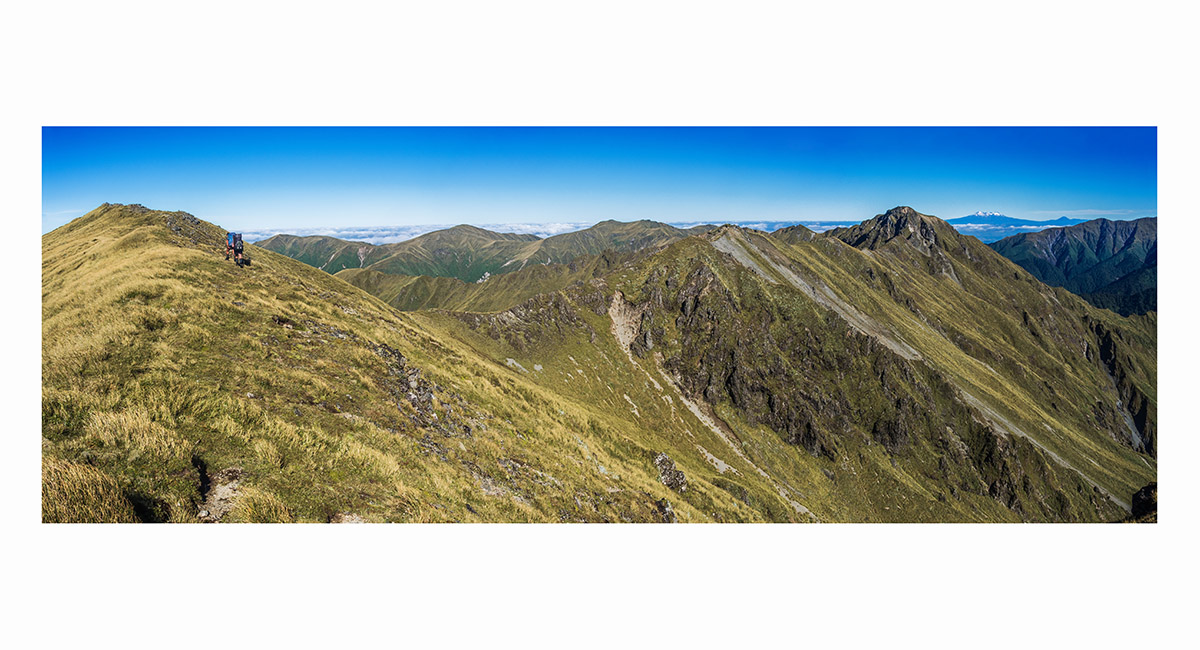
The view east to the Ruahine Range, from near Mangaweka's summit (1,731m) on the Hikurangi Range

The view east to the Ruahine Range, from near Mangaweka's summit (1,731m) on the Hikurangi Range

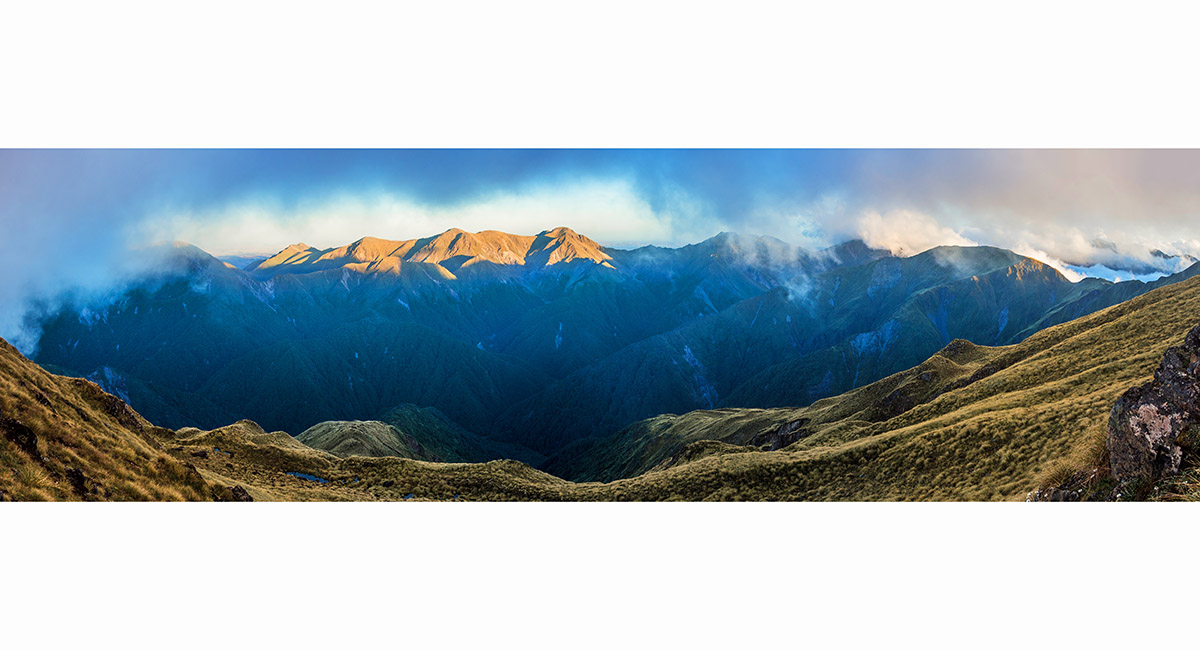
The view east to the Ruahine Range, from near Mangaweka's summit (1,731m) on the Hikurangi Range


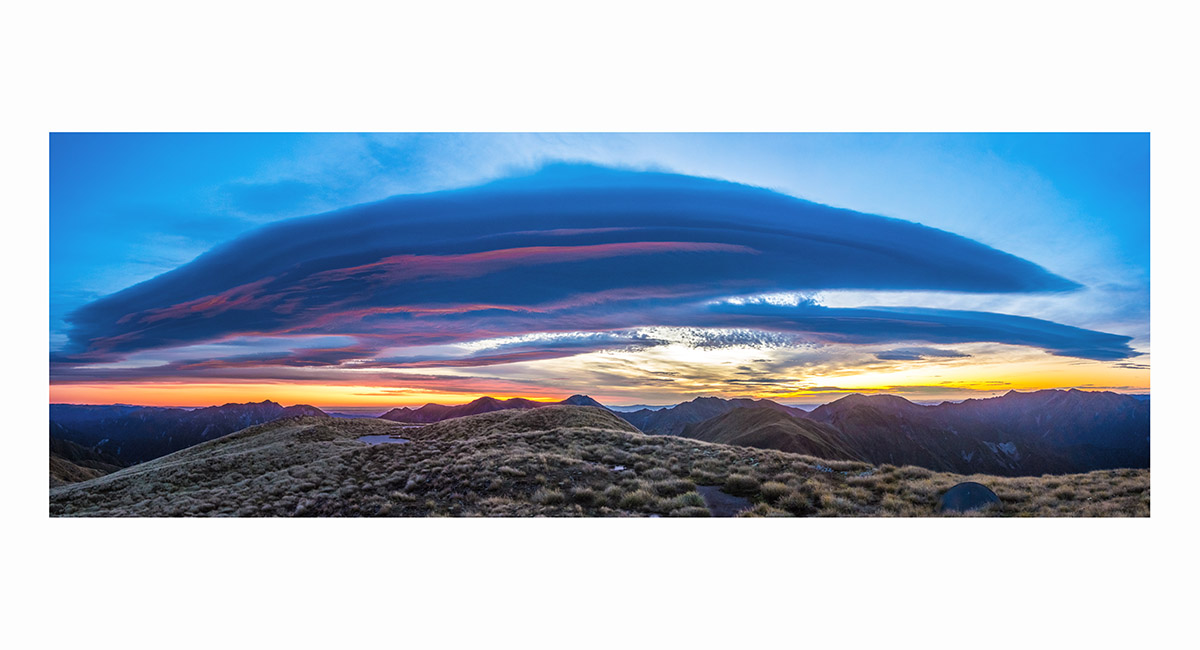
From beneath the summit of Mangaweka, looking west at sunset to the ridge leading up from Purity Hut to Wooden Peg

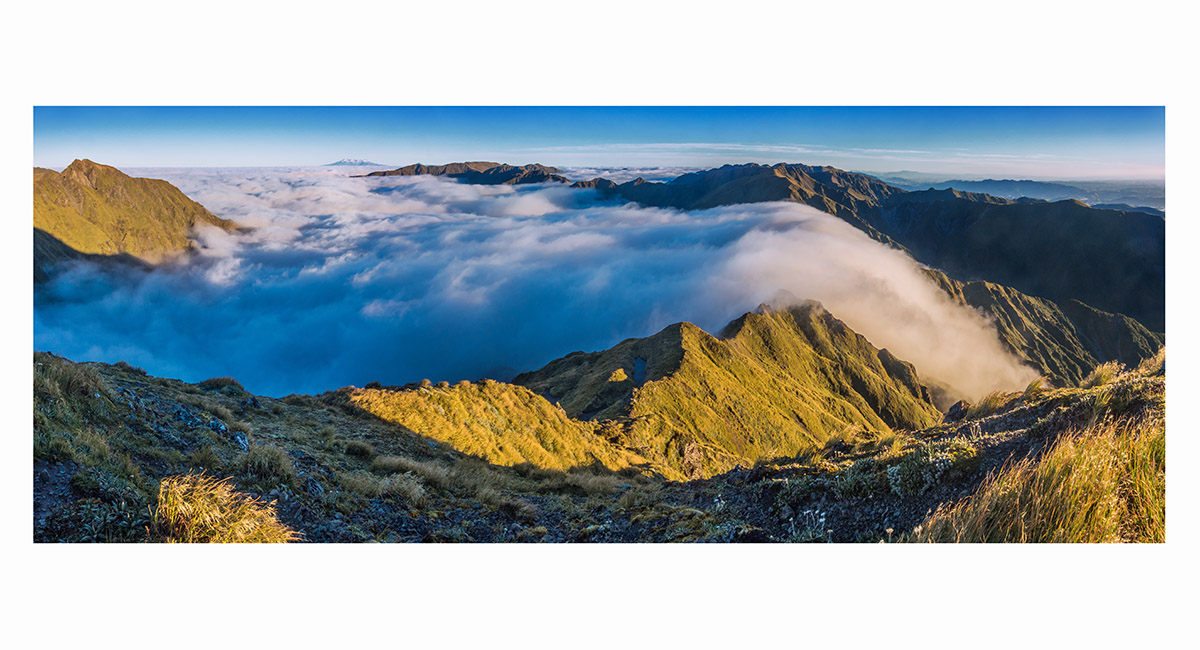
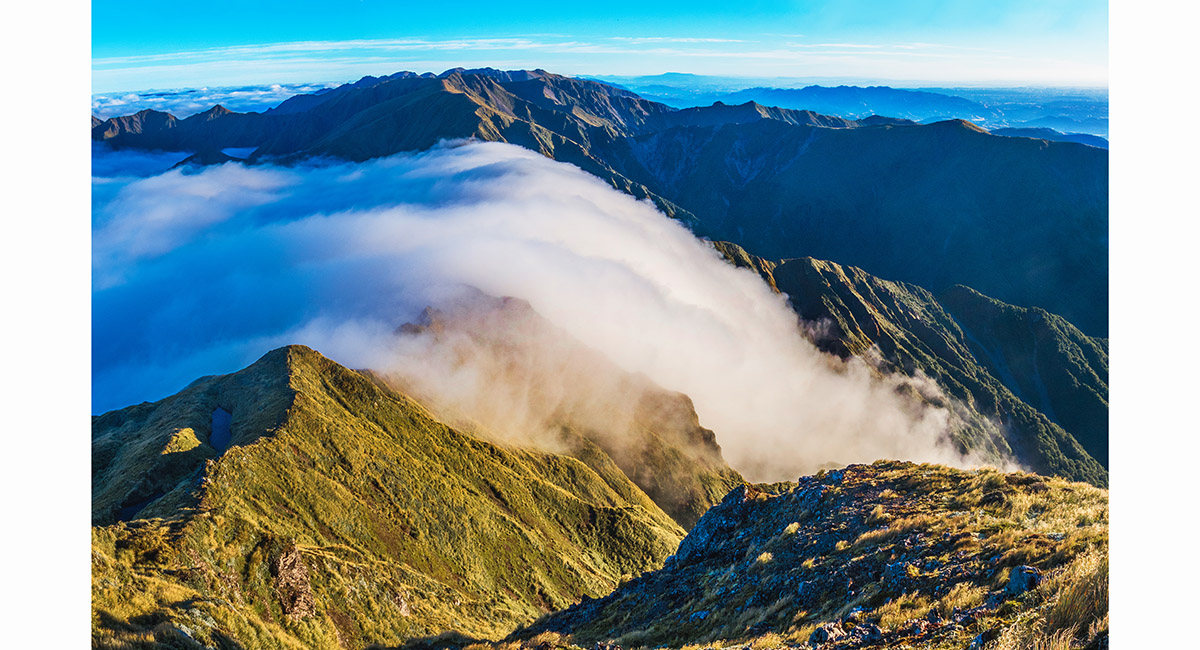
Dawn view east from our campsite near Iron Peg (1,703m)

Dawn view east from our campsite near Iron Peg (1,703m)

Dawn view east from our campsite near Iron Peg (1,703m)

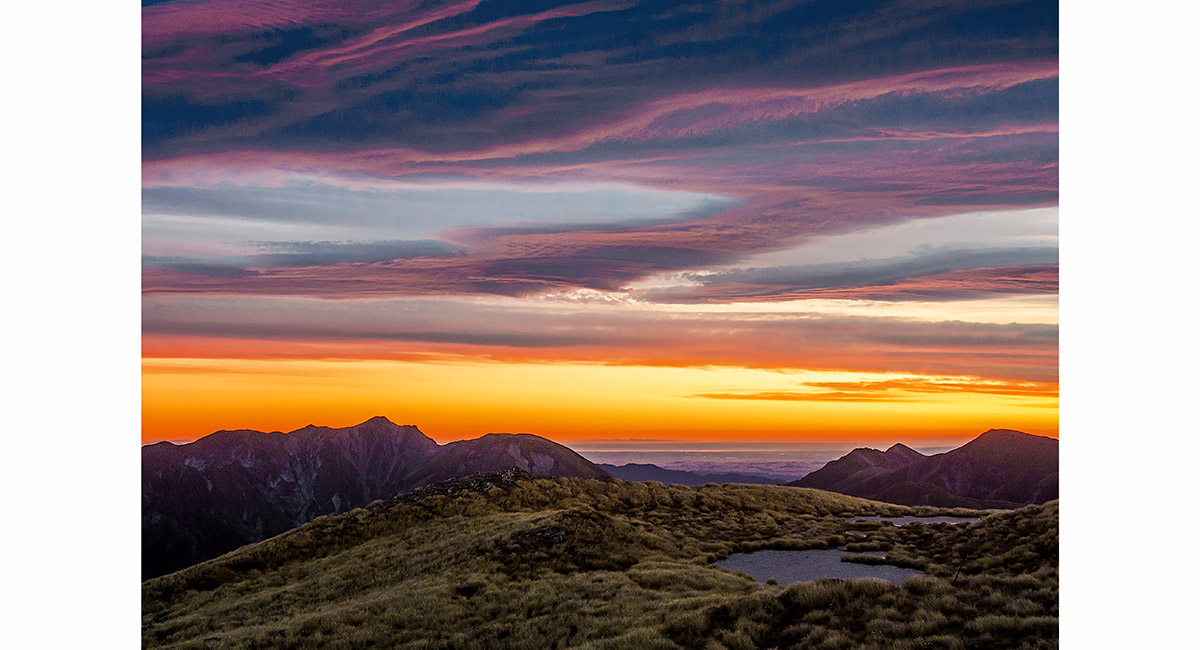
Dawn view east from our campsite near Iron Peg (1,703m)


Dawn view east from our campsite near Iron Peg (1,703m)


Dawn view east from our campsite near Iron Peg (1,703m)

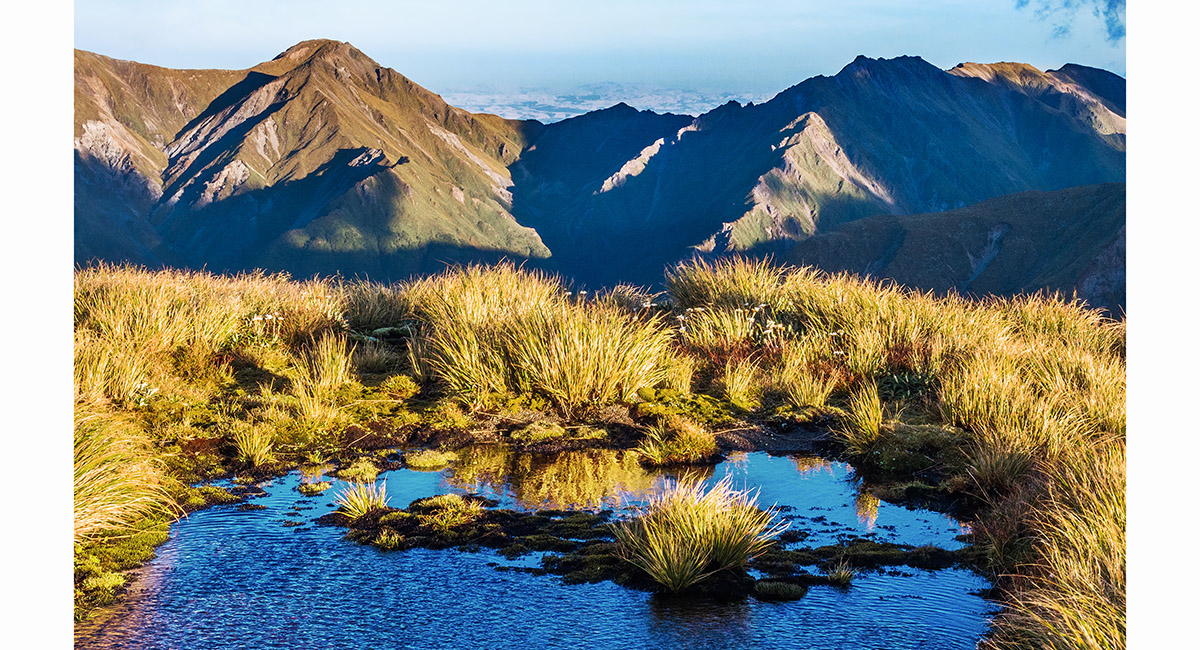
Dawn view northwest from our campsite near Iron Peg (1,703m)

Dawn view northwest from our campsite near Iron Peg (1,703m)

Dawn view northwest from our campsite near Iron Peg (1,703m)


Dawn view east from our campsite near Iron Peg (1,703m)


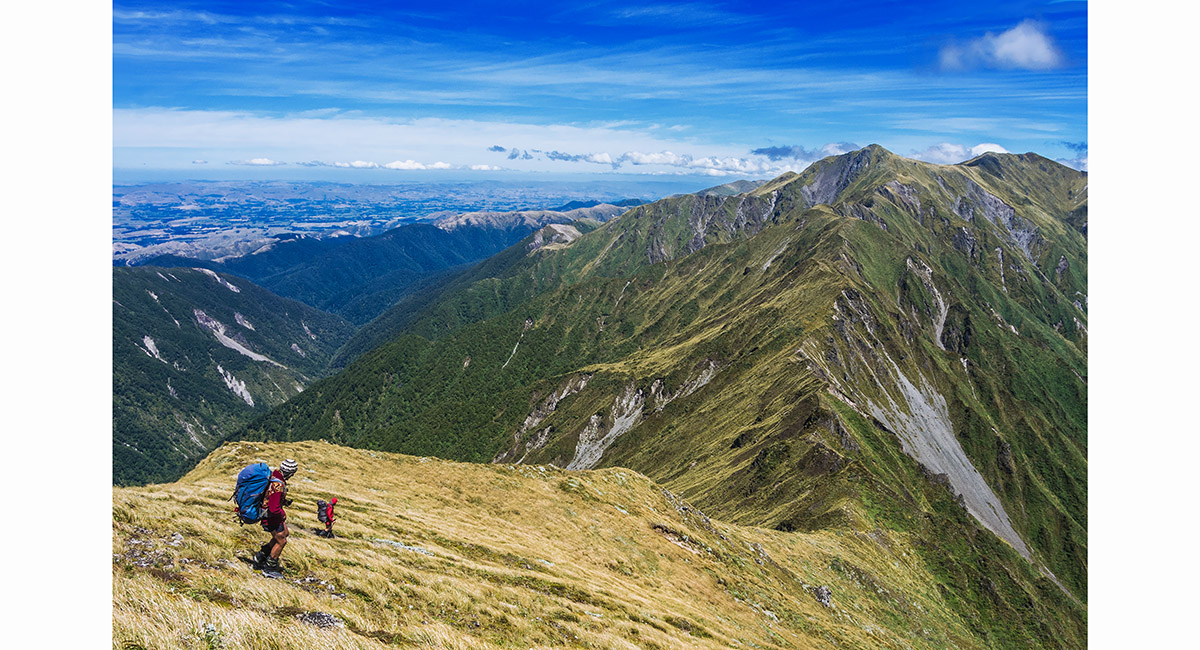
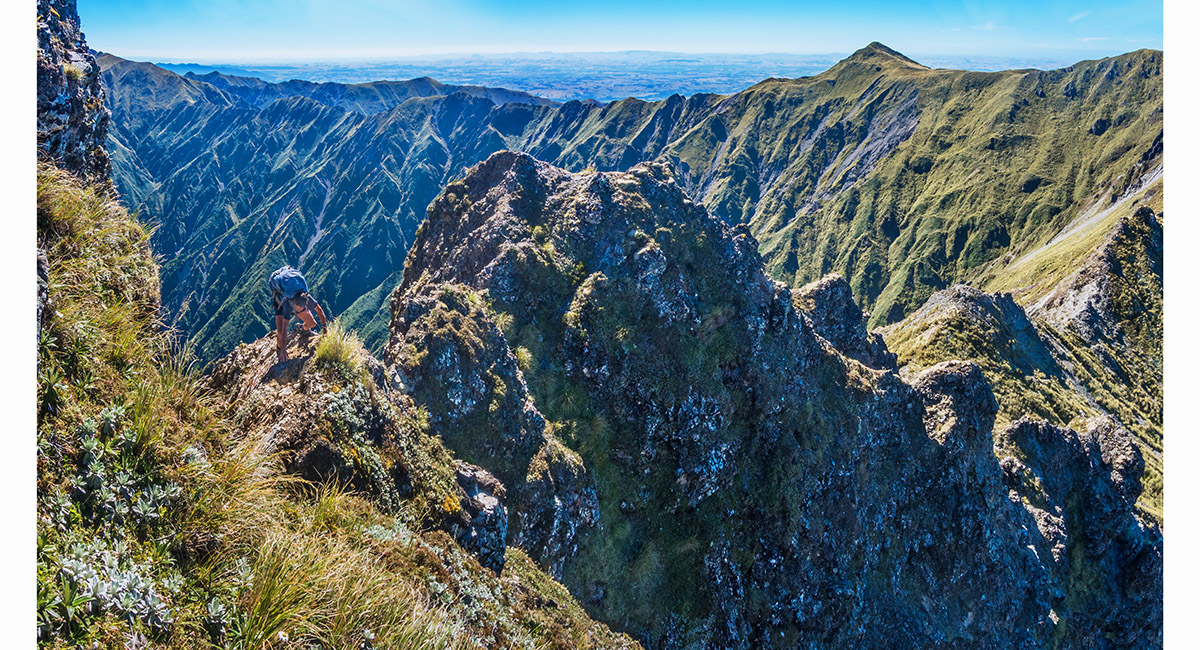
Into the merk - heading off Iron Peg at the beginning of Day 2, along the ridge heading southeast to Ohuinga


A 1,660m high point on the ridge between Iron Peg and Ohuinga

Looking southeast towards Ohuinga (1,686m, centre), with Sawtooth Ridge in cloud out to the right

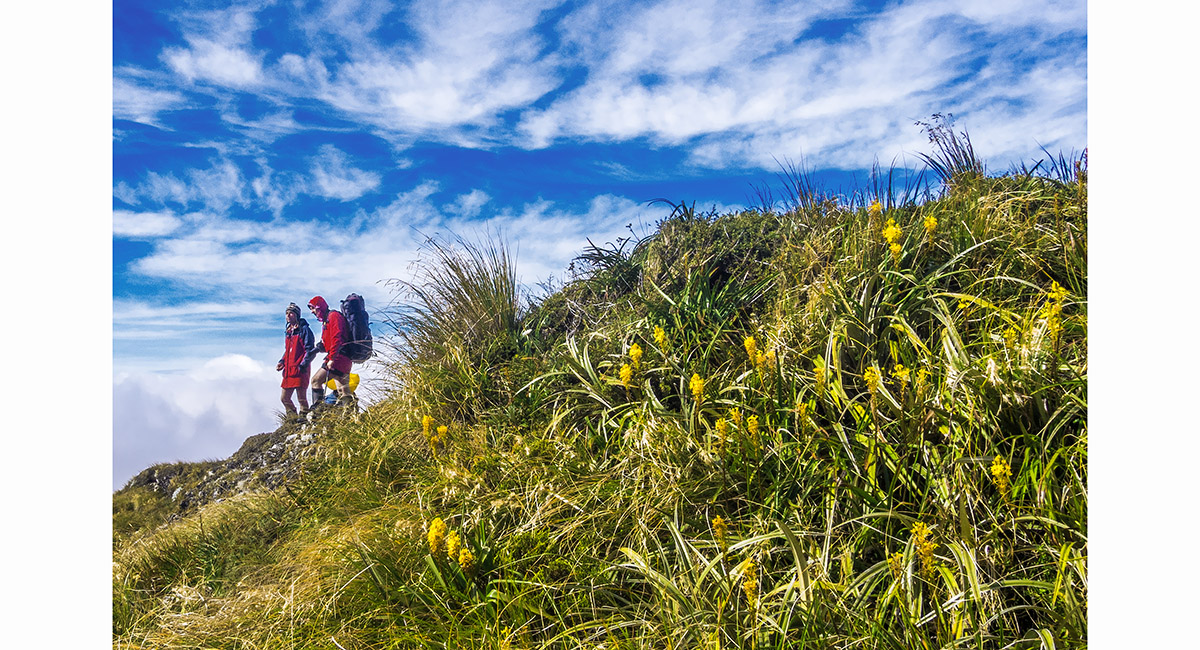
Maori onion amongst the tussock, on the ridge about a third of the way between Iron Peg and Ohuinga


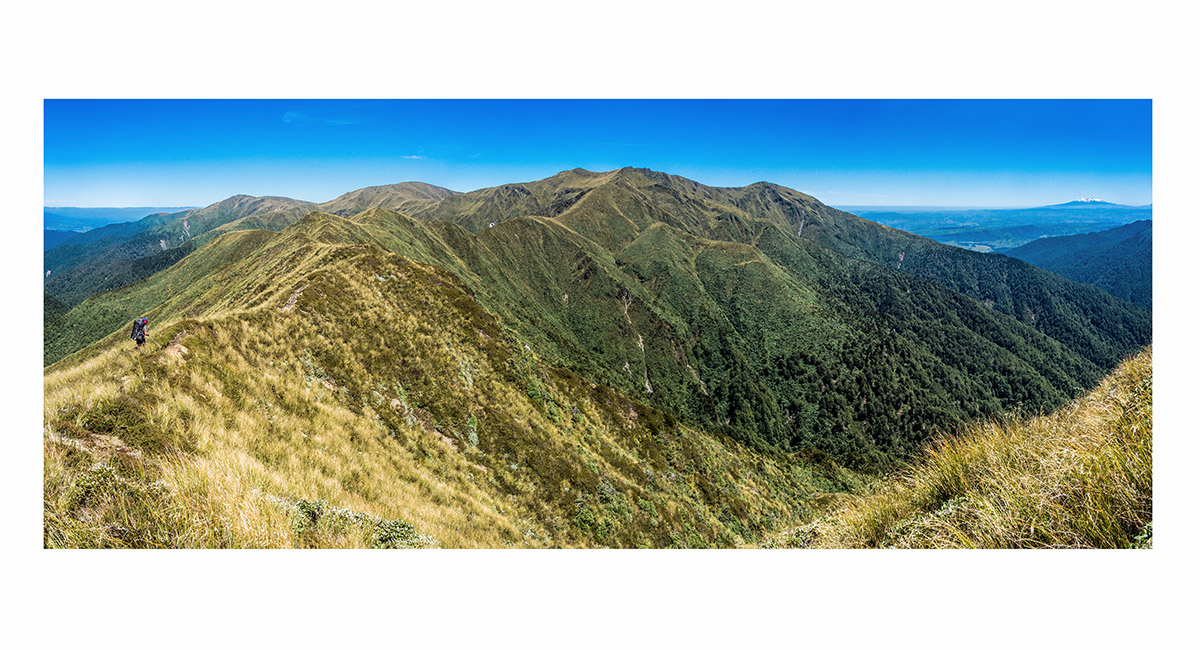
A view on the ridge about a third of the way between Iron Peg and Ohuinga

A view on the ridge about a third of the way between Iron Peg and Ohuinga

A view on the ridge about a third of the way between Iron Peg and Ohuinga


A slipy section near the junction with the Pourangaki track

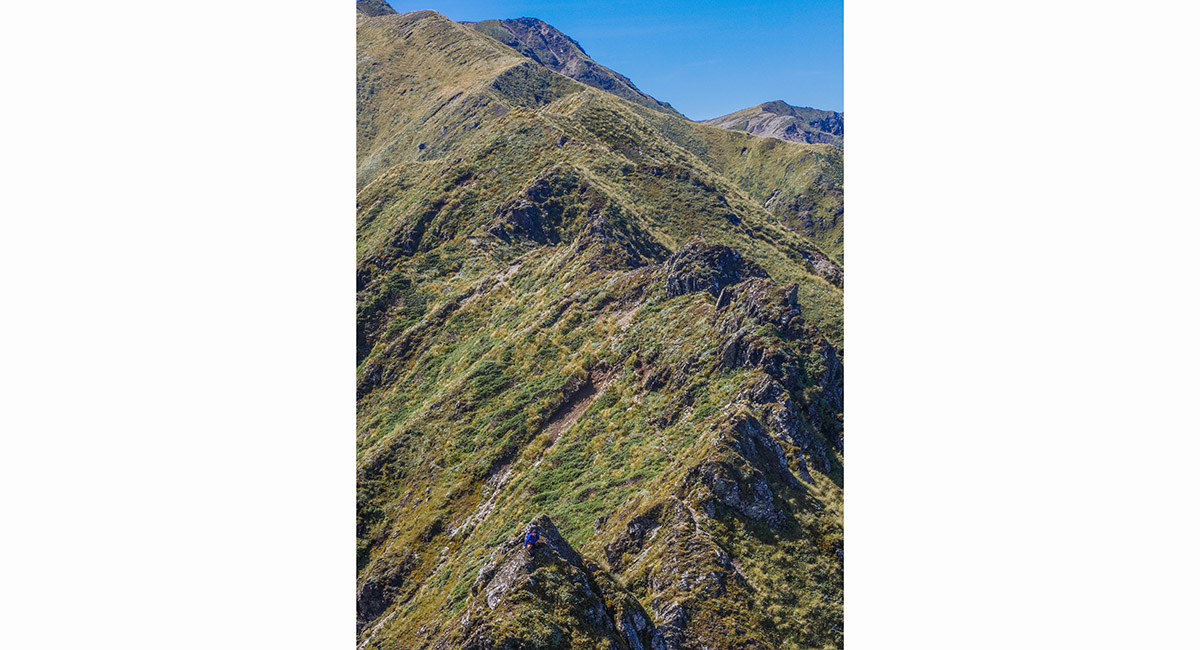
One of many 1,600m undulations along the route


Lunch stop at the junction with the Pourangaki track (1,632m)

Checking out a possible route down off the ridge to Waterfall Hut (1,050m)


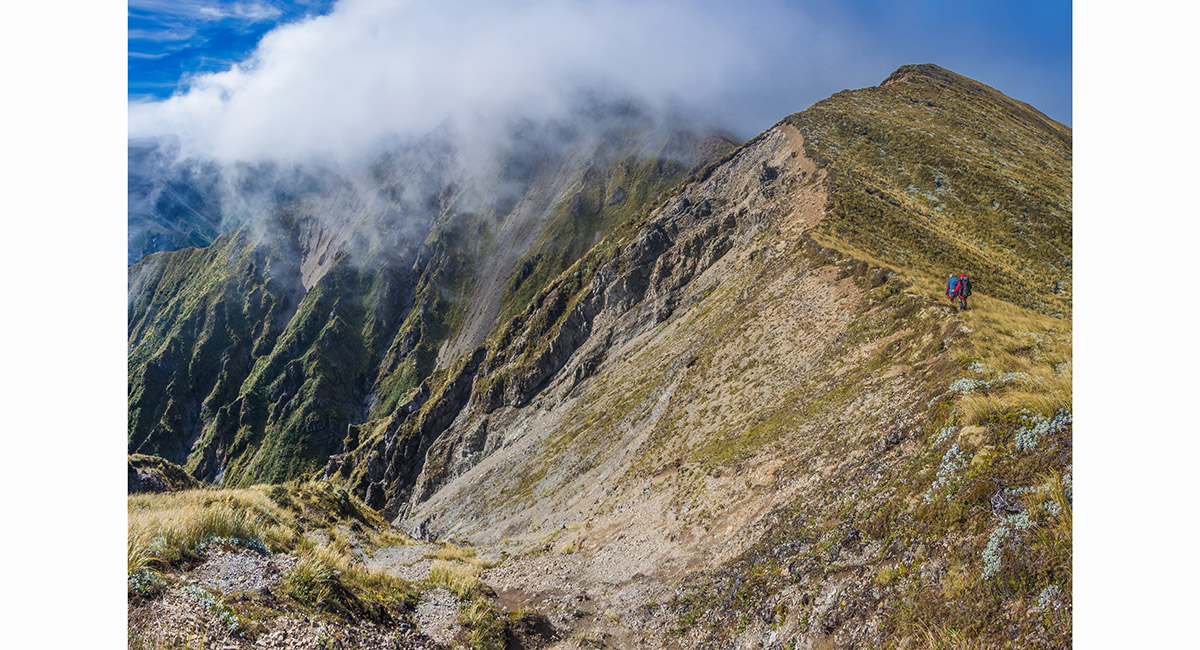
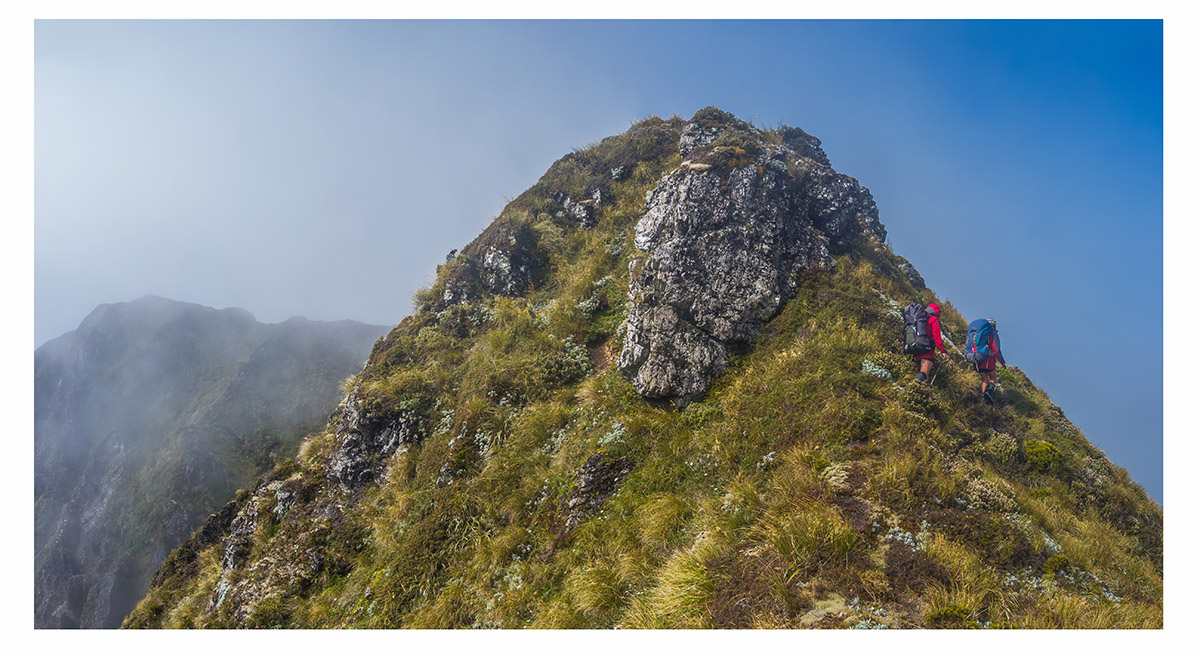
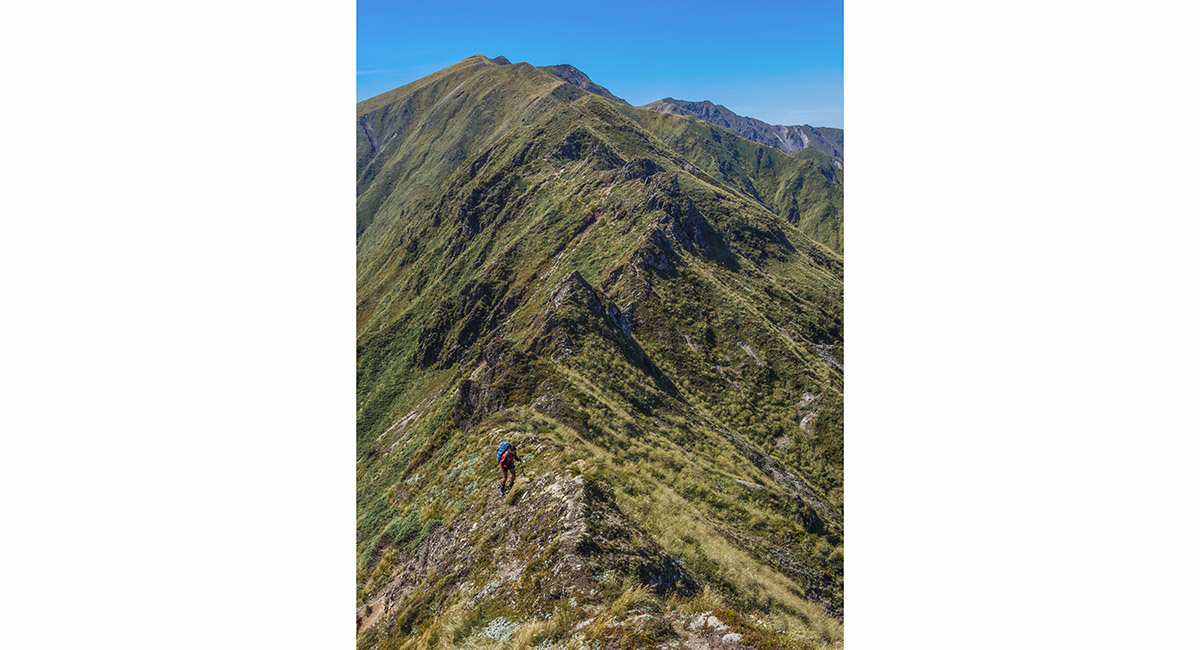
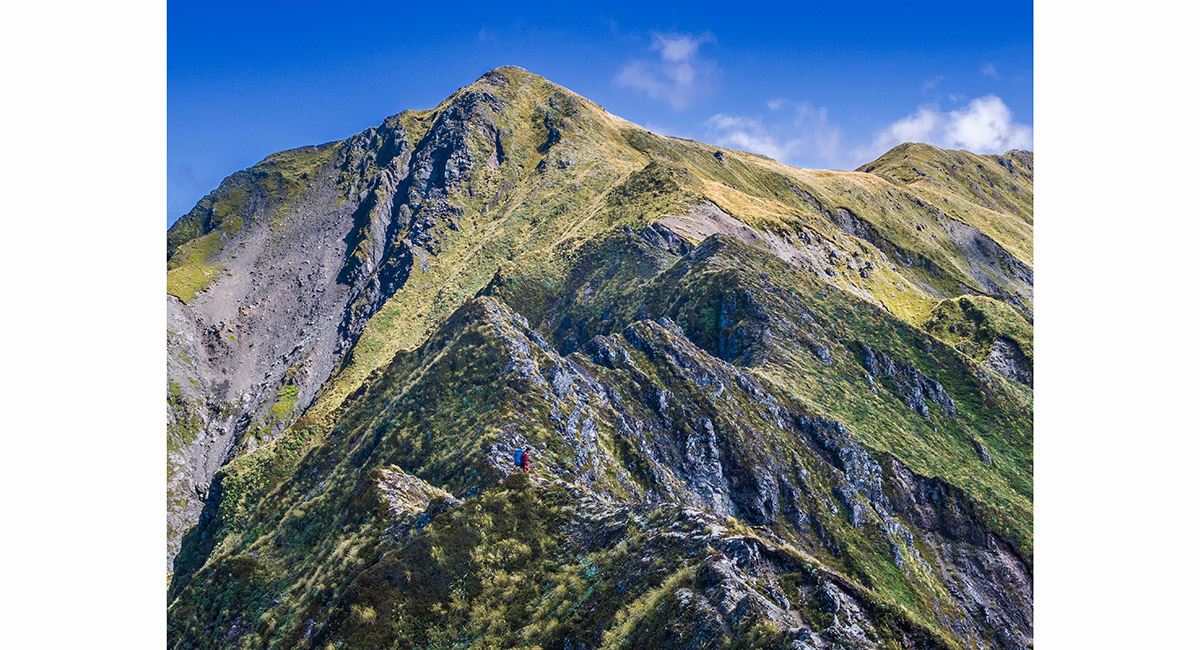
A craggy section of ridge northwest of Ohuinga


A craggy section of ridge northwest of Ohuinga


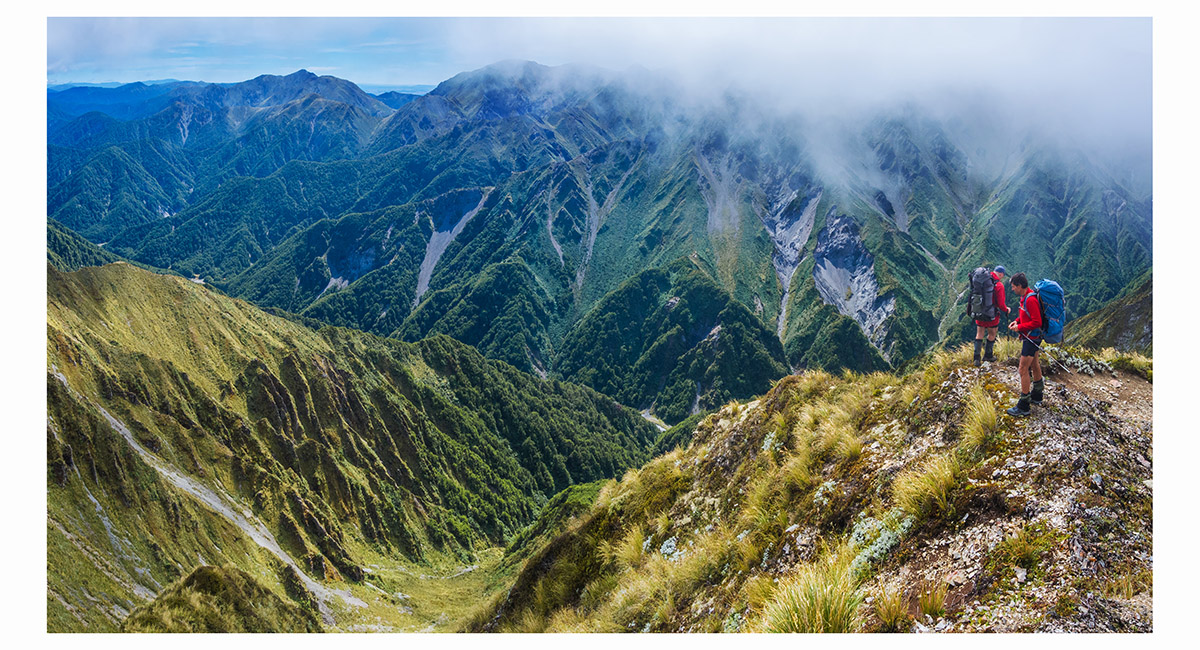
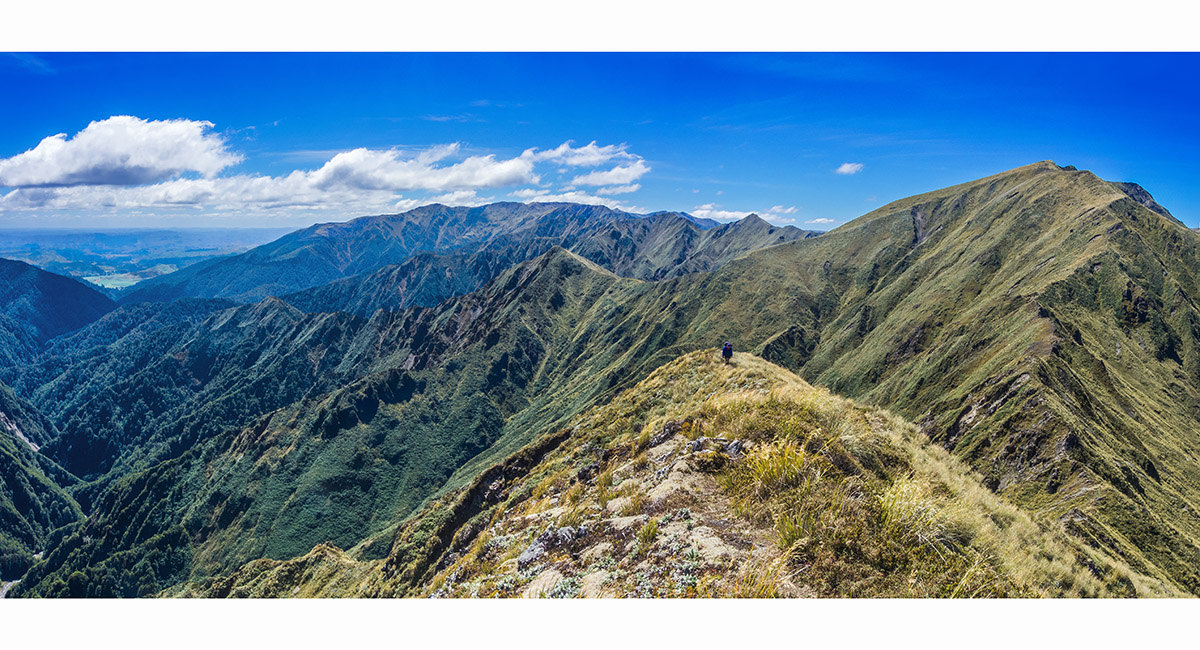
From near the summit of Ohuinga (1,686m), looking back northwest along the ridge we'd traversed


From near the summit of Ohuinga (1,686m), looking back northwest along the ridge we'd traversed


A view of Howletts Hut (the tiny dot at centre - 1,365m) from the summit of Ohuinga (1,686m)

Looking south from Ohuinga, along Sawtooth Ridge to Tiraha Peak (1,668m)


Looking east and south from Ohuinga. Black Ridge drops from the left towards the Hawkes Bay. Sawtooth Ridge leads to Tiraha Peak (1,668m). From there, to the right, our route of the next day is revealed - over Taumataemekura (1,682m) to Te Hekenga (1,695m)

In transit along Sawtooth Ridge, looking northwest back to Mangaweka and, in the dip far left, our beginning and end point down in farmlands

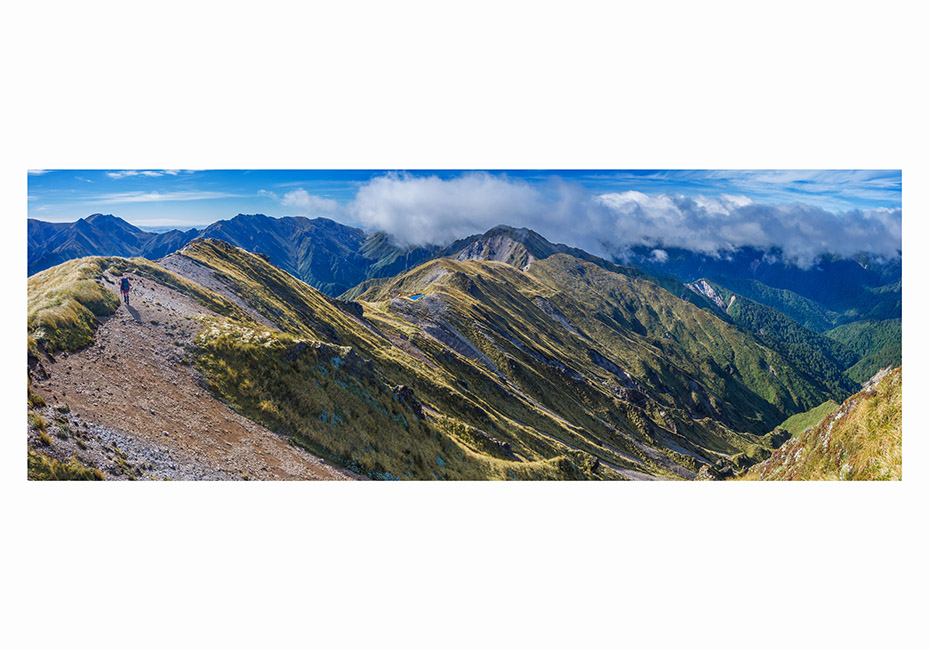
A view north, back along a section of Sawtooth Ridge

A view north, back along a section of Sawtooth Ridge

A view south, along a section of Sawtooth Ridge beneath Tiraha (1,668m)


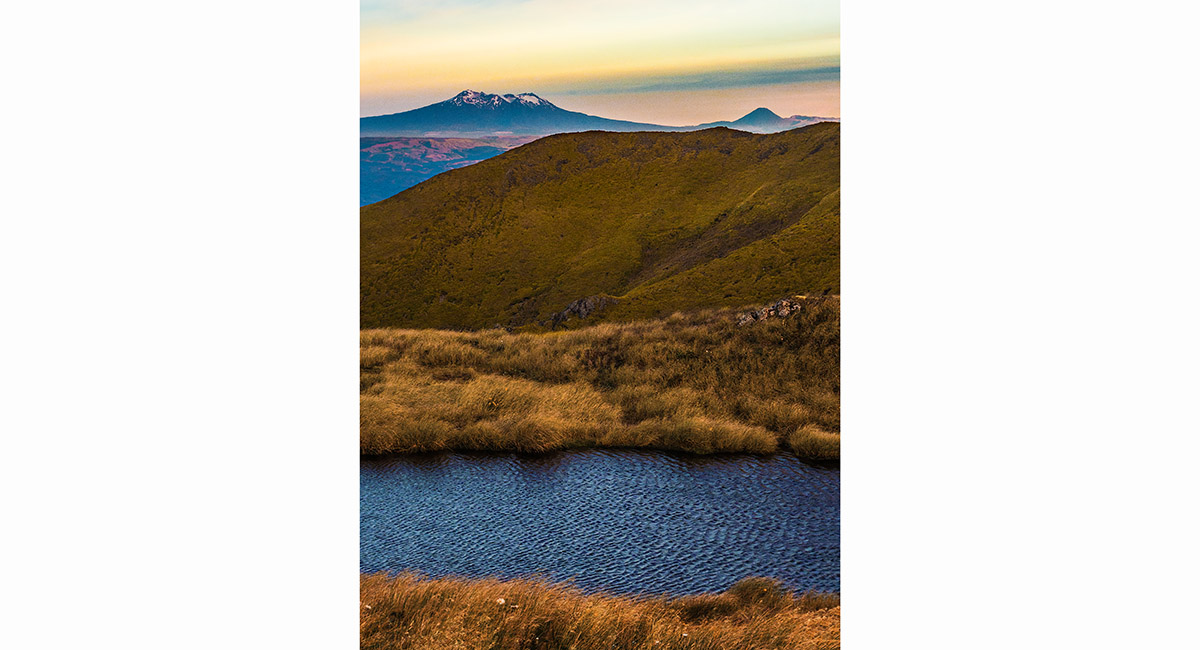
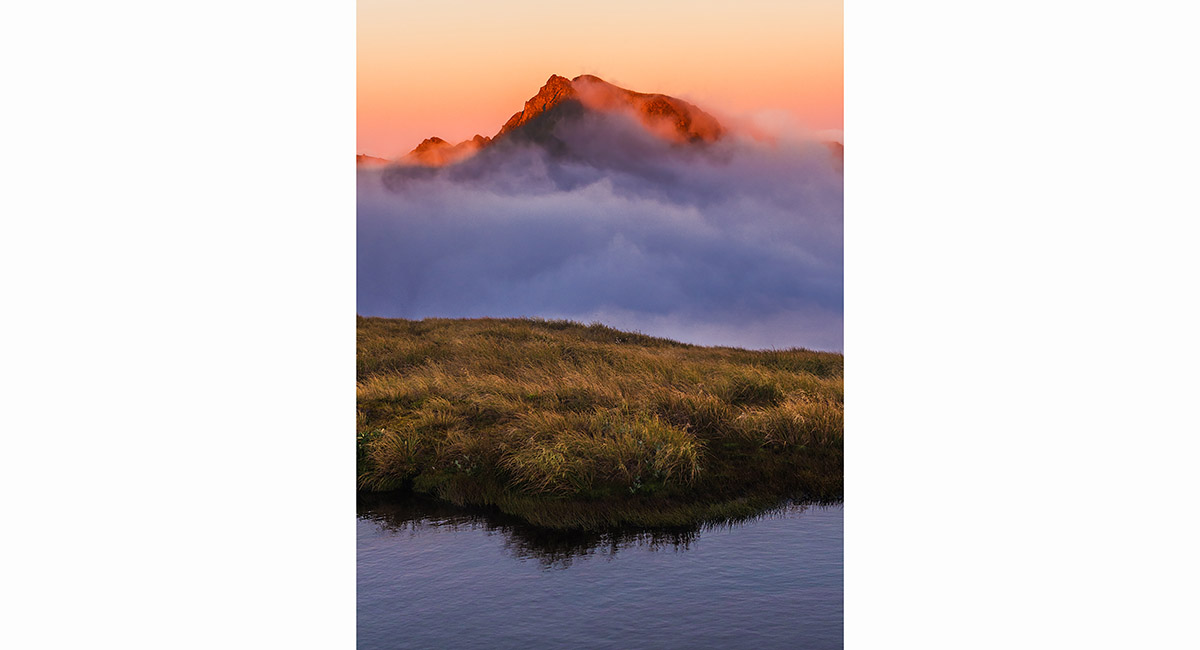
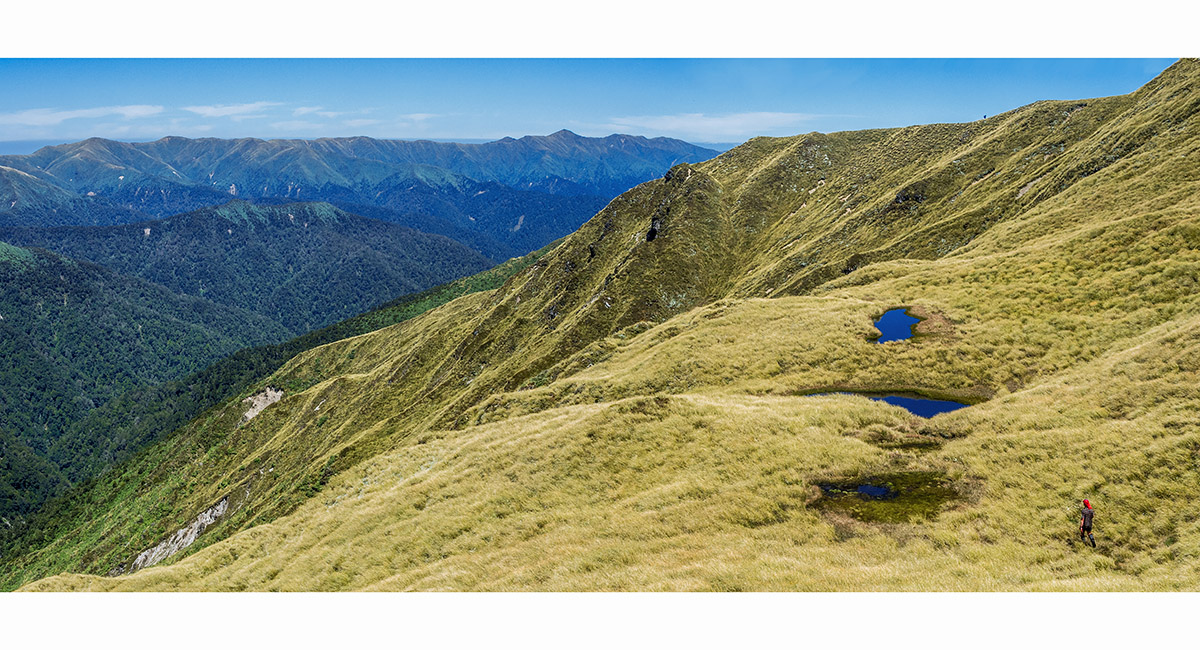
Approaching the tarns just north of Tiraha (1,668m)

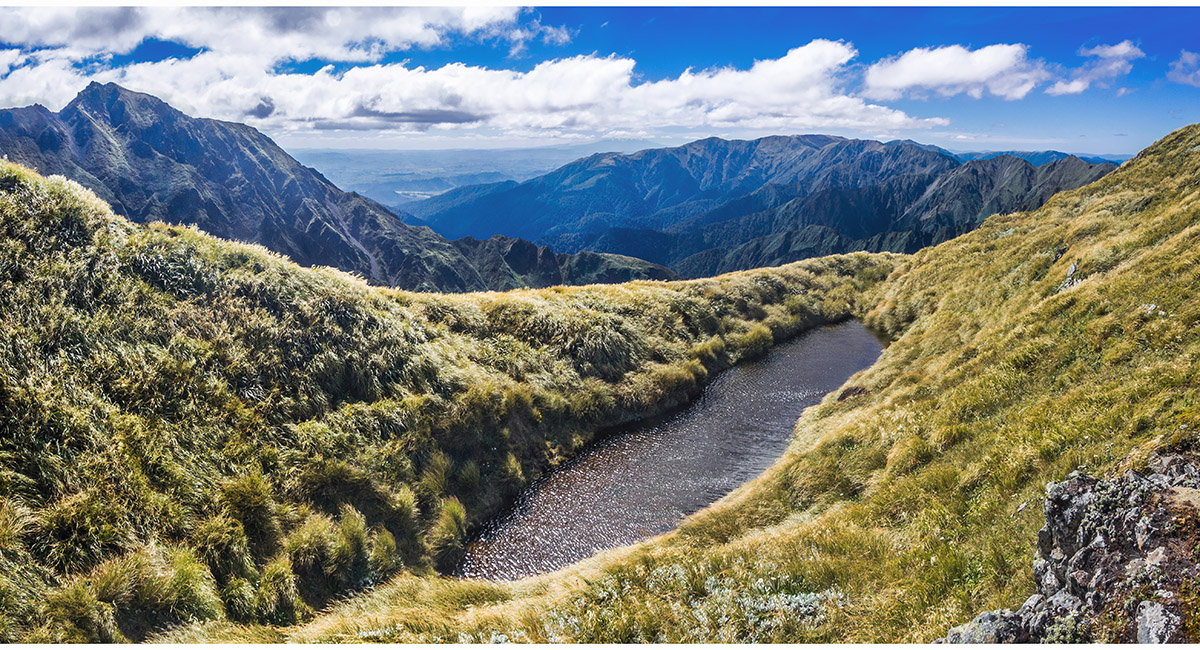
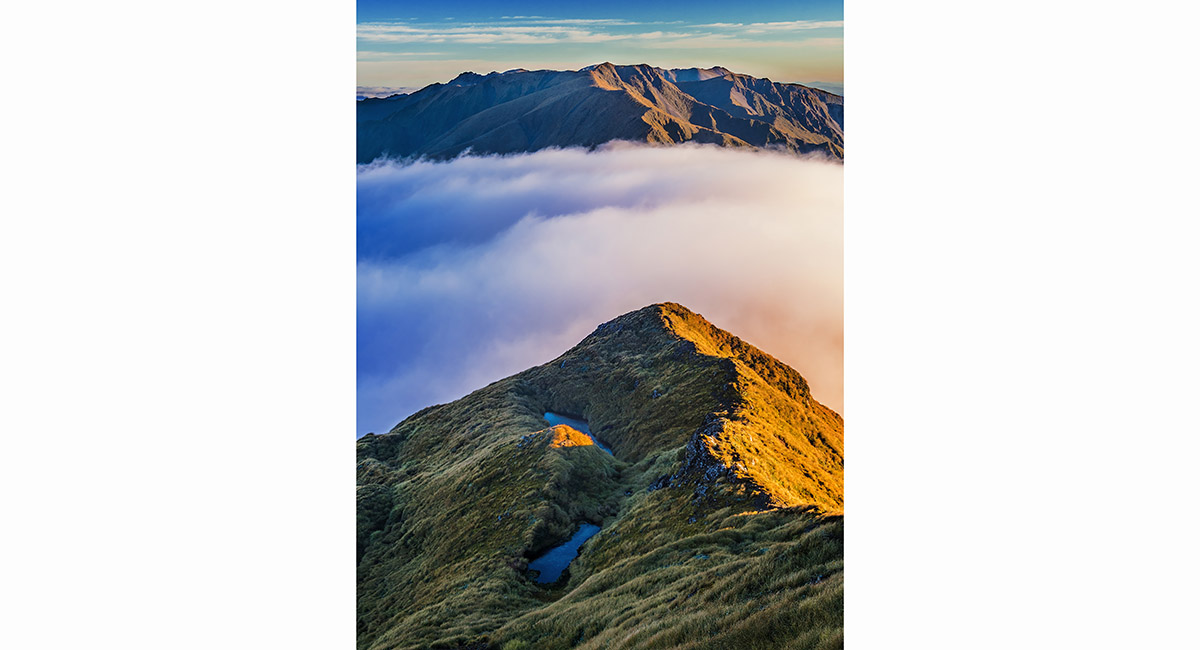
A view across a tarn just north of Tiraha (1,668m) back to Mangaweka (1,731m - centre skyline) and Te Hekenga (1,695m - left)


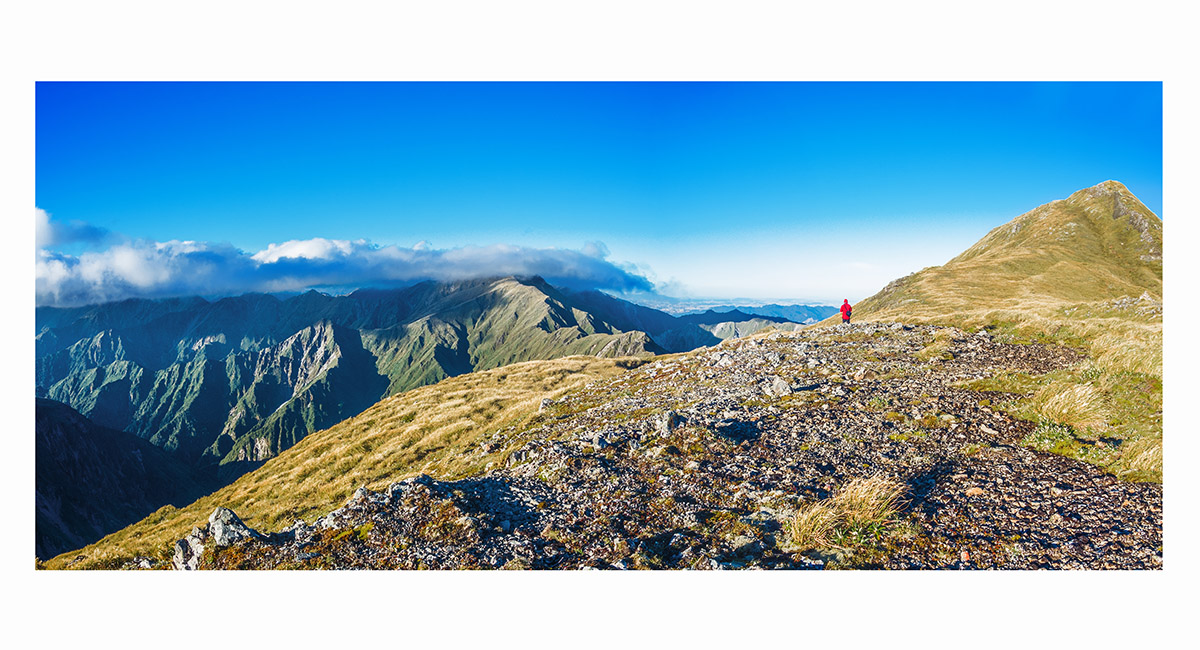
Tiraha summit view north, along Sawtooth Ridge, all the way back to Mangaweka on the left skyline - a good day's effort

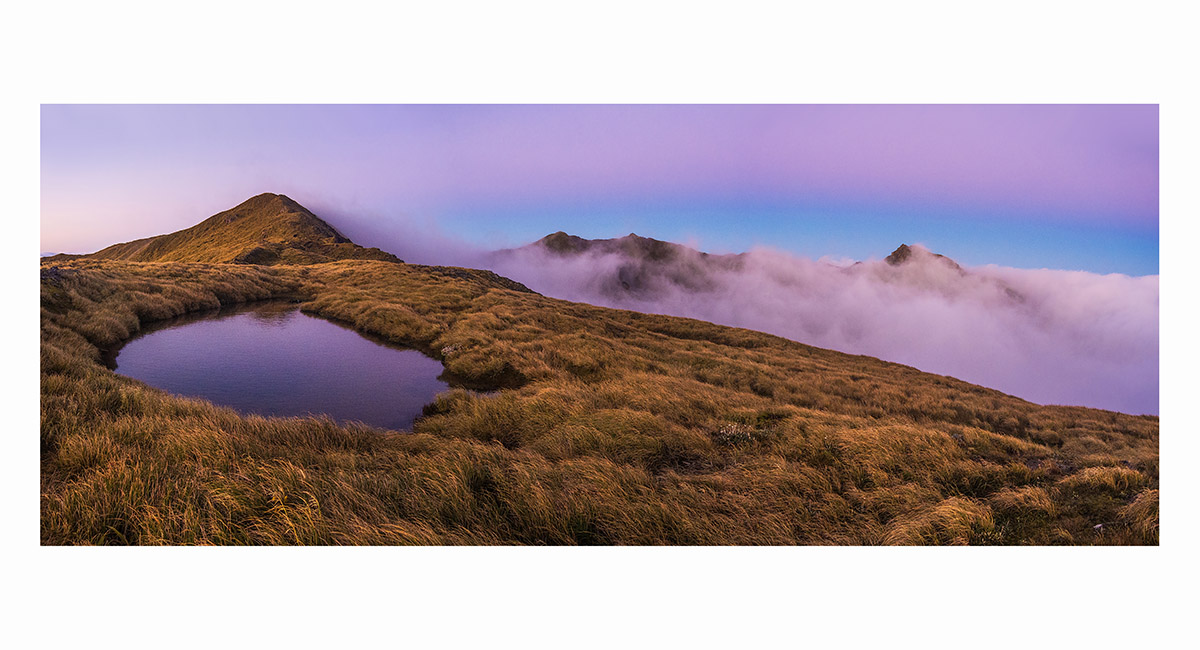
On the broad saddle, at 1,600m just south of Tiraha. We camped for the second night here on the east side out of a strong wind


Our campsite at dawn on Day 3, looking out to the Hawkes Bay


The view east to the Hawkes Bay and, completely submerged in dense cloud, Howletts Hut on Daphne Ridge

Dawn view on the saddle, west to Taumataemekura (1,682m - left) and Te Hekenga (1,695m - right)


The point of sunrise, looking east from our campsite

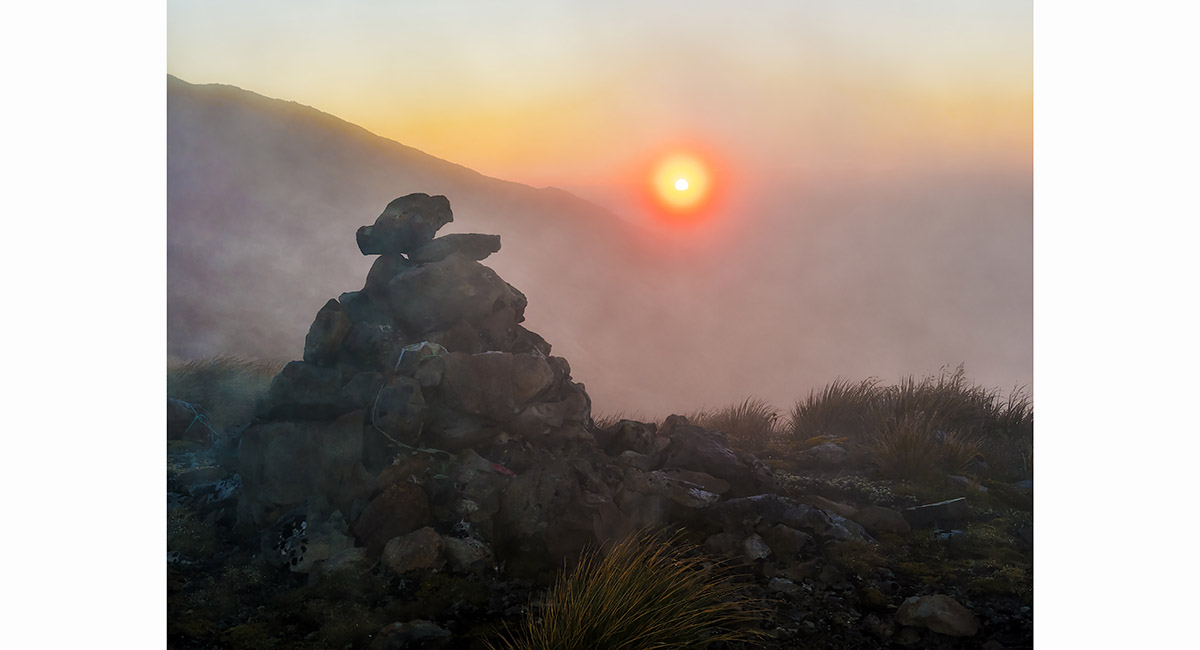
The clouds continued to swirl in from the west, partly obscuring a cairn on the saddle and the sun itself

Dawn view on the saddle, west to Taumataemekura (1,682m - left) and Te Hekenga (1,695m - right)

Dawn view on the saddle, west to Te Hekenga (1,695m)


Shaun Barnett on the saddle enjoying beautiful photography conditions, looking west to Taumataemekura (1,682m - left), Te Hekenga (1,695m - centre) and Mount Ruapehu (2,797m - right)


Dawn view on the saddle, west to Te Hekenga (1,695m - left), Mount Ruapehu (2,797m - centre) and Mangaweka (1,731m - right)

Summit view from Tiraha, looking north along Sawtooth ridge, now completely engulfed in cloud. On the far side is Ohuinga

Summit view from Tiraha, looking west to Te Hekenga (left), Mount Ruapehu and Mangaweka (left of centre skyline) and north along Sawtooth Ridge, completely engulfed in cloud, with Ohuinga on the far side


Summit view from Tiraha, looking southeast across the saddle to Taumataemekura (1,682m - left of centre) and Te Hekenga (1,695m - right)


Mount Ruapehu hovers on a sea of cloud, viewed from Tiraha

Summit view from Tiraha, looking north along Sawtooth ridge, engulfed in cloud. On the far side is Ohuinga


As we are about to set off on Day 3, a view from the saddle beneath Tiraha, looking west to Te Hekenga (left), Mount Ruapehu and Mangaweka (centre skyline)


As we are about to set off on Day 3, a view from the saddle beneath Tiraha, looking west to Te Hekenga (left), Mount Ruapehu and Mangaweka (centre skyline)

A view from the saddle beneath Tiraha, looking west to Te Hekenga (left), with Mounts Ruapehu and Ngauruhoe on the skyline


A view of Mount Ruapehu on the approach to Taumataemekura

From left - Te Hekenga, Mount Ruapehu, Mount Ngauruhoe, Iron Peg and Mangaweka, on the approach to Taumataemekura

Nearing the summit of Taumataemekura (1,682m), with Te Hekenga (1,695m) at the other end of the northwestern ridge


Taumataemekura summit view. From left - Mount Ruapehu (2,797m), Te Hekenga (1,695m), Mount Ngauruhoe (2,291m)


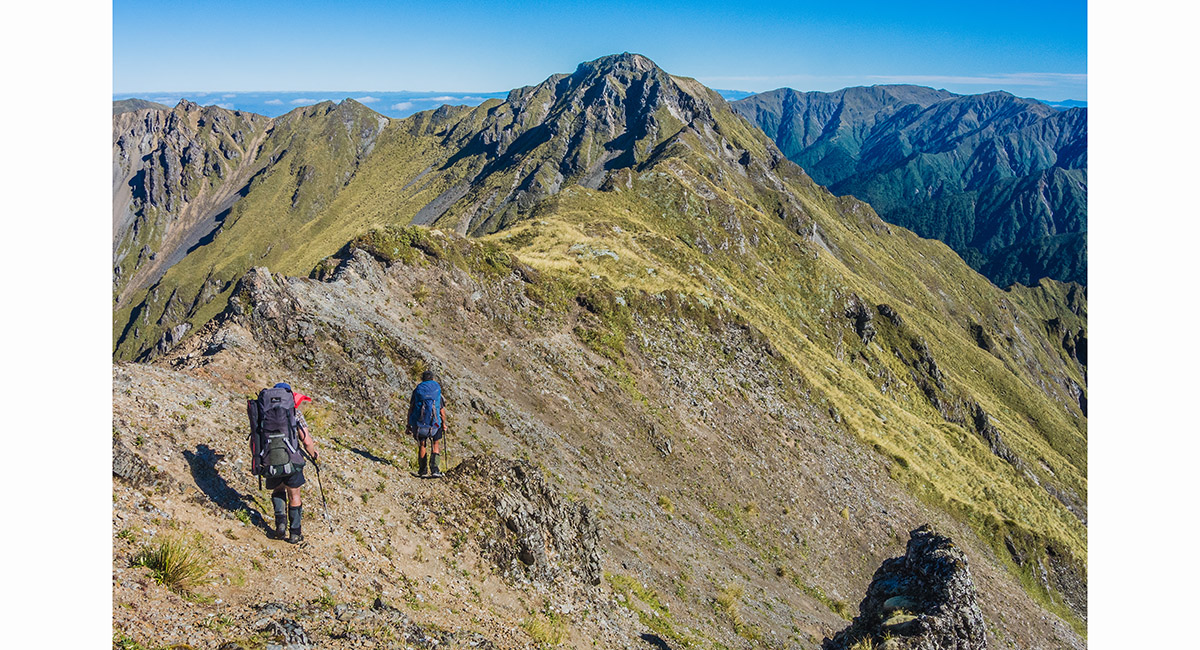
Heading along the ridge to Te Hekenga

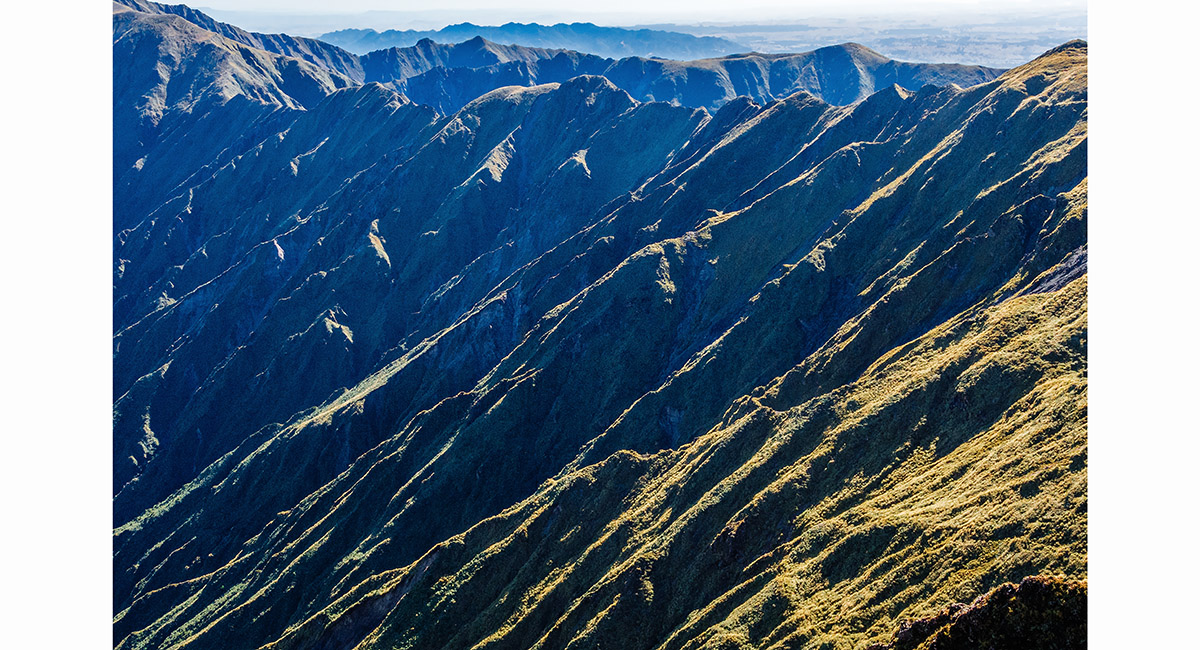
The bones of the earth, looking across to Sawtooth Ridge

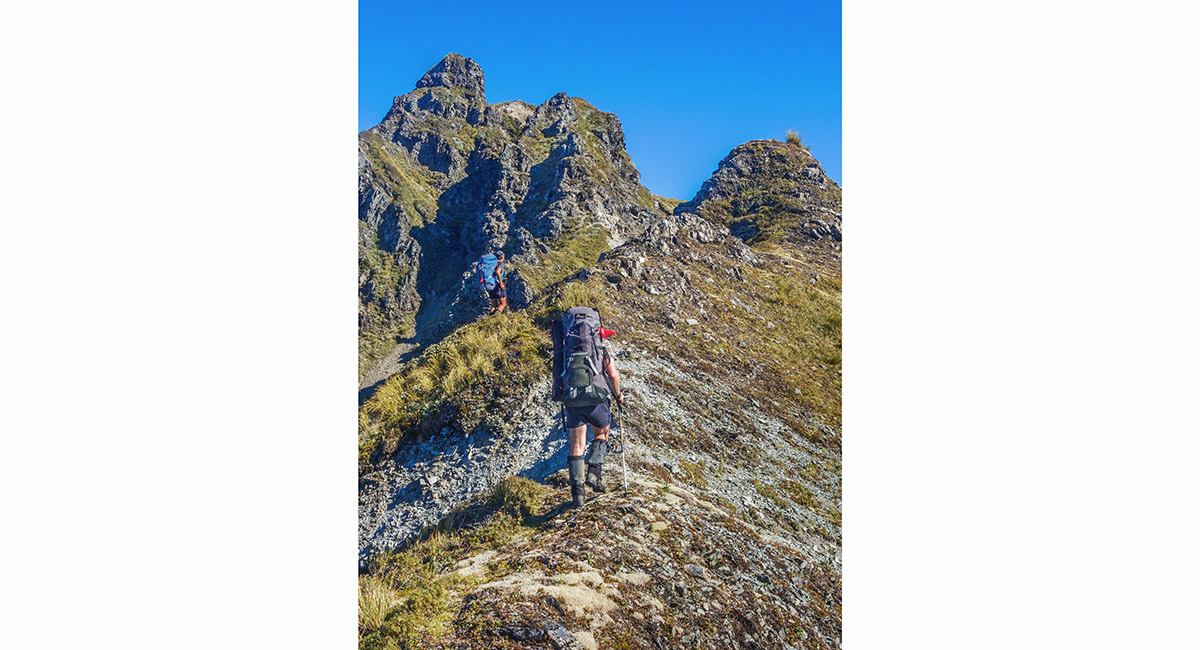
Approaching Te Hekenga


Approaching Te Hekenga


Approaching Te Hekenga

Pondering the crux of our 4 day route, a cheval on the southeast side of Te Hekenga, giving access to the summit


Joe Nawalaniec doing an exploratory of Te Hekenga's cheval


Joe Nawalaniec - the Cheval Kid, savouring one of his multiple crossings of the crux this fine day. The summit of Te Hekenga is the black section directly above him


Looking back from beneath the summit to the cheval

Looking back from beneath the summit to the cheval. Tiraha is the cone on the right skyline


Shaun Barnett on top of Te Hekenga. The cheval is clearly seen in the dip left of the summit. Tiraha is on the left skyline


The Cheval Kid, at one with a cheval - naturally


The team on top of Te Hekenga, pleased to have the crux behind us

View west to Maungamahue (1,661m - centre skyline)


Looking east along the ridge we were traversing to Maungamahue, leading back up to Te Hekenga at top right

Two very inviting tarns about 100m beneath the summit of Maungamahue. This was now afternoon and it was HOT


Shaun about to get wet


A wide view of almost our entire journey. Mangaweka is the dark hump on the left skyline. From there we traveled right across to Te Hekenga - the two pointed peak on the right, before heading in along the ridge leading to Maungamahue, where this viewpoint is. The near ridge at left leads in the direction of Kelly Knight Hut, way down at 650m beside the Pourangaki River


Heading northwest and down towards Pourangaki (1,539m), enjoying fine views of Ruapehu and Ngauruhoe


A nice view of Ruapehu provided an excuse for a breather near the end of Day 3


We had planned to camp beside a tarn at 1,440m, but the levy was dry, so we forged on down towards Kelly Knight Hut. A gentle trickling promted us to stop at 1,250m and set up camp right across the trail - nice


Our trail blockage. At dusk we didn't expect any visitors though, which proved to be the case

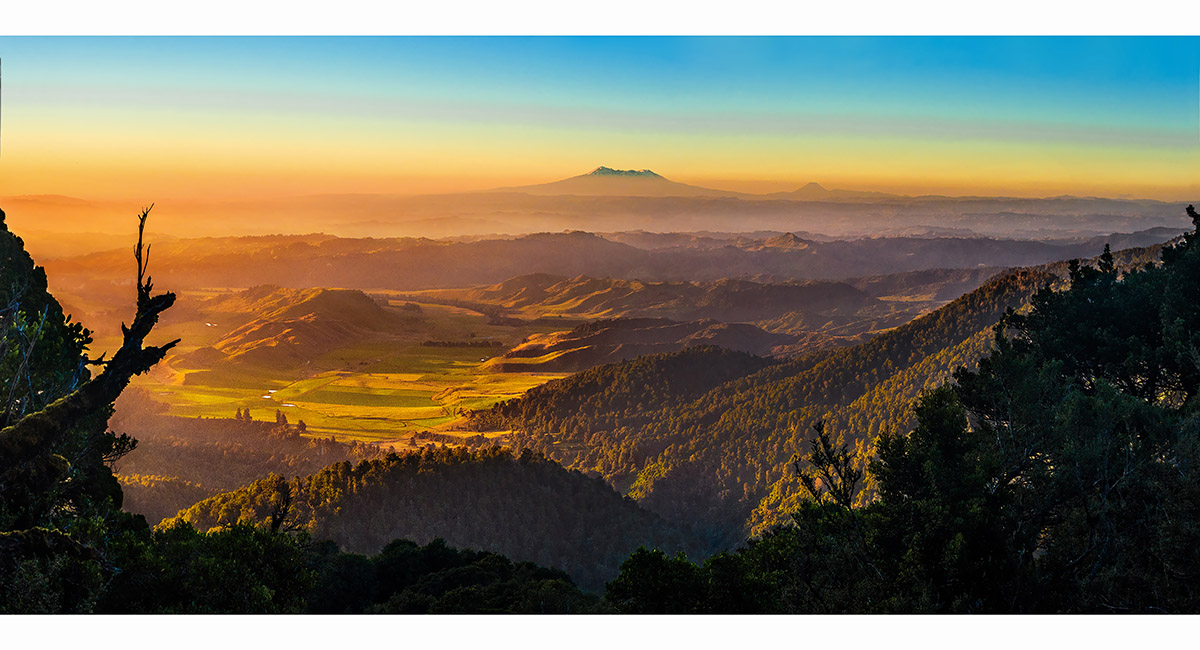
Campsite view at dusk to Mount Ruapehu


Day 4 - campsite view at dawn to Mount Ruapehu


En route down to Kelly Knight Hut

Kelly Knight Hut (650m)


Crossing the Pourangaki River, just beyond Kelly Knight Hut


Crossing the Pourangaki River, just beyond Kelly Knight Hut


Above the true right of the Pourangaki River, looking across to Kelly Knight Hut

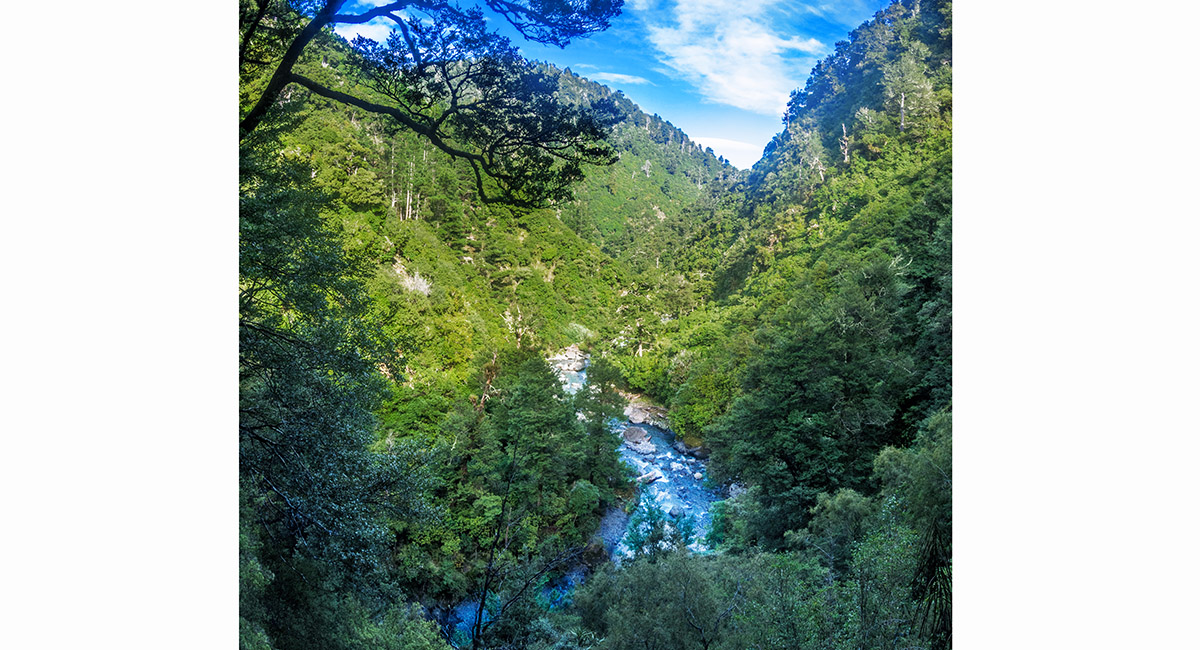
A glimpse through dense forest of the Pourangaki River, not far before we exited the forest into private farmland


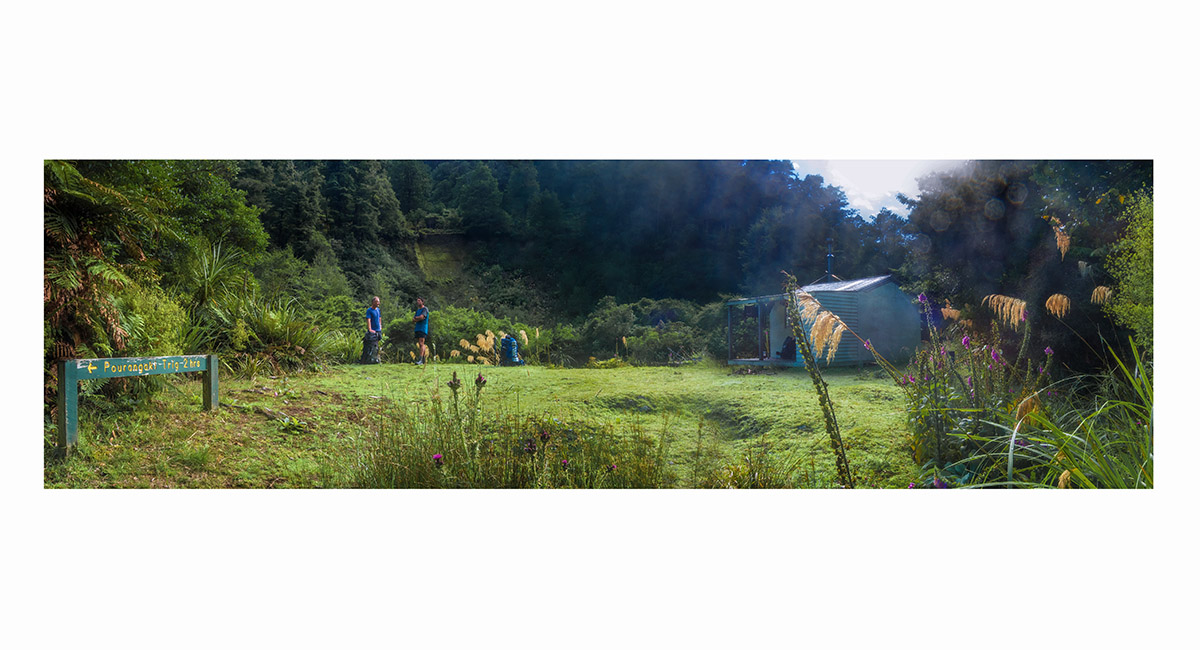
Exiting via private farmland. It's important to secure permission to pass through before you head in to/out from Kelly Knight Hut. Call Colin Thompson, 06 382 5577


Nearly out to the roadend


A view back across an irrigation pond to the foothills of the Ruahines - all the 1,600m plus big boys now out of view

Read about it
The four day horseshoe Vertigo Feb 17
Dawn at Iron Peg Wilderness Magazine Sep 17
Curves with teeth Wilderness Magazine Oct 17
![]()
To order a print or web resolution file of any image you see in this slide show, just right click the image, click “Copy Image URL” and paste in to the “Your message” box of our Contact Us form. Please also note, for each image, if you want a print or web resolution file. We will get back to you as soon as possible to confirm price and payment details.
Open Contact Us in a new window to paste Image URL(s) easily